一、工作原理
Apollo(阿波罗)是携程框架部门研发的分布式配置中心,能够集中化管理应用不同环境、不同集群的配置,配置修改后能够实时推送到应用端,并且具备规范的权限、流程治理等特性,适用于微服务配置管理场景。
服务端基于Spring Boot和Spring Cloud开发,打包后可以直接运行,不需要额外安装Tomcat等应用容器。
二、Apollo
下载地址:https://github.com/ctripcorp/apollo/releases
操作系统:Ubuntu 16.04
java环境:JDK 1.8
SpringBoot版本:1.5.13
SpringCloud版本:Edgware.SR3
1. 下载和解压
我下载的是apollo-0.10.2.tar.gz
# 解压
tar -zxvf apollo-0.10.2.tar.gz
2. 导入数据库文件
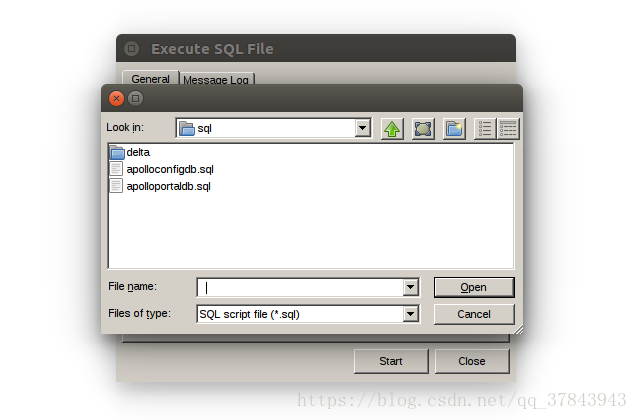
切换到apollo目录下的scripts/sql/目录
# 切换目录
cd apollo-0.10.2/scripts/sql/
将apolloconfigdb.sql和apolloportaldb.sql导入数据库(我用的是Navicat)

3. 打包
切换到apollo目录下的scripts/目录
# 切换目录
cd apollo-0.10.2/scripts/
修改build.sh文件
# 修改build.sh
sudo gedit build.sh
将数据库的账号密码修改为刚才生成表的库,其余不用修改

运行build.sh(首次运行需要下载一些文件,耐心等待)

下载完成
4. 新建文件夹
在/opt目录下新建logs、data、settings三个文件夹,并赋予读写权限
# 新建文件夹
sudo mkdir /opt/logs
sudo mkdir /opt/data
sudo mkdir /opt/settings

# 赋予读写权限
sudo chmod 777 /opt/logs
sudo chmod 777 /opt/data
sudo chmod 777 /opt/settings
在settings文件夹下新建server.properties,在里面加入"env=dev"

5. 启动
启动顺序:apollo-configservice -> apollo-adminservice(可省略) -> apollo-portal
apollo-configservice
切换到apollo目录下的apollo-configservice/target/目录
# 切换目录
cd apollo-0.10.2/apollo-configservice/target/
解压apollo-configservice-0.10.2-github.zip到当前目录的test文件夹下
# 解压
unzip apollo-configservice-0.10.2-github.zip -d test

启动test/scripts/目录下的startup.sh
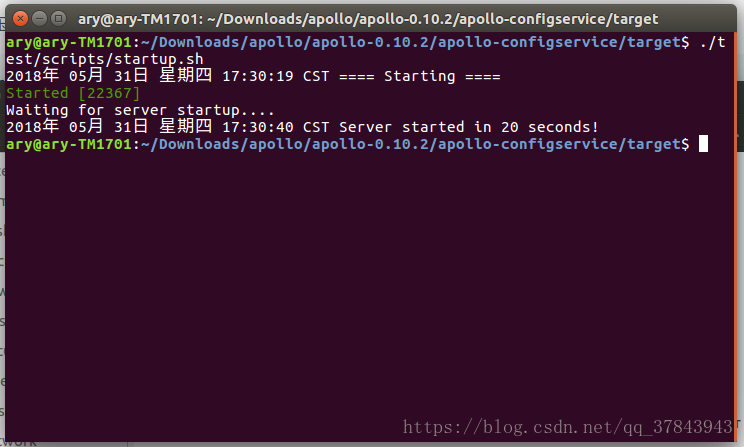
访问http://localhost:8080/
apollo-configservice启动成功

apollo-adminservice(可省略)
切换到apollo目录下的apollo-adminservice/target/目录
# 切换目录
cd apollo-0.10.2/apollo-adminservice/target/
解压apollo-adminservice-0.10.2-github.zip到当前目录的test文件夹下
# 解压
unzip apollo-adminservice-0.10.2-github.zip -d test

启动test/scripts/目录下的startup.sh

访问http://localhost:8090/
apollo-adminservice启动成功

apollo-portal
切换到apollo目录下的apollo-portal/target/目录
# 切换目录
cd apollo-0.10.2/apollo-portal/target/
解压apollo-portal-0.10.2-github.zip到当前目录的test文件夹下
# 解压
unzip apollo-portal-0.10.2-github.zip -d test

启动test/scripts/目录下的startup.sh
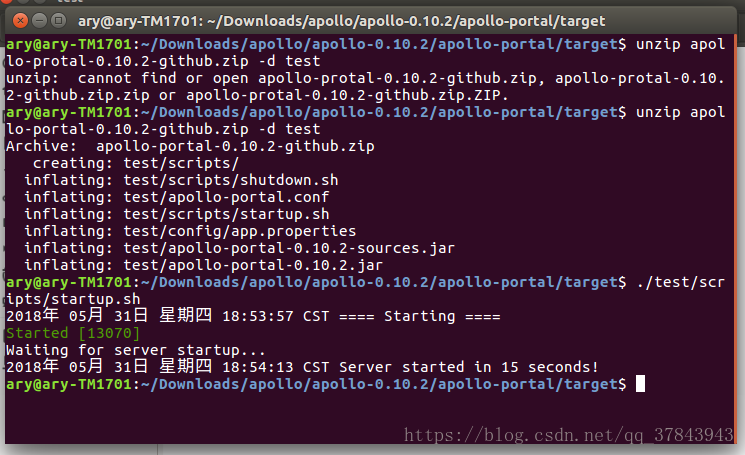
访问http://localhost:8070/
用户名:apollo
密码:admin
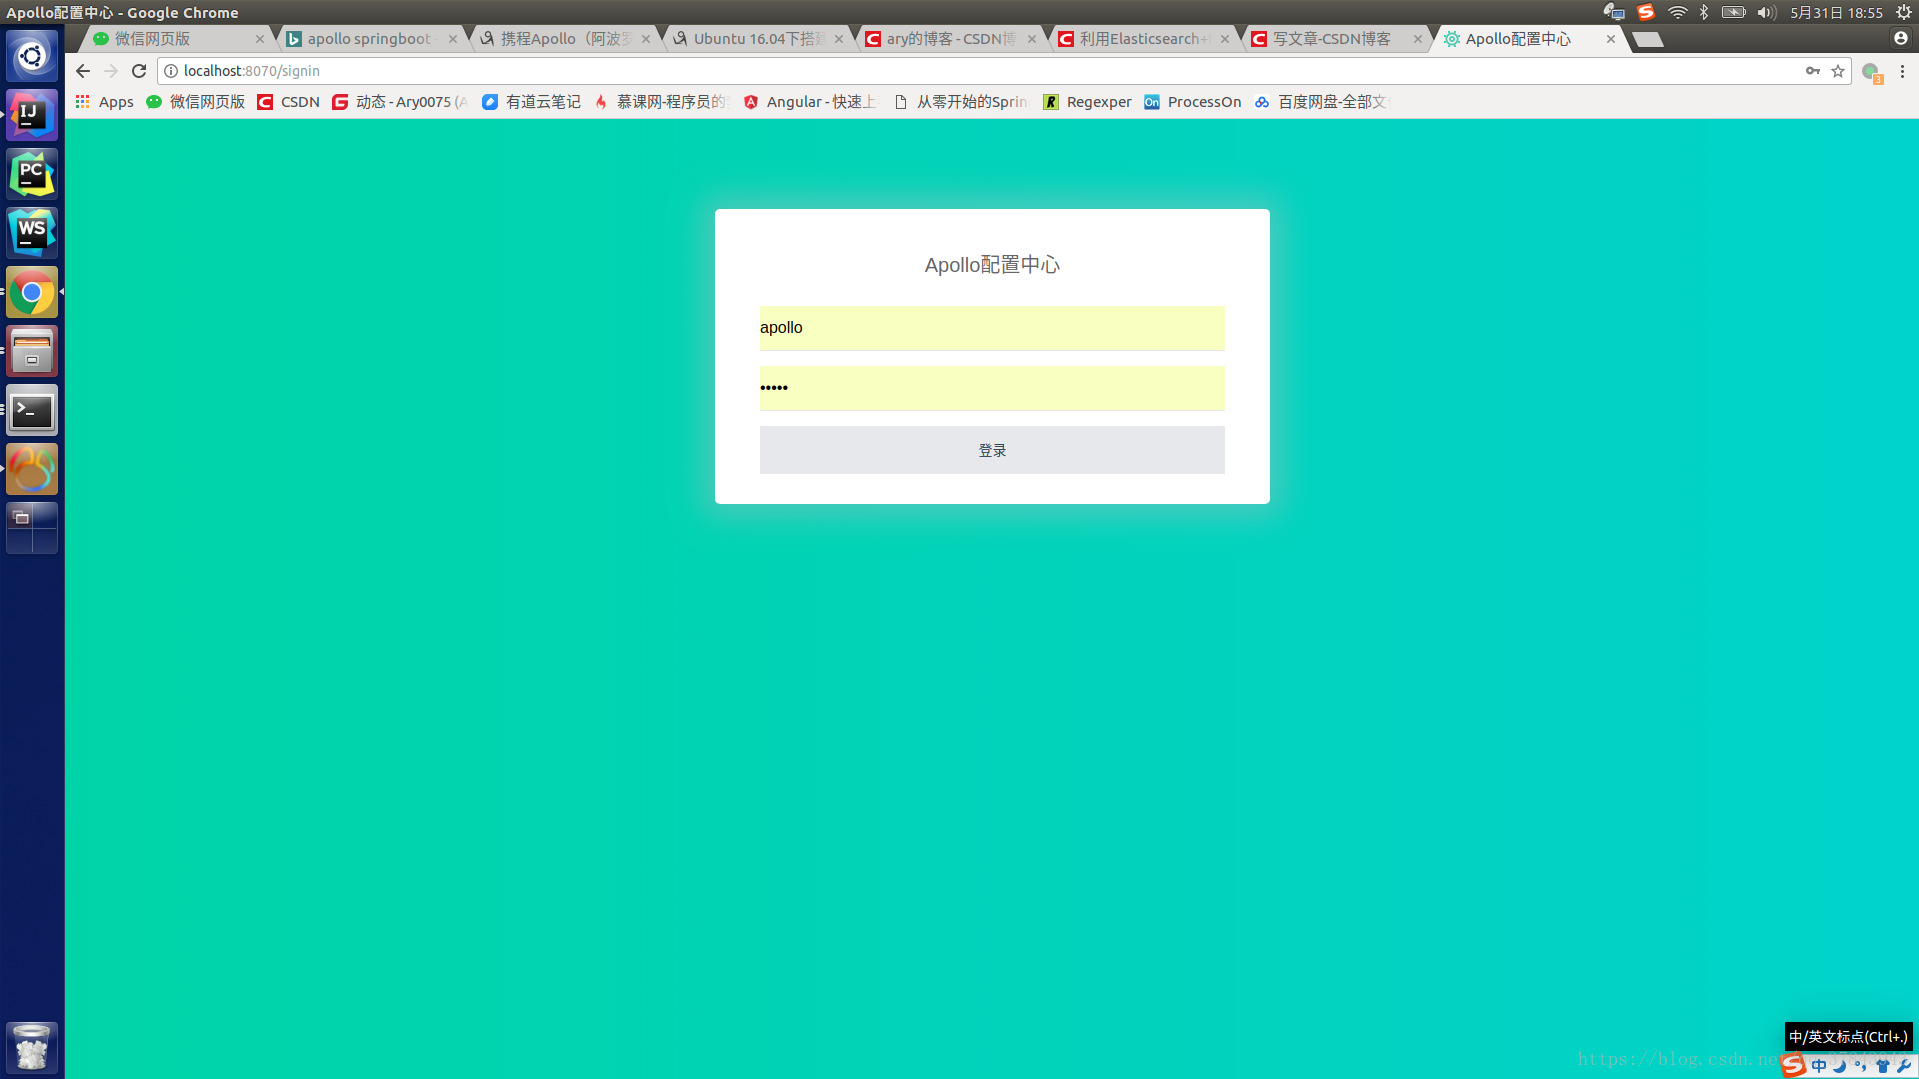
apollo-portal启动成功

三、SpringBoot
1. pom.xml
加入第二步中build的jar包
<!-- apollo -->
<dependency>
    <groupId>com.ctrip.framework.apollo</groupId>
    <artifactId>apollo-client</artifactId>
    <version>0.10.2</version>
</dependency>
引入eureka服务中心
最新的Finchley.RC2版本SpringCloud会产生版本异常的错误,所以我用的是1.5.13版本的SpringBoot和Edgware.SR3版本的SpringCloud
<parent>
    <groupId>org.springframework.boot</groupId>
    <artifactId>spring-boot-starter-parent</artifactId>
    <version>1.5.13.RELEASE</version>
    <relativePath/> <!-- lookup parent from repository -->
</parent>
<dependency>
    <groupId>org.springframework.cloud</groupId>
    <artifactId>spring-cloud-starter-eureka</artifactId>
</dependency>
<dependencyManagement>
    <dependencies>
        <dependency>
            <groupId>org.springframework.cloud</groupId>
            <artifactId>spring-cloud-dependencies</artifactId>
            <version>Edgware.SR3</version>
            <type>pom</type>
            <scope>import</scope>
        </dependency>
    </dependencies>
</dependencyManagement>
2. application.properties
服务注册中心地址对应apollo-configservice的地址,此处是http://localhost:8080/eureka
默认SpringBoot的web项目启动端口也是8080,为了避免端口冲突必须修改其中之一
# 为了避免端口冲突此处将项目端口改为8100
server.port=8100

eureka.port=8080
eureka.instance.hostname=localhost

# 在此指定服务注册中心地址
eureka.client.serviceUrl.defaultZone=http://${eureka.instance.hostname}:${eureka.port}/eureka/
3. app.properties
在resource目录下创建META-INF/app.properties,并定义一个app.id

4. SpringBoot启动类
添加@Configuration、@EnableApolloConfig、@EnableEurekaClient三个注解

四、Apollo配置中心
1.创建项目

应用id和app.properties里定义的app.id保持一致

2. 发布application.properties
定义一个test.msg属性用于测试

提交修改并发布


读取配置成功!

五、参考
https://blog.csdn.net/weixin_37623470/article/details/79044988
小白所学尚浅,文章内容是根据参考+实践理解所得,如果有错误的地方欢迎指正!