版权声明:本文为博主原创文章,未经博主允许不得转载。 https://blog.csdn.net/chen18677338530/article/details/91047514
Apollo简介
Apollo(阿波罗)是携程框架部门研发的分布式配置中心,能够集中化管理应用不同环境、不同集群的配置,配置修改后能够实时推送到应用端,并且具备规范的权限、流程治理等特性,适用于微服务配置管理场景。
官方网站 https://github.com/ctripcorp/apollo
Apollo 环境搭建
详细步骤参见: https://github.com/ctripcorp/apollo/wiki/Quick-Start
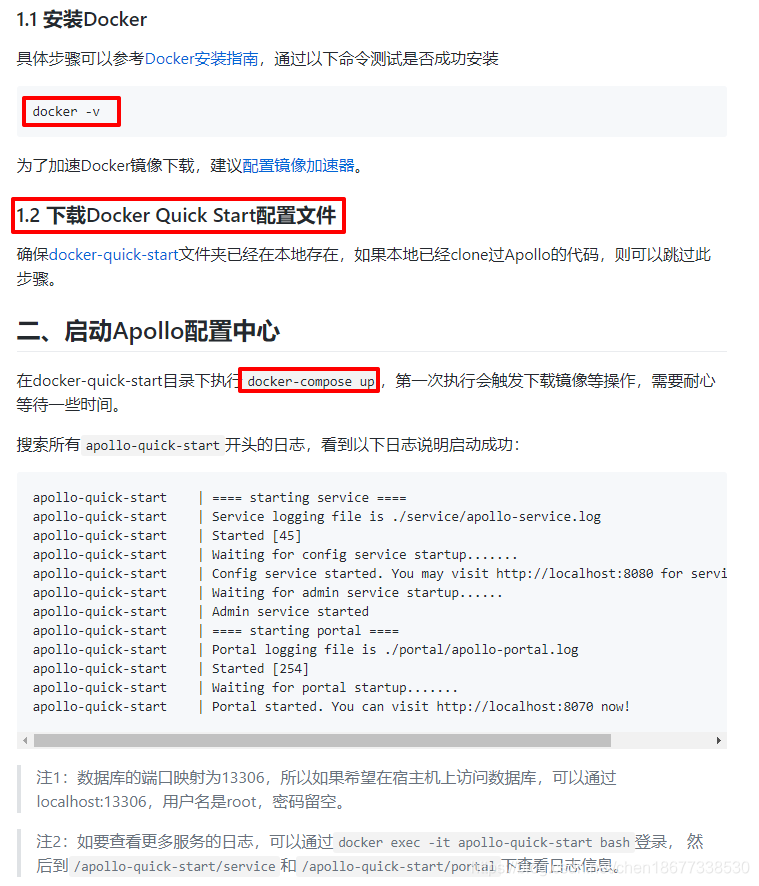
官网已经很详细的说明了操作步骤。但是有很多前置条件才能完成安装。
-
必须要有git环境,才能下载Apollo代码
yum –y install git然后需要clone代码。
-
安装docker-compose环境
地址:https://github.com/docker/compose/releasescurl -L https://github.com/docker/compose/releases/download/1.24.0/docker-compose-`uname -s`-`uname -m` -o /usr/local/bin/docker-compose chmod +x /usr/local/bin/docker-compose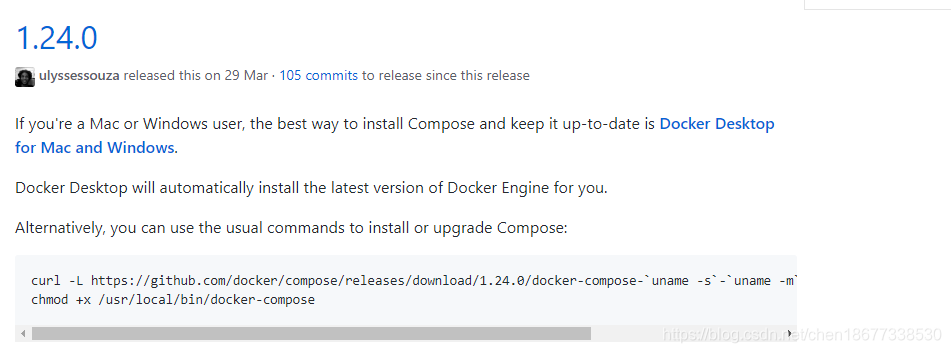
测试结果

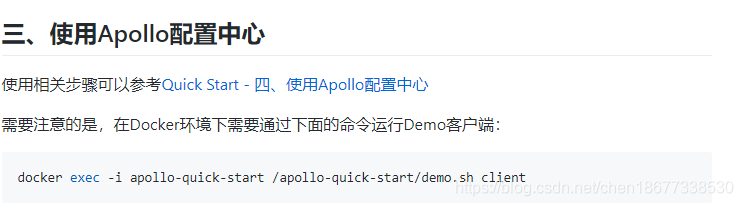
至此为止,就可以运行文档中的脚本了。
安装完成之后,需要等待两三分钟就可以访问了。

输入账号:apollo,密码:admin

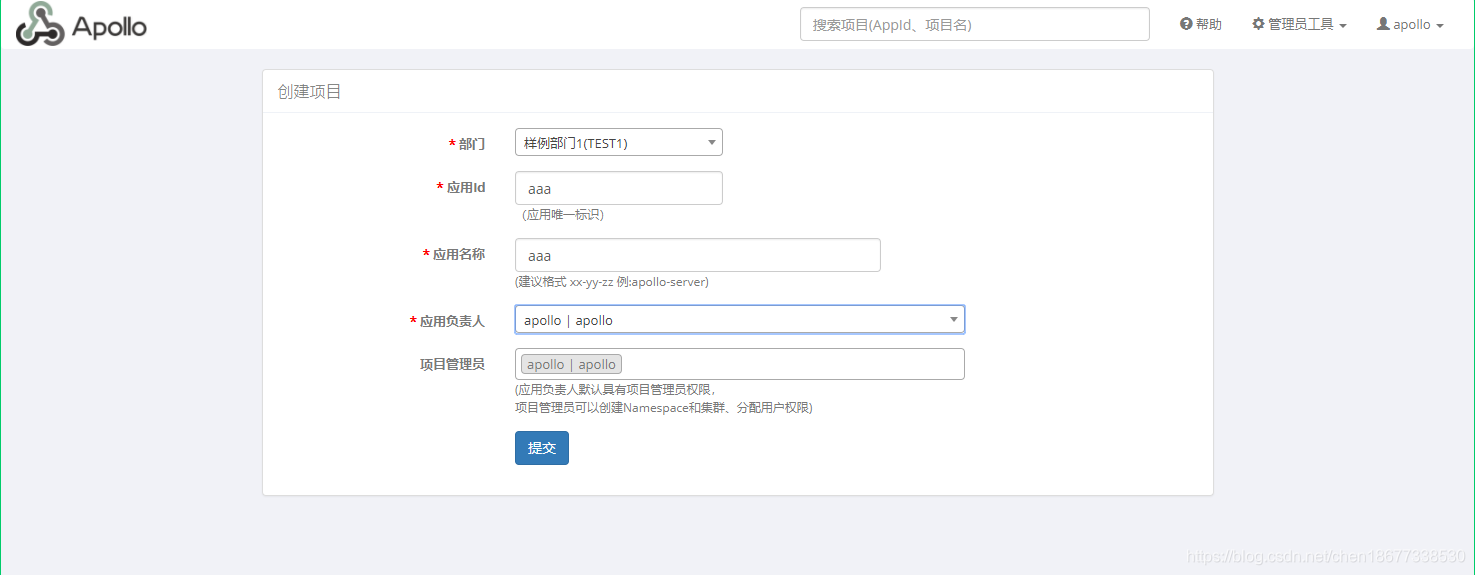
点击创建项目
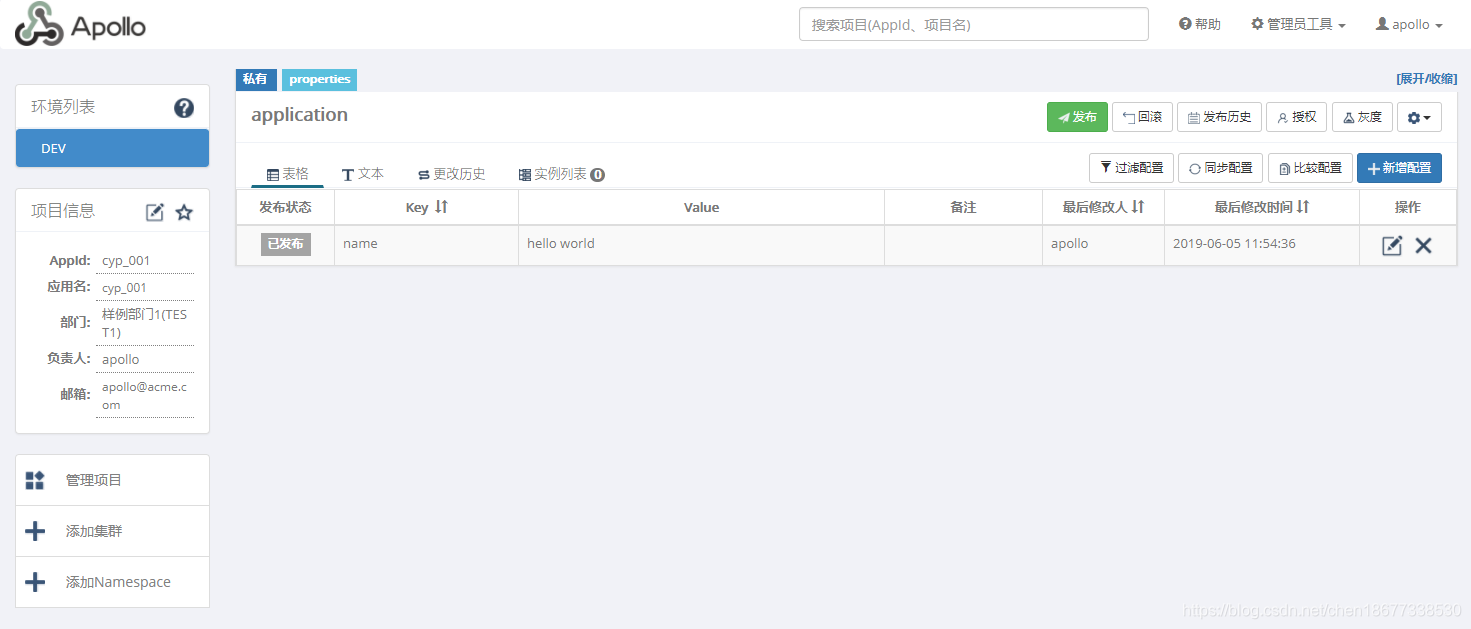
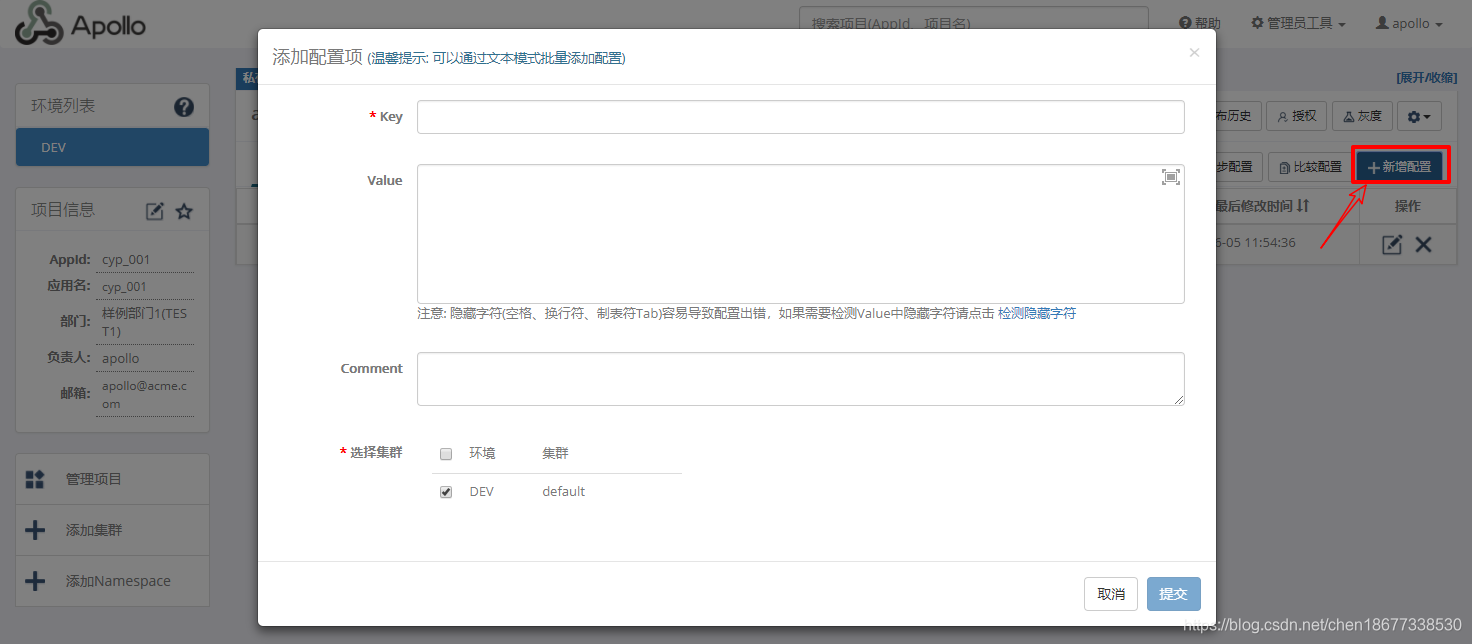
点击新建配置
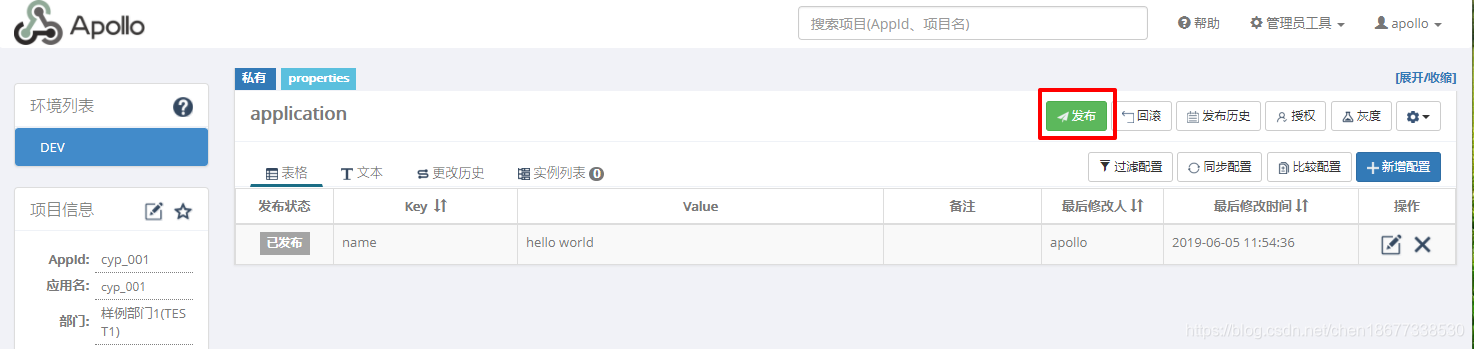
点击发布
发布之后的配置才能生效

查看发布历史

整合SpringBoot项目
-
使用idea新建springboot项目
-
修改pom.xml
<dependency> <groupId>com.ctrip.framework.apollo</groupId> <artifactId>apollo-client</artifactId> <version>1.1.0</version> </dependency> <dependency> <groupId>com.ctrip.framework.apollo</groupId> <artifactId>apollo-core</artifactId> <version>1.1.0</version> </dependency> -
创建apollo配置文件
local.meta=http://192.168.75.50:8080
dev.meta=http://192.168.75.50:8080
fat.meta=${fat_meta}
uat.meta=${uat_meta}
lpt.meta=${lpt_meta}
pro.meta=${pro_meta}
-
创建app.id配置文件,每一个应用基本使用一个app.id
app.id=cyp_001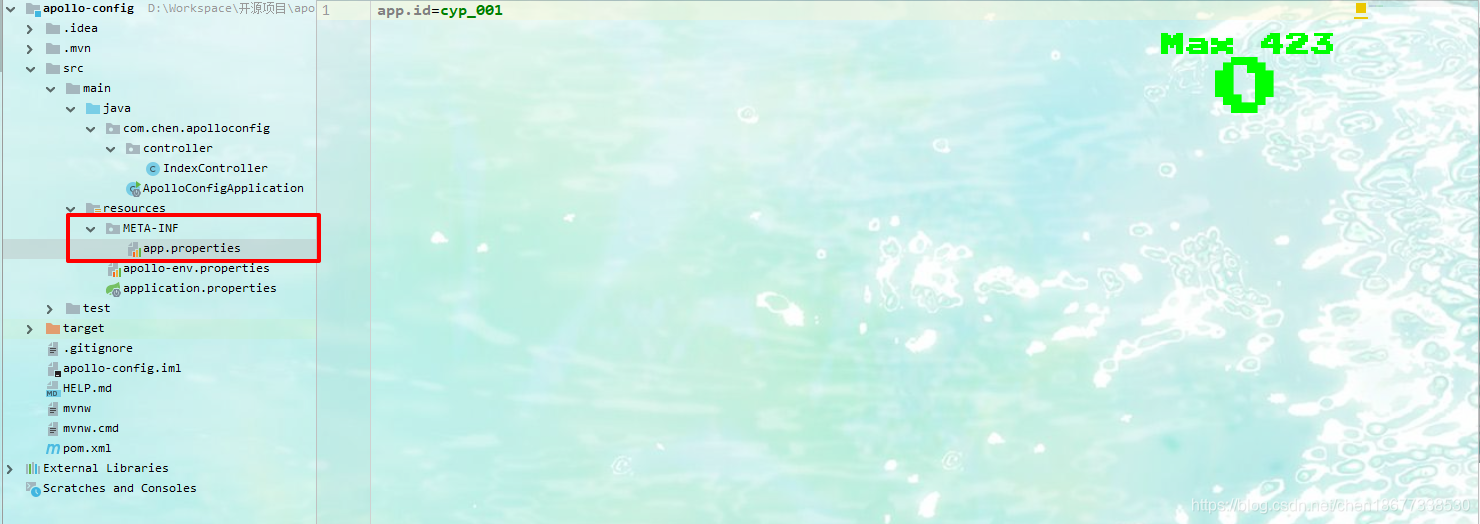
-
读取apollo中的配置信息,防止配置没有注入,一定要设置默认值!
package com.chen.apolloconfig;

import com.ctrip.framework.apollo.spring.annotation.EnableApolloConfig;
import org.springframework.boot.SpringApplication;
import org.springframework.boot.autoconfigure.SpringBootApplication;
import org.springframework.context.annotation.Configuration;

@Configuration
@EnableApolloConfig
@SpringBootApplication
public class ApolloConfigApplication {

    public static void main(String[] args) {
        SpringApplication.run(ApolloConfigApplication.class, args);
    }

}
```
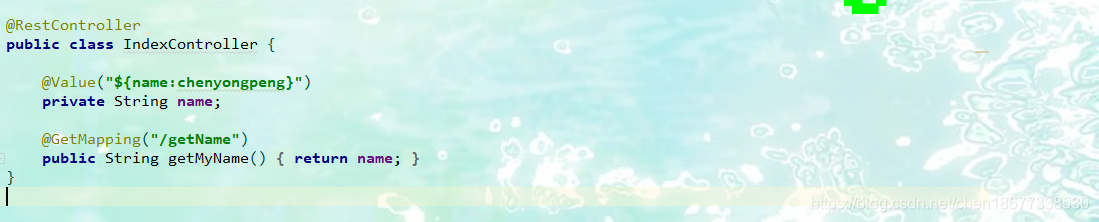
package com.chen.apolloconfig.controller;
import org.springframework.beans.factory.annotation.Value;
import org.springframework.web.bind.annotation.GetMapping;
import org.springframework.web.bind.annotation.RestController;
@RestController
public class IndexController {
@Value("${name:chenyongpeng}")
private String name;
@GetMapping("/getName")
public String getMyName(){
return name;
}
}
```
总结
至此,springboot整合apollo配置中心已经验证通过!
springcloud的配置中心是基于git或者gitte,gitlib等托管中心!
apollo是基于数据库和本地缓存!
采坑之处
项目启动之后一直说是找不到dev环境!!!
此处需要在本机下新建环境配置!

env=DEV