目录
一:SpringBoot集成Dubbo
阿里巴巴提供了 dubbo 集成 springBoot 开源项目, 可以到 GitHub 上 GitHub - apache/dubbo-spring-boot-project: Spring Boot Project for Apache Dubbo查看入门教程
Apache Dubbo Spring Boot 项目可以轻松使用 Dubbo 作为 RPC 框架创建Spring Boot应用程序。更重要的是,它还提供:
Apache Dubbo是一个高性能、轻量级、基于java的RPC框架。 Dubbo 提供了三个关键功能,包括基于接口的远程调用、容错和负载均衡以及自动服务注册和发现。
发布版本
dubbo-spring-boot-starter您可以通过将以下依赖项添加到 pom.xml 来将最新内容引入您的项目。
<dependencies>
    <!-- Dubbo Spring Boot Starter -->
    <dependency>
        <groupId>org.apache.dubbo</groupId>
        <artifactId>dubbo-spring-boot-starter</artifactId>
        <version>2.7.8</version>
    </dependency>
</dependencies>
1. 创建公共项目
按照 Dubbo 官方开发建议,创建一个接口项目,该项目只定义接口和 model 类。此项目就是一个普通的 maven 项目。
pom.xml
<?xml version="1.0" encoding="UTF-8"?>

<project xmlns="http://maven.apache.org/POM/4.0.0" xmlns:xsi="http://www.w3.org/2001/XMLSchema-instance"
  xsi:schemaLocation="http://maven.apache.org/POM/4.0.0 http://maven.apache.org/xsd/maven-4.0.0.xsd">
  <modelVersion>4.0.0</modelVersion>

  <groupId>com.zl</groupId>
  <artifactId>dubbo-maven-1</artifactId>
  <version>1.0-SNAPSHOT</version>

</project>
model类
package com.zl.model;

import java.io.Serializable;

public class Student implements Serializable {
    private static final long serialVersionUID = 7924975682459971235L;
    private Integer id;
    private String name;
    private Integer age;

    @Override
    public String toString() {
        return "Student{" +
                "id=" + id +
                ", name='" + name + '\'' +
                ", age=" + age +
                '}';
    }

    public Integer getId() {
        return id;
    }

    public void setId(Integer id) {
        this.id = id;
    }

    public String getName() {
        return name;
    }

    public void setName(String name) {
        this.name = name;
    }

    public Integer getAge() {
        return age;
    }

    public void setAge(Integer age) {
        this.age = age;
    }
}
服务接口
package com.zl.service;

import com.zl.model.Student;


public interface StudentService  {
    Student queryStudent(Integer id);
}
2. 创建提供者项目provider
是一个SpringBoot项目,所以需要新建一个新工程!
第一步:创建SpringBoot项目,引入核心依赖
pom.xml
核心依赖:公共项目的gav、dubbo依赖、zookeeper依赖。
<?xml version="1.0" encoding="UTF-8"?>
<project xmlns="http://maven.apache.org/POM/4.0.0" xmlns:xsi="http://www.w3.org/2001/XMLSchema-instance"
	xsi:schemaLocation="http://maven.apache.org/POM/4.0.0 https://maven.apache.org/xsd/maven-4.0.0.xsd">
	<modelVersion>4.0.0</modelVersion>
	<parent>
		<groupId>org.springframework.boot</groupId>
		<artifactId>spring-boot-starter-parent</artifactId>
		<version>2.7.15</version>
		<relativePath/> <!-- lookup parent from repository -->
	</parent>

	<groupId>com.zl</groupId>
	<artifactId>dubbo-provider</artifactId>
	<version>0.0.1-SNAPSHOT</version>
	<name>dubbo-provider</name>
	<description>dubbo-provider</description>

	<properties>
		<java.version>1.8</java.version>
	</properties>

	<dependencies>
		<!--加入公共项目的gav-->
		<dependency>
			<groupId>com.zl</groupId>
			<artifactId>dubbo-maven-1</artifactId>
			<version>1.0-SNAPSHOT</version>
		</dependency>
		<!--dubbo依赖-->
		<dependency>
			<groupId>org.apache.dubbo</groupId>
			<artifactId>dubbo-spring-boot-starter</artifactId>
			<version>2.7.8</version>
		</dependency>
		<!--zookeeper依赖-->
		<dependency>
			<groupId>org.apache.dubbo</groupId>
			<artifactId>dubbo-dependencies-zookeeper</artifactId>
			<version>2.7.8</version>
			<type>pom</type>
			<exclusions>
				<!-- 排除log4j依赖 -->
				<exclusion>
					<artifactId>slf4j-log4j12</artifactId>
					<groupId>org.slf4j</groupId>
				</exclusion>
			</exclusions>
		</dependency>

		<dependency>
			<groupId>org.springframework.boot</groupId>
			<artifactId>spring-boot-starter</artifactId>
		</dependency>

		<dependency>
			<groupId>org.springframework.boot</groupId>
			<artifactId>spring-boot-starter-test</artifactId>
			<scope>test</scope>
		</dependency>
	</dependencies>

	<build>
		<plugins>
			<plugin>
				<groupId>org.springframework.boot</groupId>
				<artifactId>spring-boot-maven-plugin</artifactId>
			</plugin>
		</plugins>
	</build>

</project>
第二步:实现Service公共项目的接口,暴露服务
注:使用@DubboService注解去暴露服务;使用interfaceClass属性指定接口的类,version属性指定版本号,还可以使用timeout指定延迟时间。
package com.zl.service.impl;

import com.zl.model.Student;
import com.zl.service.StudentService;
import org.apache.dubbo.config.annotation.DubboService;

// 暴露服务
@DubboService(interfaceClass = StudentService.class,version = "1.0"
,timeout = 5000)
public class StudentServiceImpl implements StudentService {
    @Override
    public Student queryStudent(Integer id) {
        Student student = new Student();
        if (1001 == id){
            student.setId(1001);
            student.setName("Jack");
            student.setAge(18);
        }else if(1002 == id){
            student.setId(1002);
            student.setName("Rose");
            student.setAge(22);
        }

        return student;
    }
}
第三步:application.properties进行dubbo属性配置
#配置服务器名称
spring.application.name=studentService-provider
#配置扫描的包
dubbo.scan.base-packages=com.zl.service
#配置dubbo协议
#dubbo.protocol.name=dubbo
#dubbo.protocol.port=20881
#注册中心
dubbo.registry.address=zookeeper://localhost:2181
第四步:启动类
注:适应@EnableDubbo注解启动dubbo,这是一个复合注解,有@EnableDubboConfig和
@DubboComponentScan的功能。
package com.zl;

import org.apache.dubbo.config.spring.context.annotation.EnableDubbo;
import org.springframework.boot.SpringApplication;
import org.springframework.boot.autoconfigure.SpringBootApplication;

@SpringBootApplication
@EnableDubbo // 启动Dubbo
public class DubboProviderApplication {

	public static void main(String[] args) {
		SpringApplication.run(DubboProviderApplication.class, args);
	}

}
3. 创建消费者consumer项目
第一步:创建SpringBoot项目,引入核心依赖,和提供者相同;增加一个web依赖,方便测试
<dependency>
	<groupId>org.springframework.boot</groupId>
	<artifactId>spring-boot-starter-web</artifactId>
</dependency>
第二步:controller调用远程服务
注:使用@DubboReference注解调用远程服务,并把创建好的代理对象,注入给studentService。
package com.zl.controller;

import com.zl.model.Student;
import com.zl.service.StudentService;
import org.apache.dubbo.config.annotation.DubboReference;
import org.springframework.web.bind.annotation.GetMapping;
import org.springframework.web.bind.annotation.RestController;

@RestController
public class DubboController {
    // 这里的interfaceClass属性省略也行
    @DubboReference(interfaceClass = StudentService.class,version = "1.0")
    private StudentService studentService;

    @GetMapping("/query")
    public String queryStudent(){
        Student student = studentService.queryStudent(1001);
        return "调用远程接口,获取对象:"+student;
    }

}
第三步:application.properties进行dubbo属性配置
#指定服务名称
spring.application.name=consumer-application
#指定注册中心
dubbo.registry.address=zookeeper://localhost:2181
第四步:启动类
package com.zl;

import org.apache.dubbo.config.spring.context.annotation.EnableDubbo;
import org.springframework.boot.SpringApplication;
import org.springframework.boot.autoconfigure.SpringBootApplication;

@SpringBootApplication
@EnableDubbo
public class DubboConsumerApplication {

	public static void main(String[] args) {
		SpringApplication.run(DubboConsumerApplication.class, args);
	}

}
4. 注册中心Zookeeper的安装
解压下载好的Zookeeper压缩包:
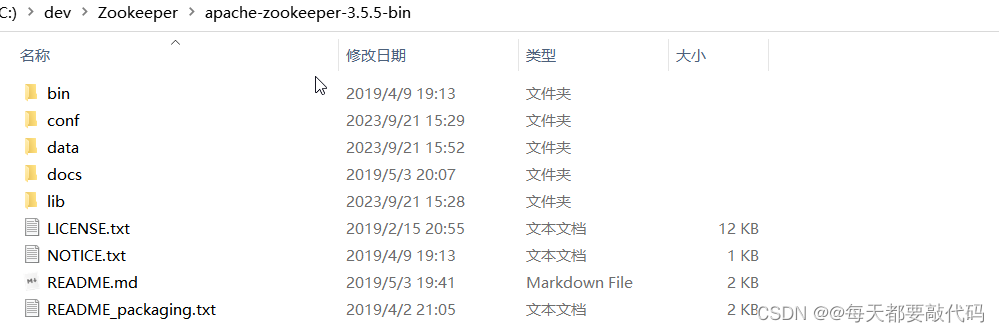
C:\dev\Zookeeper\apache-zookeeper-3.5.5-bin\conf\zoo.cfg进行配置
# The number of milliseconds of each tick
tickTime=2000
# The number of ticks that the initial
# synchronization phase can take
initLimit=10
# The number of ticks that can pass between
# sending a request and getting an acknowledgement
syncLimit=5
# the directory where the snapshot is stored.
# do not use /tmp for storage, /tmp here is just
# example sakes.

#dataDir=/tmp/zookeeper
#修改存放临时生成的数据的目录
dataDir=C:/dev/Zookeeper/apache-zookeeper-3.5.5-bin/data

# the port at which the clients will connect
#端口号
clientPort=2181
#需要启动另外一个服务,默认端口是8080,防止冲突修改一下
admin.serverPort=8888
# the maximum number of client connections.
# increase this if you need to handle more clients
#maxClientCnxns=60
#
# Be sure to read the maintenance section of the
# administrator guide before turning on autopurge.
#
# http://zookeeper.apache.org/doc/current/zookeeperAdmin.html#sc_maintenance
#
# The number of snapshots to retain in dataDir
#autopurge.snapRetainCount=3
# Purge task interval in hours
# Set to "0" to disable auto purge feature
#autopurge.purgeInterval=1
执行zkServer.cmd程序,启动Zookeeper

启动提供者和消费者项目的启动类

进行访问

图书推荐:《Python 自动化办公应用大全》
本次送书 1本!
活动时间:截止到 2023-09-29 00:00:00。抽奖方式:利用程序进行抽奖。
参与方式:关注博主(只限粉丝福利哦)、点赞、收藏,评论区随机抽取,最多三条评论!
关键点
1. 借助ChatGPT与Python轻松实现办公自动化。
2. Excel Home多位微软全球MVP专家打造,用大量实例介绍使用Python操作Excel、Word、PPT和日常办公中涉及的各种对象。
3. 方式新颖 详细介绍了如何用 ChatGPT 来补充学习知识点,以及如何快速生成所需的代码,零基础人员学习编程的成本进一步降低。
4. 内容丰富 以Excel数据处理与分析为重点,延展到 Word、PPT、邮件、图片、视频、音频、本地文件管理、网页交互等现代办公所需要处理的各种形式的数据。
5. 案例实用 用大量易借鉴的案例帮助用户学会在各个场景中使用自动化技术。
6. 作者权威 Excel Home团队策划,多位微软全球最有价值专家(MVP)通力打造,确保每个案例都实用,对编程小白友好。
7. 让没有编程经验的普通办公人员也能驾驭 Python,实现多个场景的办公自动化,提升效率!
内容简介
以Excel数据处理与分析为重点,延展到 Word、PPT、邮件、图片、视频、音频、本地文件管理、网页交互等现代办公所需要处理的各种形式的数据。

当当网链接:《Python自动化办公应用大全(ChatGPT版)
京东的链接:京东安全