版权声明:本文为博主原创文章,未经博主允许不得转载。 https://blog.csdn.net/wj610671226/article/details/84557658
FFmpeg编译以及如何集成到iOS项目
工具环境的准备
- 下载FFmpeg源代码
下载地址:http://www.ffmpeg.org/documentation.html
- 下载编译需要的gas-preprocessor
下载地址:https://github.com/libav/gas-preprocessor
- 命令行安装
brew install ffmpeg

// 命令行合成mp4
ffmpeg -i /Users/mac/Desktop/video_demo.h264 -i /Users/mac/Desktop/audio_demo.aac -f mp4 /Users/mac/Desktop/test.mp4
FFmpeg的编译
- 可能会遇到的问题
GNU assembler not found, install/update gas-preprocessor

If you think configure made a mistake, make sure you are using the latest
version from Git.  If the latest version fails, report the problem to the
[email protected] mailing list or IRC #ffmpeg on irc.freenode.net.
Include the log file "ffbuild/config.log" produced by configure as this will help
solve the problem.
解决方案:
拷贝gas-preprocessor.pl到/usr/local/bin目录下,赋予执行权限
cp ./gas-preprocessor.pl /usr/local/bin/
chmod +x /usr/local/bin/gas-preprocessor.pl
- 查看FFmpeg配置选项(部分)
进入下载的源码目录,利用configure --help查看配置选项

Help options: 帮助选项
    --list-decoders 支持的解码列表
    --list-encoders 支持的编码列表

Standard options:标准选项
    --prefix=PREFIX 安装目录

Licensing options:许可选项
Configuration options:配置选项
Program options:程序选项
    --disable-ffmpeg 禁用构建ffmpeg
    --disable-ffplay 禁用构建ffplay播放器
    --disable-ffserver 禁用构建ffserver服务

Documentation options: 文档选项
    --disable-doc 不创建文档

Component options: 组件选项
    --disable-avcodec 禁用编译avcodec
    --disable-avformat 禁用编译libavformat
    --disable-avutil 禁用编译libavutil

External library support: 外部库支持
    --enable-libfdk-aac 启用libfdk-aac编译aac
    --enable-libx264 启用libx264编译h264

Toolchain options: 工具链配置
Advanced options (experts only):高级选项
    --target-os 指定目标系统
    --as=AS 使用汇编程序
    --cc=CC 指定c的编译器
    --extra-cflags=ECFLAGS 添加c头文件
    --extra-ldflags=ELDFLAGS 添加静态库进入交叉编译
Optimization options (experts only):优化选项
Developer options (useful when working on FFmpeg itself):开发者选项
- 利用Shell脚本编译
执行脚本编译:
./ffmpeg.sh arm64 // 只编译arm64架构的库
#!/bin/bash

#1、首先:定义下载的库名称
source="ffmpeg"

#git clone git://source.ffmpeg.org/ffmpeg.git
#cd ffmpeg


#2、其次:定义".h/.m/.c"文件编译的结果目录
#目录作用:用于保存.h/.m/.c文件编译后的结果.o文件
cache="cache"

#3、定义".a"静态库保存目录
#pwd命令:表示获取当前目录
staticdir=`pwd`/"ffmpeg-iOS"

#4、添加FFmpeg配置选项->默认配置
#Toolchain options:工具链选项(指定我么需要编译平台CPU架构类型,例如:arm64、x86等等…)
#--enable-cross-compile: 交叉编译
#Developer options:开发者选项
#--disable-debug: 禁止使用调试模式
#Program options选项
#--disable-programs:禁用程序(不允许建立命令行程序)
#Documentation options:文档选项
#--disable-doc:不需要编译文档
#Toolchain options:工具链选项
#--enable-pic:允许建立与位置无关代码
configure_flags="--enable-cross-compile --disable-debug --enable-x86asm --disable-programs --disable-doc --enable-pic"
#核心库(编解码->最重要的库):avcodec
configure_flags="$configure_flags --enable-avdevice --enable-avcodec --enable-avformat"

#5、定义默认CPU平台架构类型
#arm64 armv7->真机->CPU架构类型
#x86_64 i386->模拟器->CPU架构类型
archs="arm64 armv7 x86_64 i386"

#6、指定我们的这个库编译系统版本->iOS系统下的7.0以及以上版本使用这个静态库
targetversion="8.0"

#7、接受命令后输入参数
#我是动态接受命令行输入CPU平台架构类型(输入参数:编译指定的CPU库)
if [ "$*" ]
then
    #存在输入参数,也就说:外部指定需要编译CPU架构类型
    archs="$*"
fi

echo "循环编译"

#9、for循环编译FFmpeg静态库
currentdir=`pwd`
for arch in $archs
do
    echo "开始编译"
    #9.1、创建目录
    #在编译结果目录下-创建对应的平台架构类型
    mkdir -p "$cache/$arch"
    #9.2、进入这个目录
    cd "$cache/$arch"

    #9.3、配置编译CPU架构类型->指定当前编译CPU架构类型
    archflags="-arch $arch"

    #9.4、判定一下你到底是编译的是模拟器.a静态库,还是真机.a静态库
    if [ "$arch" = "i386" -o "$arch" = "x86_64" ]
    then
        #模拟器
        platform="iPhoneSimulator"
        #支持最小系统版本->iOS系统
        archflags="$archflags -mios-simulator-version-min=$targetversion"
    else
        #真机(mac、iOS都支持)
        platform="iPhoneOS"
        #支持最小系统版本->iOS系统
        archflags="$archflags -mios-version-min=$targetversion -fembed-bitcode"
        #注意:优化处理(可有可无)
        #如果架构类型是"arm64",那么
        if [ "$arch" = "arm64" ]
        then
            #GNU汇编器(GNU Assembler),简称为GAS
            #GASPP->汇编器预处理程序
            #解决问题:分段错误
            #通俗一点:就是程序运行时,变量访问越界一类的问题
            EXPORT="GASPP_FIX_XCODE5=1"
        fi
    fi


    #10、正式编译
    #tr命令可以对来自标准输入的字符进行替换、压缩和删除
    #'[:upper:]'->将小写转成大写
    #'[:lower:]'->将大写转成小写
    #将platform->转成大写或者小写
    XCRUN_SDK=`echo $platform | tr '[:upper:]' '[:lower:]'`
    #编译器->编译平台
    CC="xcrun -sdk $XCRUN_SDK clang"

    #架构类型->arm64
    if [ "$arch" = "arm64" ]
    then
        #音视频默认一个编译命令
        #preprocessor.pl帮助我们编译FFmpeg->arm64位静态库
        AS="gas-preprocessor.pl -arch aarch64 -- $CC"
    else
        #默认编译平台
        AS="$CC"
    fi

    echo "执行到了1"

    #目录找到FFmepg编译源代码目录->设置编译配置->编译FFmpeg源码
    #--target-os:目标系统->darwin(mac系统早起版本名字)
    #darwin:是mac系统、iOS系统祖宗
    #--arch:CPU平台架构类型
    #--cc:指定编译器类型选项
    #--as:汇编程序
    #$configure_flags最初配置
    #--extra-cflags
    #--prefix:静态库输出目录
    TMPDIR=${TMPDIR/%\/} $currentdir/$source/configure \
        --target-os=darwin \
        --arch=$arch \
        --cc="$CC" \
        --as="$AS" \
        $configure_flags \
        --enable-gpl \
        --disable-encoders \
        --enable-libx264 \
        --enable-encoder=libx264 \
        --enable-nonfree \
        --enable-libfdk-aac \
        --enable-encoder=libfdk_aac \
        --enable-decoder=libfdk_aac \
        --enable-encoder=mjpeg \
        --enable-encoder=png \
        --extra-cflags="$archflags " \
        --extra-ldflags="$archflags " \
        #h264交叉编译配置
        --extra-cflags="-I/Users/mac/Documents/bianyi/thin-x264/arm64/include" \
        --extra-ldflags="-L/Users/mac/Documents/bianyi/thin-x264/arm64/lib" \
        #aac交叉编译配置
        --extra-cflags="-I/Users/mac/Documents/bianyi/thin-fdkaac/arm64/include" \
        --extra-ldflags="-L/Users/mac/Documents/bianyi/thin-fdkaac/arm64/lib" \
        --prefix="$staticdir/$arch" \
        || exit 1

    echo "执行了"
    #解决问题->分段错误问题
    #安装->导出静态库(编译.a静态库)
    #执行命令
    #将-j设置为支持多核心/线程
    make -j3 install $EXPORT || exit 1
    #回到了我们的脚本文件目录
    cd $currentdir
done
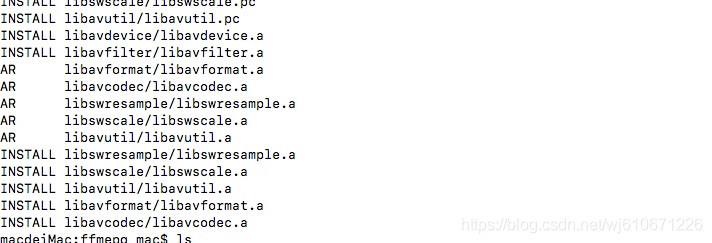
完成编译如下
将FFmpeg编译静态库集成到iOS项目中
- 将编译好的代码导入项目中

libavformat: 用于各种音视频封装格式的生成和解析,包括获取解码所需信息以生成解码上下文结构
libavcodec: 用于各种类型声音/图像编解码
libavutil: 包含一些公共的工具函数
libswscale:用于视频场景比例缩放、色彩映射转换
libpostproc:用于后期效果处理
ffsever: 一个HTTP多媒体即时广播串流服务器
ffplay:是一个简单的播放器,使用ffmpeg库解析和解码,通过SDL显示
- 配置Header Search Paths和 Library Search Paths
在Build Settings中设置Header Search Paths 和 Library Search Paths

$(PROJECT_DIR)/FFmpeg/arm64/include

$(PROJECT_DIR)/FFmpeg/arm64/lib
-
导入系统库文件

-
编写代码编译测试
FFmpegDemo-Bridging-Header.h
#import <libavformat/avformat.h>

let filePath = Bundle.main.path(forResource:"Test", ofType: "mov")
avformat_network_init();
var avformat_context = avformat_alloc_context();
let url = (filePath! as NSString).utf8String!
let result = avformat_open_input(&avformat_context, url, nil, nil)
guard result == 0 else {
    print("打开文件失败")
    return
}
print("打开文件成功")