文章目录
FFmpeg集成qsv的编译安装
一、参考
Ubuntu20.04 ffmpeg添加 Intel核显QSV加速支持
视频和视频帧:Intel GPU(核显)的编解码故事
二、编译安装流程
整体依赖关系:
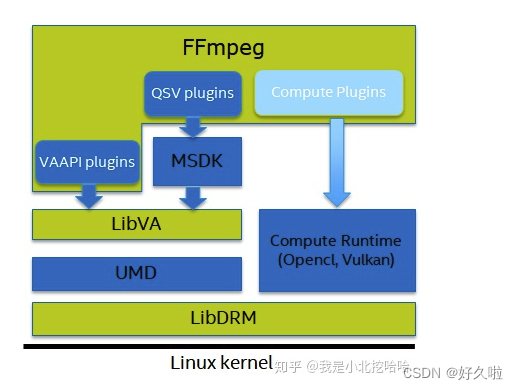
主要步骤:
- 安装intel media sdk
-
LibVA 和 Media-Driver 的安装
ubuntu 19.04之后可以使用apt安装,可通过lsb_release -a命令查看当前系统版本 -
Intel Media SDK 编译安装
-
- 编译安装ffmpeg
1. LibVA 和 Media-Driver 的安装
apt-get install -y libmfx1 libmfx-tools libva-dev libmfx-dev intel-media-va-driver-non-free vainfo
环境配置
vim ~/.bashrc
#末尾添加
export LIBVA_DRIVER_NAME=iHD
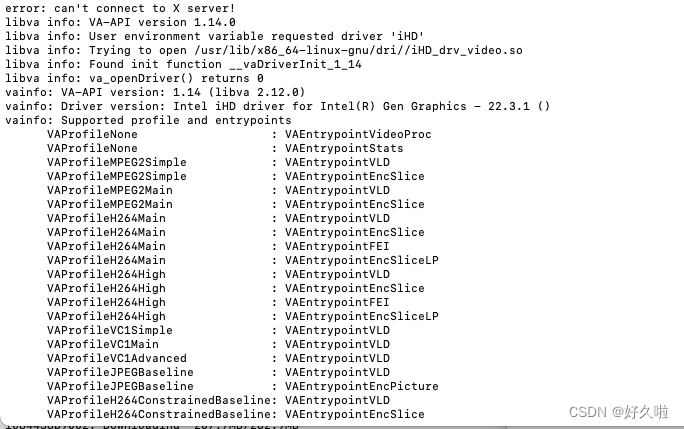
使用vainfo查看是否安装成功
2. Intel Media SDK 编译
# 安装依赖
sudo apt-get install git cmake pkg-config meson libdrm-dev automake libtool

#下载MDSK源码
git clone https://github.com/Intel-Media-SDK/MediaSDK msdk
cd msdk
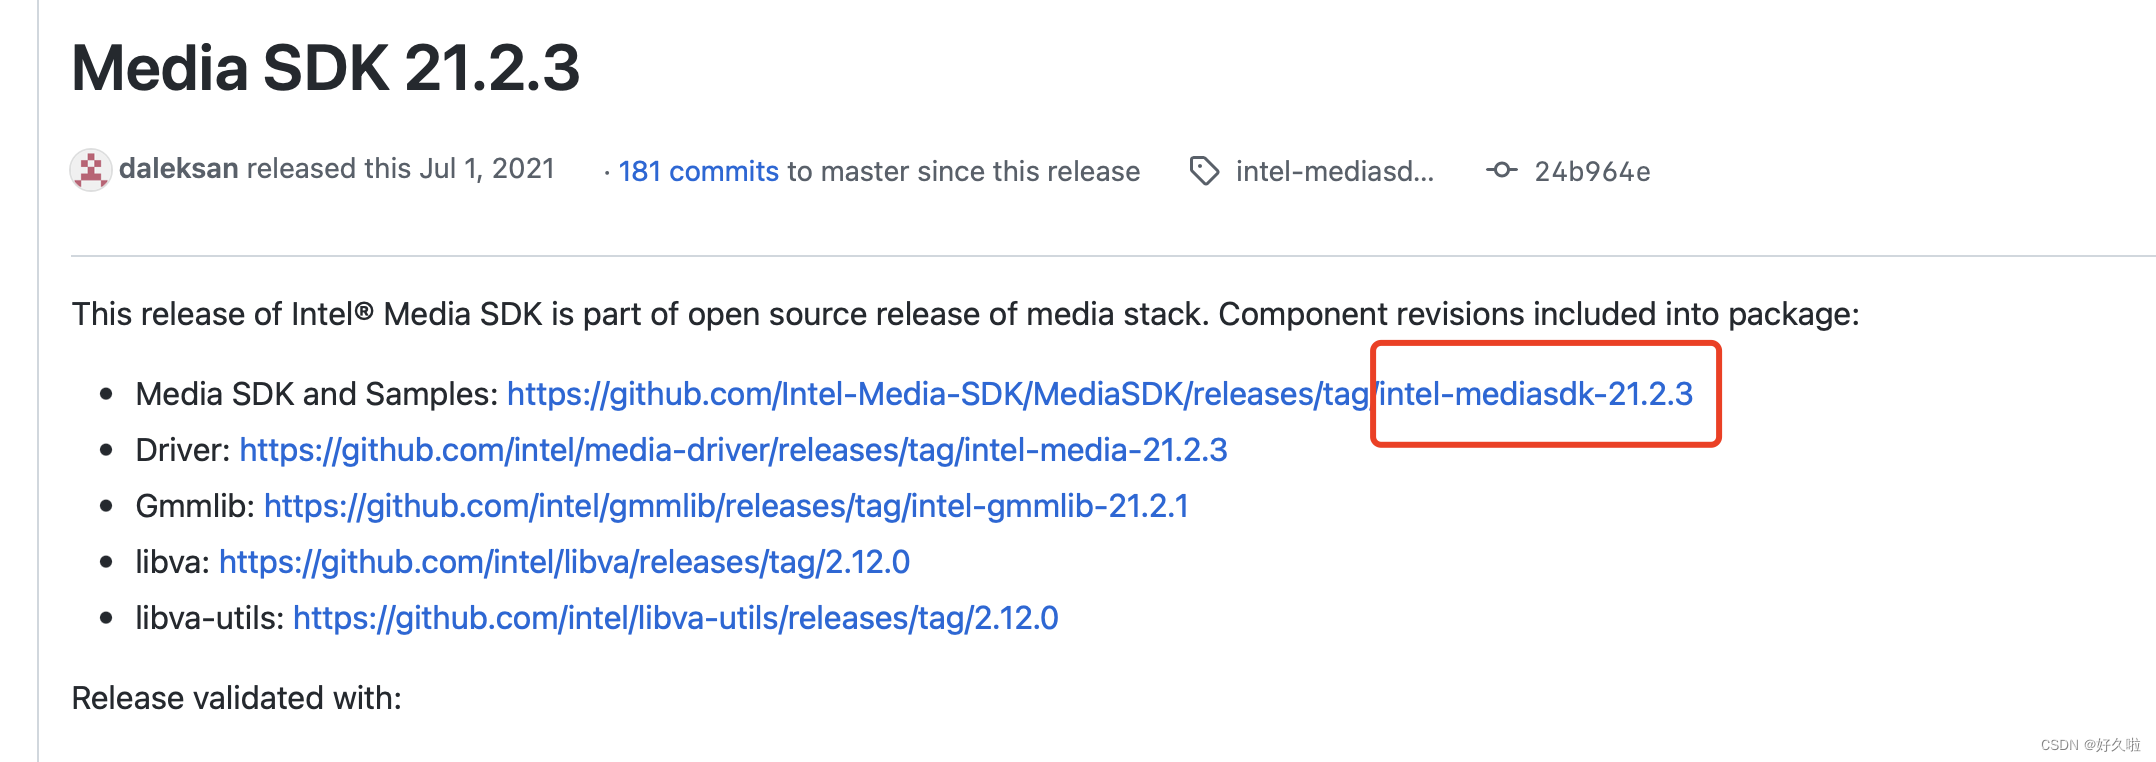
需要注意的点:使用vainfo,可以看到安装的libva版本是2.12.0
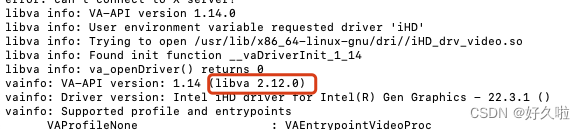
通过Releases · Intel-Media-SDK/MediaSDK · GitHub能够查看到MDSK与依赖的libva对照版本,使用git checkout 指定tag切换
如安装的2.12.0 libva版本,则对应下载 Media SDK 21.2.3,使用git checkout intel-mediasdk-21.2.3 切换
mkdir build && cd build
cmake ..
make
#安装
make install

vim ~/.bashrc
#末尾添加
export PKG_CONFIG_PATH=/usr/lib/x86_64-linux-gnu/pkgconfig/
export LIBVA_DRIVERS_PATH=/usr/lib/x86_64-linux-gnu/dri/
export LD_LIBRARY_PATH=/opt/intel/mediasdk/lib/
3. ffmpeg的编译安装
#回归到原始下载msdk的目录,即

#下载源码
git clone https://github.com/ffmpeg/ffmpeg

cd msdk
#编译
./configure --arch=x86_64 --disable-yasm --enable-vaapi --enable-libmfx
make

# 安装
sudo make install
编译结果报警告但不影响后续,自行考虑是否修改编译配置
WARNING: The --disable-yasm option is only provided for compatibility and will be removed in the future. Use --enable-x86asm / --disable-x86asm instead.
–disable-yasm选项在未来会被移除,使用–enable-x86asm/–disable-x86asm代替
4. 验证安装
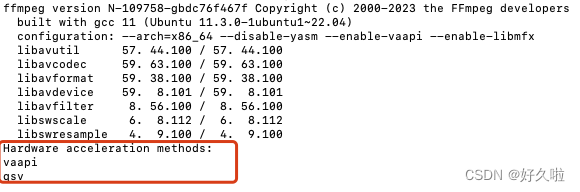
ffmpeg -codecs | grep qsv

ffmpeg -hwaccels 可查看支持的加速库
该命令只是列出此 ffmpeg 构建中启用的所有硬件加速组件,实际运行时可用性取决于硬件及其安装的合适驱动程序;如及时显示支持qsv加速库,还需要安装qsv的相关依赖,如mdsk等
测试解码能力
准备工具:intel_gpu_tools ,通过 apt-get install intel_gpu_tools安装
- QSV硬件加速:ffmpeg -hwaccel qsv -i -c:v qsv解码器 你的视频文件 -f null - -benchmark
- eg:ffmpeg -hwaccel qsv -c:v h264_qsv -i input.mp4 -f null - -benchmark
- VAAPI硬件加速:ffmpeg -hwaccel vaapi -hwaccel_output_format vaapi -i 你的视频文件 -f null - -benchmark
- 软解码:ffmpeg -i 你的视频文件 -f null - -benchmark
- 新建一个窗口键入intel_gpu_top可以观察gpu使用情况,vaapi和qsv两种方式都会用到
- benchmark:显示实际使用的系统和用户时间以及最大内存消耗。并非所有系统都支持最大内存消耗,如果不支持,它通常会显示为 0
三、解码器基准命令
VAAPI
Fromhttp://trac.ffmpeg.org/wiki/Hardware/VAAPI
ffmpeg -hwaccel vaapi -hwaccel_device /dev/dri/renderD128 -hwaccel_output_format vaapi -i input.mp4 -f null -可以粗略作为解码器的基准
其中-hwaccel_device 仅在-hwaccel选项也被指定,即实际上
ffmpeg -hwaccel vaapi -hwaccel_device /dev/dri/renderD128 -hwaccel_output_format vaapi -i input.mp4 -f null - 等价于 ffmpeg -hwaccel vaapi -hwaccel_output_format vaapi -i input.mp4 -f null -
笔者查阅网上资料,一开始一直使用ffmpeg -hwaccel vaapi -i input.mp4 -f null -作为解码器基准,后面在以上链接查阅到上诉命令之后,测试了两个命令的区别,运行的速率差距大至一倍之差,原先笔者使用的命令的cpu占用率、gpu占用、内存消耗都比增加了-hwaccel_output_format vaapi 参数的命令大很多。
上诉附着的链接也给出了答案(可以打开链接,ctrl + F 搜索hwaccel_output_format 即可定位到)
- The hardware codecs used by VAAPI are not able to access frame data in arbitrary memory. Therefore, all frame data needs to be uploaded to hardware surfaces connected to the appropriate device before being used. All VAAPI hardware surfaces in ffmpeg are represented by the vaapi pixfmt (the internal layout is not visible here, though).
The hwaccel decoders normally output frames in the associated hardware format, but by default the ffmpeg utility download the output frames to normal memory before passing them to the next component. This allows the decoder to work standlone to make decoding faster without any additional options
大致意思就是:
vaapi硬件编解码器无法访问到内存中的帧数据,因此需要将帧数据上传到硬件表面,而参数的增加可以减少了将解码后位于硬件表面的数据下载到普通内存的步骤;新参数的增加用于指定要使用的格式,可以是软件格式(哪些格式可用取决于驱动程序),也可以是 vaapi 硬件格式,目的是表明不用去下载硬件表面
也正是因为vaapi硬件编解码器无法访问到内存中的帧数据,因此需要将帧数据上传到硬件表面,同等情况下,vaapi的内存消耗会比qsv硬件加速消耗得多
QSV
From QSV硬件加速相关命令
ffmpeg -hwaccel qsv -c:v h264_qsv -i 10min39.mp4 -f null -
命令执行时,会报警告
WARNING: defaulting hwaccel_output_format to qsv for compatibility with old commandlines. This behaviour is DEPRECATED and will be removed in the future. Please explicitly set “-hwaccel_output_format qsv”.
可以将命令修改为
ffmpeg -hwaccel qsv -hwaccel_output_format qsv -c:v h264_qsv -i 10min39.mp4 -f null -
如果运行之后报警告
convert the video using the Intel® Quick Sync Video accelerator. You can ignore the info message about “A decode call did not consume any data: expect more data at input”, that just indicates it has reached the end of the file.
笔者查阅资料,出现该警告只是表明到达文件末尾
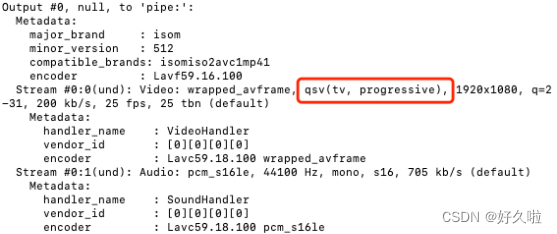
其他
除了intel_gpu_top ,以上测试解码能力的命令输出结果output当中Video的像素格式,可以得知是否成功使用了对应的硬件加速插件