简述
仿射变换是二维坐标间的线性变换,故而变换后的图像仍然具有原图的一些性质,包括“平直性”以及“平行性”,常用于图像翻转(Flip)、旋转(Rotations)、平移(Translations)、缩放(Scale operations)等,然而其实现的函数就是cv::warpAffine()
下面我们将对warpAffine()函数进行介绍,并且实现图像的旋转和平移。
warpAffine()--官网介绍
warpAffine
Applies an affine transformation to an image.
C++: void warpAffine(InputArray src, OutputArray dst, InputArray M, Size dsize, int flags=INTER_LINEAR, int borderMode=BORDER_CONSTANT, const Scalar& borderValue=Scalar())
Python: cv2.warpAffine(src, M, dsize[, dst[, flags[, borderMode[, borderValue]]]]) → dst
C: void cvWarpAffine(const CvArr* src, CvArr* dst, const CvMat* mapMatrix, int flags=CV_INTER_LINEAR+CV_WARP_FILL_OUTLIERS, CvScalar fillval=cvScalarAll(0) )
Python: cv.WarpAffine(src, dst, mapMatrix, flags=CV_INTER_LINEAR+CV_WARP_FILL_OUTLIERS, fillval=(0, 0, 0, 0)) → None
C: void cvGetQuadrangleSubPix(const CvArr* src, CvArr* dst, const CvMat* mapMatrix)
Python: cv.GetQuadrangleSubPix(src, dst, mapMatrix) → None
Parameters:
- src – Source image.
- dst – Destination image that has the size dsize and the same type as src .
- M –
transformation matrix.
- dsize – Size of the destination image.
- flags – Combination of interpolation methods (see resize() ) and the optional flag WARP_INVERSE_MAP that means that M is the inverse transformation (
).
- borderMode – Pixel extrapolation method (see borderInterpolate() ). When borderMode=BORDER_TRANSPARENT , it means that the pixels in the destination image corresponding to the “outliers” in the source image are not modified by the function.
- borderValue – Value used in case of a constant border. By default, it is 0.
The function warpAffine transforms the source image using the specified matrix:
when the flag WARP_INVERSE_MAP is set. Otherwise, the transformation is first inverted with invertAffineTransform() and then put in the formula above instead of M . The function cannot operate in-place.
由此可看出dst的计算公式:
图像的旋转
主要步骤:
1、根据旋转角度和旋转中心获取旋转矩阵;
2、根据旋转矩阵进行仿射变换,即可实现任意角度和任意中心的旋转效果。
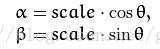
旋转矩阵的形式如下:

其中,
代码:
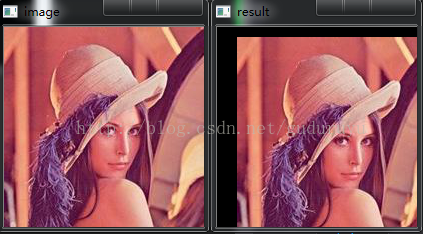
cv::Mat src = cv::imread("lenna.jpg");
cv::Mat dst;

//旋转角度
double angle = 45;

cv::Size src_sz = src.size();
cv::Size dst_sz(src_sz.height, src_sz.width);
int len = std::max(src.cols, src.rows);

//指定旋转中心
cv::Point2f center(len / 2., len / 2.);

//获取旋转矩阵(2x3矩阵)
cv::Mat rot_mat = cv::getRotationMatrix2D(center, angle, 1.0);

//根据旋转矩阵进行仿射变换
cv::warpAffine(src, dst, rot_mat, dst_sz);

//显示旋转效果
cv::imshow("image", src);
cv::imshow("result", dst);

cv::waitKey(0);

return 0;
旋转结果显示:

图像的平移
主要步骤:
1、定义好图像的平移矩阵;
2、分别指定x方向和y方向上的平移量tx和ty。
平移矩阵的形式如下:
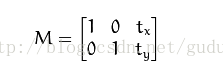
目标值dst计算公式已经在上面介绍过了。
代码:
cv::Mat src = cv::imread("lenna.jpg");
cv::Mat dst;

cv::Size dst_sz = src.size();

//定义平移矩阵
cv::Mat t_mat =cv::Mat::zeros(2, 3, CV_32FC1);

t_mat.at<float>(0, 0) = 1;
t_mat.at<float>(0, 2) = 20; //水平平移量
t_mat.at<float>(1, 1) = 1;
t_mat.at<float>(1, 2) = 10; //竖直平移量

//根据平移矩阵进行仿射变换
cv::warpAffine(src, dst, t_mat, dst_sz);

//显示平移效果
cv::imshow("image", src);
cv::imshow("result", dst);

cv::waitKey(0);

return 0;
平移结果显示: