此篇文章的主要目的是展示cv2.warpAffine()函数基本的使用方法,具体的参数含义我在另有一篇博客有详细描述。我们自己设置M变换矩阵实现平移,因为实现平移的M矩阵比较简单,所以我们可以自己设置
import cv2
import numpy as np

img = cv2.imread('aier.jpg')
rows,cols = img.shape[:2]

# 定义平移矩阵,需要是numpy的float32类型
# x轴平移200,y轴平移100, 2*3矩阵
M = np.float32([[1, 0, 200], [0, 1, 100]])
# 用仿射变换实现平移
img_s = cv2.warpAffine(img, M, (cols, rows), borderValue=(155, 150, 200))

原始图像
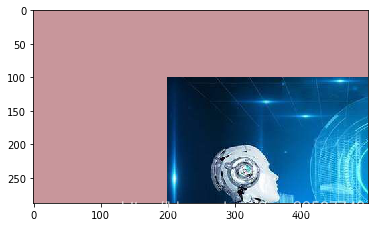
平移后的图像
