GitLab 概述
GitLab 是一个利用 Ruby on Rails 开发的开源应用程序,实现一个自托管的 Git 项目仓库,可通过 Web界面迚行访问公开的或者私人项目。Ruby on Rails 是一个可以使你开发、部署、维护 web 应用程序变得简单的框架。
GitLab 拥有不 Github 类似的功能,能够浏览源代码,管理缺陷和注释。可以管理团队对仓库的访问,它非常易亍浏览提交过的版本并提供一个文件历叱库。它还提供一个代码片段收集功能可以轻松实现代码复用,便于日后有需要的时候进行查找。
GitLab和GitHub的区别
相同点:
- 都是基于web的Git仓库
- 都提供了分享开源项目的平台,为开发团队提供了存储、分享、发布和合作开发项目的中心化于存储的场所。
不同点:
- GitHub使用私有仓库,是需要付费的。GitLab可以在上边创建私人的免费仓库
- GitLab让开发团队对他们的代码仓库拥有更多的控制,而GitHub则是代码托管的首选
- 相比于GitHub,它有不少的特色:允许免费设置仓库权限;允许用户选择分享一个 project 的部分代码;允许用户设置 project 的获取权限,进一步的提升安全性;可以设置获取到团队整体的改进进度;通过 innersourcing 让不在权限范围内的人访问不到该资源。
系统环境
[root@node1 ~]# cat /etc/redhat-release
CentOS Linux release 7.5.1804 (Core)

[root@node1 ~]# uname -r
3.10.0-862.el7.x86_64

#虚拟机内存为4G
[root@node1 ~]# free -h
                    total        used        free      shared  buff/cache   available
Mem:           3.7G        2.8G        475M         30M        408M        542M
Swap:          2.0G        1.5G        556M

#防火墙已关闭
[root@node1 ~]# systemctl status firewalld
● firewalld.service - firewalld - dynamic firewall daemon
   Loaded: loaded (/usr/lib/systemd/system/firewalld.service; disabled; vendor preset: enabled)
   Active: inactive (dead)
     Docs: man:firewalld(1)
#selinux设置为Disabled
[root@node1 ~]# getenforce
Disabled
搭建GitLab
安装GitLab所需的组件
yum install curl policycoreutils openssh-server openssh-clients postfix -y开启Postfix发送邮件
[root@node1 ~]# systemctl start postfix
#设置开机自启
[root@node1 ~]# systemctl enable postfix
安装GitLab
下载GitLab的RPM包,再复制到虚拟机
https://mirrors.tuna.tsinghua.edu.cn/gitlab-ce/yum/el7/gitlab-ce-10.2.3-ce.0.el7.x86_64.rpm
rpm -ivh gitlab-ce-10.2.3-ce.0.el7.x86_64.rpm 修改gitlab域名
[root@node1 ~]# vim /etc/gitlab/gitlab.rb
#修改为IP地址
external_url 'http://192.168.231.130'
修改配置文件后,重新配置GitLab

[root@node1 ~]# gitlab-ctl reconfigure
查看gitlab状态

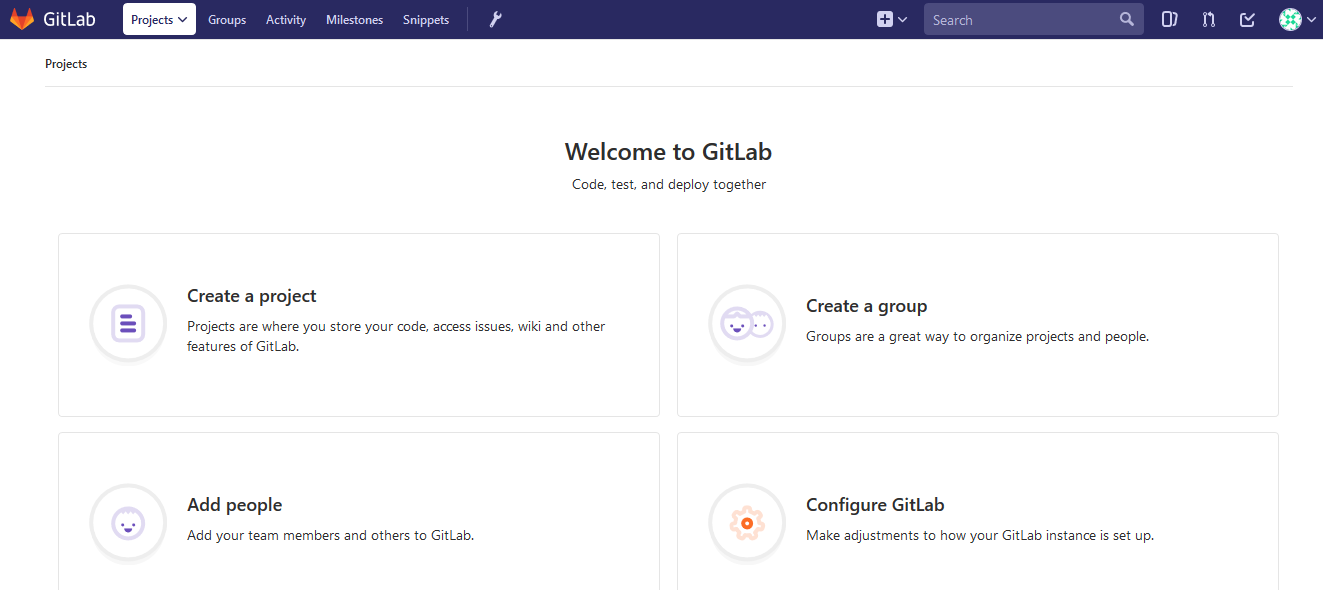
登录GitLab
在浏览器中输入虚拟机IP地址192.168.231.130
设置密码
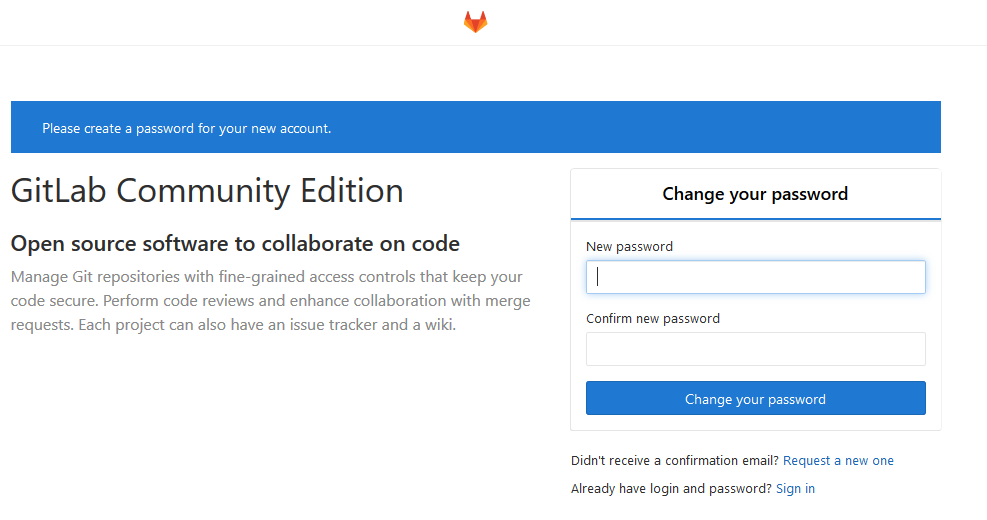
登录

GitLab的简单使用
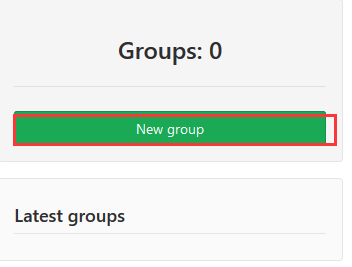
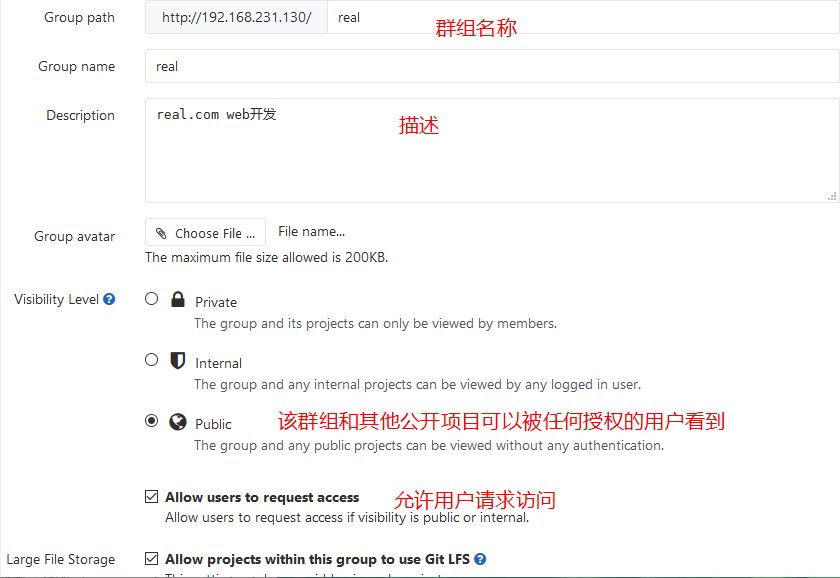
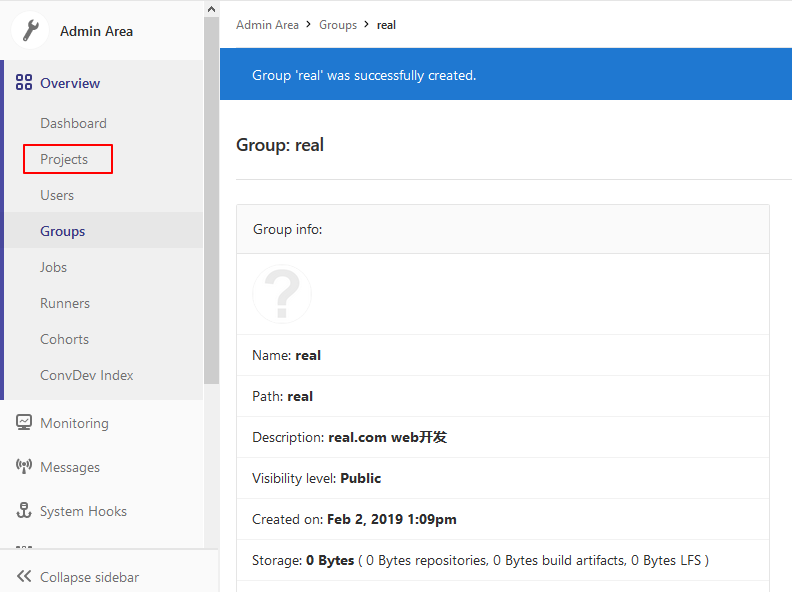
1.创建群组
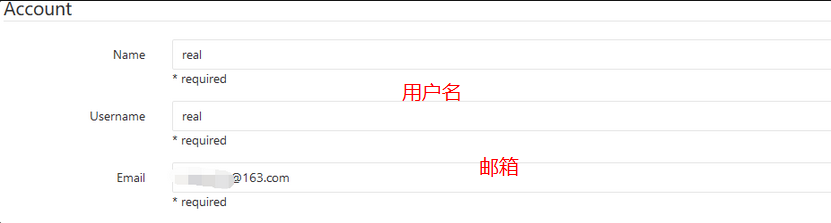
2.创建用户
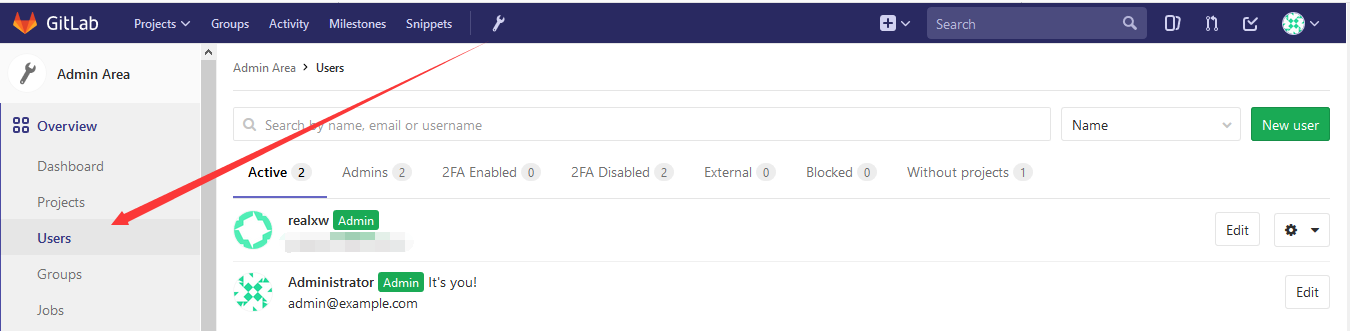
选择管理员区域->Users->New user

填写信息
163邮箱会收到账号创建成功的邮件
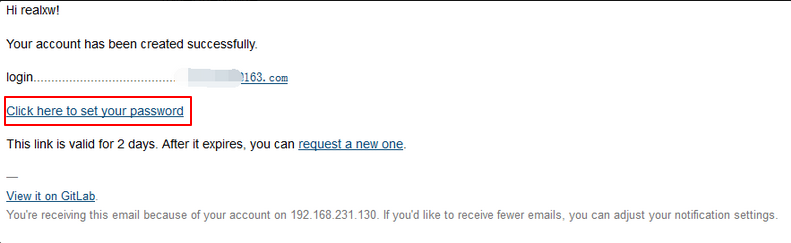
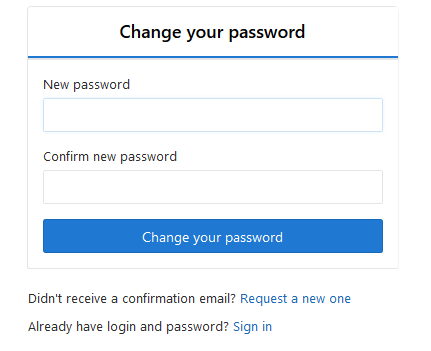
点击设置密码,必须8位以上
创建成功
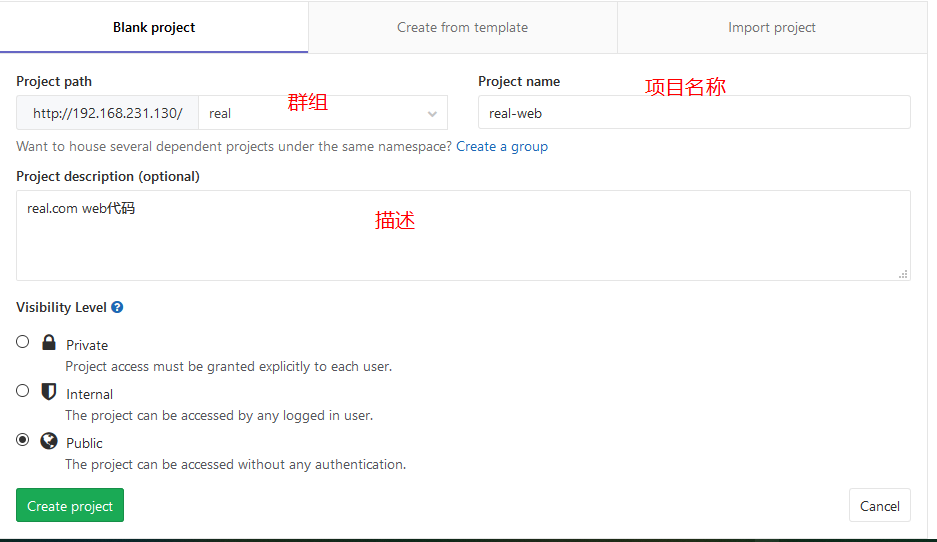
3.创建项目


黄色警号:如果想使用https,就添加一个SSH key,这里先不添加
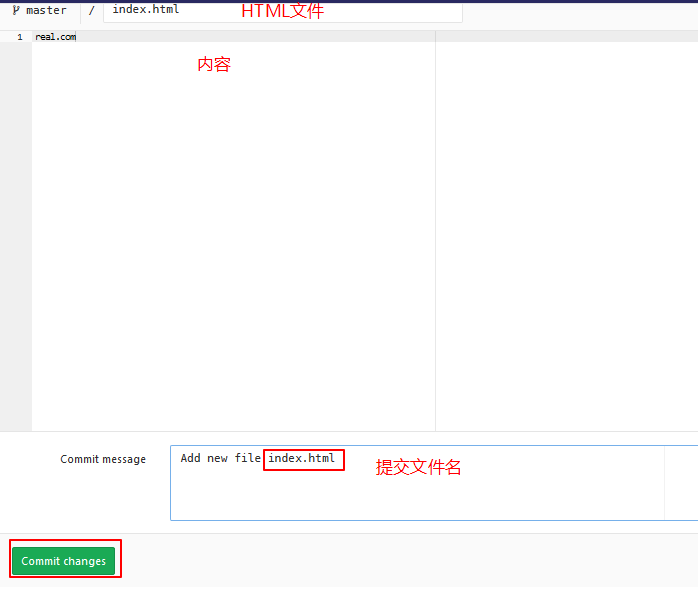
创建一个html文件并提交(root用户登录)

设置gitlab用户名和邮箱
[root@node1 ~]# git config --global user.name "realxw"
[root@node1 ~]# git config --global user.email "[email protected]"

获取创建的项目(复制url):


git 相关概念
git 是一种版本控制系统,是一个命令,是一种工具
gitlib 是用于实现 git 功能的开发库
github 是一个基于 git 实现的在线代码托管仓库,包含一个网站界面,向互联网开放
gitlab 是一个基于 git 实现的在线代码仓库托管软件,一般用于在企业内部网络搭建 git 私服
注: gitlab-ce 社区版 ; gitlab-ee 是企业版
git常用命令及使用
安装git
# yum install git -y
git config --global username "xxx" #设置全局用户名

git config --global user.emai [email protected] #设置全局邮箱

git config --global --list   #列出用户全局设置

git add index.html  #添加文件到暂存区

git commit -m "describe"  #提交文件到工作区

git status  #查看工作区的状态

git push  #提交代码到服务器

git pull  #获取代码到本地

git log #查看操作日志
git reset --hard  HEAD^ # git版本回滚,HEAD为当前版本, 加一个^为上一个,^^为上上一个版本

git reflog  #获取毎次提交的ID,可以使用--hard根据提交的ID进行版本回退

git reset --hard  ID #回退到指定id的版本

# git branch  #查看当前所处的分支

git checkout  -- file #从服务器更新某个文件覆盖本地的文件
演示:
git add , git commit -m ,git push origin master
#切换到项目目录
[root@node1 test]# cd real-web/
[root@node1 real-web]# ls
index.html
#创建上传文件
[root@node1 real-web]# echo "hello" > hello.txt
[root@node1 real-web]# ls
hello.txt  index.html
#添加文件到暂存区
[root@node1 real-web]# git add hello.txt
#提交文件到工作区
[root@node1 real-web]# git commit -m 'add hello.txt'
[master f5584a6] add hello.txt
 1 file changed, 1 insertion(+)
 create mode 100644 hello.txt
#提交到服务器(orgin后边跟分支,主分支)
[root@node1 real-web]# git push origin master
Username for 'http://192.168.231.130': root
Password for 'http://[email protected]':
Counting objects: 4, done.
Delta compression using up to 4 threads.
Compressing objects: 100% (2/2), done.
Writing objects: 100% (3/3), 276 bytes | 0 bytes/s, done.
Total 3 (delta 0), reused 0 (delta 0)
To http://192.168.231.130/root/real-web.git
   b04498e..f5584a6  master -> master
网页刷新查看:

git log,查看提交日志

git reset --hard ID,git reflog,git branch
修改hello.txt,提交,并恢复到修改前的版本
#修改hello.txt
[root@node1 real-web]# echo "123" > hello.txt
[root@node1 real-web]# cat hello.txt
123
#提交项目
[root@node1 real-web]# git add hello.txt
[root@node1 real-web]# git commit -m 'update hello.txt'
[master ea0fa54] update hello.txt
 1 file changed, 1 insertion(+), 1 deletion(-)
#查看当前分支
[root@node1 real-web]# git branch
* master
[root@node1 real-web]# git push origin master
Username for 'http://192.168.231.130': root
Password for 'http://[email protected]':
Counting objects: 5, done.
Delta compression using up to 4 threads.
Compressing objects: 100% (2/2), done.
Writing objects: 100% (3/3), 276 bytes | 0 bytes/s, done.
Total 3 (delta 0), reused 0 (delta 0)
To http://192.168.231.130/root/real-web.git
   088c115..ea0fa54  master -> master
#获取每次提交的ID
[root@node1 real-web]# git reflog
ea0fa54 HEAD@{0}: commit: update hello.txt
088c115 HEAD@{1}: commit: update index.html
f5584a6 HEAD@{2}: commit: add hello.txt
b04498e HEAD@{3}: clone: from http://192.168.231.130/root/real-web.git
[root@node1 real-web]# cat hello.txt
123
#恢复hello.txt到前一个版本
[root@node1 real-web]# git reset --hard f5584a6
HEAD is now at f5584a6 add hello.txt
#恢复
[root@node1 real-web]# cat hello.txt
hello