Spring Boot快速入门(thymeleaf标签使用)
1.1 建立Maven项目,导入spring boot父工程(本人使用IDEA)


修改pom.xml:
<?xml version="1.0" encoding="UTF-8"?>
<project xmlns="http://maven.apache.org/POM/4.0.0"
         xmlns:xsi="http://www.w3.org/2001/XMLSchema-instance"
         xsi:schemaLocation="http://maven.apache.org/POM/4.0.0 http://maven.apache.org/xsd/maven-4.0.0.xsd">
    <modelVersion>4.0.0</modelVersion>

    <groupId>com.maximus</groupId>
    <artifactId>springboot-shiro</artifactId>
    <version>1.0-SNAPSHOT</version>

    <!-- 继承Spring Boot的默认父工程 -->
    <!-- Spring Boot 父工程 -->
    <parent>
        <groupId>org.springframework.boot</groupId>
        <artifactId>spring-boot-starter-parent</artifactId>
        <version>1.5.4.RELEASE</version>
    </parent>

</project>
1.2 导入web支持
修改pom.xml:
<!-- 导入依赖 -->
    <dependencies>
        <!-- 导入web支持:SpringMVC开发支持,Servlet相关的程序 -->
        <!-- web支持,SpringMVC, Servlet支持等 -->
        <dependency>
            <groupId>org.springframework.boot</groupId>
            <artifactId>spring-boot-starter-web</artifactId>
        </dependency>
    </dependencies>
1.3 编写测试Controller类
package com.maximus;

import org.springframework.stereotype.Controller;
import org.springframework.web.bind.annotation.RequestMapping;
import org.springframework.web.bind.annotation.ResponseBody;

/**
 * 测试Controller类
 */
@Controller
public class UserController {
    /**
     * 测试方法
     */
    @RequestMapping("/hello")
    @ResponseBody
    public String hello(){
        System.out.println("UserController.hello()");
        return "ok";
    }

}
1.4 编写SpringBoot启动类
package com.maximus.controller;

import org.springframework.stereotype.Controller;
import org.springframework.web.bind.annotation.RequestMapping;
import org.springframework.web.bind.annotation.ResponseBody;

/**
 * 测试Controller类
 */
@Controller
public class UserController {
    /**
     * 测试方法
     */
    @RequestMapping("/hello")
    @ResponseBody
    public String hello(){
        System.out.println("UserController.hello()");
        return "ok";
    }

}
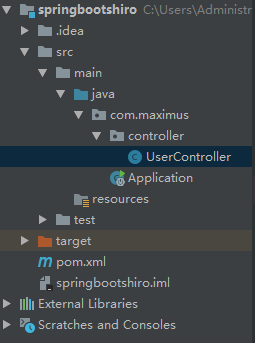
当前项目架构:
运行启动类,出现以下界面表示启动成功:

打开浏览器輸入:http://localhost:8080/hello 出现以下界面表示测试成功

1.5 导入thymeleaf页面模块
pom.xml 中引入thymeleaf依赖
<!-- 导入thymeleaf依赖 -->

        <dependency>

            <groupId>org.springframework.boot</groupId>

            <artifactId>spring-boot-starter-thymeleaf</artifactId>

        </dependency>
在Controller添加测试方法
/**
     * 测试thymeleaf
     */
    @RequestMapping("/testThymeleaf")
    public String testThymeleaf(Model model){
        //把数据存入model
        model.addAttribute("name","MaximusRj");
        //返回test.html
        return "test";
    }
建立test.html页面
在src/main/resource目录下创建templates目录,然后创建test.html页面
<!DOCTYPE html>
<html xmlns:th="http://www.w3.org/1999/xhtml">
<head>
    <meta charset="UTF-8"/>
    <title>测试Thymeleaf的使用</title>
</head>
<body>
<h3 th:text="${name}"></h3>
</body>
</html>
在thymeleaf3.0以前对页面标签语法要求比较严格,开始标签必须有对应的结束标签。
如果希望页面语法不严谨,但是也能够运行成功,可以把thymeleaf升级为3.0或以上版本。
升级thymeleaf3.0.2版本:
<!-- 修改参数 -->
	<properties>
		<!-- 修改JDK的编译版本为1.8 -->
		<java.version>1.8</java.version>
		<!-- 修改thymeleaf的版本 -->
		<thymeleaf.version>3.0.2.RELEASE</thymeleaf.version>
		<thymeleaf-layout-dialect.version>2.0.4</thymeleaf-layout-dialect.version>
	</properties>
运行启动类,打开浏览器輸入:http://localhost:8080/testThymeleaf 出现以下界面表示测试成功:

本章节源码:git地址:https://gitee.com/maximusrj/springboot-shiro.git
**下一章节:Spring Boot与Shiro整合实现用户认证**