09.Spring Boot 实战~Spring Boot整合Shiro
本文是上一篇文章的后续,详情点击该链接~
在这篇文章里呢,我们对Shiro的一些操作都有了基本认识。那么现在呢,我们更应该把Shiro投入到实战当中,所以现在,我们就来整合Spring Boot

本文用到的数据库表(数据只加盐了一次)


我们现在就来实现一下登陆验证吧!
先来做好准备工作~
导入我们所需要的依赖
<?xml version="1.0" encoding="UTF-8"?>

<project xmlns="http://maven.apache.org/POM/4.0.0" xmlns:xsi="http://www.w3.org/2001/XMLSchema-instance"
  xsi:schemaLocation="http://maven.apache.org/POM/4.0.0 http://maven.apache.org/xsd/maven-4.0.0.xsd">
  <modelVersion>4.0.0</modelVersion>

  <groupId>com.alvin</groupId>
  <artifactId>SpringBootAndShiroLogin</artifactId>
  <version>1.0-SNAPSHOT</version>
  <packaging>war</packaging>

  <name>SpringBootAndShiroLogin Maven Webapp</name>
  <!-- FIXME change it to the project's website -->
  <url>http://www.example.com</url>

  <properties>
    <project.build.sourceEncoding>UTF-8</project.build.sourceEncoding>
    <maven.compiler.source>1.7</maven.compiler.source>
    <maven.compiler.target>1.7</maven.compiler.target>
  </properties>

  <parent>
    <groupId>org.springframework.boot</groupId>
    <artifactId>spring-boot-starter-parent</artifactId>
    <version>2.1.13.RELEASE</version>
  </parent>

  <dependencies>
    <dependency>
      <groupId>org.apache.shiro</groupId>
      <artifactId>shiro-spring-boot-web-starter</artifactId>
      <version>1.4.2</version>
    </dependency>
    <dependency>
      <groupId>org.springframework.boot</groupId>
      <artifactId>spring-boot-starter-thymeleaf</artifactId>
      <version>2.3.0.RELEASE</version>
    </dependency>

    <!--mybatis的启动器-->
    <dependency>
      <groupId>org.mybatis.spring.boot</groupId>
      <artifactId>mybatis-spring-boot-starter</artifactId>
      <version>2.1.1</version>
    </dependency>

    <!--数据库的驱动-->
    <dependency>
      <groupId>mysql</groupId>
      <artifactId>mysql-connector-java</artifactId>
      <version>8.0.20</version>
    </dependency>
  </dependencies>

</project>
搭建好项目结构:

User实体类
package com.alvin.pojo;

import java.io.Serializable;

public class User  implements Serializable {
    private   Integer  uid;
    private  String  uname;
    private  String  pwd;
    private  String  salt;
//get set那些就不写在文章里面了
启动类
package com;

import org.mybatis.spring.annotation.MapperScan;
import org.springframework.boot.SpringApplication;
import org.springframework.boot.autoconfigure.SpringBootApplication;

@SpringBootApplication
@MapperScan("com.alvin.mapper")
public class SpringBootAndShiroLogin {
    public static void main(String[] args) {
        SpringApplication.run(SpringBootAndShiroLogin.class,args);
    }
}
PathController
package com.alvin.controller;

import org.springframework.stereotype.Controller;
import org.springframework.web.bind.annotation.PathVariable;
import org.springframework.web.bind.annotation.RequestMapping;

@Controller
public class PathController {
    @RequestMapping("/{path}")
    public  String   getPath(@PathVariable String path){
        return   path;
    }
}
application.yml配置文件
spring:
  datasource:
    driver-class-name: com.mysql.cj.jdbc.Driver
    url: jdbc:mysql://127.0.0.1:3306/mybatis?characterEncoding=utf8&useSSL=false&serverTimezone=GMT%2B8
    username: root
    password: root

shiro:
  #如果没有认证跳转到登录页面即可
  loginUrl: login
那么现在,准备工作我们已经做好了,该上代码了~
UserController
package com.alvin.controller;

import org.apache.shiro.SecurityUtils;
import org.apache.shiro.authc.AuthenticationException;
import org.apache.shiro.authc.IncorrectCredentialsException;
import org.apache.shiro.authc.UnknownAccountException;
import org.apache.shiro.authc.UsernamePasswordToken;
import org.apache.shiro.subject.Subject;
import org.apache.shiro.web.mgt.CookieRememberMeManager;
import org.springframework.stereotype.Controller;
import org.springframework.web.bind.annotation.RequestMapping;
import org.springframework.web.bind.annotation.RequestParam;

@Controller
public class UserController {

    //用户认证实现
    @RequestMapping("/userLogin")
    public   String   login(String uname, String pwd) {

        //SpringBoot结合shiro以后会自动创建Security Manager
        //我们直接再SecurityUtils对象中获得subject主体对象
        Subject subject = SecurityUtils.getSubject();
        //把信息保存到usernamepassToken
        UsernamePasswordToken token = new UsernamePasswordToken(uname, pwd);
        try {
            //进行身份验证
            subject.login(token);
            //通过方法判断是否登录成功
            if (subject.isAuthenticated()) {
                System.out.println("登录成功");
                return "main";
            }else{
                return "login";
            }
        } catch (IncorrectCredentialsException e) {
            System.out.println("登录失败");
            return "login";
        } catch (UnknownAccountException e) {
            System.out.println("用户名不正确");
            return "login";
        }
    }
}
UserMapper
package com.alvin.mapper;

import com.alvin.pojo.User;
import org.apache.ibatis.annotations.Select;

public interface UserMapper {
     @Select("select *  from  user  where  uname=#{param1}")
     User  selectOne(String uname);
}
UserServiceImpl
package com.alvin.service.impl;

import com.alvin.mapper.UserMapper;
import com.alvin.pojo.User;
import com.alvin.service.UserService;
import org.springframework.beans.factory.annotation.Autowired;
import org.springframework.stereotype.Service;

@Service
public class UserServiceImpl implements UserService {

    @Autowired
    private UserMapper  userMapper;

    @Override
    public User findOne(String uname) {
        return userMapper.selectOne(uname);
    }
}
Shiro操作,这里才是重点
MyRealm
package com.alvin.realm;

import com.alvin.pojo.User;
import com.alvin.service.UserService;
import org.apache.shiro.authc.AuthenticationException;
import org.apache.shiro.authc.AuthenticationInfo;
import org.apache.shiro.authc.AuthenticationToken;
import org.apache.shiro.authc.SimpleAuthenticationInfo;
import org.apache.shiro.realm.AuthenticatingRealm;
import org.apache.shiro.util.ByteSource;
import org.springframework.beans.factory.annotation.Autowired;
import org.springframework.stereotype.Component;

@Component
public class MyRealm extends AuthenticatingRealm {

     @Autowired
     private UserService  userService;

    @Override
    protected AuthenticationInfo doGetAuthenticationInfo(AuthenticationToken token) throws AuthenticationException {

        //[A]获得用户输入得用户名
        String  principal = (String) token.getPrincipal();

        //[B]根据用户名去数据库查询用户名是否存在
        User user = userService.findOne(principal);

        //[C]如果用户名存在 ,交给shiro进行密码得比较
        if(user!=null){
            AuthenticationInfo  info=new SimpleAuthenticationInfo(user,user.getPwd(), ByteSource.Util.bytes(user.getSalt()),"realname");
            return   info;
        }
        return null;
    }
}
MyConfig
package com.alvin.config;

import com.alvin.realm.MyRealm;
import org.apache.shiro.authc.credential.HashedCredentialsMatcher;
import org.apache.shiro.authc.credential.Md5CredentialsMatcher;
import org.apache.shiro.spring.web.config.DefaultShiroFilterChainDefinition;
import org.apache.shiro.spring.web.config.ShiroFilterChainDefinition;
import org.apache.shiro.web.filter.authc.LogoutFilter;
import org.apache.shiro.web.mgt.CookieRememberMeManager;
import org.apache.shiro.web.mgt.DefaultWebSecurityManager;
import org.apache.shiro.web.servlet.Cookie;
import org.apache.shiro.web.servlet.SimpleCookie;
import org.springframework.beans.factory.annotation.Autowired;
import org.springframework.context.annotation.Bean;
import org.springframework.context.annotation.Configuration;

@Configuration
public class MyConfig {

    @Autowired
    private MyRealm  myRealm;

    @Bean
    public DefaultWebSecurityManager  defaultWebSecurityManager(){
        DefaultWebSecurityManager  securityManager=new DefaultWebSecurityManager();
        //指定加密的算法 MD5
        HashedCredentialsMatcher matcher=new HashedCredentialsMatcher();
        matcher.setHashAlgorithmName("md5");
        //迭代次数
        matcher.setHashIterations(1);
        //把加密对象设置到myRealm中
        myRealm.setCredentialsMatcher(matcher);
        //把自定义的realm设置到securityManager
        securityManager.setRealm(myRealm);

        return   securityManager;
    }

     @Bean
    public ShiroFilterChainDefinition  shiroFilterChainDefinition(){

        DefaultShiroFilterChainDefinition filterChain=new DefaultShiroFilterChainDefinition();

        //指定放行得路径
        filterChain.addPathDefinition("/login","anon");
        filterChain.addPathDefinition("/userLogin","anon");
        //必须认证
        filterChain.addPathDefinition("/**","authc");

        return   filterChain;
    }
}
最后是前台
<!DOCTYPE html>
<html lang="en" xmlns:th="http://www.thymeleaf.org">
<link rel="shortcut icon" href="../resources/favicon.ico" th:href="@{/static/favicon.ico}"/>
    <head>
        <meta charset="UTF-8">
        <title>Title</title>
    </head>
    <body>

        <form method="post" action="userLogin">

            <p>
                用户名:<input type="text" name="uname"/>
            </p>
            <p>
                密码:<input type="text" name="pwd"/>
            </p>
            <p>
                 <input type="submit" value="登录"/>
            </p>

        </form>
    </body>
</html>
我们运行看看吧?
先输错一次

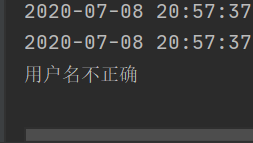
然后正常输入

