版权声明:本文为博主原创文章,未经博主允许不得转载。 https://blog.csdn.net/yu_hongrun/article/details/81708762
本篇只简单讲述简的环境搭建,如题,在SpringBoot2.0.4中集成Druid(阿里的数据源)、Mybatis(sql写在xml中的配置)和redis(最常用的缓存数据库)。本项目只限提供RestAPI服务,不涉及网站页面文件(静态和动态)的支持。
1.先看pom.xml
<dependencies>
<!-- 主要的几个依赖,现在主流的框架都支持springboot了,省去了那一大推依赖 -->
<!-- web服务starter -->
<dependency>
<groupId>org.springframework.boot</groupId>
<artifactId>spring-boot-starter-web</artifactId>
</dependency>
<!-- https://mvnrepository.com/artifact/org.springframework.boot/spring-boot-starter-thymeleaf -->
<dependency>
<groupId>org.springframework.boot</groupId>
<artifactId>spring-boot-starter-thymeleaf</artifactId>
</dependency>
<!-- redis的starter -->
<dependency>
<groupId>org.springframework.boot</groupId>
<artifactId>spring-boot-starter-redis</artifactId>
<version>1.4.7.RELEASE</version>
</dependency>
<!-- druid的starter -->
<dependency>
<groupId>com.alibaba</groupId>
<artifactId>druid-spring-boot-starter</artifactId>
<version>1.1.9</version>
</dependency>
<!-- mybatis的starter -->
<dependency>
<groupId>org.mybatis.spring.boot</groupId>
<artifactId>mybatis-spring-boot-starter</artifactId>
<version>1.3.2</version>
</dependency>
<!-- 其他辅助依赖,对,总共就这么几个,没有了,是不是很清爽 -->
<dependency>
<groupId>org.springframework.boot</groupId>
<artifactId>spring-boot-starter-test</artifactId>
<scope>test</scope>
</dependency>
<dependency>
<groupId>org.springframework.boot</groupId>
<artifactId>spring-boot-devtools</artifactId>
<optional>true</optional>
</dependency>
<dependency>
<groupId>mysql</groupId>
<artifactId>mysql-connector-java</artifactId>
<scope>runtime</scope>
</dependency>
<dependency>
<groupId>log4j</groupId>
<artifactId>log4j</artifactId>
<version>1.2.17</version>
</dependency>
<!-- lombok -->
<dependency>
<groupId>org.projectlombok</groupId>
<artifactId>lombok</artifactId>
<version>1.18.2</version>
<scope>provided</scope>
</dependency>
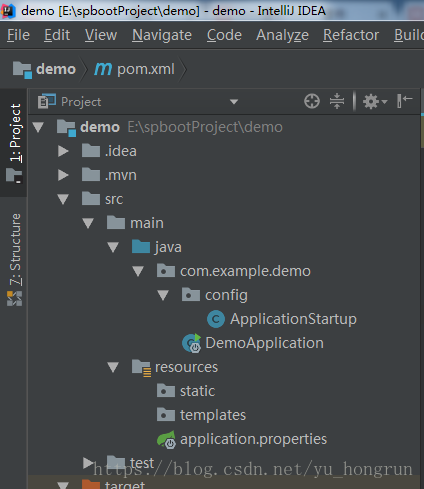
</dependencies>2.项目结构
3.springBoot主要配置application.properties,几乎所有的配置都在这里了,已附上官网配置参考链接,想深入的同学可以自行阅读
debug=false
trace=false

server.port=8080
server.path=http://localhost

# Druid连接池配置,官方配置参考:https://github.com/alibaba/druid/tree/master/druid-spring-boot-starter
spring.datasource.druid.url=jdbc:mysql://localhost:3306/blog?useUnicode=true&characterEncoding=utf8
spring.datasource.druid.username=root
spring.datasource.druid.password=root
spring.datasource.druid.initial-size=5
spring.datasource.druid.max-active=20
spring.datasource.druid.min-idle=10
spring.datasource.druid.max-wait=10
spring.datasource.druid.filters=stat,wall
spring.datasource.druid.filter.stat.log-slow-sql=true
spring.datasource.druid.filter.stat.slow-sql-millis=2000

# Druid WebStatFilter配置,说明请参考Druid Wiki,配置_配置WebStatFilter
spring.datasource.druid.web-stat-filter.enabled=true
spring.datasource.druid.web-stat-filter.url-pattern=/*
spring.datasource.druid.web-stat-filter.exclusions=*.gif,*.png,*.jpg,*.html,*.js,*.css,*.ico,/druid/*

# Druid StatViewServlet配置,说明请参考Druid Wiki,配置_StatViewServlet配置
spring.datasource.druid.stat-view-servlet.enabled=true
spring.datasource.druid.stat-view-servlet.url-pattern=/druid/*
spring.datasource.druid.stat-view-servlet.reset-enable=true
spring.datasource.druid.stat-view-servlet.login-username=admin
spring.datasource.druid.stat-view-servlet.login-password=admin
spring.datasource.druid.stat-view-servlet.allow=
spring.datasource.druid.stat-view-servlet.deny=

#Mybatis配置,官方参考:http://www.mybatis.org/spring-boot-starter/mybatis-spring-boot-autoconfigure/
mybatis.mapper-locations=classpath*:mybatis/*Mapper.xml

# Redis配置,官方参考:https://docs.spring.io/spring-boot/docs/2.0.0.RELEASE/reference/htmlsingle/#common-application-properties
spring.redis.database=0
spring.redis.host=127.0.0.1
spring.redis.port=6379
spring.redis.password=
spring.redis.timeout=5000
4.启动类Application.java的代码,也是少的可怜;这里唯一需要注意的就是Mybatis的配置这里需要指定一下扫描的mapper包路径(其实觉得完全可以放在application.properties中指定,但本人亲测,只有放在这里管用,具体原理还没细纠)
@SpringBootApplication
@MapperScan("com.example.mapper")
public class Application {
    public static void main(String[] args) {
        SpringApplication.run(Application.class, args);
    }
}
5.其他废话
除了上述几个配置之外,其他的代码跟普通的spring项目一样,没有任何区别。虽说springboot虽然还需要一些配置,但整体来说已经比传统的项目配置要少的多了,主要在于一些大厂都已经开始支持springboot了,于是就有了各种各样的starter。需要哪个服务的支持,可以直接去github上搜对应的starter就可以了。最后附上springboot的官方配置连接,还是很详细的。
SpringBoot官方配置参考