版权声明:本文为博主原创文章,未经博主允许不得转载。 https://blog.csdn.net/x7418520/article/details/81537265
相关工具:
- IDE:idea
- 包管理器:maven
1创建一个springboot的空项目,由于springcloud需要启动的项目实在太多,我使用了maven的多模块方法。
创建完毕后,需要对pom文件进行改造一下,pom文件应该如下所示。
<?xml version="1.0" encoding="UTF-8"?>
<project xmlns="http://maven.apache.org/POM/4.0.0" xmlns:xsi="http://www.w3.org/2001/XMLSchema-instance"
xsi:schemaLocation="http://maven.apache.org/POM/4.0.0 http://maven.apache.org/xsd/maven-4.0.0.xsd">
<modelVersion>4.0.0</modelVersion>
<groupId>com.duanss</groupId>
<artifactId>spring-cloud-demo</artifactId>
<version>0.0.1-SNAPSHOT</version>
<packaging>jar</packaging>
<name>spring-cloud-demo</name>
<description>Demo project for Spring Boot</description>
<modules>
<module>eureka-server</module>
</modules>
<parent>
<groupId>org.springframework.boot</groupId>
<artifactId>spring-boot-starter-parent</artifactId>
<version>2.0.4.RELEASE</version>
<relativePath/> <!-- lookup parent from repository -->
</parent>
<properties>
<project.build.sourceEncoding>UTF-8</project.build.sourceEncoding>
<project.reporting.outputEncoding>UTF-8</project.reporting.outputEncoding>
<java.version>1.8</java.version>
<spring-cloud.version>Finchley.SR1</spring-cloud.version>
</properties>
<dependencies>
<dependency>
<groupId>org.springframework.boot</groupId>
<artifactId>spring-boot-starter-test</artifactId>
<scope>test</scope>
</dependency>
</dependencies>
<dependencyManagement>
<dependencies>
<dependency>
<groupId>org.springframework.cloud</groupId>
<artifactId>spring-cloud-dependencies</artifactId>
<version>${spring-cloud.version}</version>
<type>pom</type>
<scope>import</scope>
</dependency>
</dependencies>
</dependencyManagement>
<build>
<plugins>
<plugin>
<groupId>org.springframework.boot</groupId>
<artifactId>spring-boot-maven-plugin</artifactId>
</plugin>
</plugins>
</build>
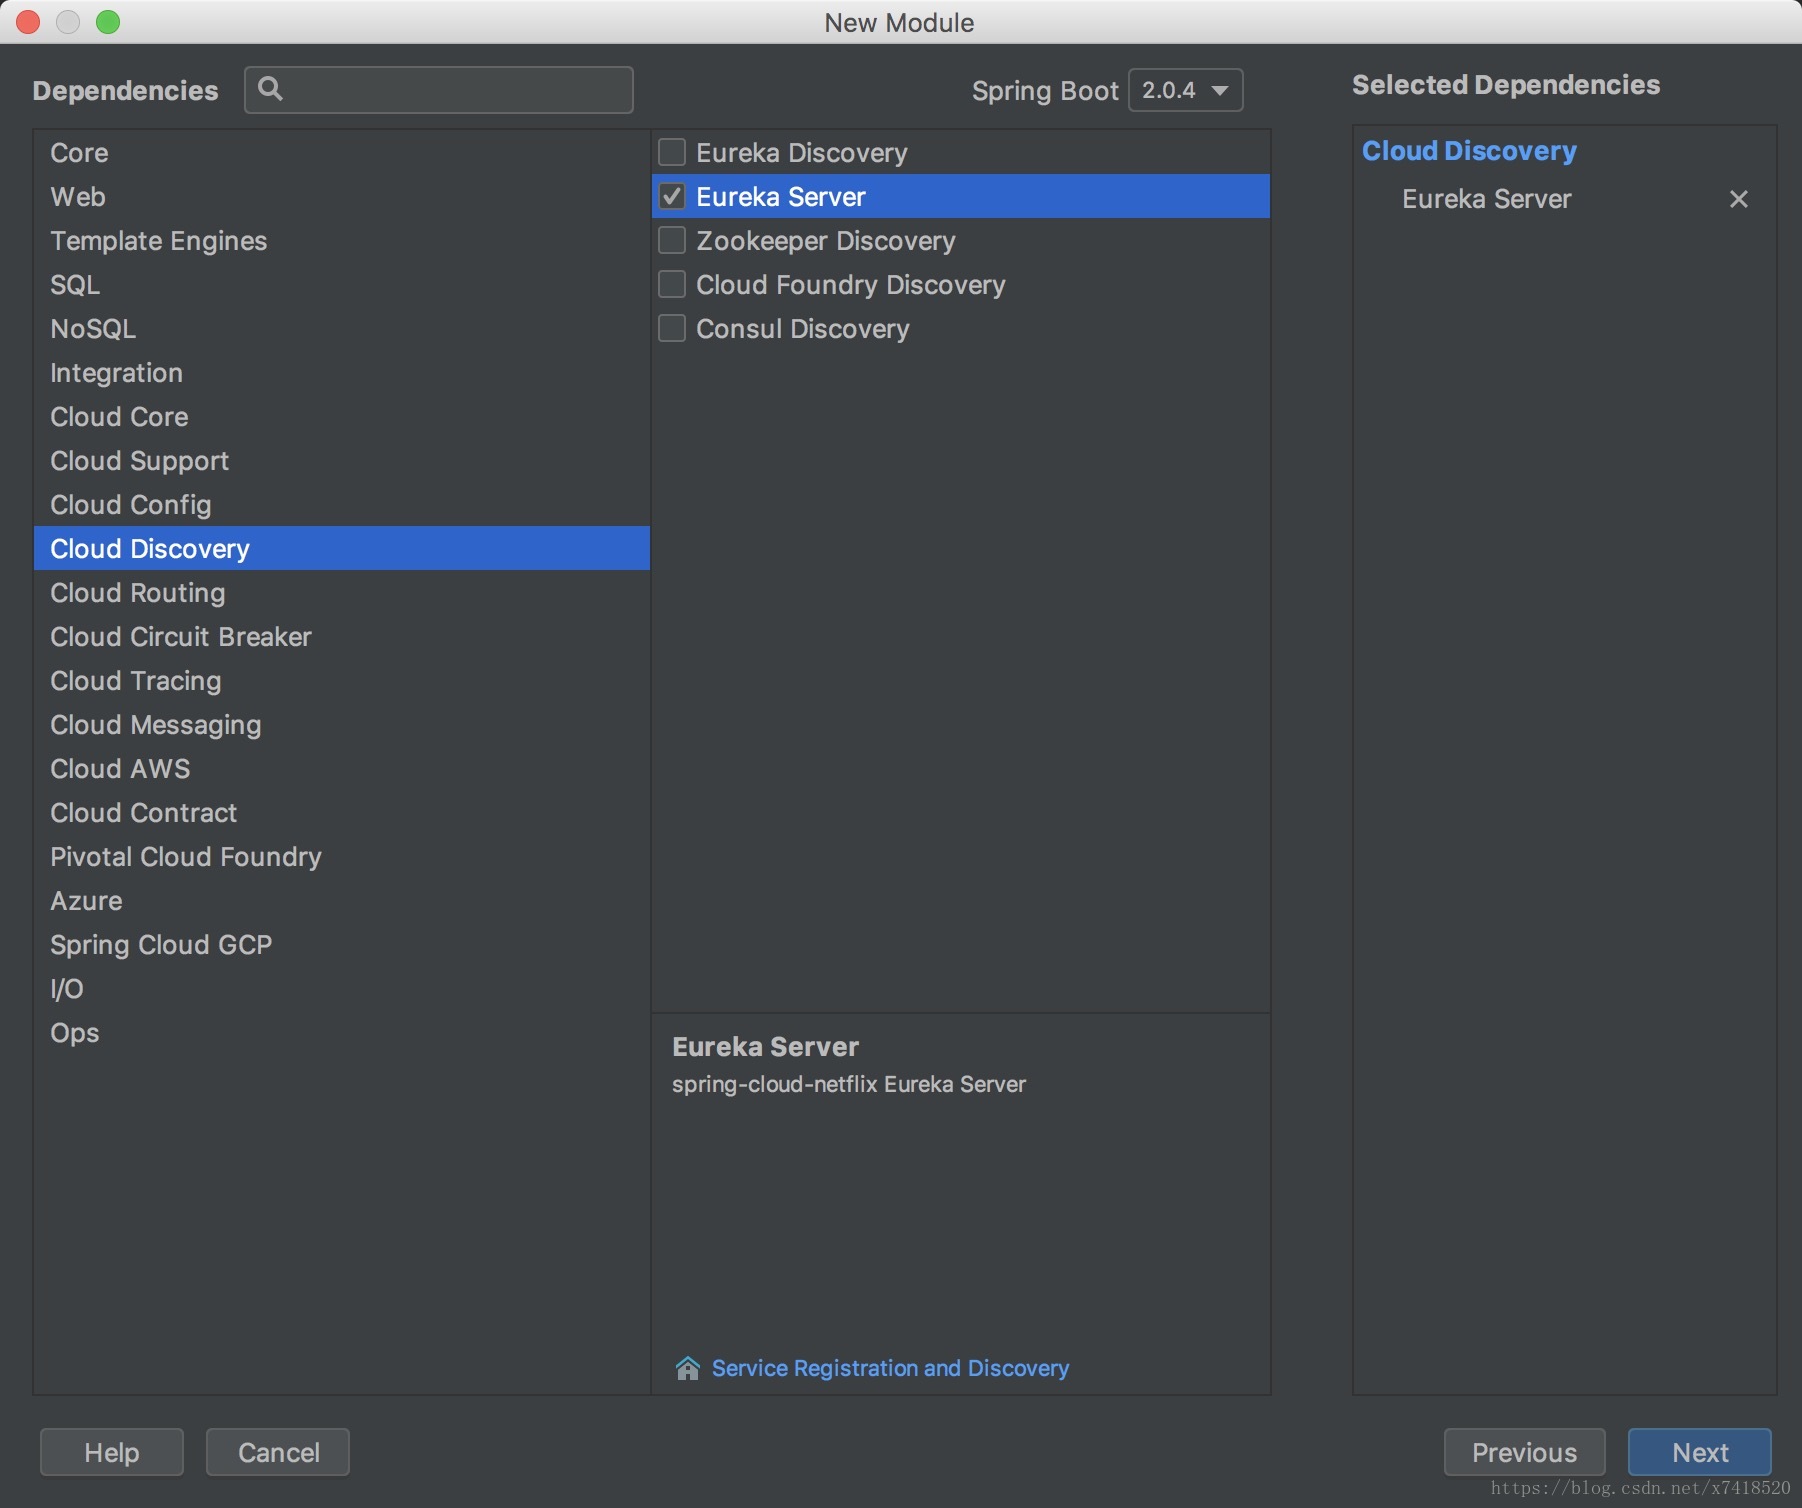
</project>2使用idea创建module,选择一个eureka server。
使用idea创建module时,选择这个。
同样,要对pom文件进行修改。
<?xml version="1.0" encoding="UTF-8"?>
<project xmlns="http://maven.apache.org/POM/4.0.0" xmlns:xsi="http://www.w3.org/2001/XMLSchema-instance"
         xsi:schemaLocation="http://maven.apache.org/POM/4.0.0 http://maven.apache.org/xsd/maven-4.0.0.xsd">
    <modelVersion>4.0.0</modelVersion>

    <groupId>com.duanss</groupId>
    <artifactId>eureka-server</artifactId>
    <version>0.0.1-SNAPSHOT</version>
    <packaging>jar</packaging>

    <name>eureka-server</name>
    <description>Demo project for Spring Boot</description>

    <parent>
        <groupId>com.duanss</groupId>
        <artifactId>spring-cloud-demo</artifactId>
        <version>0.0.1-SNAPSHOT</version>
    </parent>

    <dependencies>
        <dependency>
            <groupId>org.springframework.cloud</groupId>
            <artifactId>spring-cloud-starter-netflix-eureka-server</artifactId>
        </dependency>
    </dependencies>

</project>
创建完eurekaserve还没完,需要在application文件中加入注解@EnableEurekaServer
EurekaServerApplication.java的代码如下:
@SpringBootApplication
@EnableEurekaServer
public class EurekaServerApplication {
public static void main(String[] args) {
SpringApplication.run(EurekaServerApplication.class, args);
}
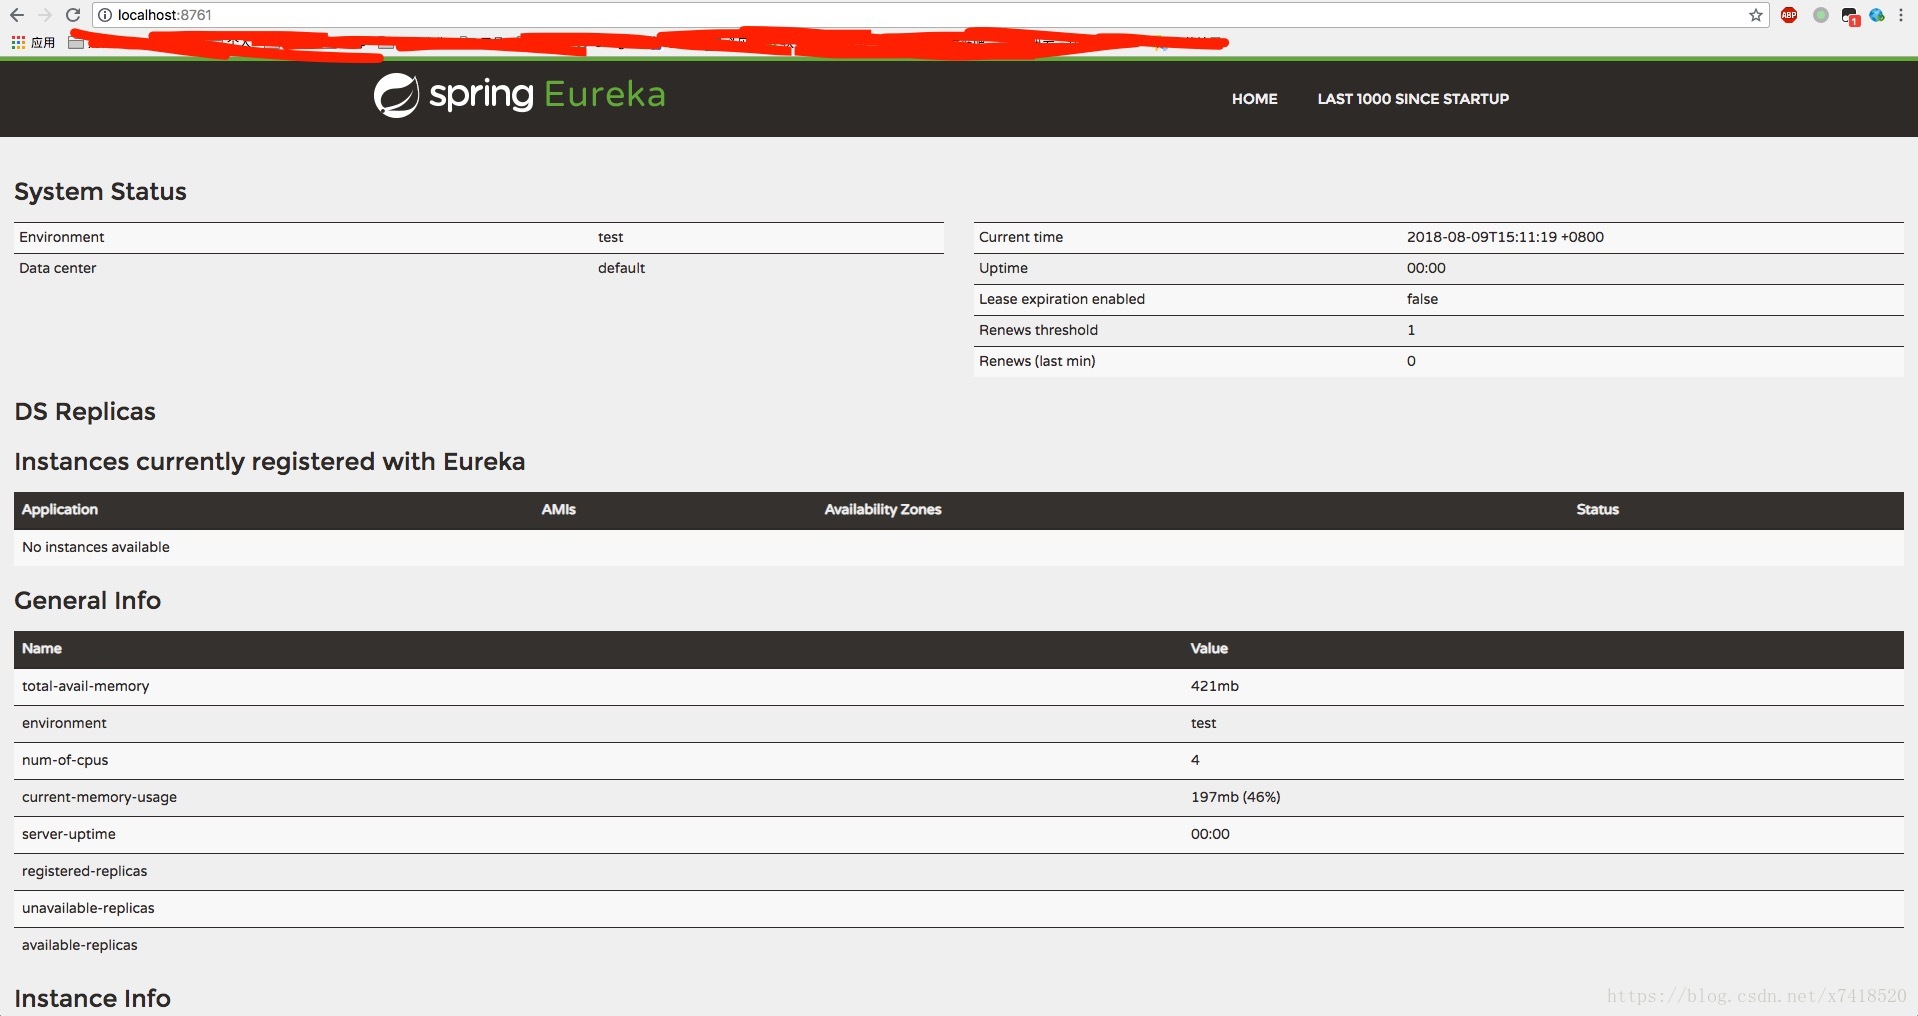
}在application.yml文件中加入如下配置:
server:
    port: 8761
eureka:
    instance:
        hostname: localhost
    client:
        registerWithEureka: false
        fetchRegistry: false
        serviceUrl:
            defaultZone: http://${eureka.instance.hostname}:${server.port}/eureka/
spring:
    application:
name: eurka-server- registerWithEureka,说明了不需要想eureka注册eureka,就是不注册自己
- fetchRegistry:说明自己是注册服务
现在启动项目,打开http://locahost:8761,就可以看到eureka自带的界面。