项目有个需求是需要捕获某个页面的数据(后端完成),因为之前用过phantom,所以就毫不犹豫的选择了它,关于phantom的介绍,安装和简单使用百度很容易找到,这里就不再赘述了。 之后就开始大刀阔斧的码起来了,兴致冲冲的利用网上找到的截取某网页的代码(见附录1)测试。
'use strict';

var page = require('webpage').create(),
	system = require('system'),
	args = system.args,
	page_url = 'http://www.oschina.net/',
	filename = '../phantomjs_temp/capture0.png';


function capture(url,filename,callback){
	console.log("ready to capture");
	page.open(url,function(status){
		if("success" === status){
			console.log("open page succeed");
			onPageReady(url,filename,callback);
		}else{
			console.log("open page failed");
			closePhantom();
		}

	});
}

function onPageReady(url,filename,callback){
	page.render(filename);
	closePhantom();
}

function closePhantom(){
	console.log("page is closing...");
	page.close();
	console.log("phantom is closing...");
	phantom.exit(1);
}

capture(page_url,filename);
没问题。然后发现了问题, 我oschina明明登录了,为什么这里是未登录状态呢(因为项目需求截图的页面也有权限验证),查阅相关资料之后,找到了解决方案 方案1:将用户登录的cookie加入到phantomjs中(登录oschina后打开控制台,查看请求里面的cookie,有一条是oscid的) 如下图 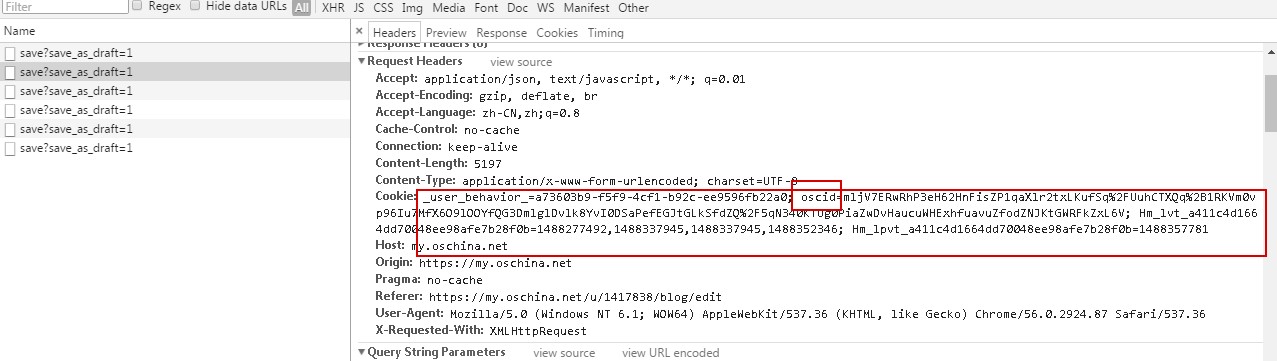 代码如下
代码如下
'use strict';

var page = require('webpage').create(),
	system = require('system'),
	args = system.args,
	page_url = 'http://www.oschina.net/',
	filename = '../phantomjs_temp/capture1.png';


function capture(url,filename,callback){
	console.log("ready to capture");
	page.open(url,function(status){
		if("success" === status){
			console.log("open page succeed");
			onPageReady(url,filename,callback);
		}else{
			console.log("open page failed");
			closePhantom();
		}

	});
}

function onPageReady(url,filename,callback){
	page.render(filename);
	closePhantom();
}

function closePhantom(){
	console.log("page is closing...");
	page.close();
	console.log("phantom is closing...");
	phantom.exit(1);
}

phantom.addCookie({"name":"oscid","value":"mljV7ERwRhP3eH62HnFisZP1qaXlr2txLKufSq%2FUuhCTXQq%2B1RKVm0vp96Iu7MfX6O9lOOYfQG3DmlglDvlk8YvI0DSaPefEGJtGLkSfdZQ%2F5qN340KTUg0PiaZwDvHaucuWHExhfuavuZfodZNJKtGWRFkZxL6V","domain":'www.oschina.net'});

capture(page_url,filename);
运行,binggo,完成。 方案2:打开oschina的登录页面,用phantom模拟登陆过程,然后截图 依然没问题
'use strict';

var page = require('webpage').create(),
	system = require('system'),
	args = system.args,
	page_url = 'http://www.oschina.net/',
	login_url = 'https://www.oschina.net/home/login?goto_page=http%3A%2F%2Fwww.oschina.net%2F',
	filename = '../phantomjs_temp/capture2.png';

function login(){
	page.open(login_url,function(status){
		if("success" === status){
			page.evaluate(function(){
				document.querySelector("#userMail").value = 'your user name';
				document.querySelector("#userPassword").value = 'your password';
				document.querySelector(".btn-login").click();
			});
			setTimeout('print_cookies()',15000);
		}
	});
}

function capture(url,filename,callback){
	console.log("ready to capture");
	page.open(url,function(status){
		if("success" === status){
			console.log("open page succeed");
			onPageReady(url,filename,callback);
		}else{
			console.log("open page failed");
			closePhantom();
		}

	});
}

function print_cookies(){
	console.log("running print_cookies");
	for(var i in page.cookies){
		console.log(JSON.stringify(page.cookies[i]));
	}
	capture(page_url,filename);
}


function onPageReady(url,filename,callback){
	page.render(filename);
	closePhantom();
}

function closePhantom(){
	console.log("page is closing...");
	page.close();
	console.log("phantom is closing...");
	phantom.exit(1);
}

login();
这里已经完成了一大笔工作了,长长的出口气吧~
如果需要Python方面的入门知识可以点击这个链接获取入门资料
但是我项目里面有另外一个问题就是异步请求特别多,截图的时候虽然页面加载完成了,但是部分异步请求数据还没返回,没有渲染到页面里,所以截图会有部分loading。。
找了很多资料,有个拙劣的解决方法,就是在截图前在wait一段时间(自己根据实际情况约定,几秒到几分钟都可以),但是这明显不合理,时间定的太短,可能还是有上面的问题,定的太长,可能页面在就等着你截图了,你还在那傻傻的wait,多不合适啊。最合适的不过页面所有资源和元素都完成了返回和渲染的时刻,这个时刻怎么得到呢。
这时候就发现百度好坑。搜索的结果全是重复的,还不能解决这个问题 所以我就把目光放到了QQ群里,这里感谢highchart中文站长的帮助,他告诉我可以用document.readyState是不是等于‘complete’来判断,测试一下确实可以啦 然而多次测试还是存在巧合,当我在服务器端将异步请求的处理方法增加sleep阻塞后,这部分就又回到了loading状态,气气气气气。。。
多次翻阅资料,终于在stackoverflow上面找到个类似的问题http://stackoverflow.com/questions/11340038/phantomjs-not-waiting-for-full-page-load
最后Dave的方法解决了我的问题,就是用page.onResourceReceived 和 page.onResourceRequested 一个是page发送请求执行的callback 一个是page接收到返回执行的callback API:http://phantomjs.org/api/webpage/
每次requested的时候增加一个请求,每次received的时候减少一次请求,当所有请求都得到反馈了,那么他们差值不就是0了吗?
怀着忐忑的心情测试了以下,oh,yeah!终于解决了,代码如下
var page = require('webpage').create(),
	system = require('system'),
	args = system.args,
	page_url = 'url***********',
	filename = '../phantomjs_temp/'+Math.random()+'.png',
	countTotal = 1000,
	seconds = 1000,
	requestIDArr = [];

function capture(url,filename,callback){
	console.log("ready to capture");
	page.open(url,function(status){
		if("success" === status){
			console.log("open page succeed");
			checkReadyState(url,filename,callback);
		}else{
			console.log("open page failed");
			closePhantom();
		}

	});
}

function checkReadyState(url,filename,callback,count){
	var count = count || 0;
	console.log("this is the "+count+"time check ready state");
	var timeout = setTimeout(function(){
		if(requestIDArr.length==0){
			onPageReady(url,filename,callback);
		}else{
			console.log("still waiting for resoinse id is "+requestIDArr.join(","))
			if(count>countTotal){
				clearTimeout(timeout);
				console.log("has tryed "+(countTotal*seconds/1000)+" seconds,but still failed get correct data");
				closePhantom();
				return false;
			}
			count++;
			checkReadyState(url,filename,callback,count);
		}
	},seconds);
}

function onPageReady(url,filename,callback){//页面完全加载完了(包含异步请求的数据的渲染也完成了)
	var scroll = page.evaluate(function(){
		var mainDiv = document.querySelector(".main");
		return {"height":mainDiv.scrollHeight,"width":mainDiv.scrollWidth};
	});
	page.clipRect.height = scroll.height || page.clipRect.height;
	page.clipRect.width = scroll.width || page.clipRect.width;
	page.viewportSize.width = scroll.width || page.viewportSize.width;

	page.render(filename);

	closePhantom();
}

function closePhantom(){
	console.log("page is closing...");
	page.close();
	console.log("phantom is closing...");
	phantom.exit(1);
}

page.viewportSize = {
  width: 400,
  height: 550
};

page.clipRect = {
  top: 95,
  left: 191,
  width: 1100,
  height: 2200
};

page.onResourceRequested = function (request) {
	requestIDArr.push(request.id);
	console.log("add is ",request.id);
};
page.onResourceReceived = function (response) {
	spliceRequestID(response.id);
};

function spliceRequestID(id){
	var spliceTimeout = setTimeout(function(){
		var index = requestIDArr.indexOf(id);
		if(index>=0){
			requestIDArr.splice(index,1);
			console.log("delete is ",id);
		}else{
			spliceRequestID(id);
		}
	},100);
}

phantom.addCookie({"name":"JSESSIONID","value":"00AF0CF1FB333A5268A9CD5C8FF0487A","domain":'192.168.12.35','path':'/local_adreport/'});

capture(page_url,filename);
至此,整个探究就结束了,可能后面还会遇到其他问题,但是一样需要耐心解决;