前言
用 QML 开发界面的好处想必就不用多说了吧,可以总结为一个字:爽。
的确如此,用 QML 可以快速的开发出一些非常酷炫和复杂的界面,并且代码还非常简洁,可读性很强,容易理解。
今天要总结的是关于 ListView 中的一些常用的属性,非常实用,不过如果是刚接触 ListView 的话,可能会有些陌生(本人刚开始用的时候也是,然后翻遍了 Qt 帮助文档),所以这里汇总一些最常用的属性并介绍其用法。
正文
类似相片浏览
相片浏览的场景相信大家都非常熟悉了,在手机中打开相册浏览相片的时候,通过左右滑动可以一张张的浏览相片,那么如果用ListView如何来实现呢,来看个简单的 demo
import QtQuick.Window 2.2
import QtQuick.Controls 2.2

Window {
    visible: true
    width: 300
    height: 450
    title: qsTr("Hello World")

    ListView{
        id:listView
        anchors.fill: parent
        model: 10
        snapMode: ListView.SnapOneItem
        orientation:ListView.Horizontal
        delegate: Rectangle{
              width: listView.width
              height: listView.height
              color: index%2 ? "red":"yellow"
              Label{
                  anchors.centerIn: parent
                  font.pointSize: 100
                  text: index
              }
        }
    }
}
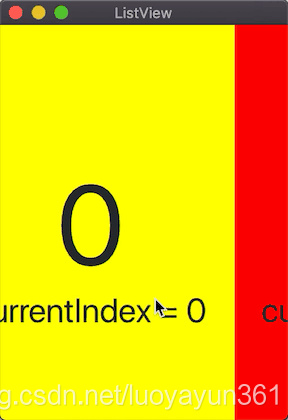
效果图:

代码很简单,最重要的两句话:
snapMode: ListView.SnapOneItem
orientation:ListView.Horizontal
第一句是将切换模式设置为单张切换;
第二句是将列表改成水平浏览模式。
currentIndex动态切换
不知道大家有没有遇到过这种情况,当切换ListView的item的时候,currentIndex并不会跟随着变化,来看个示例:
那么,如何将在我们切换 item 的时候将 currentIndex 也跟随着变化呢?只需要添加一句:
highlightRangeMode: ListView.StrictlyEnforceRange
再看看效果图:
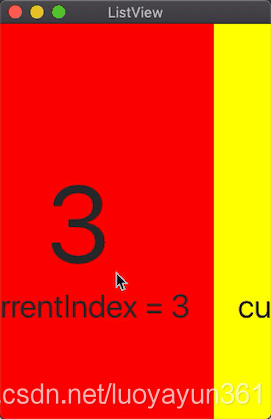
为什么要特意将 currentIndex动态切换提出来单独说呢,有时候这个功能会特别有用,特别是我在开发相片浏览功能的时候,比如我们在切换 item 后需要用到当前的 currentIndex,这时候如果 index 不跟随变化那就麻烦了。之前网上有人的做法是,在 delegate 中添加 MouseAera中,响应点击事件然后手动currentIndex ,这种方法存在很多弊端。
禁止列表首尾滑动
这个标题可能有些拗口,意思其实就是,当列表在首页或尾页的时候,如果再继续滑动会有回弹的效果。
先看个效果图:
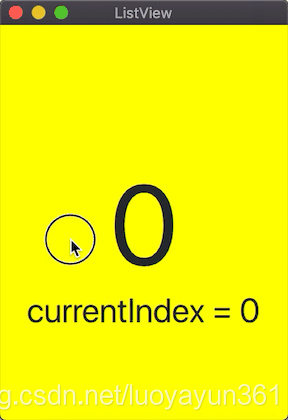
但是有些设计中可能并不需要这种默认的设置,那么该如何修改呢,其实很简单,加上这句话:
boundsBehavior:Flickable.StopAtBounds
这其实就是设置在边缘的时候不能再滑动,再看一下效果:

设置最大滑动速度
不知道大家在做 QML for Android 开发的时候有没有遇到过这种问题,特别是前几年 Qt 低版本的时候,使用 ListView 编译到 Android 手机上,列表滑动特别不自然,滑动速度特别快(也和手机屏幕像素有关),和平台的兼容性没有做得很好,幸好随着 Qt 版本的升级,解决了这个问题,不过有时候还是需要自己控制最大的滑动速度,设置属性如下:
maximumFlickVelocity:7000 //设置滑动的最大速度
这里的数值单位是: 像素/秒
如果不做设置,会默认跟随平台特性来执行。如果要自己定义这个滑动速度,需要多调试一下,找到适合的滑动效果。
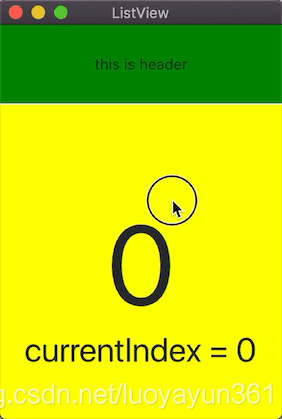
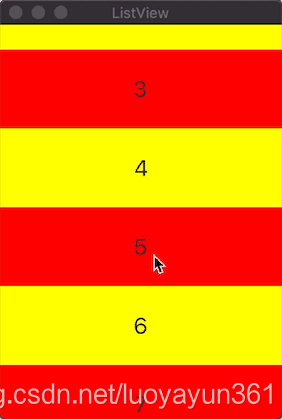
添加 header
ListView 可以设置 headerItem,话不多说,直接看效果图吧
ListView{
        id:listView
        anchors.fill: parent
        model: 10
        headerPositioning: ListView.PullBackHeader

        header: Rectangle{
            width: listView.width
            height: 70
            color: "green"
            Label{
                anchors.centerIn: parent
                text: "this is header"
            }
        }

        onCurrentIndexChanged: {
            console.log("current index = ",currentIndex)
        }

        delegate: Rectangle{
              width: listView.width
              height: 280
              color: index%2 ? "red":"yellow"
              Label{
                  id:txt
                  anchors.centerIn: parent
                  font.pointSize: 100
                  text: index
              }
              Label{
                  anchors.top: txt.bottom
                  font.pointSize: 30
                  text: "currentIndex = " + listView.currentIndex
                  anchors.horizontalCenter: parent.horizontalCenter
              }
        }
    }
和 header 对应的还有一个 footer,原理是一样的,只是显示的位置是在底部。这里就不多介绍了。
下拉刷新
ListView列表下拉刷新是最常见的 场景了吧,这里为了演示做了一个简单的 demo,先来看看效果
源码:
import QtQuick 2.9
import QtQuick.Window 2.2
import QtQuick.Controls 2.2

Window {
    visible: true
    width: 250
    height: 350
    title: qsTr("ListView")
    property bool refreshFlag: false

    Rectangle{
        width: parent.width
        height: -listView.contentY
        color: "cyan"
        Label{
            anchors.centerIn: parent
            text:"下拉刷新"
            visible: listView.contentYr
        }
    }

    BusyIndicator{
        id:busy
        z:4
        running: false
        anchors.horizontalCenter: parent.horizontalCenter
        anchors.top: parent.top
        anchors.topMargin: parent.height/3.
        Timer{
            interval: 2000
            running: busy.running
            onTriggered: {
                busy.running = false
            }
        }
    }

    ListView{
        id:listView
        anchors.fill: parent
        model: 30

        onContentYChanged: {
            if(-contentY > 40){
                refreshFlag = true
            }
        }
        onMovementEnded: {
            if(refreshFlag){
                refreshFlag = false
                busy.running = true
            }
        }

        onCurrentIndexChanged: {
            console.log("current index = ",currentIndex)
        }

        delegate: Rectangle{
              width: listView.width
              height: 70
              color: index%2 ? "red":"yellow"
              Label{
                  id:txt
                  anchors.centerIn: parent
                  font.pointSize: 20
                  text: index
              }
        }
    }
}
OK,暂且介绍这几种最常用的功能,写得不好的地方请多指出。