Official Tutorials:
4. Installing cuDNN on Windows
4.1. Prerequisites
Ensure you meet the following requirements before you install cuDNN.
- A GPU of compute capability 3.0 or higher. To understand the compute capability of the GPU on your system, see: CUDA GPUs.
- One of the following supported platforms:
- Windows 7
- Windows 10
- Windows Server 2012
- One of the following supported CUDA versions and NVIDIA graphics driver:
- NVIDIA graphics driver R377 or newer for CUDA 8
- NVIDIA graphics driver R384 or newer for CUDA 9
- NVIDIA graphics driver R390 or newer for CUDA 9.2
4.1.1. Installing NVIDIA Graphics Drivers
Install up-to-date NVIDIA graphics drivers on your Windows system.
- Go to: NVIDIA download drivers
- Select the GPU and OS version from the drop down menus.
- Download and install NVIDIA driver as indicated in that webpage. For more information, select the ADDITIONAL INFORMATION tab for step-by-step instructions for installing a driver.
- Restart your system to ensure the graphics driver takes effect.
4.1.2. Installing CUDA
Refer to the following instructions for installing CUDA on Windows, including the CUDA driver and toolkit: NVIDIA CUDA Installation Guide for Windows.
4.2. Downloading cuDNN
In order to download cuDNN, ensure you are registered for the NVIDIA Developer Program.
- Go to: NVIDIA cuDNN home page.
- Click Download.
- Complete the short survey and click Submit.
- Accept the Terms and Conditions. A list of available download versions of cuDNN displays.
- Select the cuDNN version to want to install. A list of available resources displays.
- Extract the cuDNN archive to a directory of your choice.
4.3. Installing cuDNN on Windows
The following steps describe how to build a cuDNN dependent program. In the following sections:
- your CUDA directory path is referred to as C:\Program Files\NVIDIA GPU Computing Toolkit\CUDA\v9.0
- your cuDNN directory path is referred to as <installpath>
- Navigate to your <installpath> directory containing cuDNN.
- Unzip the cuDNN package.
orcudnn-9.0-windows7-x64-v7.zipcudnn-9.0-windows10-x64-v7.zip - Copy the following files into the CUDA Toolkit directory.
- Copy <installpath>\cuda\bin\cudnn64_7.dll to C:\Program Files\NVIDIA GPU Computing Toolkit\CUDA\v9.0\bin.
- Copy <installpath>\cuda\ include\cudnn.h to C:\Program Files\NVIDIA GPU Computing Toolkit\CUDA\v9.0\include.
- Copy <installpath>\cuda\lib\x64\cudnn.lib to C:\Program Files\NVIDIA GPU Computing Toolkit\CUDA\v9.0\lib\x64.
- Set the following environment variables to point to where cuDNN is located. To access the value of the $(CUDA_PATH) environment variable, perform the following steps:
- Open a command prompt from the Start menu.
- Type Run and hit Enter.
- Issue the control sysdm.cpl command.
- Select the Advanced tab at the top of the window.
- Click Environment Variables at the bottom of the window.
- Ensure the following values are set:
Variable Name: CUDA_PATH
Variable Value: C:\Program Files\NVIDIA GPU Computing Toolkit\CUDA\v9.0
- Include cudnn.lib in your Visual Studio project.
- Open the Visual Studio project and right-click on the project name.
- Click Linker > Input > Additional Dependencies.
- Add cudnn.lib and click OK.
4.4. Upgrading from v6 to v7
cuDNN v7 can coexist with previous versions of cuDNN, such as v5 or v6.
4.5. Troubleshooting
Join the NVIDIA Developer Forum to post questions and follow discussions.
Install and Test Tensorflow Using GPU:
If you have installed the Cpu version of Tensorflow,use the command:pip uninstall tensorflow to uninstall it
then using the command:pip install tensorflow-gpu
Test tensorflow,use this code
import sys
import numpy as np
import tensorflow as tf
from datetime import datetime

### argv[1] = type of device and which one
### argv[2] = size of the matrix to operate on

device_name = sys.argv[1]
shape = (int(sys.argv[2]), int(sys.argv[2]))
if device_name == "gpu":
    device_name = "/gpu:0"
else:
    device_name = "/cpu:0"

with tf.device(device_name):
    random_matrix = tf.random_uniform(shape=shape, minval=0, maxval=1)
    dot_operation = tf.matmul(random_matrix, tf.transpose(random_matrix))
    sum_operation = tf.reduce_sum(dot_operation)

startTime = datetime.now()
with tf.Session(config=tf.ConfigProto(log_device_placement=True)) as session:
        result = session.run(sum_operation)
        print(result)

### Print the shape, device name and timing
print("\n" * 3)
print("Shape:", shape, "Device:", device_name)
print("Time taken:", datetime.now() - startTime)
print("\n" * 3)
then run the script in the command window:
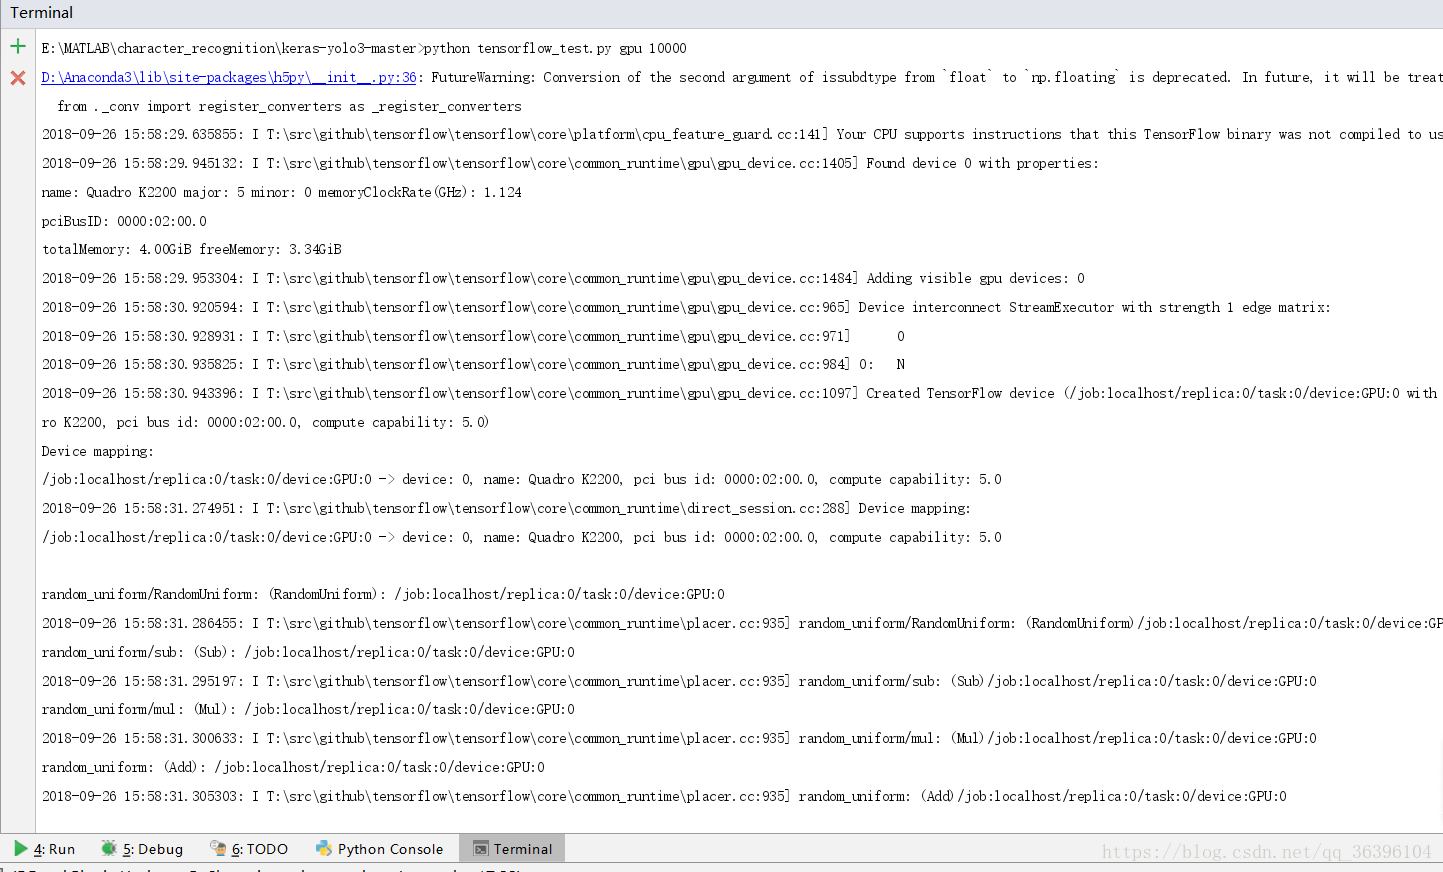
python tensorflow_test.py gpu 10000
if you successfully configured the environment,youwill see this: