
当点击“编辑”,的时候。页面需要跳转到发布文章的界面:如下:
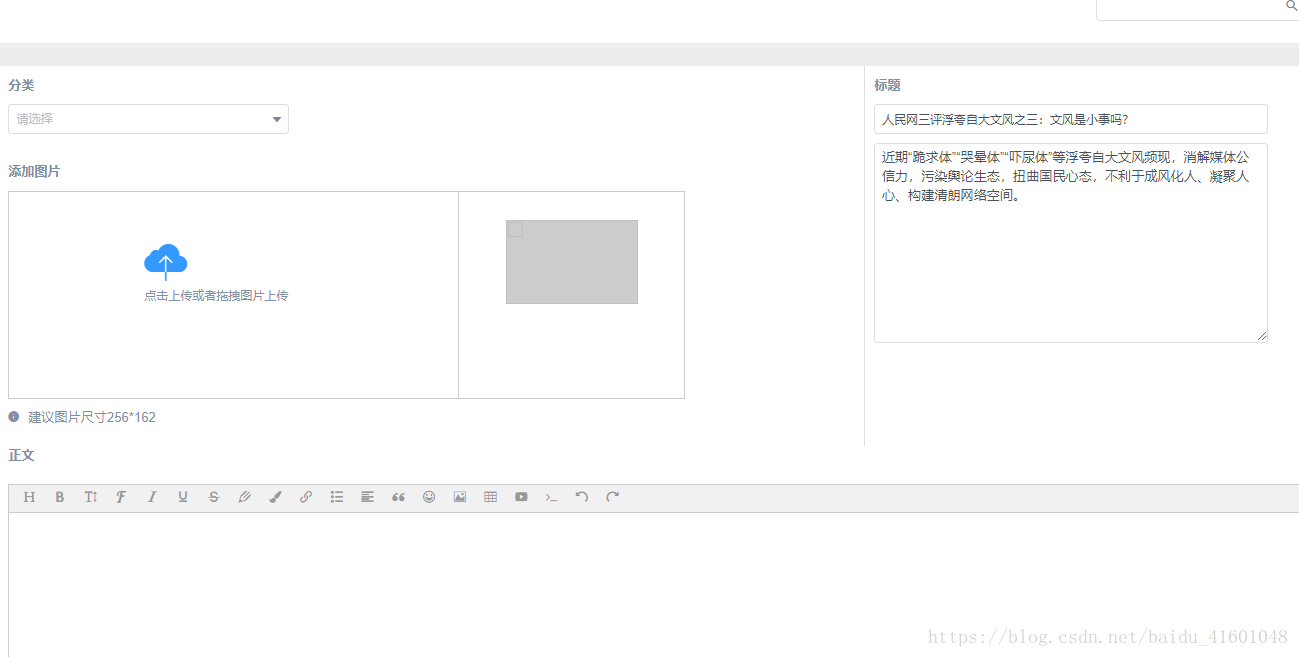
在回到编辑界面的时候。我们需要把文章本身的标题,文章和内容都显示在对应的位置。
思路:
1点击“”编辑“”按钮我们获取到当前的数据。然后通过路由传递到文章编辑的页面。
2 在create生命周期里,我们通过开始赋值。但是因为富文本编辑器在页面dom加载完成以后才能正常显示。所以在created里赋值发现,富文本的内容没有正常出现,而标题和摘要的内容却正常显示。所以这里我们采用nextTick方法
3 在created里做如下修改:
let self=this;
self.articlTitle=title;self.abstract=section;
self.cont=content;
this.$nextTick(function(){
self.editor.txt.html(content)
})
完整代码:
created(){
let{title,section,content}=this.$route.params;
this.articlTitle=title;
this.abstract=section;
// this.cont=content; 这里赋值富文本里的content是无法显示的
this.$nextTick(function(){
self.editor.txt.html(content) // 通过txt.html()方法设置路由传过来的内容content
})
mounted(){
//DOM加载完成以后,配置富文本编辑器
let self=this;
var editor=new Editor("#mytext");
editor.customConfig.uploadImgShowBase64 = true; // 使用 base64 保存图片;
this.editor= editor;
editor.customConfig.zIndex=100;
editor.customConfig.emotions=[
{
title:"表情",
type:"image",
content:enjio,
}
];
editor.customConfig.onchange=(html)=>{
this.cont=html;
console.log("当前输入内容:",html)
}
editor.create())
}
实例中采用的wangEditor富文本编辑器。其他的富文本编辑器也是同样