前言
使用nRF52840已经有段时间了,虽然还没有完全将nRF52840的所有功能都玩一遍,但从目前情况来看,做为一款多协议并存的无线芯片来说还是很强大的,即使目前市场上以及公司层面上对其的评价也大多是功能虽强,但价更高。但是,做为Nordic的拳头产品以及随着IoT市场对多协议、大容量以及更复杂的功能的需求越来越旺盛,nRF52840势必在不久的将来会投入各个落地的应用中去。好像扯得有点远了,接下来我们就看看如何在vscode搭建nRF52840的开发调试环境。
困惑
虽然nRF52840目前支持4种开发工具链,如下所示:
- SEGGER Embedded Studio
- Keil MDK-ARM
- GCC
- IAR Embedded Workbench
但是,它们均有各自的优缺点。由于国情以及历史原因,Keil MDK-ARM和IAR Embedded Workbench在我们国内有很高的支持率。但是,这两个都是商业软件,是需要付费的。随着国内版权意识的不断增强,我相信在不久的将来,这两个软件在国内的占比会大幅下降。基于以上原因,剩下能选的就只有SEGGER Embedded Studio和GCC了。虽然SEGGER Embedded Studio也是商业软件,但是Nordic已经将其版权买下,但凡使用Nordic芯片的用户均可以免费使用这个软件。然而,在小编使用的过程中感觉这个软件还是too young了。
- 经常用着用着,莫名其妙就崩溃了,只留下小编一脸的茫然
- 设置选项太多了
- 目前最新版本V3.5,一些选项莫名其妙的显示不了了
- 设置环境背景为程序员专属颜色即黑色,竟然只是代码编辑区是黑色而不是全局变黑
- 有时小编写代码速度过快,代码提示跟不上小编手速……
- 函数不能折叠
- 剩下的由网友补充……
综上所述,有强迫症的童鞋就只有剩下GCC这条路可选了,因为已经无路可走了。但是GCC只是一个工具链,而上面的其他三位大佬则均是IDE,这个时候就不得不祭出号称 “最叼编辑器Visual studio” 它弟—-VSCODE。
准备工作
工具
-
根据自己的开发环境,下载对应的安装包
J-Link Software and Documentation pack
根据自己的开发环境,下载对应的安装包,后面会用来下载调试使用
-
届时配合上面的Jlink软件对nRF52840执行擦除烧录等动作
-
这是GNU Arm embedded toolchain被打包成vscode的插件,直接下载即可安装至vscode
-
这是vscode中的Cortex-Debug插件,在vscode中使用它来调用JLinkGDBServer就可以调试nRF52840,直接下载即可安装至vscode
-
主要是一些windows下没有的常用工具
设置
增加windows-arm-none-eabi以及nRF5x-Command-Line-Tools的路径至环境变量,以下是小编的路径
C:\Program Files (x86)\Nordic Semiconductor\nrf5x\bin
C:\Users\Administrator\.vscode\extensions\atomclip.windows-arm-none-eabi-0.1.2\bin
注意:如果windows-arm-none-eabi升级了,路径也要跟着更新解压从其他下载得到的工具,并将其全部复制到windows-arm-none-eabi的路径下

安装完Cortex-Debug之后,指定JLinkGDBServer的路径,以下是小编的路径
C:/Program Files (x86)/SEGGER/JLink_V634e/JLinkGDBServerCL.exe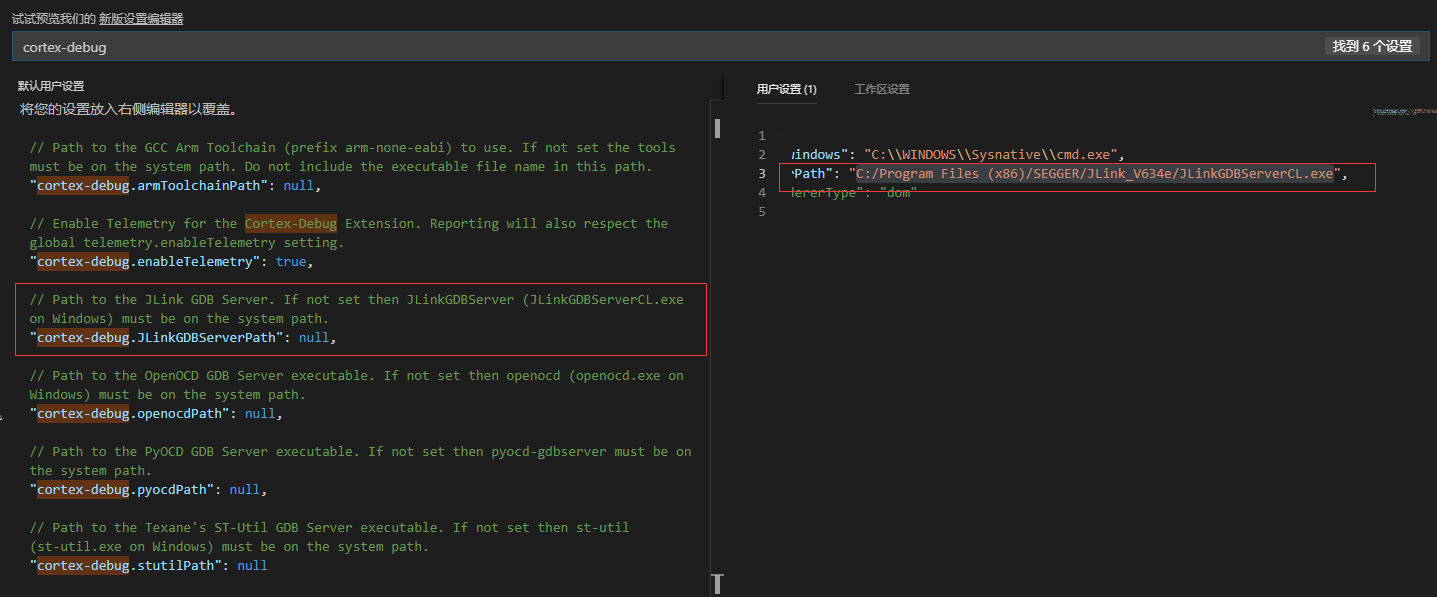
增加编译以及烧录等相关任务,至于如何在vscode上增加任务,可以参考此教程中的配置任务这一小节
{
  "version": "2.0.0",
  "tasks": [
    {
      "label": "build firmware",
      "type": "shell",
      "command": "make -j8",
      "options": {
        "cwd": "D:/Project/wireless_tech/nRF5_SDK_15.0.0_a53641a/examples/ble_peripheral/ble_app_template/pca10056/s140/armgcc"
      },
      "osx": {
        "options": {
          "env": {
            "PATH": "${config:arm-none-eabi.bin}:${env:PATH}",
          }
        },
      },
      "linux": {
        "options": {
          "env": {
            "PATH": "${config:arm-none-eabi.bin}:${env:PATH}",
          }
        },
      },
      "windows": {
        "options": {
          "env": {
            "PATH": "${config:arm-none-eabi.bin};${env:PATH}",
          }
        },
      },
      "group": {
        "kind": "build",
        "isDefault": true,
      },
      "problemMatcher": "$gcc"
    },
    {
      "label": "clean firmware",
      "type": "shell",
      "command": "make clean",
      "options": {
        "cwd": "D:/Project/wireless_tech/nRF5_SDK_15.0.0_a53641a/examples/ble_peripheral/ble_app_template/pca10056/s140/armgcc"
      },
      "osx": {
        "options": {
          "env": {
            "PATH": "${config:arm-none-eabi.bin}:${env:PATH}",
          }
        },
      },
      "linux": {
        "options": {
          "env": {
            "PATH": "${config:arm-none-eabi.bin}:${env:PATH}",
          }
        },
      },
      "windows": {
        "options": {
          "env": {
            "PATH": "${config:arm-none-eabi.bin};${env:PATH}",
          }
        },
      },
      "group": {
        "kind": "build",
        "isDefault": true,
      },
      "problemMatcher": "$gcc"
    },
    {
      "label": "download flash",
      "type": "shell",
      "command": "make flash -j8",
      "options": {
        "cwd": "D:/Project/wireless_tech/nRF5_SDK_15.0.0_a53641a/examples/ble_peripheral/ble_app_template/pca10056/s140/armgcc"
      },
      "osx": {
        "options": {
          "env": {
            "PATH": "${config:arm-none-eabi.bin}:${env:PATH}",
          }
        },
      },
      "linux": {
        "options": {
          "env": {
            "PATH": "${config:arm-none-eabi.bin}:${env:PATH}",
          }
        },
      },
      "windows": {
        "options": {
          "env": {
            "PATH": "${config:arm-none-eabi.bin};${env:PATH}",
          }
        },
      },
      "group": {
        "kind": "build",
        "isDefault": true,
      },
      "problemMatcher": "$gcc"
    },
    {
      "label": "erase all flash",
      "type": "shell",
      "command": "make erase -j8",
      "options": {
        "cwd": "D:/Project/wireless_tech/nRF5_SDK_15.0.0_a53641a/examples/ble_peripheral/ble_app_template/pca10056/s140/armgcc"
      },
      "osx": {
        "options": {
          "env": {
            "PATH": "${config:arm-none-eabi.bin}:${env:PATH}",
          }
        },
      },
      "linux": {
        "options": {
          "env": {
            "PATH": "${config:arm-none-eabi.bin}:${env:PATH}",
          }
        },
      },
      "windows": {
        "options": {
          "env": {
            "PATH": "${config:arm-none-eabi.bin};${env:PATH}",
          }
        },
      },
      "group": {
        "kind": "build",
        "isDefault": true,
      },
      "problemMatcher": "$gcc"
    },{
      "label": "download softdevice",
      "type": "shell",
      "command": "make flash_softdevice -j8",
      "options": {
        "cwd": "D:/Project/wireless_tech/nRF5_SDK_15.0.0_a53641a/examples/ble_peripheral/ble_app_template/pca10056/s140/armgcc"
      },
      "osx": {
        "options": {
          "env": {
            "PATH": "${config:arm-none-eabi.bin}:${env:PATH}",
          }
        },
      },
      "linux": {
        "options": {
          "env": {
            "PATH": "${config:arm-none-eabi.bin}:${env:PATH}",
          }
        },
      },
      "windows": {
        "options": {
          "env": {
            "PATH": "${config:arm-none-eabi.bin};${env:PATH}",
          }
        },
      },
      "group": {
        "kind": "build",
        "isDefault": true,
      },
      "problemMatcher": "$gcc"
    }
  ]
}
完成1.2.3.4之后,在vscode的工具栏中选择
调试->添加配置->{}Cortex Debug:JLink,最后将弹出的内容替换为以下内容: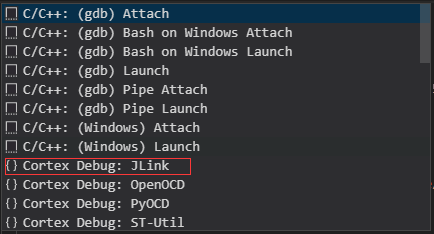
{ // Visual Studio Code launch.json for XMC 2Go development board "version": "0.2.0", "configurations": [ { "cwd": "${workspaceRoot}", "executable": "D:/Project/wireless_tech/nRF5_SDK_15.0.0_a53641a/examples/ble_peripheral/ble_app_template/pca10056/s140/armgcc/_build/nrf52840_xxaa.out",// 根据自身的情况填充自己的实际路径 "name": "Debug Microcontroller", "request": "launch", "type": "cortex-debug", "servertype": "jlink", "runToMain": true, "device": "nRF52840_xxAA", "interface": "swd", "ipAddress": null, "serialNumber": null, "preLaunchTask": "download flash"//如果你想要在调试之前下载固件,则必须将填充下载固件的任务名(这是自定义的名字),否则删除掉这一行即可 }, ] }- 最后,将工程的
components->toolchain->gcc->Makefile.windows工具链路径指向windows-arm-none-eabi的实际路径,以下是小编的工具链路径:
 GNU_INSTALL_ROOT := C:/Users/Administrator/.vscode/extensions/atomclip.windows-arm-none-eabi-0.1.2/bin/
 GNU_VERSION := 7.3.1
 GNU_PREFIX := arm-none-eabi
至此,就完成了所有的设置了,接下来就可以使用vscode开发nRF52840了。
效果
擦除

编译
烧录application

烧录协议栈

调试并烧录application
技术交流


本文原创,转载请注明出处