机器学习与计算机视觉入门项目——视频投篮检测(一)
随着机器学习、深度学习技术的迅猛发展,计算机视觉无疑是近年来发展最快的AI领域之一。正因如此,互联网上有关计算机视觉和机器学习、深度学习的社区、博文、论文、代码、算法框架等极大地丰富起来,给初入该领域的新人丰富的参考资料。同时计算机视觉比较易于理解,适合新手入门,培养最基本的工程素养和代码项目经验,从而了解处理具体计算机科学相关领域的基本流程。
——浙江大学教授 王跃明
该博客是由我2018年8月1日至22日在浙江大学玉泉校区参加计算机学院保研夏令营时所做的项目整理而来。在此,向培训期间授课和指导的王跃明老师、潘纲老师、祁玉老师表示感谢!向与我同组的西北工业大学祝同学表示感谢,她负责了项目的绝大部分实验和PPT,她的认真态度和拼搏精神永远值得我学习,祝她前程似锦!感谢一直陪伴我们的姜学长,整个过程中,姜学长给了我很多启发和指导,祝他在浙大求得真理!
正式开始
Getting Started:Practice Machine Learning Algorithms in Computer Vision
计算机视觉和机器学习的关系
Machine learning focuses more than a model itself, has more
mathematics, emphasizes the understanding of models and algorithms. Computer vision can be seen as an application field, and seems more like problem(s). Obviously, the models in ML can be applied to solve CV problems. Indeed, people are doing this.
显然,机器学习是解决计算机视觉问题的一个有力工具,但是也并不能解决CV的任何问题。同时计算机视觉也有着自己的特点:
- Data are usually large
- Processing skills of image and video data are varied
- Many problems have priors
- Requiring good programming skills
总结一句话,将机器学习算法应用到CV问题上时,应充分考虑到问题的特性,充分应用问题的先验知识改造我们的机器学习“工具”。
项目简介——篮球进球检测
给定一个篮球赛视频,如何确定何时进球得分?更进一步说,如何判断进球时刻的frames?

让我们来考虑几个现实的问题,看看是否能得出思路。
首先,视频是由若干帧图片组成的,分析进球与否可以通过判断球框区域有无篮球来完成。即,构造一个图像分类器,送入一张图片,判断其中有无篮球。这是一个标准的机器学习的二分类问题。
这样问题就从一个视频分析任务转化成了图像分析任务,只不过需要考虑一下单帧图像的处理速度,能否胜任视频的播放速度。不过在我们的项目中运算量还不是很大,基本不用考虑。
其次,若以25帧/秒的速率录制视频,一次进球的过程可能长达十几帧。这么多帧的图片都是一次进球,我们的图像分类器将每张图片都判定成进球怎么办?

然后,我们应该如何选取篮筐区域的大小?篮框的区域总不能太大,否则将包含太多无用信息,干扰模型的训练;也不能太小,因为进球情况多样,有相当数量的情况是倾斜进框的,篮框区域太小会使篮球捕捉不完整。总之这是一个需要反复琢磨和思考的问题,直接影响了后面的特征提取和分类器训练。
最后,我们通过截帧和标注,获得了一个进球数据集,然后选择了一个合适的分类器模型进行训练好了,那我们如何评价训练的模型好坏呢?一个模型有很多参数,我们如何衡量参数改变带来的模型分类性能的变化?如何划定训练集和测试集的比例,这对模型有何影响?
该博客将在随后的逐渐回答这些问题或者给出作者的思考,也希望各位前辈同行不吝赐教!
最后是训练与检测的框图

工欲善其事,必先利其器——环境配置
关于Python的安装和配置请看我的博客
Windows10 GPU版Tensorflow配置教程+Anaconda3+Jupyter Notebook
项目常用到的package有如下:
numpy # 矩阵运算
scipy # 科学计算
matplotlib # 画图
random # 随机数相关
sklearn # 机器学习
cv2 # OpenCV计算机视觉
pickle # 保存变量
os # 文件操作
theano # 机器学习和深度学习框架
tensorflow # 同上
keras # 同上这些package利用Anaconda都可以很方便的安装,conda install yourpackage,或者是Python自带的。
代码的最开头,我都会引入这些
# -- coding: utf-8 --
import cv2
import math
import matplotlib.pyplot as plt
import numpy as np
import scipy
import copy
import os
import pickle
import random
from scipy import interp

from sklearn import svm,datasets
from sklearn.metrics import roc_curve, auc
from sklearn.cross_validation import StratifiedKFold

import tensorflow as tf
import tensorflow.examples.tutorials.mnist.input_data as input_data

import theano
%matplotlib inline
IDE我用的是Jupyter Notebook,解释性比较好,Anaconda自带。当然,Pycharm也不错。
数据集制作
曾听过这样两句话,“人工智能,有多少人工,就有多少智能”,“数据集的好坏决定了这个任务的performance上限,而后的模型选择、参数调整不过是在不断接近这个上限”。
因此数据集的制作是很重要的,直接影响了我们的分类器性能的好坏。同时,这也体现了较多的主观性,毕竟判断是否是进球是一个很模糊的概念,比如

那么我们现在开始处理视频。视频的链接在这里https://pan.baidu.com/s/1Vq9cr5HUSaRyPk1tinztFA
处理视频并得到篮筐位置截图的流程如下:
- 读入视频
- 拾取鼠标位置坐标,获得篮框位置
- 依次读取每帧图片,截取第二步获得的区域
- 保存至指定目录
我首先用面向过程的方法编写代码,调试BUG,直至无误后将其封装成Annotation类。
下面是面向过程的代码.
代码的第三部分,受姜学长启发,是我关于自动标注图片的一个尝试。运行代码可以实现给图片自动打标签(0 不进球 1 进球)的功能。
其基本思想是这样的:灰度显示的篮筐区域里,255代表白色,0代表黑色,进球的图像中,由于球体的颜色偏深灰,因而篮球会使整个区域的像素和降低,即,区域灰度值之和关于时间的图像上会出现一个负尖峰。如下:

当选取合适的阈值,就可以截获所有进球的帧。
但是问题没有那么简单。很多具有迷惑性的情况也会出现明显的负尖峰,比如由于摄像机角度的问题,篮球出现在了球网的前面,读者可以自行想象。或者球网摆动造成的毛刺现象。因此我又对上图做了均值平滑滤波(或者高斯平滑滤波),削弱“毛刺”现象,并将平滑前后图像相减,得到下图

选取合适阈值,截取负尖峰对应的帧就完成了进球帧的标注。但是理想总是美好的,实现起来效果感人。一是不明显的进球没有检测出来,二是错误的标注了一些很有迷惑性的负样本。当然这只是手工标注前的一个辅助工作,没有期望具有很高的精度。
还有一个做法是手工标注小规模数据,训练一个分类器,用这个分类器帮助我们标注剩下的图片,这当然比上面只用灰度值好得多
def annotation(filename,dir_to_save,smoothing_method,waitMs = 40):

    # 该函数用于
    # 1)标定视频中的篮球框,获得篮球框的左上角和右下角坐标
    # 2)截取视频(每一帧)的篮球框图片,尺寸约38*37,三十分钟视频约45000帧
    # 3)根据进球与否,标定篮框图片为正负样本,正样本有球,负样本无球,并将其命名

    #---------------task1: get the position of hoop---------------
    print('----------task1: get the position of hoop----------\n')
    # 视频名称
    filename_video = filename
    # 每帧间隔(毫秒)
    waitMs = waitMs
    # 播放视频,鼠标拾取篮框坐标
    def getHoopPosition(filename,waitMs):
        """
        function: get the position of hoop
        filename: the name of video, datatype string
        waitMs  : the interval of 2 frame, generally 40 ms, controls the speed of video

        """
        # 存储篮框位置的全局变量
        global hoopPos
        hoopPos = np.zeros((2,2),np.int)
        # 鼠标响应函数
        def hoopPosition(event,x,y,flags,param):
            # 鼠标左键点击,记录左上角点
            if event == cv2.EVENT_LBUTTONDOWN:
                hoopPos[0,:] = x,y
            # 鼠标右键点击,记录右上角点
            if event == cv2.EVENT_RBUTTONDOWN:
                hoopPos[1,:] = x,y
        # 打开可调大小的窗口
        cv2.namedWindow('image',cv2.WINDOW_NORMAL)
        # 设置鼠标响应,名字应一致
        cv2.setMouseCallback('image',hoopPosition)
        # 读取视频
        cap = cv2.VideoCapture(filename)
        # 显示视频帧率
        fps = cap.get(cv2.CAP_PROP_FPS)
        print("FPS of the video: ", fps)
        # 显示视频总帧数
        counts = cap.get(cv2.CAP_PROP_FRAME_COUNT)
        print("Total number of frames: ", counts)
        # 读取视频尺寸
        size=[(int(cap.get(cv2.CAP_PROP_FRAME_WIDTH))),
               int(cap.get(cv2.CAP_PROP_FRAME_HEIGHT))]
        print("The size of the video: ", size)
        # 播放视频,isOpened()检测视频是否正确读入
        if cap.isOpened() == True:
            print("The video is loaded correctly!")
        else:
            print("The video is not loaded correctly! Please check the path!")
        while(cap.isOpened()):
            ret, frame=cap.read()
            if ret==True:
                cv2.imshow("image",frame)
                # 1000ms播放25帧,每帧停顿40ms
                k=cv2.waitKey(waitMs)
                # 64位系统都要 &0xff
                if (k&0xff==ord('q')):
                    break
        # 释放cap对象
        cap.release()
        # 关闭视频窗口
        cv2.destroyAllWindows()
        # 打印篮框位置
        print('The position of hoop is:')
        print(hoopPos)
        return(hoopPos,fps,counts,size)
        # 篮球框
        # (591,78)
        # (628,116)

    hoopPos1 = np.zeros((2,2),np.int)
    # 注意,fps和counts是浮点
    hoopPos1,fps_video,counts_video,size_video = getHoopPosition(filename,waitMs)
    counts_video = int(int(counts_video)/100)
    # 显示矩形框
    cap=cv2.VideoCapture(filename_video)
    if(cap.isOpened()):
        ret, frame=cap.read()
        if ret==True:
            # 画矩形
            cv2.rectangle(frame,(hoopPos1[0,0],hoopPos1[0,1]),(hoopPos1[1,0],hoopPos1[1,1]),(0,255,0),1)
            cv2.imshow("video",frame)
            k=cv2.waitKey(0)
            cap.release()
            cv2.destroyAllWindows()

    #---------------task2: crop the image of hoop---------------
    print('\n----------task2: crop the image of hoop----------\n')
    # 先存所有图片,再打标签

    cap = cv2.VideoCapture(filename_video)
    # 图片计数
    count = 0
    while(cap.isOpened()):
        ret, frame = cap.read()
        if ret == True:
            # 转灰度图
            frame_GRAY = cv2.cvtColor(frame,cv2.COLOR_BGR2GRAY)
            # 扣取篮筐
            frame_GRAY = frame_GRAY[hoopPos1[0,1]:hoopPos1[1,1],hoopPos1[0,0]:hoopPos1[1,0]]
            # 生成文件名
            filename_pic = dir_to_save +str(count)+".png"
            # 写文件
            cv2.imwrite(filename_pic,frame_GRAY)
            # 计数+1
            count += 1
            if count%50 == 0:
                print("saving ",count," pictures")
            if count == counts_video:
                print("all the pictures have been saved correctly!")
                break
    cap.release()
    cv2.destroyAllWindows()

    #---------------task3: label the pic---------------
    print('\n----------task3: label the pic----------\n')

    # 首先对每一帧计算篮筐区域所有像素值的和,然后根据该值判断有无篮球进筐
    print("calculate the sum of pixel value of hoop region.")
    cap=cv2.VideoCapture(filename_video)
    count = 0
    # 篮框区域内所有像素值的和
    PixelValue = []
    while(cap.isOpened()):
        ret, frame=cap.read()
        if ret==True:
            frame_GRAY = cv2.cvtColor(frame,cv2.COLOR_BGR2GRAY)
            # 扣取篮筐
            frame_GRAY = frame_GRAY[hoopPos[0,1]:hoopPos[1,1],hoopPos[0,0]:hoopPos[1,0]]
            PixelValue.append(frame_GRAY.sum())
            count += 1
            if count%50 == 0:
                print("now we calculate ",count,"pictures")
            if count == counts_video:
                print("done!")
                break
    cap.release()
    cv2.destroyAllWindows()
    # 画像素之和的曲线图
    fig1=plt.figure('fig1')
    plt.plot(range(0,count),PixelValue,'b-',label='PixelValue')
    plt.title('Pixel Value of Each Frame')
    plt.xlabel('Frame')
    plt.ylabel('Pixel Value')
    plt.grid(color='b' , linewidth='0.3' ,linestyle='--')
    # plt.legend(loc='lower right')

    # python内核经常崩坏,要把PixelValue保存起来
    print("saving the PixelValue in a txt")
    fileObject = open('PixelValue.txt', 'w')
    for item in PixelValue:
        fileObject.write(str(item))
        fileObject.write('\n')
    fileObject.close()

    if smoothing_method == 'linear':
        # 均值滤波操作
        print("smooth the PixelValue using linear filter")
        tmp1 = []
        for i in range(0,counts_video-2):
            tmp1.append((PixelValue[i]+PixelValue[i+1]+PixelValue[i+2])/3)
        tmp1.append(PixelValue[counts_video-2])
        tmp1.append(PixelValue[counts_video-1])
        fig2=plt.figure('fig2')
        plt.plot(range(0,counts_video),tmp1,'b-',label='PixelValue after smoothing')
        plt.title('PixelValue after average filtering')
        plt.xlabel('Frame')
        plt.ylabel('Pixel Value')
        plt.grid(color='b' , linewidth='0.3' ,linestyle='--')
        temp1 = []
        for i in range(0,counts_video):
            temp1.append(PixelValue[i]-tmp1[i])
        fig3=plt.figure('fig3')
        plt.plot(range(0,counts_video),temp1,'b-',label='difference of PixelValue')
        plt.title('difference between PixelValue and smooth result')
        plt.grid(color='b' , linewidth='0.3' ,linestyle='--')
        plt.xlabel('Frame')
        plt.ylabel('D-Value')

    if smoothing_method == 'gaussian':
        # 高斯平滑操作
        print("smooth the PixelValue using Gaussian filter")
        tmp2 = []
        for i in range(0,counts_video-4):
            tmp2.append((PixelValue[i]+3*PixelValue[i+1]+5*PixelValue[i+2]+3*PixelValue[i+3]+PixelValue[i+4])/13)
        tmp2.append(PixelValue[counts_video-4])
        tmp2.append(PixelValue[counts_video-3])
        tmp2.append(PixelValue[counts_video-2])
        tmp2.append(PixelValue[counts_video-1])
        fig2=plt.figure('fig2')
        plt.plot(range(0,int(counts_video)),tmp2,'b-',label='PixelValue after smoothing')
        plt.title('PixelValue after Gaussian filtering')
        plt.xlabel('Frame')
        plt.ylabel('Pixel Value')
        plt.grid(color='b' , linewidth='0.3' ,linestyle='--')
        temp2 = []
        for i in range(0,counts_video):
            temp2.append(PixelValue[i]-tmp2[i])
        fig3=plt.figure('fig3')
        plt.plot(range(0,counts_video),temp2,'b-',label='difference of PixelValue')
        plt.title('difference between PixelValue and smooth result')
        plt.grid(color='b' , linewidth='0.3' ,linestyle='--')
        plt.xlabel('Frame')
        plt.ylabel('D-value')


    # 找出所有的正样本,可能有假阳性样本
    # 用户输入阈值
    def rename():
        threshold = input("input the threshold")
        threshold = int(threshold)

        positive_list = []
        for i in range(0,counts_video):
            if smoothing_method == 'linear':
                if temp1[i] <=threshold:
                    positive_list.append(i)
            if smoothing_method == 'gaussian':
                if temp2[i] <=threshold:
                    positive_list.append(i)
    # 打标签

        filelist = os.listdir(dir_to_save)

        for item in filelist:
            src = os.path.join(os.path.abspath(dir_to_save), item)
            if (int(item.split('.')[0])) in positive_list:
                dst = os.path.join(os.path.abspath(dir_to_save), "pos_" + item)
                os.rename(src, dst)
            else:
                dst = os.path.join(os.path.abspath(dir_to_save), "neg_" + item)
                os.rename(src, dst)
        print("labeling work done!")
    rename()
这是封装成类的代码
class Annotation:
'''
该对象用于:
1)标定视频中的篮球框,获得篮球框的左上角和右下角坐标
2)截取视频(每一帧)的篮球框图片,尺寸约38*37,三十分钟视频约45000帧
3)根据进球与否,标定篮框图片为正负样本,正样本有球,负样本无球,并将其命名
参数:
1)filename,视频路径+名称
2)dir_to_save,截图存放路径
3)smoothing_method,数据平滑方法,'linear'或'gaussian'
4)waitMs,视频播放每帧间隔,以毫秒计
'''
def __init__(self,filename,dir_to_save,smoothing_method = 'linear',waitMs = 40):
self.filename = filename
self.dir_to_save = dir_to_save
self.smoothing_method = smoothing_method
self.waitMs = waitMs
def getHoopPosition(self):
"""
播放视频,鼠标拾取篮框坐标
function: get the position of hoop
filename: the name of video, datatype string
waitMs : the interval of 2 frame, generally 40 ms, controls the speed of video
"""
print('----------task: get the position of hoop----------\n')
# 存储篮框位置的全局变量
global hoopPos
hoopPos = np.zeros((2,2),np.int)
# 鼠标响应函数
def hoopPosition(event,x,y,flags,param):
if event == cv2.EVENT_LBUTTONDOWN:# 鼠标左键点击,记录左上角点
hoopPos[0,:] = x,y
if event == cv2.EVENT_RBUTTONDOWN:# 鼠标右键点击,记录右上角点
hoopPos[1,:] = x,y
cv2.namedWindow('image',cv2.WINDOW_NORMAL)# 打开可调大小的窗口
cv2.setMouseCallback('image',hoopPosition)# 设置鼠标响应,名字应一致
cap = cv2.VideoCapture(self.filename)# 读取视频
fps = cap.get(cv2.CAP_PROP_FPS)# 显示视频帧率
print("FPS of the video: ", fps)
counts = cap.get(cv2.CAP_PROP_FRAME_COUNT)# 显示视频总帧数
print("Total number of frames: ", counts)
size=[(int(cap.get(cv2.CAP_PROP_FRAME_WIDTH))),# 读取视频尺寸
int(cap.get(cv2.CAP_PROP_FRAME_HEIGHT))]
print("The size of the video: ", size)
if cap.isOpened() == True:# 播放视频,isOpened()检测视频是否正确读入
print("The video is loaded correctly!")
else:
print("The video is not loaded correctly! Please check the path!")
while(cap.isOpened()):
ret, frame=cap.read()
if ret==True:
cv2.imshow("image",frame)
k=cv2.waitKey(self.waitMs)
if (k&0xff==ord('q')):# 64位系统都要 &0xff
break
cap.release()# 释放cap对象
cv2.destroyAllWindows()# 关闭视频窗口
print('The position of hoop is:')
print(hoopPos)
return(hoopPos,fps,counts,size)
def drawRectangle(self,hoopPos1):# 画篮框
cap=cv2.VideoCapture(self.filename)
if(cap.isOpened()):
ret, frame=cap.read()
if ret==True:
cv2.rectangle(frame,(hoopPos1[0,0],hoopPos1[0,1]),(hoopPos1[1,0],hoopPos1[1,1]),(0,255,0),1)
cv2.imshow("video",frame)
k=cv2.waitKey(0)
cap.release()
cv2.destroyAllWindows()
def saveHoopImage(self,hoopPos1):
cap = cv2.VideoCapture(self.filename)
count = 0
while(cap.isOpened()):
ret, frame = cap.read()
if ret == True:
frame_GRAY = cv2.cvtColor(frame,cv2.COLOR_BGR2GRAY)
frame_GRAY = frame_GRAY[hoopPos1[0,1]:hoopPos1[1,1],hoopPos1[0,0]:hoopPos1[1,0]]# 扣取篮筐
filename_pic = dir_to_save +str(count)+".png"
cv2.imwrite(filename_pic,frame_GRAY)
count += 1
if count%50 == 0:
print("saving ",count," pictures")
if count == counts_video:
print("all the pictures have been saved correctly!")
break
cap.release()
cv2.destroyAllWindows()
def evaluationPixelValue(self,hoopPos):
# 首先对每一帧计算篮筐区域所有像素值的和,然后根据该值判断有无篮球进筐
print("calculate the sum of pixel value of hoop region.")
cap=cv2.VideoCapture(self.filename)
count = 0
PixelValue = []# 篮框区域内所有像素值的和,存储45000个值的列表
while(cap.isOpened()):
ret, frame=cap.read()
if ret==True:
frame_GRAY = cv2.cvtColor(frame,cv2.COLOR_BGR2GRAY)
frame_GRAY = frame_GRAY[hoopPos[0,1]:hoopPos[1,1],hoopPos[0,0]:hoopPos[1,0]]
PixelValue.append(frame_GRAY.sum())
count += 1
if count%5000 == 0:
print("now we calculate ",count,"pictures")
if count == counts_video:
print("done!")
break
cap.release()
cv2.destroyAllWindows()
fig1=plt.figure('fig1')# 画像素之和的曲线图
plt.plot(range(0,count),PixelValue,'b-',label='PixelValue')
plt.title('Pixel Value of Each Frame')
plt.xlabel('Frame')
plt.ylabel('Pixel Value')
plt.grid(color='b' , linewidth='0.3' ,linestyle='--')
return PixelValue
def save_PixelValue(self,PixelValue):# Jupyter内核经常崩坏,要把PixelValue保存起来
print("saving the PixelValue in a pkl file")
PixelValue_output = open('PixelValue.pkl', 'wb')
pickle.dump(PixelValue, PixelValue_output)
PixelValue_output.close()
print("done!")
def smooth_PixelValue_draw(self,PixelValue,counts_video):# 平滑像素曲线图,并用原图与之相减,凸显进球时的像素脉冲
if self.smoothing_method == 'linear':# 均值滤波操作
print("smooth the PixelValue using linear filter")
tmp1 = []
for i in range(0,counts_video-2):
tmp1.append((PixelValue[i]+PixelValue[i+1]+PixelValue[i+2])/3)
tmp1.append(PixelValue[counts_video-2])
tmp1.append(PixelValue[counts_video-1])
fig1=plt.figure('fig1')
plt.plot(range(0,counts_video),tmp1,'b-',label='PixelValue after smoothing')
plt.title('PixelValue after average filtering')
plt.xlabel('Frame')
plt.ylabel('Pixel Value')
plt.grid(color='b' , linewidth='0.3' ,linestyle='--')
temp1 = []
for i in range(0,counts_video):
temp1.append(PixelValue[i]-tmp1[i])
fig2=plt.figure('fig2')
plt.plot(range(0,counts_video),temp1,'b-',label='difference of PixelValue')
plt.title('difference between PixelValue and smooth result')
plt.grid(color='b' , linewidth='0.3' ,linestyle='--')
plt.xlabel('Frame')
plt.ylabel('D-Value')
if smoothing_method == 'gaussian':# 高斯平滑操作
print("smooth the PixelValue using Gaussian filter")
tmp2 = []
for i in range(0,counts_video-4):
tmp2.append((PixelValue[i]+3*PixelValue[i+1]+5*PixelValue[i+2]+3*PixelValue[i+3]+PixelValue[i+4])/13)
tmp2.append(PixelValue[counts_video-4])
tmp2.append(PixelValue[counts_video-3])
tmp2.append(PixelValue[counts_video-2])
tmp2.append(PixelValue[counts_video-1])
fig1=plt.figure('fig1')
plt.plot(range(0,int(counts_video)),tmp2,'b-',label='PixelValue after smoothing')
plt.title('PixelValue after Gaussian filtering')
plt.xlabel('Frame')
plt.ylabel('Pixel Value')
plt.grid(color='b' , linewidth='0.3' ,linestyle='--')
temp2 = []
for i in range(0,counts_video):
temp2.append(PixelValue[i]-tmp2[i])
fig2=plt.figure('fig2')
plt.plot(range(0,counts_video),temp2,'b-',label='difference of PixelValue')
plt.title('difference between PixelValue and smooth result')
plt.grid(color='b' , linewidth='0.3' ,linestyle='--')
plt.xlabel('Frame')
plt.ylabel('D-value')
# 找出所有的正样本,可能有假阳性样本
# 用户输入阈值
def rename(self):
threshold = input("input the threshold")
threshold = int(threshold)
positive_list = []
for i in range(0,counts_video):
if self.smoothing_method == 'linear':
if temp1[i] <=threshold:
positive_list.append(i)
if self.smoothing_method == 'gaussian':
if temp2[i] <=threshold:
positive_list.append(i)
filelist = os.listdir(self.dir_to_save)
for item in filelist:
src = os.path.join(os.path.abspath(self.dir_to_save), item)
if (int(item.split('.')[0])) in positive_list:
dst = os.path.join(os.path.abspath(self.dir_to_save), "pos_" + item)
os.rename(src, dst)
else:
dst = os.path.join(os.path.abspath(self.dir_to_save), "neg_" + item)
os.rename(src, dst)
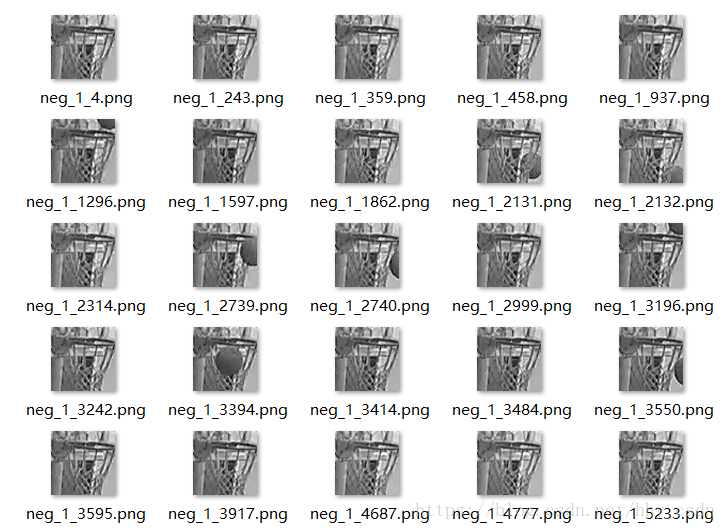
print("labeling work done!")标注好的数据集(1张图片是一个样本)大概这个样子:
下面我们将对数据集提取特征了,特征的选取也是图像分类的关键一环,敬请期待!