主要参考:(1)https://www.bilibili.com/video/av20542427/?p=1
: (2)https://blog.csdn.net/jiongnima/article/details/78337783?locationNum=8&fps=1
根据(2)博主的规划,笔者已经建立结构如下(文章结尾附上完整代码:主要来源(1)的up主):

下面我们一个个说明:
(1)datasets
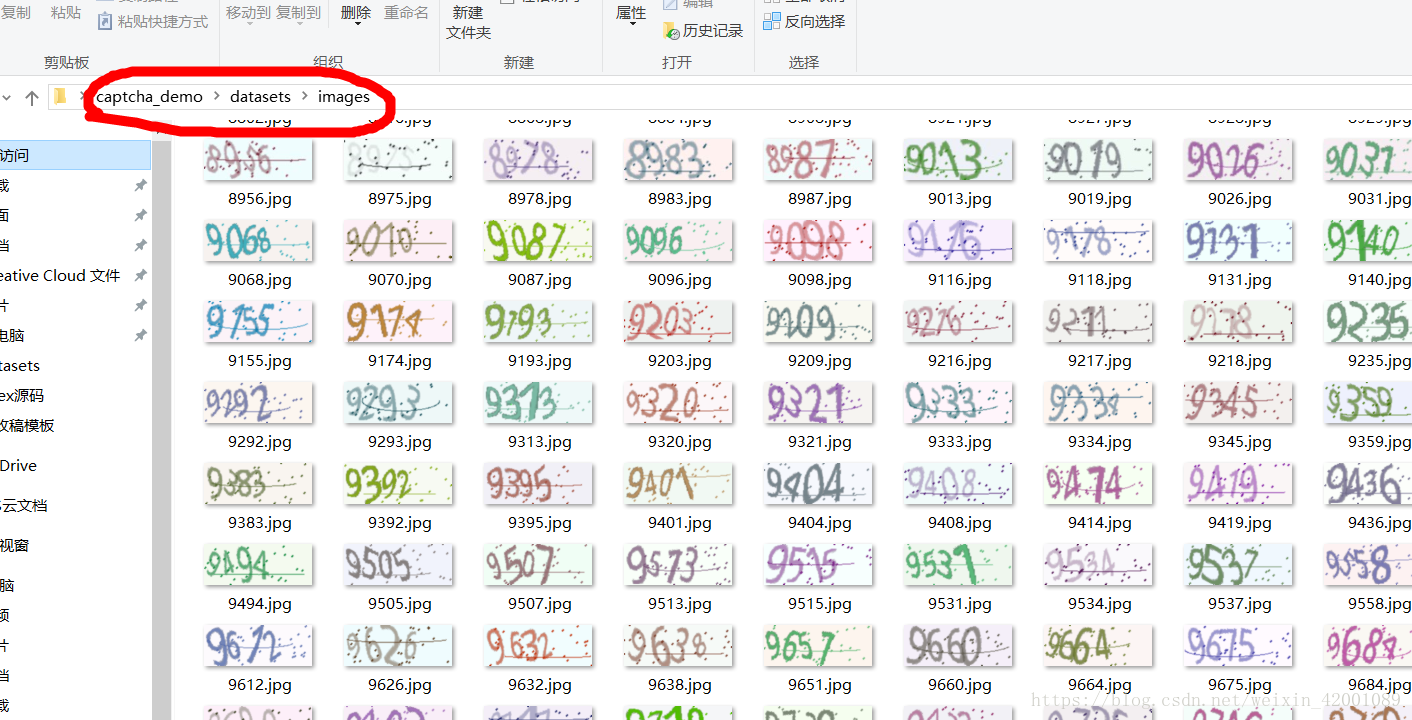
这是数据集文件夹,因为我们要实现验证码,所以首先要生成验证码图片,在datasets目录下有gen_image.py用于生成验证码图片。这里可以通过下载或者爬虫获取各种数据集,笔者采用下面方法
需要安装captcha(这是一个生成验证码图片的库)
pip install captcha如果报错no module named setuptools可以参考
https://www.cnblogs.com/Mr-Rice/p/3960487.html
然后运行产生图片的脚本(gen_image.bat)
python C:/Users/asus-/Desktop/captcha_demo/datasets/gen_image.py ^
--output_dir C:/Users/asus-/Desktop/captcha_demo/datasets/images/ ^
--Captcha_size 4 ^
--image_num 1000 ^
pause
--output_dir就是输出图片的存储路径
--Captcha_size就是识别码图片上面字符的个数
--image_num就是产生图片的数量,但是有可能少于这个数,因为有可能产生重复的随机数,会覆盖前面的
关于gen_image.py为:
import tensorflow as tf
from captcha.image import ImageCaptcha
import random
import sys

FLAGS = tf.app.flags.FLAGS

tf.app.flags.DEFINE_string('output_dir', '/ ', 'This is the saved directory of the picture')
tf.app.flags.DEFINE_integer('Captcha_size', 3, 'This is the number of characters of captcha')
tf.app.flags.DEFINE_integer('image_num', 1000, 'This is the number of pictures generated ,but less than  image_num')


#验证码内容
Captcha_content = ['0','1','2','3','4','5','6','7','8','9']

# 生成字符
def random_captcha_text():
    captcha_text = []
    for i in range(FLAGS.Captcha_size):
        ch = random.choice(Captcha_content)
        captcha_text.append(ch)
    return captcha_text

# 生成字符对应的验证码
def gen_captcha_text_and_image():
    image = ImageCaptcha()
    captcha_text = random_captcha_text()
    captcha_text = ''.join(captcha_text)
    captcha = image.generate(captcha_text)
    image.write(captcha_text, FLAGS.output_dir + captcha_text + '.jpg')


def main(unuse_args):
    for i in range(FLAGS.image_num ):
        gen_captcha_text_and_image()
        sys.stdout.write('\r>> Creating image %d/%d' % (i+1, FLAGS.image_num))
        sys.stdout.flush()
    sys.stdout.write('\n')
    sys.stdout.flush()
    print("Finish!!!!!!!!!!!")

if __name__ == '__main__':
    tf.app.run()
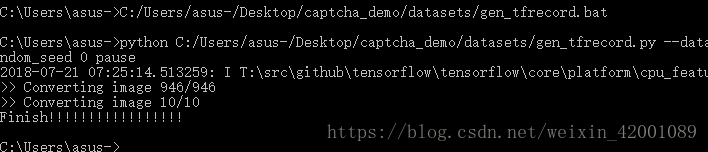
运行后为:

接着转化图片为tfrecord格式,tfrecord数据文件是一种将图像数据和标签统一存储的二进制文件,能更好的利用内存,在tensorflow中快速的复制,移动,读取,存储等.
同样这里写了一个简单的脚本:
python C:/Users/asus-/Desktop/captcha_demo/datasets/gen_tfrecord.py ^
--dataset_dir C:/Users/asus-/Desktop/captcha_demo/datasets/images/ ^
--output_dir C:/Users/asus-/Desktop/captcha_demo/datasets/ ^
--test_num 10 ^
--random_seed 0 ^
pause
从上到下依次是数据集位置,tfrecord生成位置,测试集个数,随机种子(用于打乱数据集)
import tensorflow as tf
import os
import random
import math
import sys
from PIL import Image
import numpy as np

FLAGS = tf.app.flags.FLAGS

tf.app.flags.DEFINE_string('dataset_dir', '/ ', 'This is the source directory of the picture')
tf.app.flags.DEFINE_string('output_dir', '/ ', 'This is the saved directory of the picture')
tf.app.flags.DEFINE_integer('test_num', 20, 'This is the number of test of captcha')
tf.app.flags.DEFINE_integer('random_seed', 0, 'This is the random_seed')

#判断tfrecord文件是否存在
def dataset_exists(dataset_dir):
    for split_name in ['train', 'test']:
        output_filename = os.path.join(dataset_dir,split_name + '.tfrecords')
        if not tf.gfile.Exists(output_filename):
            return False
    return True

#获取所有验证码图片
def get_filenames_and_classes(dataset_dir):
    photo_filenames = []
    for filename in os.listdir(dataset_dir):
        #获取文件路径
        path = os.path.join(dataset_dir, filename)
        photo_filenames.append(path)
    return photo_filenames

def int64_feature(values):
    if not isinstance(values, (tuple, list)):
        values = [values]
    return tf.train.Feature(int64_list=tf.train.Int64List(value=values))

def bytes_feature(values):
    return tf.train.Feature(bytes_list=tf.train.BytesList(value=[values]))

def image_to_tfexample(image_data, label0, label1, label2, label3):
    #Abstract base class for protocol messages.
    return tf.train.Example(features=tf.train.Features(feature={
      'image': bytes_feature(image_data),
      'label0': int64_feature(label0),
      'label1': int64_feature(label1),
      'label2': int64_feature(label2),
      'label3': int64_feature(label3),
    }))

#把数据转为TFRecord格式
def convert_dataset(split_name, filenames, dataset_dir):
    assert split_name in ['train', 'test']

    with tf.Session() as sess:
        #定义tfrecord文件的路径+名字
        output_filename = os.path.join(FLAGS.output_dir,split_name + '.tfrecords')
        with tf.python_io.TFRecordWriter(output_filename) as tfrecord_writer:
            for i,filename in enumerate(filenames):
                try:
                    sys.stdout.write('\r>> Converting image %d/%d' % (i+1, len(filenames)))
                    sys.stdout.flush()

                    #读取图片
                    image_data = Image.open(filename)
                    #根据模型的结构resize
                    image_data = image_data.resize((224, 224))
                    #灰度化
                    image_data = np.array(image_data.convert('L'))
                    #将图片转化为bytes
                    image_data = image_data.tobytes()

                    #获取label
                    labels = filename.split('/')[-1][0:4]
                    num_labels = []
                    for j in range(4):
                        num_labels.append(int(labels[j]))

                    #生成protocol数据类型
                    example = image_to_tfexample(image_data, num_labels[0], num_labels[1], num_labels[2], num_labels[3])
                    tfrecord_writer.write(example.SerializeToString())

                except IOError as e:
                    print('Could not read:',filename)
                    print('Error:',e)
    sys.stdout.write('\n')
    sys.stdout.flush()


def main(unuse_args):

    if dataset_exists(FLAGS.output_dir):
        print('tfcecord file has been existed!!')

    else:
    #获得所有图片
        photo_filenames = get_filenames_and_classes(FLAGS.dataset_dir)
    #把数据切分为训练集和测试集,并打乱
        random.seed(FLAGS.random_seed)
        random.shuffle(photo_filenames)
        training_filenames = photo_filenames[FLAGS.test_num:]
        testing_filenames = photo_filenames[:FLAGS.test_num]

    #数据转换
        convert_dataset('train', training_filenames,FLAGS.dataset_dir)
        convert_dataset('test', testing_filenames, FLAGS.dataset_dir)
        print('Finish!!!!!!!!!!!!!!!!!')

if __name__ == '__main__':
    tf.app.run()
运行后:

(2)训练
运行脚本(train.bat):
python C:/Users/asus-/Desktop/captcha_demo/train.py ^
--tfrecord_dir C:/Users/asus-/Desktop/captcha_demo/datasets/train.tfrecords ^
--model_dir C:/Users/asus-/Desktop/captcha_demo/model/Alexnet ^
--batch_size 15 ^
--train_num 10 ^
--print_loss_accuracy_interval 5 ^
--learning_rate 0.005 ^
pause
这里说一个数据集的读入过程:
https://blog.csdn.net/zzk1995/article/details/54292859
def read_and_decode(filename):
    # 根据文件名生成一个队列
    filename_queue = tf.train.string_input_producer([filename])
    reader = tf.TFRecordReader()
    # 返回文件名和文件
    _, serialized_example = reader.read(filename_queue)
    features = tf.parse_single_example(serialized_example,
                                       features={
                                           'image' : tf.FixedLenFeature([], tf.string),
                                           'label0': tf.FixedLenFeature([], tf.int64),
                                           'label1': tf.FixedLenFeature([], tf.int64),
                                           'label2': tf.FixedLenFeature([], tf.int64),
                                           'label3': tf.FixedLenFeature([], tf.int64),
                                       })
    # 获取图片数据
    image = tf.decode_raw(features['image'], tf.uint8)
    # tf.train.shuffle_batch必须确定shape
    image = tf.reshape(image, [224, 224])
    # 图片预处理
    image = tf.cast(image, tf.float32) / 255.0
    image = tf.subtract(image, 0.5)
    image = tf.multiply(image, 2.0)
    # 获取label
    label0 = tf.cast(features['label0'], tf.int32)
    label1 = tf.cast(features['label1'], tf.int32)
    label2 = tf.cast(features['label2'], tf.int32)
    label3 = tf.cast(features['label3'], tf.int32)

    return image, label0, label1, label2, label3
正如上面所说我们这里的reader对应的是即tfrecord格式的reader
reader = tf.TFRecordReader()(1)资料中up主运行了大概6000次,因为笔者电脑配置较低又是cpu,但是为了后续可视化设计的神经网络,这里我就暂且先运行10次,使之产生model

接下来我们通过tensorboard写了个小demo来直观的看一下设计的多任务alexnet网络
import tensorflow as tf

with tf.Session() as sess:

    my_saver = tf.train.import_meta_graph('C:/Users/asus-/Desktop/captcha_demo/model/Alexnet.meta')
    my_saver.restore(sess,tf.train.latest_checkpoint('C:/Users/asus-/Desktop/captcha_demo/model/'))
    graph = tf.get_default_graph()
    writer_test=tf.summary.FileWriter('C:/Users/asus-/Desktop/logs/',sess.graph)


可以看到前5层convolutional,后边3层full-connected,最后一层的full-connected采取的是全连接层,对应这个采用多任务的类子中最后一层对应四个连接层
关于更多的alexent网络,可以查文档
最后贴一下train.py:
import os
import tensorflow as tf
from nets import nets_factory
import numpy as np
import image_reader as ir

FLAGS = tf.app.flags.FLAGS

tf.app.flags.DEFINE_string('tfrecord_dir', '/ ', 'This is the tfrecord directory of the picture')
tf.app.flags.DEFINE_string('model_dir', '/ ', 'This is the saved model directory of the net')
tf.app.flags.DEFINE_integer('batch_size', 10, 'This is the batch size')
tf.app.flags.DEFINE_integer('train_num', 1000, 'This is the number of train')
tf.app.flags.DEFINE_integer('print_loss_accuracy_interval', 10, 'This is the interval of printing')
tf.app.flags.DEFINE_float('learning_rate', 0.001, 'This is the rate of learning')

# 不同字符数量
CHAR_SET_LEN = 10

# placeholder
x = tf.placeholder(tf.float32, [None, 224, 224])
y0 = tf.placeholder(tf.float32, [None])
y1 = tf.placeholder(tf.float32, [None])
y2 = tf.placeholder(tf.float32, [None])
y3 = tf.placeholder(tf.float32, [None])

image, label0, label1, label2, label3 = ir.read_and_decode(FLAGS.tfrecord_dir)

#使用shuffle_batch可以随机打乱
image_batch, label_batch0, label_batch1, label_batch2, label_batch3 = tf.train.shuffle_batch(
        [image, label0, label1, label2, label3], batch_size =FLAGS.batch_size,
        capacity = 50000, min_after_dequeue=10000, num_threads=1)

#定义网络结构
train_network_fn = nets_factory.get_network_fn(
    'alexnet_v2',
    num_classes=CHAR_SET_LEN,
    weight_decay=0.0005,
    is_training=True)

# inputs: a tensor of size [batch_size, height, width, channels]
X = tf.reshape(x, [FLAGS.batch_size, 224, 224, 1])
# 数据输入网络得到输出值
logits0,logits1,logits2,logits3,end_points = train_network_fn(X)

# 把标签转成one_hot的形式
one_hot_labels0 = tf.one_hot(indices=tf.cast(y0, tf.int32), depth=CHAR_SET_LEN)
one_hot_labels1 = tf.one_hot(indices=tf.cast(y1, tf.int32), depth=CHAR_SET_LEN)
one_hot_labels2 = tf.one_hot(indices=tf.cast(y2, tf.int32), depth=CHAR_SET_LEN)
one_hot_labels3 = tf.one_hot(indices=tf.cast(y3, tf.int32), depth=CHAR_SET_LEN)


loss0 = tf.reduce_mean(tf.nn.softmax_cross_entropy_with_logits(logits=logits0,labels=one_hot_labels0))
loss1 = tf.reduce_mean(tf.nn.softmax_cross_entropy_with_logits(logits=logits1,labels=one_hot_labels1))
loss2 = tf.reduce_mean(tf.nn.softmax_cross_entropy_with_logits(logits=logits2,labels=one_hot_labels2))
loss3 = tf.reduce_mean(tf.nn.softmax_cross_entropy_with_logits(logits=logits3,labels=one_hot_labels3))

total_loss = (loss0+loss1+loss2+loss3)/4.0
optimizer = tf.train.AdamOptimizer(learning_rate=FLAGS.learning_rate).minimize(total_loss)

# 计算准确率
correct_prediction0 = tf.equal(tf.argmax(one_hot_labels0,1),tf.argmax(logits0,1))
accuracy0 = tf.reduce_mean(tf.cast(correct_prediction0,tf.float32))

correct_prediction1 = tf.equal(tf.argmax(one_hot_labels1,1),tf.argmax(logits1,1))
accuracy1 = tf.reduce_mean(tf.cast(correct_prediction1,tf.float32))

correct_prediction2 = tf.equal(tf.argmax(one_hot_labels2,1),tf.argmax(logits2,1))
accuracy2 = tf.reduce_mean(tf.cast(correct_prediction2,tf.float32))

correct_prediction3 = tf.equal(tf.argmax(one_hot_labels3,1),tf.argmax(logits3,1))
accuracy3 = tf.reduce_mean(tf.cast(correct_prediction3,tf.float32))

# 用于保存模型
saver = tf.train.Saver()

def main(unuse_args):

    with tf.Session() as sess:

        # 初始化
        sess.run(tf.global_variables_initializer())

        # 创建一个协调器,管理线程
        coord = tf.train.Coordinator()
        threads = tf.train.start_queue_runners(sess=sess, coord=coord)

        for i in range(FLAGS.train_num):
            b_image, b_label0, b_label1 ,b_label2 ,b_label3 = sess.run([image_batch, label_batch0, label_batch1, label_batch2, label_batch3])
            sess.run(optimizer, feed_dict={x: b_image, y0:b_label0, y1: b_label1, y2: b_label2, y3: b_label3})

            if i % FLAGS.print_loss_accuracy_interval == 0:

                acc0,acc1,acc2,acc3,TotalLoss = sess.run([accuracy0,accuracy1,accuracy2,accuracy3,total_loss],feed_dict={x: b_image,
                                                                                                                    y0: b_label0,
                                                                                                                    y1: b_label1,
                                                                                                                    y2: b_label2,
                                                                                                                    y3: b_label3})
                print ("times:%d  Loss:%.3f  Accuracy:%.2f,%.2f,%.2f,%.2f" % (i,TotalLoss,acc0,acc1,acc2,acc3))


        saver.save(sess, FLAGS.model_dir)
        # 通知其他线程关闭
        coord.request_stop()
        coord.join(threads)

if __name__ == '__main__':
    tf.app.run()
(3)测试
同样运行一个脚本:
python C:/Users/asus-/Desktop/captcha_demo/evaluate.py ^
--tfrecord_dir C:\Users\asus-\Desktop\captcha_demo\datasets\test.tfrecords ^
--test_size 10 ^
pause
关于evaluate.py 则为:
import tensorflow as tf
import image_reader as ir
from nets import nets_factory


FLAGS = tf.app.flags.FLAGS

tf.app.flags.DEFINE_string('tfrecord_dir', '/ ', 'This is the tfrecord directory of the picture')
tf.app.flags.DEFINE_integer('test_size', 10, 'This is the batch size')


# 不同字符数量
CHAR_SET_LEN = 10

BATCH_SIZE=1

# placeholder
x = tf.placeholder(tf.float32, [None, 224, 224])
y0 = tf.placeholder(tf.float32, [None])
y1 = tf.placeholder(tf.float32, [None])
y2 = tf.placeholder(tf.float32, [None])
y3 = tf.placeholder(tf.float32, [None])

image, label0, label1, label2, label3 = ir.read_and_decode(FLAGS.tfrecord_dir)

#使用shuffle_batch可以随机打乱
image_batch, label_batch0, label_batch1, label_batch2, label_batch3 = tf.train.shuffle_batch(
        [image, label0, label1, label2, label3], batch_size =BATCH_SIZE,
        capacity = 50000, min_after_dequeue=10000, num_threads=1)


#定义网络结构
train_network_fn = nets_factory.get_network_fn(
    'alexnet_v2',
    num_classes=CHAR_SET_LEN,
    weight_decay=0.0005,
    is_training=False)

# inputs: a tensor of size [batch_size, height, width, channels]
X = tf.reshape(x, [BATCH_SIZE, 224, 224, 1])
# 数据输入网络得到输出值
logits0,logits1,logits2,logits3,end_points = train_network_fn(X)

# 预测值
predict0 = tf.reshape(logits0, [-1, CHAR_SET_LEN])
predict0 = tf.argmax(predict0, 1)

predict1 = tf.reshape(logits1, [-1, CHAR_SET_LEN])
predict1 = tf.argmax(predict1, 1)

predict2 = tf.reshape(logits2, [-1, CHAR_SET_LEN])
predict2 = tf.argmax(predict2, 1)

predict3 = tf.reshape(logits3, [-1, CHAR_SET_LEN])
predict3 = tf.argmax(predict3, 1)

# 把标签转成one_hot的形式
one_hot_labels0 = tf.one_hot(indices=tf.cast(y0, tf.int32), depth=CHAR_SET_LEN)
one_hot_labels1 = tf.one_hot(indices=tf.cast(y1, tf.int32), depth=CHAR_SET_LEN)
one_hot_labels2 = tf.one_hot(indices=tf.cast(y2, tf.int32), depth=CHAR_SET_LEN)
one_hot_labels3 = tf.one_hot(indices=tf.cast(y3, tf.int32), depth=CHAR_SET_LEN)


loss0 = tf.reduce_mean(tf.nn.softmax_cross_entropy_with_logits(logits=logits0,labels=one_hot_labels0))
loss1 = tf.reduce_mean(tf.nn.softmax_cross_entropy_with_logits(logits=logits1,labels=one_hot_labels1))
loss2 = tf.reduce_mean(tf.nn.softmax_cross_entropy_with_logits(logits=logits2,labels=one_hot_labels2))
loss3 = tf.reduce_mean(tf.nn.softmax_cross_entropy_with_logits(logits=logits3,labels=one_hot_labels3))

total_loss = (loss0+loss1+loss2+loss3)/4.0
train_step = tf.train.AdamOptimizer(learning_rate=0.0001).minimize(total_loss)

# 计算准确率
correct_prediction0 = tf.equal(tf.argmax(one_hot_labels0,1),tf.argmax(logits0,1))
accuracy0 = tf.reduce_mean(tf.cast(correct_prediction0,tf.float32))

correct_prediction1 = tf.equal(tf.argmax(one_hot_labels1,1),tf.argmax(logits1,1))
accuracy1 = tf.reduce_mean(tf.cast(correct_prediction1,tf.float32))

correct_prediction2 = tf.equal(tf.argmax(one_hot_labels2,1),tf.argmax(logits2,1))
accuracy2 = tf.reduce_mean(tf.cast(correct_prediction2,tf.float32))

correct_prediction3 = tf.equal(tf.argmax(one_hot_labels3,1),tf.argmax(logits3,1))
accuracy3 = tf.reduce_mean(tf.cast(correct_prediction3,tf.float32))


def main(unuse_args):

    with tf.Session() as sess:

        sess.run(tf.global_variables_initializer())

        #载入模型
        my_saver = tf.train.import_meta_graph('C:/Users/asus-/Desktop/captcha_demo/model/Alexnet.meta')
        my_saver.restore(sess,tf.train.latest_checkpoint('C:/Users/asus-/Desktop/captcha_demo/model/'))

        coord = tf.train.Coordinator()
        threads = tf.train.start_queue_runners(sess=sess, coord=coord)

        for i in range(FLAGS.test_size):
            b_image, b_label0, b_label1 ,b_label2 ,b_label3 = sess.run([image_batch, label_batch0, label_batch1, label_batch2, label_batch3])
            print('%d times label:%d,%d,%d,%d' % ((i+1) ,b_label0, b_label1 ,b_label2 ,b_label3))
            sess.run(train_step, feed_dict={x: b_image, y0:b_label0, y1: b_label1, y2: b_label2, y3: b_label3})
            label0,label1,label2,label3 = sess.run([predict0,predict1,predict2,predict3], feed_dict={x: b_image})
            print('predict:',label0,label1,label2,label3)

        coord.request_stop()
        coord.join(threads)


if __name__ == '__main__':
    tf.app.run()
注意笔者在测试的时候
--tfrecord_dir C:\Users\asus-\Desktop\captcha_demo\datasets\test.tfrecords ^文件夹路径如果由\改为/即为:
--tfrecord_dir C:/Users/asus-/Desktop/captcha_demo/datasets/test.tfrecords ^那么结果会报错,意思就是说没有读取到数据,呵呵目前还不明觉厉!!
最后附上全部代码:
https://github.com/Mryangkaitong/tensorflow/tree/master/captcha_alexnet_demo