【nginx源码学习与运用】系列博客中的示例代码在csdn的代码托管服务器CODE上,地址https://code.csdn.net/u012819339/nginx_study ,你可以将其自由的下载到本地,或者通过Git来实时获取更新
步骤和前一篇博客类似,不再赘述,这里贴出代码,解释也在代码中
ngx_http_filetest_module.c源码如下:
//该示例代码演示如何发送磁盘中的文件

#include <ngx_config.h>
#include <ngx_core.h>
#include <ngx_event.h>
#include <ngx_http.h>
#include <ngx_files.h>

//文件描述符清理函数,nginx在处理完本次请求释放内存池的时候会同步调用该函数释放资源
void ngx_pool_cleanup_mytest_file(void *data)
{
    ngx_pool_cleanup_file_t *c = data;

    ngx_close_file(c->fd);
}


static ngx_int_t ngx_http_filetest_handler(ngx_http_request_t *r)
{
    //设定mytest模块只处理GET或HEAD请求
    if(!(r->method &(NGX_HTTP_GET|NGX_HTTP_HEAD)))
        return NGX_HTTP_NOT_ALLOWED;

    //丢弃请求中的包体
    ngx_int_t rc = ngx_http_discard_request_body(r);
    if(rc != NGX_OK)
        return rc;

    ngx_buf_t *b;
    b = ngx_palloc(r->pool, sizeof(ngx_buf_t));
    u_char *filename = (u_char *)"/tmp/filetest.txt";
    b->in_file = 1;
    b->file = ngx_pcalloc(r->pool, sizeof(ngx_file_t));
    b->file->fd = ngx_open_file(filename, NGX_FILE_RDONLY|NGX_FILE_NONBLOCK, NGX_FILE_OPEN, 0);
    b->file->log = r->connection->log;
    b->file->name.data = filename;
    b->file->name.len = ngx_strlen(filename);
    if(b->file->fd <= 0)
        return NGX_HTTP_NOT_FOUND;

    if(ngx_file_info(filename, &b->file->info) == NGX_FILE_ERROR )
    {
        ngx_close_file(b->file->fd);
        return NGX_HTTP_INTERNAL_SERVER_ERROR;
    }

    r->headers_out.content_length_n = b->file->info.st_size;
    b->file_pos = 0;
    b->file_last = b->file->info.st_size;

    //注册文件描述符清理函数
    ngx_pool_cleanup_t *cln = ngx_pool_cleanup_add(r->pool, sizeof(ngx_pool_cleanup_file_t));
    if(cln == NULL)
    {
        ngx_close_file(b->file->fd);
        return NGX_ERROR;
    }
    cln->handler = ngx_pool_cleanup_mytest_file; //需要自己实现的清理函数
    ngx_pool_cleanup_file_t *clnf = cln->data;
    clnf->fd = b->file->fd;
    clnf->name = b->file->name.data;
    clnf->log = r->pool->log;

    ngx_str_t type = ngx_string("text/html");
    r->headers_out.status = NGX_HTTP_OK;
    r->headers_out.content_type = type;
    //发送HTTP头部
    rc = ngx_http_send_header(r);
    if(rc == NGX_ERROR || rc > NGX_OK || r->header_only)
    {
        ngx_close_file(b->file->fd);
        return rc;
    }

    //发送body
    ngx_chain_t out;
    out.buf = b;
    out.next = NULL;

    //如果要支持断点续传就解注释下面语句
    //r->allow_ranges = 1;

    return ngx_http_output_filter(r, &out);
}


static char *ngx_http_filetest(ngx_conf_t *cf, ngx_command_t *cmd, void *conf)
{
    ngx_http_core_loc_conf_t *clcf;
    clcf = ngx_http_conf_get_module_loc_conf(cf, ngx_http_core_module);
    clcf->handler = ngx_http_filetest_handler;

    return NGX_CONF_OK;
}


static ngx_command_t ngx_http_filetest_commands[] =
{
    {
        ngx_string("filetest"),
        NGX_HTTP_MAIN_CONF | NGX_HTTP_SRV_CONF | NGX_HTTP_LOC_CONF | NGX_HTTP_LMT_CONF | NGX_CONF_NOARGS,
        ngx_http_filetest,
        NGX_HTTP_LOC_CONF_OFFSET,
        0,
        NULL
    },
    ngx_null_command
};

//模块接口描述的8个阶段,在http框架初始化的时候完成,函数指针都可置NULL
static ngx_http_module_t ngx_http_filetest_module_ctx =
{
    NULL,
    NULL,
    NULL,
    NULL,
    NULL,
    NULL,
    NULL,
    NULL,
};

ngx_module_t ngx_http_filetest_module =
{
    NGX_MODULE_V1,
    &ngx_http_filetest_module_ctx,
    ngx_http_filetest_commands,
    NGX_HTTP_MODULE,
    NULL,
    NULL,
    NULL,
    NULL,
    NULL,
    NULL,
    NULL,
    NGX_MODULE_V1_PADDING
};
添加filetest模块后的config文件:
ngx_addon_name="ngx_http_mytest_module ngx_http_filetest_module"
HTTP_MODULES="$HTTP_MODULES ngx_http_mytest_module ngx_http_filetest_module"
NGX_ADDON_SRCS="$NGX_ADDON_SRCS $ngx_addon_dir/ngx_http_mytest_module.c $ngx_addon_dir/ngx_http_filetest_module.c"
测试文件:
磁盘测试文件/tmp/filetest.txt内容如下:
<html>
<head>
        <title>filetest</title>
<head>

<body>
        <p>arvik filetest module!</p>
</body>

</html>
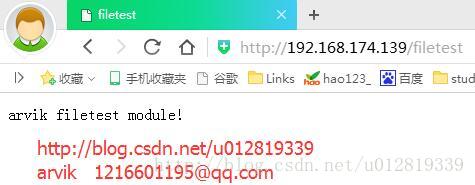
运行结果截图:
代码已经存上传到这个位置 https://code.csdn.net/u012819339/nginx_study ,在项目的test9目录中,童鞋们可自行下载演示