还是基于入门的第一个程序,因为前面的配置都是一样。
接下来的程序是添加了参数传递,对参数的处理
目标:使用springMvc框架模拟数据库的查看,修改,添加,主要是完成页面的跳转。暂不实现具体功能
1.首先需要一个student的实体类:
package com.entity;

public class Student {
	private int id;
	private String name;
	private int age;


	public Student() {
		super();
	}
	public Student(int id, String name, int age) {
		super();
		this.id = id;
		this.name = name;
		this.age = age;
	}
get,set方法此处省略.
2.写一个学生的controller类:首先写一个list()方法,用于展示获取所有学生列表
package com.controller;

import java.util.ArrayList;
import java.util.List;

import org.springframework.stereotype.Controller;
import org.springframework.web.bind.annotation.RequestMapping;
import org.springframework.web.bind.annotation.RequestParam;
import org.springframework.web.servlet.ModelAndView;

import com.entity.Student;

@Controller
@RequestMapping("/student")
public class StudentController {

	public static List<Student> studentList = new ArrayList<Student>();

	static {
		studentList.add(new Student(1,"zhu",15));
		studentList.add(new Student(2,"芳芳",16));
		studentList.add(new Student(3,"咩咩",17));
	}

	@RequestMapping("/list")
	public ModelAndView list() {
		ModelAndView mav = new ModelAndView();
		mav.setViewName("student/list");
		mav.addObject("studentList", studentList);
		return mav;
	}

}
在 StudentController类的上面添加了@RequestMapping("/student")这个注解,是发出student的请求时,就去找这个类
就像是文件夹的上下文一样,一层一层的,所以在list()方法上再添加@RequestMapping("/list")注解,是发出student/list请求时才进入这个方法,对请求进行处理的。
3.我们现在需要一个页面去展示学生列表。位置:在我们新建的jsp文件夹下方在建一个student文件夹,再student文件夹内建一个名为list.jsp页面。
<%@ page language="java" contentType="text/html; charset=UTF-8"
    pageEncoding="UTF-8"%>
<%@ taglib uri="http://java.sun.com/jsp/jstl/core" prefix="c"%>
<!DOCTYPE html PUBLIC "-//W3C//DTD HTML 4.01 Transitional//EN" "http://www.w3.org/TR/html4/loose.dtd">
<html>
<head>
<meta http-equiv="Content-Type" content="text/html; charset=UTF-8">
<title>test</title>
</head>
<body>

	<table>
		<tr>
			<th>编号</th>
			<th>姓名</th>
			<th>学生</th>

		</tr>
		<c:forEach var="student" items="${ studentList}">
			<tr>
				<td>${student.id }</td>
				<td>${student.name }</td>
				<td>${student.age }</td>

			</tr>
		</c:forEach>

	</table>
</body>
</html>
4.在做一个index.jsp主页面来发送这个请求:
<%@ page language="java" contentType="text/html; charset=UTF-8"
    pageEncoding="UTF-8"%>
<% response.sendRedirect("student/list.do");%>
不出意外,我们运行index.jsp时候,就可以完成请求的跳转了,页面也会跳转到list.jsp并且展示学生列表。
现在我们添加,增加和修改的功能:
5.在list.jsp加入两个链接,为了确保路径的正确,我们使用了绝对路径
${pageContext.request.contextPath }
<body>
<a href="${pageContext.request.contextPath }/student/preSave.do">添加学生</a>
	<table>
		<tr>
			<th>编号</th>
			<th>姓名</th>
			<th>学生</th>
			<th>操作</th>
		</tr>
		<c:forEach var="student" items="${ studentList}">
			<tr>
				<td>${student.id }</td>
				<td>${student.name }</td>
				<td>${student.age }</td>
				<td><a href="${pageContext.request.contextPath }/student/preSave.do?id=${student.id}">修改</a></td>
			</tr>
		</c:forEach>

	</table>
</body>
6.在controller类中也添新的preSave方法
	@RequestMapping("/preSave")
	public ModelAndView preSave(@RequestParam(value="id",required=false) String id ) {
		ModelAndView mav = new ModelAndView();
		if(id!=null) {
			mav.addObject("student",studentList.get(Integer.parseInt(id)-1));
			mav.setViewName("student/update");
		}else {
			mav.setViewName("student/add");
		}
		return mav;
	}
(@RequestParam(value="id",required=false) String id)
@RequestParam是接收前台请求中发送的参数,@RequestParam(value="id") String id 底层会自动将前台传来的id的值赋值给我们定义的id,但是如果前台没有传来id参数,系统就会报错,因为required默认是true,所以我们可以required=false,如果没有参数就算了,有参数就赋值给后台定义的同名参数。
7.现在我们开始写add页面和update页面(路径也是在student文件夹以下):
<%@ page language="java" contentType="text/html; charset=UTF-8"
    pageEncoding="UTF-8"%>
<!DOCTYPE html PUBLIC "-//W3C//DTD HTML 4.01 Transitional//EN" "http://www.w3.org/TR/html4/loose.dtd">
<html>
<head>
<meta http-equiv="Content-Type" content="text/html; charset=UTF-8">
<title>Insert title here</title>
</head>
<body>
	<form action="student/save.do">
		<table>
			<tr>
				<th col colspan="2">学生添加</th>
			</tr>
			<tr>
				<td>姓名:</td>
				<td><input type="text" name="name"></td>
			</tr>
			<tr>
				<td>年龄:</td>
				<td><input type="text" name="age"></td>
			</tr>

			<tr>
				<td colspan="2"><input type="submit" value="添加"></td>
			</tr>
		</table>
	</form>


</body>
</html>
<%@ page language="java" contentType="text/html; charset=UTF-8"
    pageEncoding="UTF-8"%>
<!DOCTYPE html PUBLIC "-//W3C//DTD HTML 4.01 Transitional//EN" "http://www.w3.org/TR/html4/loose.dtd">
<html>
<head>
<meta http-equiv="Content-Type" content="text/html; charset=UTF-8">
<title>update</title>
</head>
<body>
	<form action="student/save.do">
		<table>
			<tr>
				<th col colspan="2">学生修改</th>
			</tr>
			<tr>
				<td>姓名:</td>
				<td><input type="text" name="name" value="${student.name }"></td>
			</tr>
			<tr>
				<td>年龄:</td>
				<td><input type="text" name="age" value="${student.age }"></td>
			</tr>
			<tr>
				<td><input type="hidden" name="id" value="${student.id}"></td>
			</tr>
			<tr>
				<td colspan="2"><input type="submit" value="确定修改"></td>
			</tr>
		</table>
	</form>


</body>
</html>
目前的练习就完成了
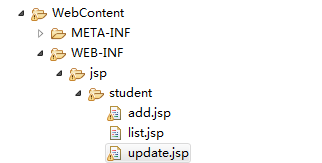
贴下文件路径:

在重新补上studentController类的代码,因为刚刚是循循渐进的贴的代码:
package com.controller;

import java.util.ArrayList;
import java.util.List;

import org.springframework.stereotype.Controller;
import org.springframework.web.bind.annotation.RequestMapping;
import org.springframework.web.bind.annotation.RequestParam;
import org.springframework.web.servlet.ModelAndView;

import com.entity.Student;

@Controller
@RequestMapping("/student")
public class StudentController {

	public static List<Student> studentList = new ArrayList<Student>();

	static {
		studentList.add(new Student(1,"zhu",15));
		studentList.add(new Student(2,"芳芳",16));
		studentList.add(new Student(3,"咩咩",17));
	}

	@RequestMapping("/list")
	public ModelAndView list() {
		ModelAndView mav = new ModelAndView();
		mav.setViewName("student/list");
		mav.addObject("studentList", studentList);
		return mav;
	}

	@RequestMapping("/preSave")
	public ModelAndView preSave(@RequestParam(value="id",required=false) String id ) {
		ModelAndView mav = new ModelAndView();
		if(id!=null) {
			mav.addObject("student",studentList.get(Integer.parseInt(id)-1));
			mav.setViewName("student/update");
		}else {
			mav.setViewName("student/add");
		}
		return mav;
	}


}
总结这次的学习:
1.@RequsetParam的使用
2.ModelAndView中的.setViewName()方法和.addObject()方法
setViewName就是返回页面view名字,addObject就像是servlet中的给request的.setAttribute()方法一样