硬件环境
操作系统:ubuntu16.04LTS
显卡:GTX1080Ti 10G显存 内存32G
代码托管在码云,因为github实在是太慢了,老是timeout,翻墙也不行,搞了半天搞不定,突然看到中国有码云这个神器,以后就用码云来放代码了。
环境配置:
基于miniconda创建的python2.7环境
自己写一些脚本是用python3.6,训练环境是用python2.7,不过统一用python3.6的问题也不大
tensorflow 中object_detection环境配置
Tip
(1)在linux下按官方要求配置行云流水,在windows下比较麻烦些,搞深度学习建议放弃windows,使用ubuntu会少走很多坑。
(2)有GPU就装GPU版本tensorflow,没有GPU装CPU,不能同时装两个版本
(3)tensorflow models需要另外下载
(4)建议将如下代码改成在系统环境变量中添加,否则每次终端运行都需要加环境变量。
export PYTHONPATH=$PYTHONPATH:`pwd`:`pwd`/slim数据准备
使用LabelImg对图片进行标注,标注的格式需要选择pascal voc,
快捷键:
W:标注 A:上一张 D:下一张 软件右上方选择默认标注的标签。
生成的xml文件分成两个文件夹train_xml和test_xml,一个用来训练,一个用来验证,注意是验证不是测试!验证是拿来计算损失的
标签
该文件可以在tensorlfow models里搜索的,这个名字和路径以及序号之后会用到,我只需要检测一个目标,所以内容如下图所示,(一个item代表一个目标,使用的vscode编辑的,id必须从1开始,因为没有目标也算其中一种检测结果)
item {
  id: 1
  name: "barcode"
}
ubuntu就用vim吧,windows的不建议用记事本,之前用记事本喷到一个坑,而且很多时候使用记事本打开文件后再保存会导致该文件不可用。
生成数据
xml_to_tfrecode.py
tensorflow需要使用的是tfrecode格式数据,但是官方的函数是先转成csv,然后转成tfrecode格式,实在是太麻烦,而且最烦的就是运行python还要加这么多参数,所以改了下代码一步到位,根据自己的路径自己更改下代码直接运行。
配置位置:
train_xml_path = './trainxmls'
test_xml_path = './testxmls'
#outputPath是那个目录名
outputPath = './data'
image_path = './images'
train_csv_path=os.path.join(outputPath, 'train.csv')
test_csv_path=os.path.join(outputPath, 'test.csv')
#train_recode_path和test_recode默认为放在同一个文件目录下
train_recode_path=os.path.join(outputPath, 'train.record')
test_recode_path=os.path.join(outputPath, 'test.record')
# TO-DO replace this with label map
def class_text_to_int(row_label):
if row_label == 'barcode':
return 1
else:
None
序号按照之前标签规定的来写配置
faster_rcnn_inception_v2_coco.config中,需要更改的地方主要有:
num_classes: 2
batch_size: 16
num_steps: 50000
fine_tune_checkpoint: "models/model.ckpt"
input_path: "data/train.record"
label_map_path: "data/mscoco_label_map.pbtxt"
下面这个是在验证集的配置中
input_path: "data/test.record"
label_map_path: "data/mscoco_label_map.pbtxt"
训练
在train.py中进行训练,详见
'''
modify these configs to run the train.py
python train.py --logtostderr
'''
FLAGS.pipeline_config_path='faster_rcnn_inception_v2_coco.config'
FLAGS.train_dir='models/train'
导出模型
使用export_inference_graph.py导出模型,需要配置的地方如下:
'''
trange the config for your project and run the script
python export_inference_graph.py --input_type image_tensor
'''
FLAGS = flags.FLAGS
FLAGS.pipeline_config_path='./faster_rcnn_inception_v2_coco.config'
FLAGS.trained_checkpoint_prefix='./models/train/model.ckpt-30000'
FLAGS.output_directory='./fine_tuned_model'
模型测试
运行testModel.py,配置路径:
PATH_TO_CKPT = './fine_tuned_model/frozen_inference_graph.pb'
PATH_TO_LABELS='data/mscoco_label_map.pbtxt'
PATH_TO_TEST_IMAGES_DIR = 'test'
PATH_TO_SAVE_IMAGES_DIR = 'result'
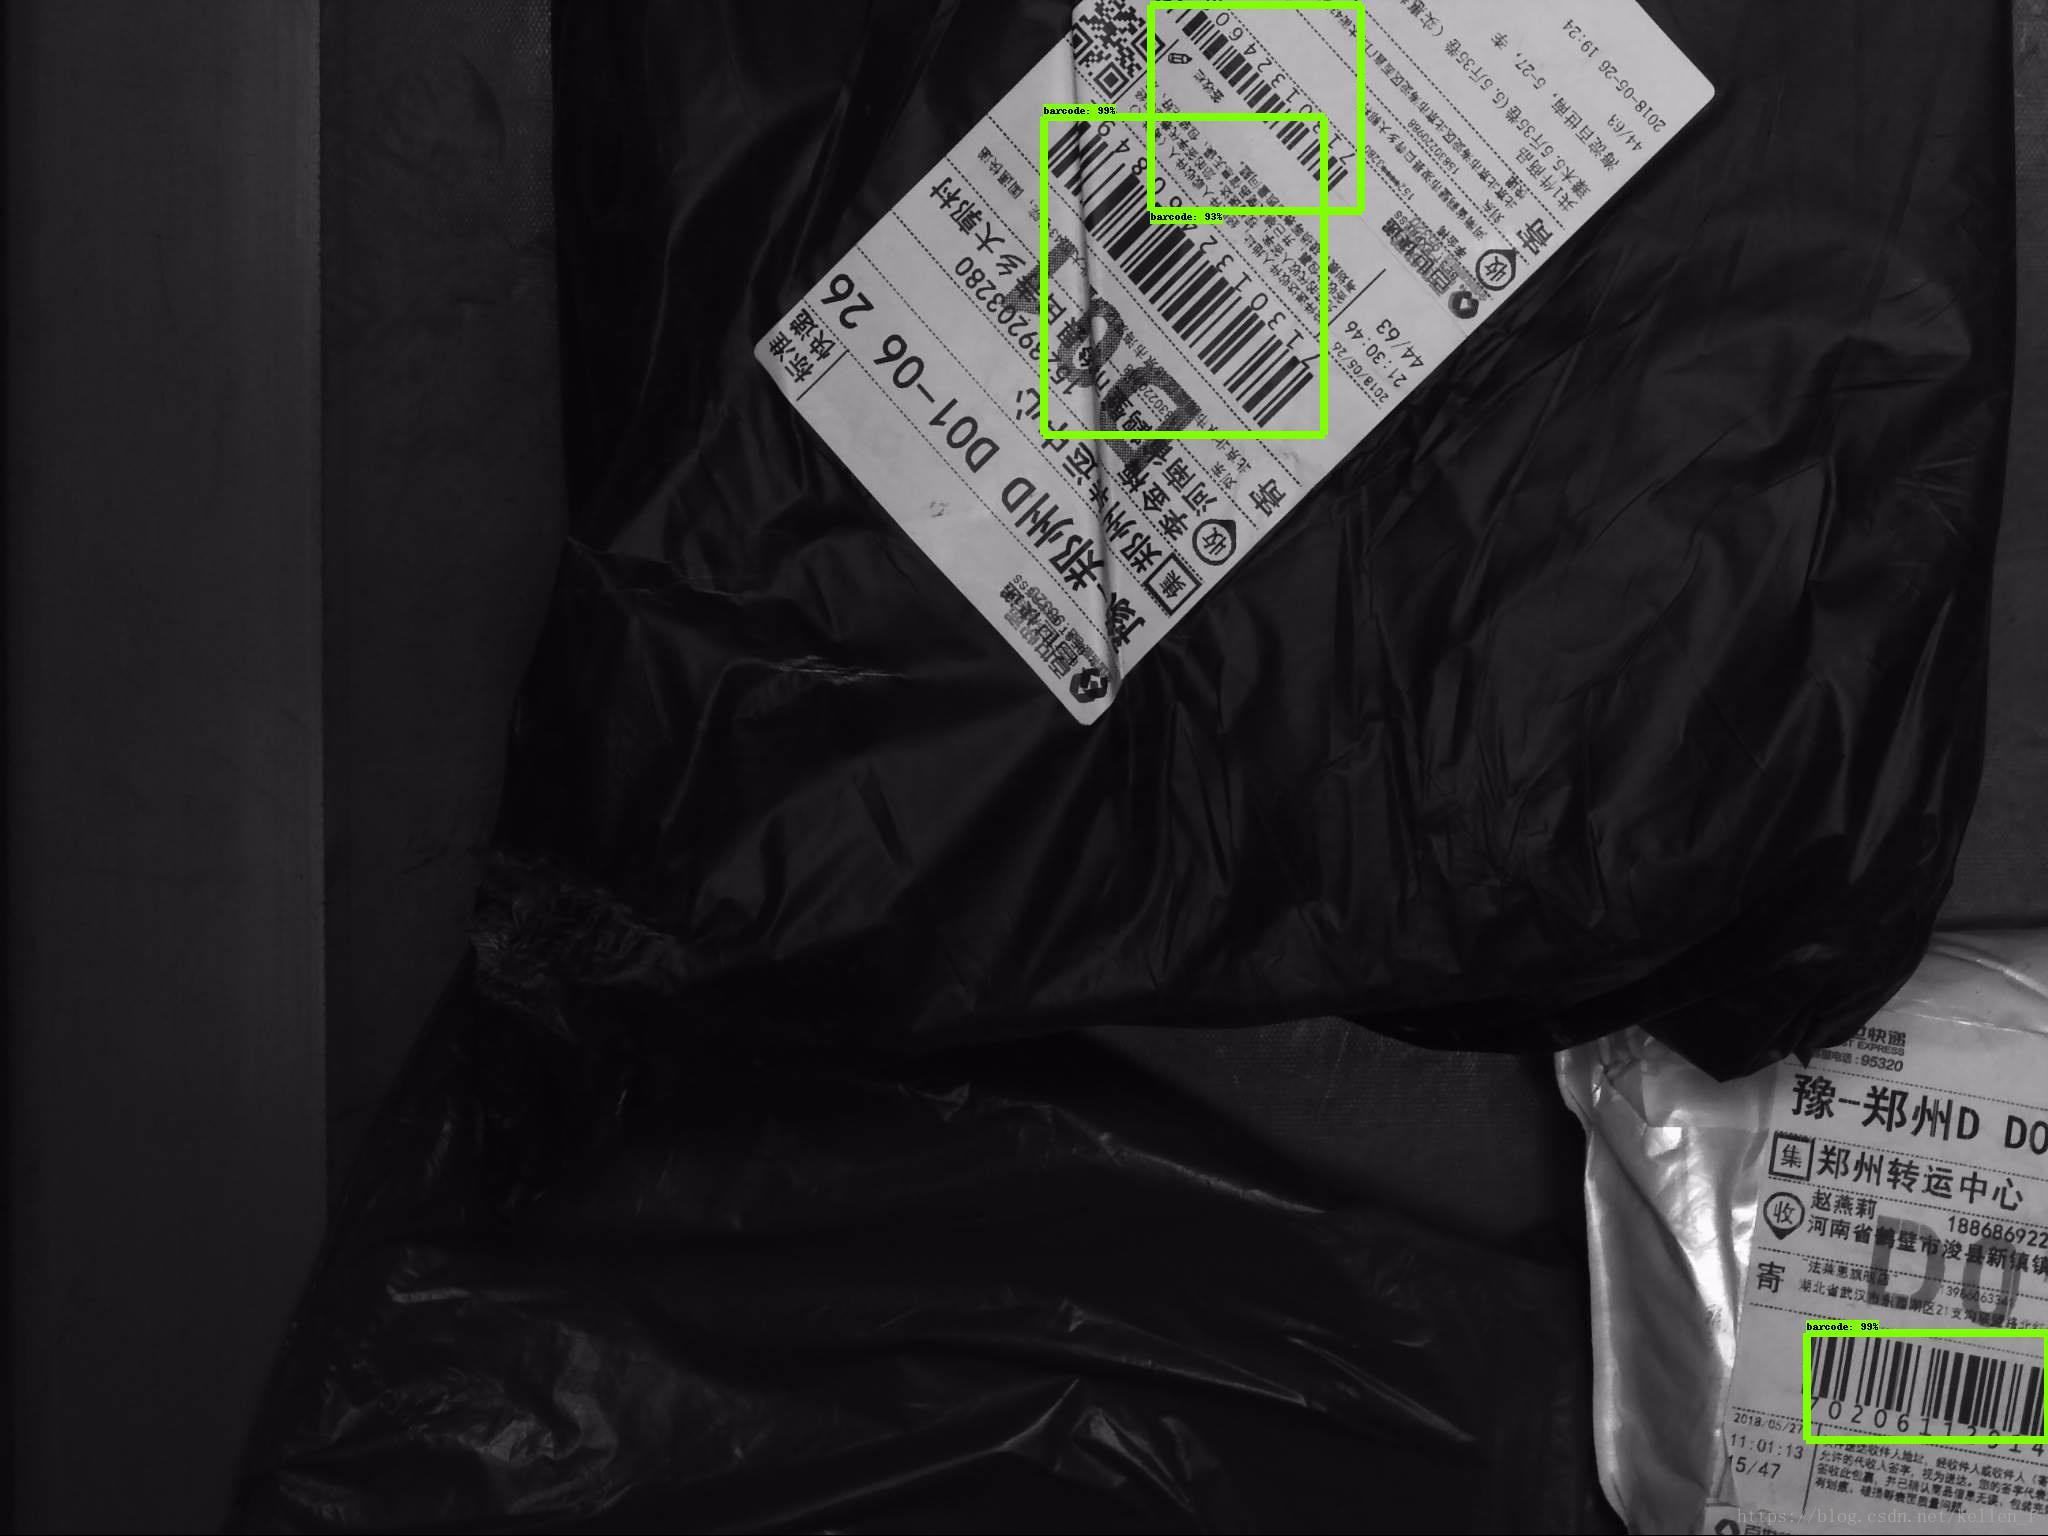
NUM_CLASSES = 2测试结果