在前面已经搭建过环境框架,现在在demo模块下写一个简单的案例,让整个环境跑起来。
一:启动Demo项目
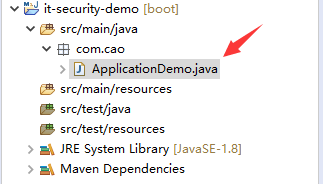
1.新建类
在这前,先建立包。
2.启动类程序
 1 package com.cao;
 2
 3 import org.springframework.boot.SpringApplication;
 4 import org.springframework.boot.autoconfigure.SpringBootApplication;
 5 import org.springframework.web.bind.annotation.GetMapping;
 6 import org.springframework.web.bind.annotation.RestController;
 7
 8 /**
 9  * 模块启动类
10  * @author dell
11  */
12 @SpringBootApplication  //说明这是一个springboot项目
13 @RestController            //可以提供rest服务
14 public class ApplicationDemo {
15
16     public static void main(String[] args) {
17         //spring标准启动方式
18         SpringApplication.run(ApplicationDemo.class, args);
19     }
20
21     @GetMapping("/hello")
22     public String hello() {
23         return "spring secutity demo";
24     }
25
26 }
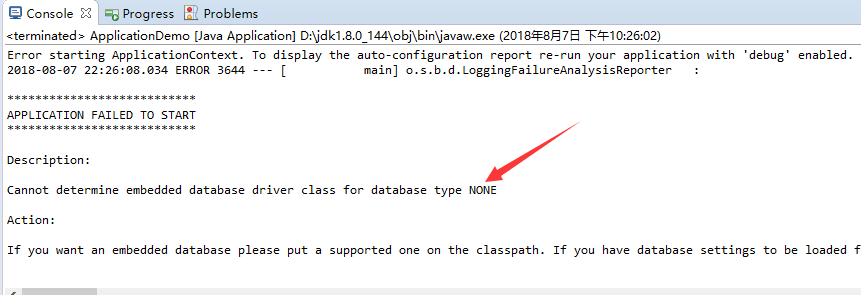
3.启动效果
说明没有指定数据库。
4.解决方式
在core虽然引入了jdbc,但是没有在项目中添加配置项。现在在demo模块中添加数据库配置项
新建File
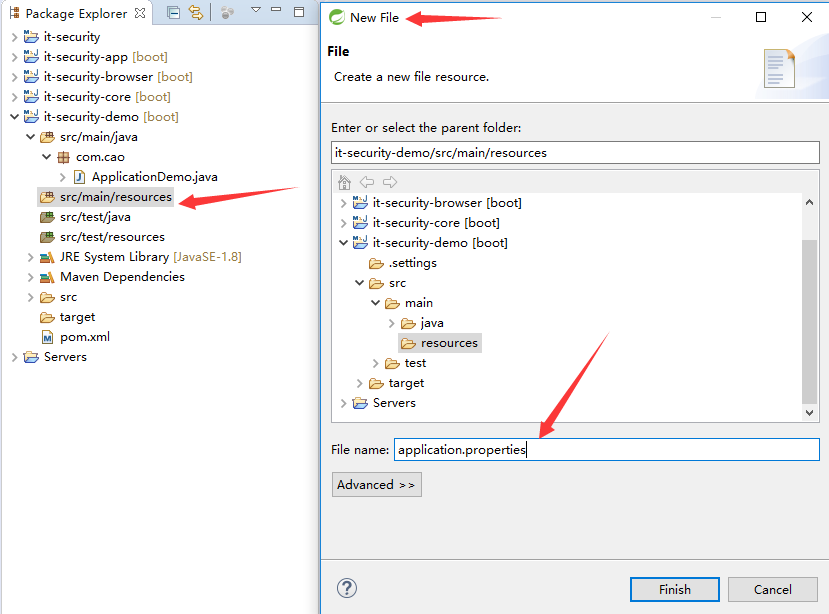
添加配置项
1 spring.datasource.driver-class-name = com.mysql.jdbc.Driver
2 spring.datasource.url= jdbc:mysql://127.0.0.1:3308/test?useUnicode=yes&characterEncoding=UTF-8&useSSL=false
3 spring.datasource.username = root
4 spring.datasource.password = 123456
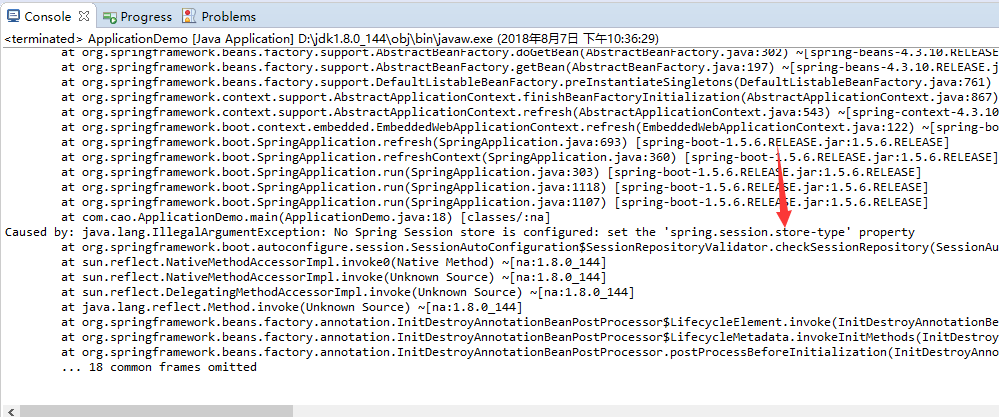
5.再次启动
session的存储没有指定。
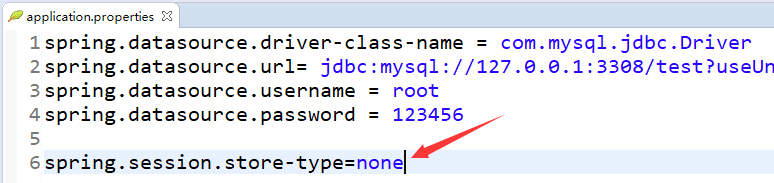
6.解决方式
在browser模块中有session引用,在这里指定session的存储为none
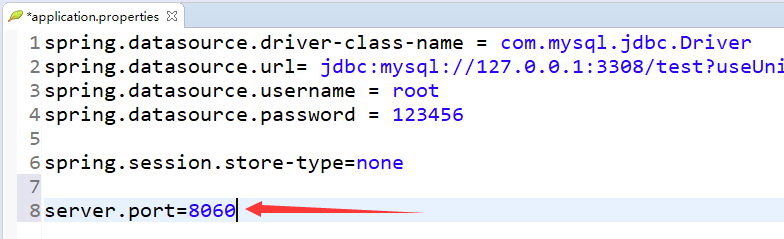
在学习过程中,如果8080端口被占用,可以在这里配置一个配置(这里使用8080,只是做一个示例)
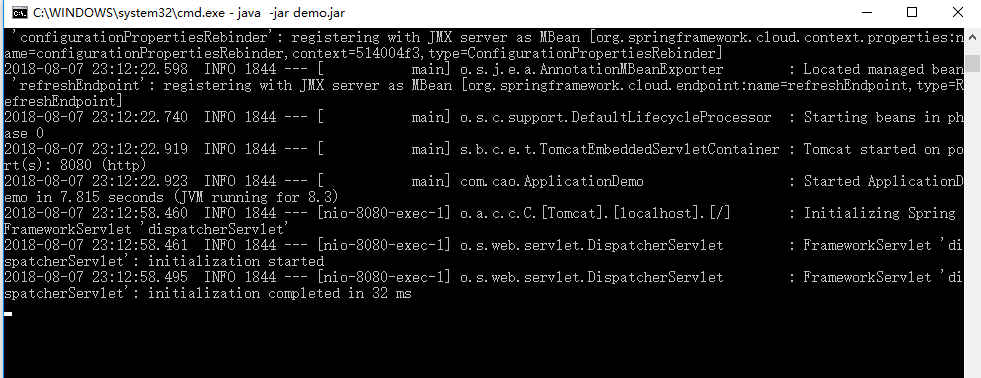
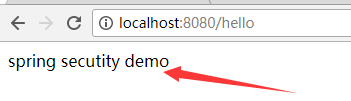
7.再次启动,可以成功启动

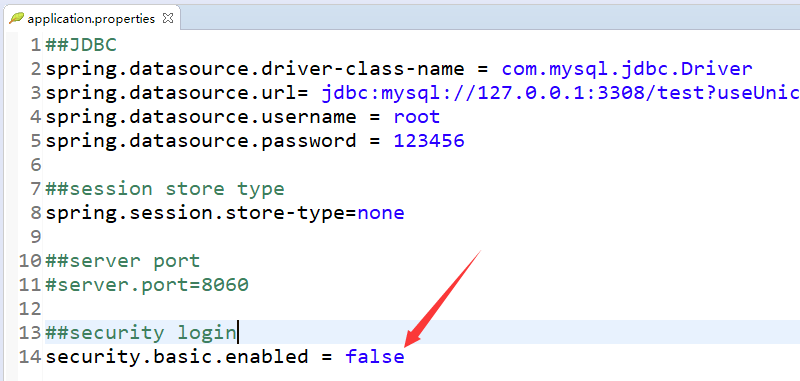
这里是默认,为了验证demo,暂时将这个通过配置项关掉。
8.最终效果
9.此时的application.properties
 1 ##JDBC
 2 spring.datasource.driver-class-name = com.mysql.jdbc.Driver
 3 spring.datasource.url= jdbc:mysql://127.0.0.1:3308/test?useUnicode=yes&characterEncoding=UTF-8&useSSL=false
 4 spring.datasource.username = root
 5 spring.datasource.password = 123456
 6
 7 ##session store type
 8 spring.session.store-type=none
 9
10 ##server port
11 #server.port=8060
12
13 ##security login
14 security.basic.enabled = false
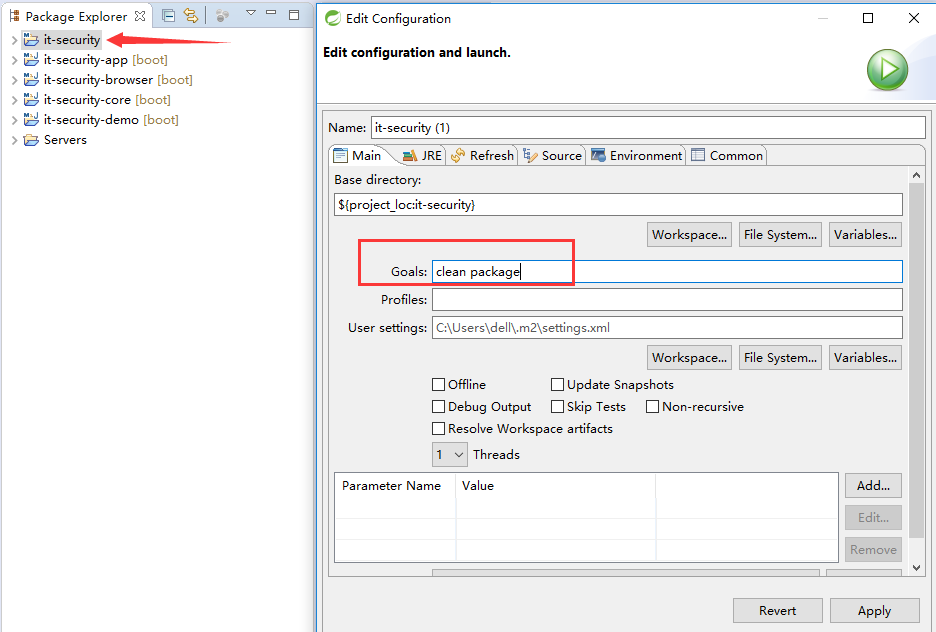
二:打包
1.在父项目上构建
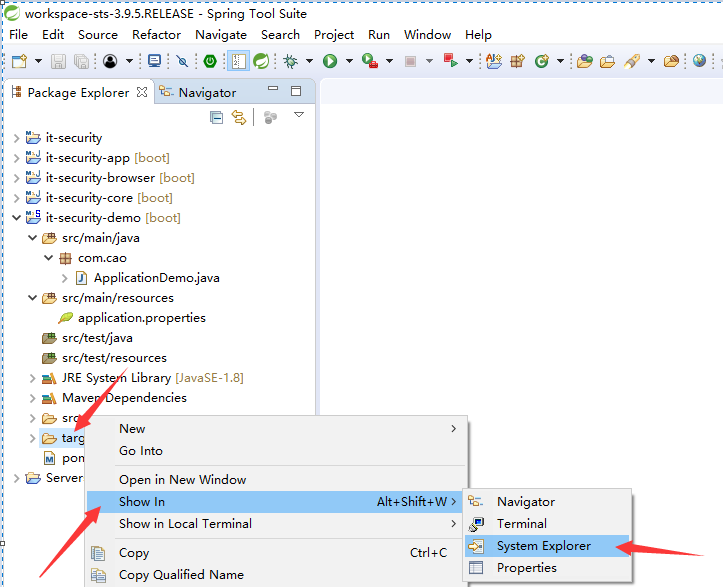
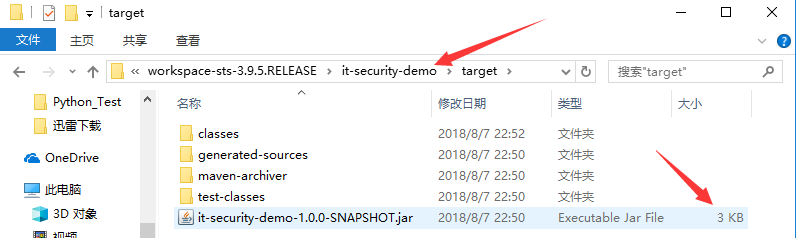
2.观看每个target
可以发现,这个打包不能提供web服务,因为包太小。
-----------------------------------------------------------------------
3.如何打一个可以执行的包呢
在demo模块中加一段build配置。
 1 <project xmlns="http://maven.apache.org/POM/4.0.0" xmlns:xsi="http://www.w3.org/2001/XMLSchema-instance" xsi:schemaLocation="http://maven.apache.org/POM/4.0.0 http://maven.apache.org/xsd/maven-4.0.0.xsd">
 2   <modelVersion>4.0.0</modelVersion>
 3   <artifactId>it-security-demo</artifactId>
 4   <parent>
 5       <groupId>com.jun.security</groupId>
 6       <artifactId>it-security</artifactId>
 7       <version>1.0.0-SNAPSHOT</version>
 8       <relativePath>../it-security</relativePath>
 9   </parent>
10
11   <dependencies>
12       <dependency>
13             <groupId>com.jun.security</groupId>
14             <artifactId>it-security-browser</artifactId>
15             <version>${it.security.version}</version>
16         </dependency>
17   </dependencies>
18
19   <build>
20         <plugins>
21             <plugin>
22                 <groupId>org.springframework.boot</groupId>
23                 <artifactId>spring-boot-maven-plugin</artifactId>
24                 <version>1.3.3.RELEASE</version>
25                 <executions>
26                     <execution>
27                         <goals>
28                             <goal>repackage</goal>
29                         </goals>
30                     </execution>
31                 </executions>
32             </plugin>
33         </plugins>
34         <finalName>demo</finalName>
35     </build>
36 </project>
4.重新打包
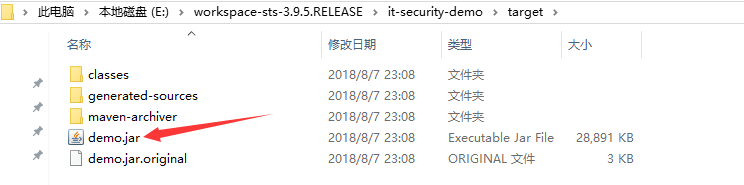
效果如下:
5.运行
在命令行运行

6.最终启动效果