配置方式
主要有四种配置方式
- Hello Spring Security Java Config
- Hello Spring Security with Boot
- Hello Spring Security Xml Config
- Hello Spring MVC Security Java Config
我根据需要,主要参考了Hello Spring Security Xml Config和Hello Spring MVC Security Java Config。
参考Hello Spring Security Xml Config
启动示例
本节概述如何在Spring Tool Suite(STS)中设置工作区,以便您可以遵循本指南。下一节将介绍如何将Spring Security应用于现有应用程序的通用步骤。虽然您可以简单地将步骤应用于现有应用程序,但我们鼓励您遵循本指南,以减少复杂性。
获取示例项目
将Spring Security Distribution解压缩到已知位置,并将其记为SPRING_SECURITY_HOME。
导入不安全的MVC示例应用程序
为了遵循,我们建议您将insecuremvc示例应用程序导入到IDE中。您可以使用任何您喜欢的IDE,但本指南中的说明将假设您正在使用Spring Tool Suite(STS)。
完整的示例应用程序可以在SPRING_SECURITY_HOME/samples/javaconfig/helloworld中找到
- 如果您没有安装STS,请从https://spring.io/tools下载STS
- 启动STS并将示例应用程序导入STS,步骤如下:
- File→Import
- Existing Maven Projects
- Click Next >
- Click Browse…
- Navigate to the samples (i.e. SPRING_SECURITY_HOME/samples/xml/insecure) and click OK
- Click Finish
运行insecuremvc应用程序
在下面的练习中,我们将修改spring-security-samples-xml-insecuremvc应用程序。在进行任何更改之前,最好验证示例是否正常工作。执行以下步骤以确保spring-security-samples-xml-insecuremvc可以正常工作。
- Right click on the spring-security-samples-xml-insecuremvc application
- Select Run As→Run on Server
- Select the latest tc Server
- Click Finish
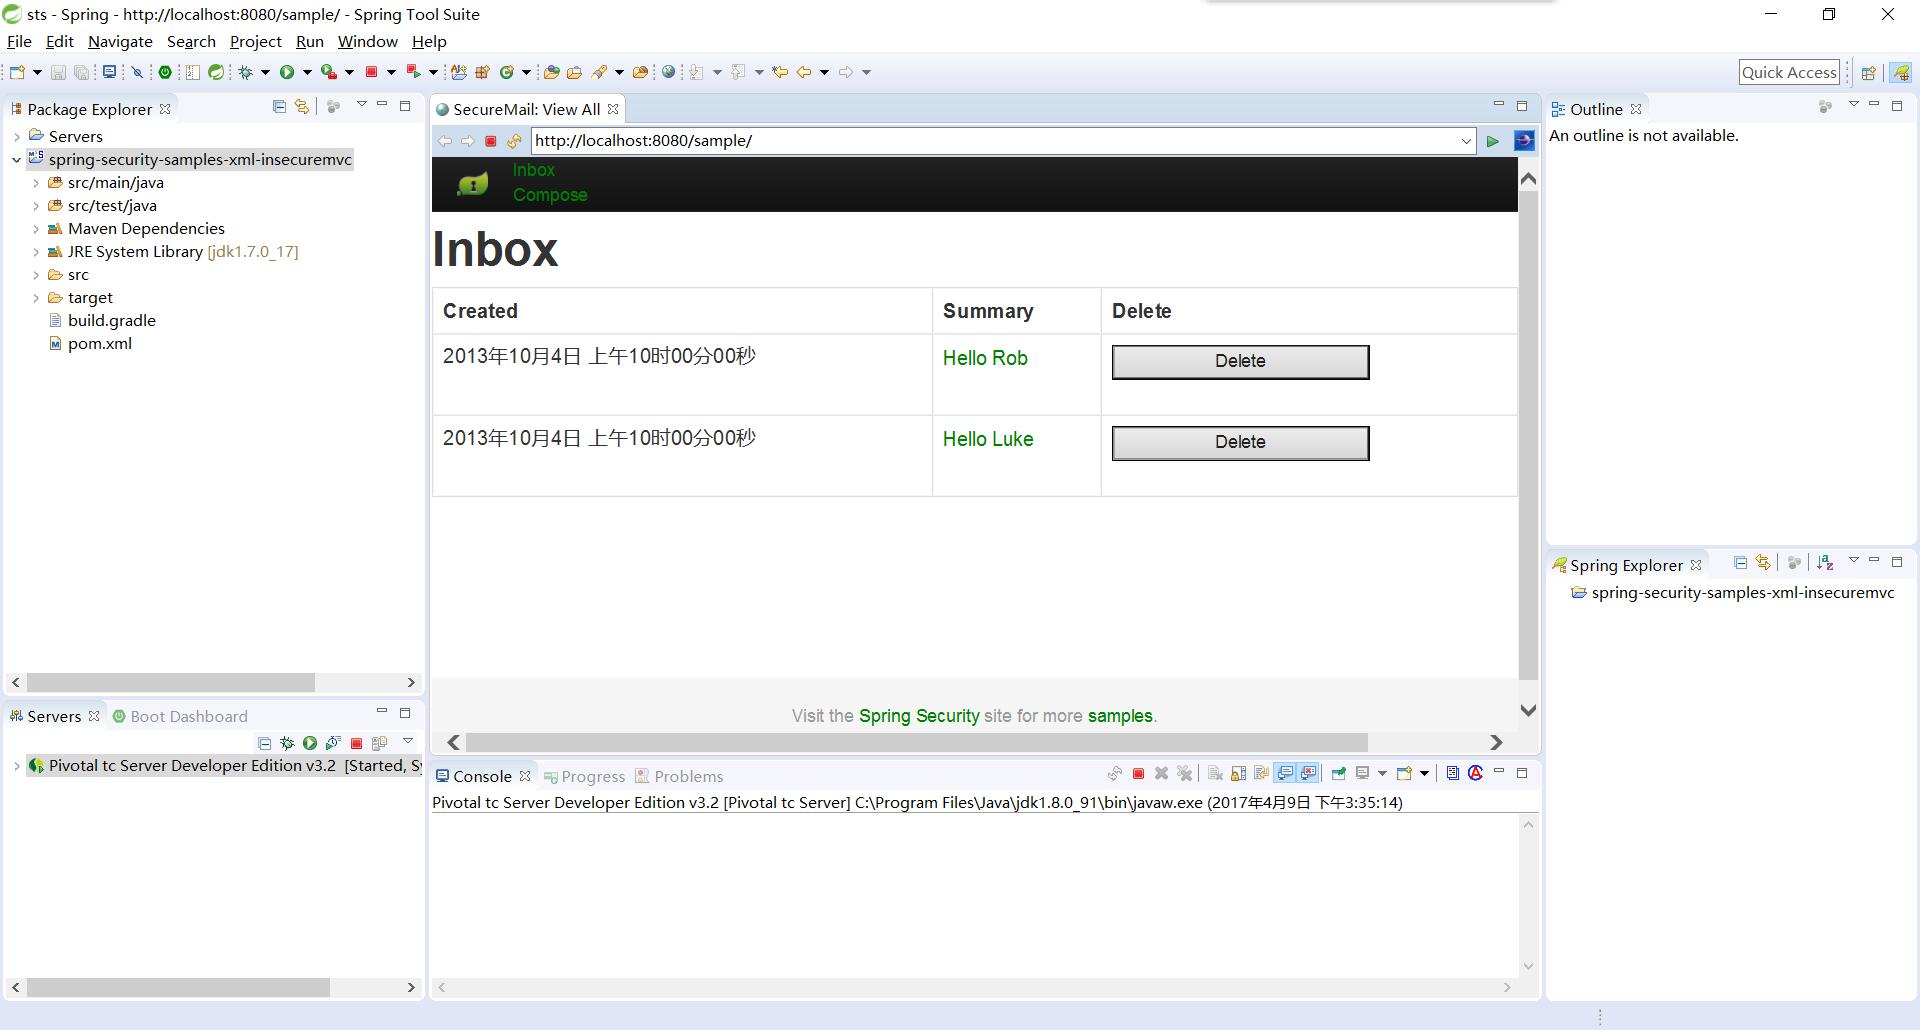
验证应用程序是否正常工作:
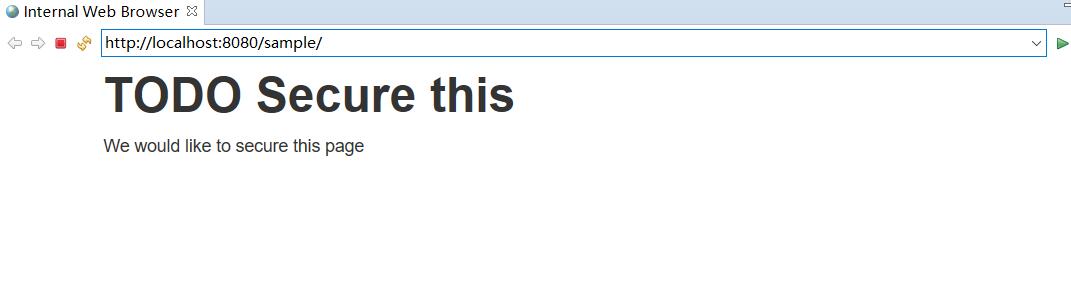
- 用户收件箱的页面可以在http//localhost8080/sample/显示TODO Secure
验证应用程序运行后,请使用以下步骤停止应用程序服务器:
- 在“服务器”视图中,选择最新的tc服务器
- 单击停止按钮(红色方块)停止应用程序服务器
保护应用程序
在保护您的应用程序之前,确保现有应用程序的工作原理与运行不安全应用程序一样重要。现在应用程序运行没有安全性,我们已经准备好向我们的应用程序添加安全性。本节演示了将Spring Security添加到我们的应用程序的最小步骤。
更新你的依赖
Spring Security GA版本包含在Maven Central中,因此不需要额外的Maven存储库。
为了使用Spring Security,您必须添加必要的依赖关系。对于示例,我们将添加以下Spring Security依赖项:
pom.xml
<dependencies>
  <!-- ... other dependency elements ... -->
  <dependency>
    <groupId>org.springframework.security</groupId>
    <artifactId>spring-security-web</artifactId>
    <version>4.2.2.RELEASE</version>
  </dependency>
  <dependency>
    <groupId>org.springframework.security</groupId>
    <artifactId>spring-security-config</artifactId>
    <version>4.2.2.RELEASE</version>
  </dependency>
</dependencies>
完成此操作后,您需要确保STS通过以下方式了解更新的依赖关系:
- Right click on the spring-security-samples-xml-insecuremvc application
- Select Maven→Update project…
- Ensure the project is selected, and click OK
创建您的Spring Security配置
下一步是创建一个Spring Security配置
- In the Package Explorer view, right click on the folder src/main/webapp
- Select New→Folder
- Enter WEB-INF/spring for the Folder name
- Then right click on the new folder WEB-INF/spring
- Select New→File
- Enter security.xml for the File name
- Click Finish
- Replace the contents of the file with the following:
src/main/webapp/WEB-INF/spring/security.xml
<b:beans xmlns="http://www.springframework.org/schema/security"
         xmlns:b="http://www.springframework.org/schema/beans"
         xmlns:xsi="http://www.w3.org/2001/XMLSchema-instance"
         xsi:schemaLocation="http://www.springframework.org/schema/beans http://www.springframework.org/schema/beans/spring-beans.xsd
                        http://www.springframework.org/schema/security http://www.springframework.org/schema/security/spring-security.xsd">

    <http />

    <user-service>
        <user name="user" password="password" authorities="ROLE_USER" />
    </user-service>

</b:beans>
security-config-xml将:
- 需要验证您的应用程序中的每个URL
- 为您生成登录表单
- 允许具有用户名user和密码password的用户使用基于表单的身份验证进行身份验证
- 允许用户注销
- 预防CSRF攻击
- 会话固定保护
- 安全头集成
- HTTP严格传输安全性用于安全请求
- X-Content-Type-Options集成
- 缓存控制(可以稍后被应用程序覆盖以允许缓存静态资源)
- X-XSS保护集成
- X-Frame-Options集成以帮助防止 Clickjacking
- 与以下Servlet API方法集成
- HttpServletRequest#getRemoteUser()
- HttpServletRequest.html#getUserPrincipal()
- HttpServletRequest.html#isUserInRole(java.lang.String)
- HttpServletRequest.html#login(java.lang.String, java.lang.String)
- HttpServletRequest.html#logout()
在war中注册Spring Security
我们创建了Spring Security配置,但是我们仍然需要在war中注册它。这可以通过以下步骤完成:
- In the Package Explorer view, right click on the folder src/main/webapp/WEB-INF
- Select New→File
- Enter web.xml for the File name
- Click Finish
- Replace the contents of the file with the following:
web.xml将执行以下操作:
- 为应用程序中的每个URL注册springSecurityFilterChain过滤器
- 添加加载security-config-xml的ContextLoaderListener
探索安全的应用程序
启动服务器,就像我们在运行insecuremvc应用程序一样当您访问http//localhost:8080/sample/时,将出现Spring Security自动生成的登录页面。
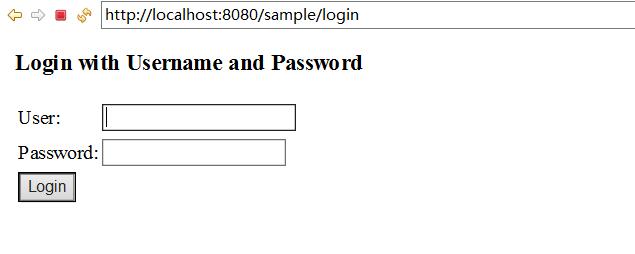
验证安全应用程序
尝试输入无效的用户名和密码:
- Username invalid
- Password invalid
您应该看到一条错误消息,指出身份验证失败。现在尝试输入有效的用户名和密码:
- Username user
- Password password
您现在应该看到我们想要保护的页面。
我们可以使用用户名用户和密码密码成功验证的原因是因为这是我们在security-config-xml中配置的。
显示用户名
现在我们已经通过身份验证,我们来更新应用程序来显示用户名。将index.jsp的body更新为以下内容:
src/main/webapp/index.jsp
<body>
  <div class="container">
    <h1>This is secured!</h1>
    <p>
      Hello <b><c:out value="${pageContext.request.remoteUser}"/></b>
    </p>
  </div>
</body>
标签确保用户名被转义以避免XSS漏洞无论应用程序如何呈现用户输入的值,应该确保正确地转义值。
刷新http://localhost:8080/sample/的页面,您将看到显示的用户名。这是因为Spring Security与Servlet API方法集成。
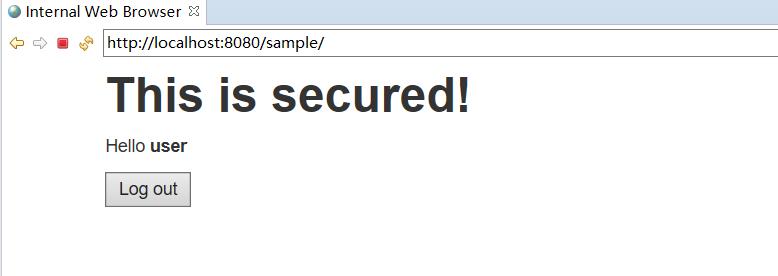
注销
现在我们可以查看用户名,让我们更新应用程序以允许注销。更新index.jsp的主体以包含一个注销表单,如下所示:
src/main/webapp/index.jsp
<body>
  <div class="container">
    <h1>This is secured!</h1>
    <p>
      Hello <b><c:out value="${pageContext.request.remoteUser}"/></b>
    </p>
    <c:url var="logoutUrl" value="/logout"/>
    <form class="form-inline" action="${logoutUrl}" method="post">
      <input type="submit" value="Log out" />
      <input type="hidden" name="${_csrf.parameterName}" value="${_csrf.token}"/>
    </form>
  </div>
</body>
为了帮助防范CSRF攻击,默认情况下,Spring Security Java Configuration注销需要:
- HTTP方法必须是POST
- 必须将CSRF令牌添加到请求中。由于我们已经使用@EnableWebSecurity并且正在使用Thymeleaf,因此CSRF令牌会自动添加为您的隐藏输入(查看源代码)。
如果您使用Spring MVC的标记库或Thymeleaf,CSRF令牌将自动添加为隐藏的输入。
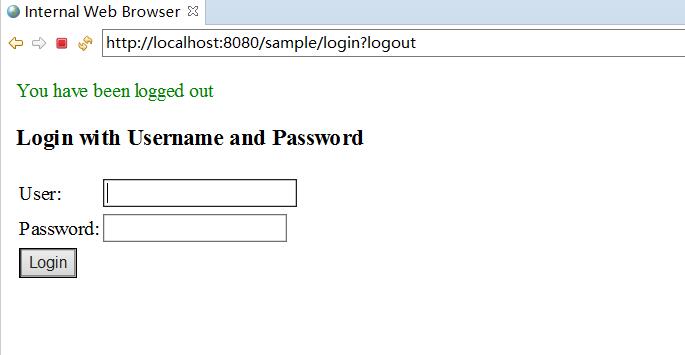
刷新页面 http://localhost:8080/sample/,您将看到注销按钮。单击注销按钮,看到应用程序成功登录。
您现在应该知道如何使用Spring Security使用XML来保护应用程序。
参考Hello Spring MVC Security Java Config
完整的示例应用程序可以在SPRING_SECURITY_HOME/samples/javaconfig/hellomvc中找到
- 如果您没有安装STS,请从https://spring.io/tools下载STS
运行insecuremvc应用程序
在下面的练习中,我们将修改spring-security-samples-xml-insecuremvc应用程序。在进行任何更改之前,最好验证示例是否正常工作。执行以下步骤以确保spring-security-samples-xml-insecuremvc可以正常工作。
- Right click on the spring-security-samples-xml-insecuremvc application
- Select Run As→Run on Server
- Select the latest tc Server
- Click Finish
验证应用程序是否正常工作:
- 用户收件箱的页面可以在http//localhost8080/sample/显示
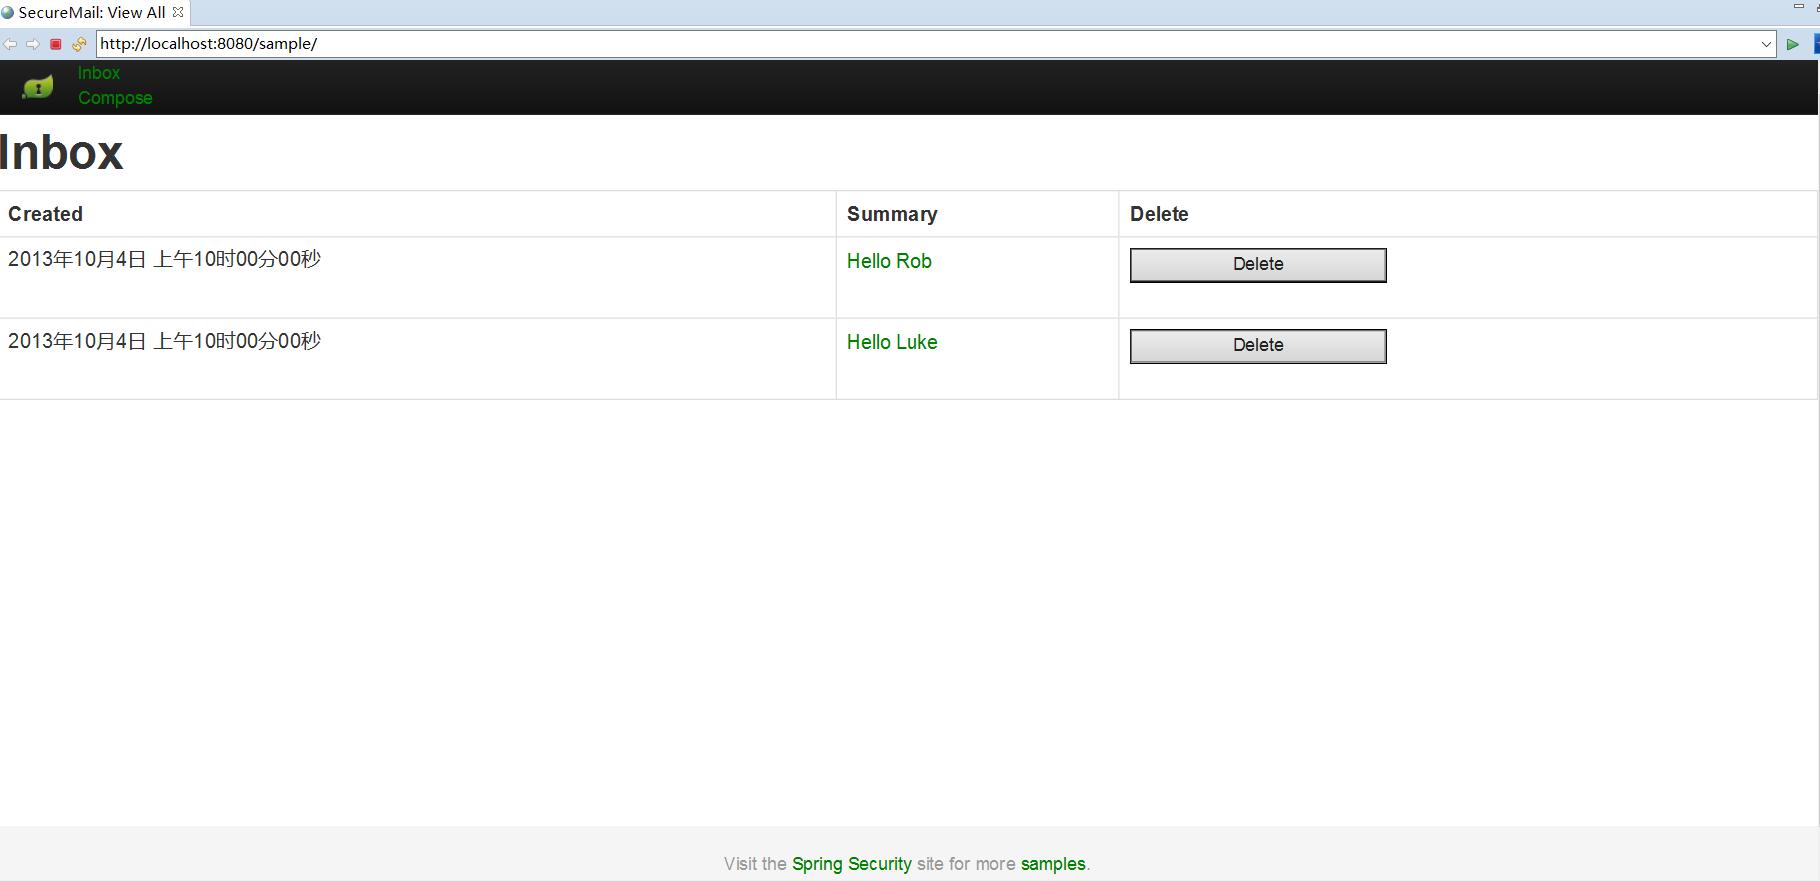
- 尝试点击撰写链接Compose并创建一条消息。应显示消息详细信息。
- 现在点击收件箱Inbox链接,看到列出的消息。您可以点击摘要链接查看再次显示的详细信息。
保护应用程序
在保护应用程序之前,确保现有应用程序的工作原理与运行insecuremvc应用程序一样重要。现在应用程序运行没有安全性,我们已经准备好向我们的应用程序添加安全性。本节演示了将Spring Security添加到我们的应用程序的最小步骤。
更新你的依赖
Spring Security GA版本包含在Maven Central中,因此不需要额外的Maven存储库。
为了使用Spring Security,您必须添加必要的依赖关系。对于示例,我们将添加以下Spring Security依赖项:
pom.xml
<dependencies>
  <!-- ... other dependency elements ... -->
  <dependency>
    <groupId>org.springframework.security</groupId>
    <artifactId>spring-security-web</artifactId>
    <version>4.2.2.RELEASE</version>
  </dependency>
  <dependency>
    <groupId>org.springframework.security</groupId>
    <artifactId>spring-security-config</artifactId>
    <version>4.2.2.RELEASE</version>
  </dependency>
</dependencies>
完成此操作后,您需要确保STS通过以下方式了解更新的依赖关系:
- Right click on the spring-security-samples-xml-insecuremvc application
- Select Maven→Update project…
- Ensure the project is selected, and click OK
创建您的Spring Security配置
下一步是创建一个Spring Security配置
- Right click the spring-security-samples-xml-insecuremvc project in the Package Explorer view
- Select New→Class
- Enter org.springframework.security.samples.config for the Package
- Enter SecurityConfig for the Name
- Click Finish
- Replace the file with the following contents:
src/main/java/org/springframework/security/samples/config/SecurityConfig.java
package org.springframework.security.samples.config;

import org.springframework.beans.factory.annotation.Autowired;
import org.springframework.security.config.annotation.authentication.builders.AuthenticationManagerBuilder;
import org.springframework.security.config.annotation.web.configuration.*;

@EnableWebSecurity
public class SecurityConfig {

    @Autowired
    public void configureGlobal(AuthenticationManagerBuilder auth) throws Exception {
        auth
            .inMemoryAuthentication()
                .withUser("user").password("password").roles("USER");
    }
}
configureGlobal方法的名称并不重要。但是,只能在使用@EnableWebSecurity,@EnableGlobalMethodSecurity或@EnableGlobalAuthentication注释的类中配置AuthenticationManagerBuilder很重要。否则有不可预知的结果。
SecurityConfig将:
- 需要验证您的应用程序中的每个URL
- 为您生成登录表单
- 允许具有用户名user和密码password的用户使用基于表单的身份验证进行身份验证
- 允许用户注销
- 预防CSRF攻击
- 会话固定保护
- 安全头集成
- HTTP严格传输安全性用于安全请求
- X-Content-Type-Options集成
- 缓存控制(可以稍后被应用程序覆盖以允许缓存静态资源)
- X-XSS保护集成
- X-Frame-Options集成以帮助防止 Clickjacking
- 与以下Servlet API方法集成
- HttpServletRequest#getRemoteUser()
- HttpServletRequest.html#getUserPrincipal()
- HttpServletRequest.html#isUserInRole(java.lang.String)
- HttpServletRequest.html#login(java.lang.String, java.lang.String)
- HttpServletRequest.html#logout()
在war中注册Spring Security
我们创建了Spring Security配置,但是我们仍然需要在war中注册它。这可以通过以下步骤完成:
- Right click the spring-security-samples-xml-insecuremvc project the Package Explorer view
- Select New→Class
- Enter org.springframework.security.samples.config for the Package
- Enter MessageSecurityWebApplicationInitializer for the Name
- Click Finish
- Replace the file with the following contents:
src/main/java/org/springframework/security/samples/config/MessageSecurityWebApplicationInitializer.java
package org.springframework.security.samples.config;

import org.springframework.security.web.context.*;

public class MessageSecurityWebApplicationInitializer
      extends AbstractSecurityWebApplicationInitializer {
}
MessageSecurityWebApplicationInitializer将自动为应用程序中的每个URL注册springSecurityFilterChain Filter。如果在其他WebApplicationInitializer实例中添加过滤器,我们可以使用@Order来控制Filter实例的排序。
验证SecurityConfig已加载
只是因为SecurityConfig存在,并不意味着我们的Spring应用程序知道它。在这种情况下,我们的Spring根应用程序上下文使用我们的spring-security-samples-javaconfig-messages项目中包含的MessageWebApplicationInitializer进行初始化。您可以在下面找到一个代码段:
MessageWebApplicationInitializer.java
public class MessageWebApplicationInitializer extends
        AbstractAnnotationConfigDispatcherServletInitializer {

    @Override
    protected Class<?>[] getRootConfigClasses() {
        return new Class[] { RootConfiguration.class };
    }

    // ... other overrides ...
}
您将注意到它正在加载也包含在我们的spring-security-samples-javaconfig-messages项目中的RootConfiguration类。
RootConfiguration.java
@Configuration
@ComponentScan
public class RootConfiguration {
}
@ComponentScan正在加载与RootConfiguration相同的包(和子包)中的所有配置。由于SecurityConfig是在这个包中,它将加载我们现有的设置,没有什么可做的。
如果没有加载SecurityConfig,我们可以在RootConfiguration的类定义之上使用@Import(SecurityConfig.class),或者将SecurityConfig添加为getRootConfigClasses()的结果之一。
探索安全的应用程序
启动服务器,就像我们在运行insecuremvc应用程序一样当您访问http//localhost:8080/sample/时,将出现Spring Security自动生成的登录页面。
验证安全应用程序
尝试输入无效的用户名和密码:
- Username invalid
- Password invalid
您应该看到一条错误消息,指出身份验证失败。现在尝试输入有效的用户名和密码:
- Username user
- Password password
您现在应该看到我们想要保护的页面。
我们可以使用用户名用户和密码密码成功验证的原因是因为这是我们在SecurityConfig中配置的。
显示用户名
现在我们已经通过身份验证,如果用户进行了身份验证,我们来看看我们的应用程序如何显示用户名。
messages/src/main/resources/views/layout.html
<div th:if="${#httpServletRequest.remoteUser != null}">
    <p th:text="${#httpServletRequest.remoteUser}">
      sample_user
    </p>
</div>
在我们的示例工程中,我们使用Thymeleaf,但任何视图技术都可以正常工作。任何技术都可以检查HttpServletRequest#getRemoteUser()来查看当前用户,因为Spring Security与Servlet API方法集成在一起。
Thymeleaf确保用户名被转义以避免XSS漏洞无论应用程序如何呈现用户输入的值,它应该确保值被正确地转义。
注销
我们可以查看用户名,但是我们如何注销?下面你可以看到我们如何注销。
messages/src/main/resources/views/layout.html
<form th:action="@{/logout}" method="post">
    <input type="submit" value="Log out" />
</form>
为了帮助防范CSRF攻击,默认情况下,Spring Security Java Configuration注销需要:
- HTTP方法必须是POST
- 必须将CSRF令牌添加到请求中。由于我们已经使用@EnableWebSecurity并且正在使用Thymeleaf,因此CSRF令牌会自动添加为您的隐藏输入(查看源代码)。
如果您不使用Spring MVC taglib或Thymeleaf,则可以使用属性_csrf访问ServletRequest上的CsrfToken。您可以在Hello Spring Security Java Config中找到将CSRF令牌包含在JSP中的示例。
重新启动应用程序服务器,然后单击注销按钮,看到应用程序成功登录。
恭喜,您现在应该知道如何使用Spring Security保护您的应用程序,而不使用任何XML了。