目录描述
自动生成目录索引
文章开头加入
@[TOC](目录描述)
插入代码片
cmd/ctrl + shift + k
一、导读
Spring Security 从名字就可以知道是一种关于安全的技术
安全是一个很广泛的技术,我们主要聚焦于认证和授权。
认证和授权最终的表现形式就是一个登录的功能。
写这个系列的博客主要是记录一下如何一步一步实现企业级的认证授权。(基于maven+spring boot)
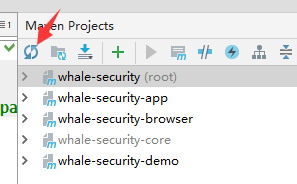
二、代码结构
whale-security :主模块,这个模块里面没有特定的代码,它的作用是作为父模块把下面四个模块统一起来,可以针对下面四个模块统一地执行maven命令以及打包,测试等
whale-security-core:核心业务逻辑(表单登录,手机验证码登录,第三方登录)
whale-security-browser:浏览器安全特定代码(需要供其他项目使用)
whale-security-app:app安全特定代码(需要供其他项目使用)
whale-security-demo:样例程序(演示如何使用上面两个模块)
三、创建项目
好多人都推荐使用sts写代码,它是spring提供的基于eclipse和之上的开发工具
http://spring.io/tools3/sts/all
不过我还是用idea,因为我目前项目都用这个,方便大家交流
maven项目的建立
父模块的建立


接下来删掉src目录

第一个子模块的建立


直接下一步


完成后,父模块和当前子模块的pom文件如下


依次建立其他三个子模块
完成后 刷新maven配置
pom配置
主模块pom配置
引入Spring IO Platform的配置
https://docs.spring.io/platform/docs/Cairo-SR6/reference/htmlsingle/
它的作用是为了控制maven中的依赖版本
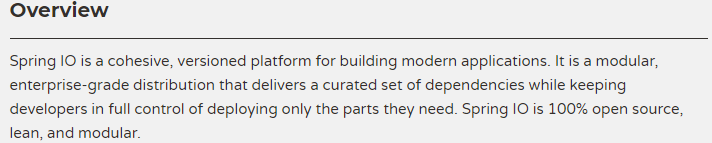
Spring IO是用于构建现代应用程序的内聚的、版本化的平台。它是一个模块化的企业级发行版,交付了一组精心策划的依赖项,同时让开发人员完全控制只部署他们需要的部分。Spring IO是100%开源、精益和模块化的。
  <dependencyManagement>
        <dependencies>
            <dependency>
                <groupId>io.spring.platform</groupId>
                <artifactId>platform-bom</artifactId>
                <version>Cairo-SR6</version>
                <type>pom</type>
                <scope>import</scope>
            </dependency>
        </dependencies>
    </dependencyManagement>
引入spring cloud
http://spring.io/projects/spring-cloud#learn

https://cloud.spring.io/spring-cloud-static/Finchley.SR2/single/spring-cloud.html#_quick_start
<dependencyManagement>
	<dependencies>
		<dependency>
			<groupId>org.springframework.cloud</groupId>
			<artifactId>spring-cloud-dependencies</artifactId>
			<version>{spring-cloud-version}</version>
			<type>pom</type>
			<scope>import</scope>
		</dependency>
	</dependencies>
</dependencyManagement>
whale-security-core的配置
<dependencies>
        <!-- https://mvnrepository.com/artifact/org.springframework.cloud/spring-cloud-starter-oauth2 -->
        <dependency>
            <groupId>org.springframework.cloud</groupId>
            <artifactId>spring-cloud-starter-oauth2</artifactId>
            <!--<version>2.0.1.RELEASE</version>-->
        </dependency>

        <!-- https://mvnrepository.com/artifact/org.springframework.boot/spring-boot-starter-data-redis -->
        <dependency>
            <groupId>org.springframework.boot</groupId>
            <artifactId>spring-boot-starter-data-redis</artifactId>
            <!--<version>1.5.9.RELEASE</version>-->
        </dependency>
        <!-- https://mvnrepository.com/artifact/org.springframework.boot/spring-boot-starter-jdbc -->
        <dependency>
            <groupId>org.springframework.boot</groupId>
            <artifactId>spring-boot-starter-jdbc</artifactId>
            <!--<version>2.1.1.RELEASE</version>-->
        </dependency>

        <!-- https://mvnrepository.com/artifact/mysql/mysql-connector-java -->
        <dependency>
            <groupId>mysql</groupId>
            <artifactId>mysql-connector-java</artifactId>
            <!--<version>8.0.13</version>-->
        </dependency>

        <!-- https://mvnrepository.com/artifact/org.springframework.social/spring-social-web -->
        <!--https://mvnrepository.com/artifact/org.springframework.social-->
        <dependency>
            <groupId>org.springframework.social</groupId>
            <artifactId>spring-social-web</artifactId>
            <!--<version>1.1.6.RELEASE</version>-->
        </dependency>

        <!-- https://mvnrepository.com/artifact/org.springframework.social/spring-social-config -->
        <dependency>
            <groupId>org.springframework.social</groupId>
            <artifactId>spring-social-config</artifactId>
            <!--<version>1.1.6.RELEASE</version>-->
        </dependency>

        <!-- https://mvnrepository.com/artifact/org.springframework.social/spring-social-core -->
        <dependency>
            <groupId>org.springframework.social</groupId>
            <artifactId>spring-social-core</artifactId>
            <!--<version>1.1.6.RELEASE</version>-->
        </dependency>

        <!-- https://mvnrepository.com/artifact/org.springframework.social/spring-social-security -->
        <dependency>
            <groupId>org.springframework.social</groupId>
            <artifactId>spring-social-security</artifactId>
            <!--<version>1.1.6.RELEASE</version>-->
        </dependency>

        <!-- https://mvnrepository.com/artifact/commons-beanutils/commons-beanutils -->
        <dependency>
            <groupId>commons-beanutils</groupId>
            <artifactId>commons-beanutils</artifactId>
            <!--<version>1.9.3</version>-->
        </dependency>

        <!-- https://mvnrepository.com/artifact/org.apache.commons/commons-collections4 -->
        <!--<dependency>
            <groupId>org.apache.commons</groupId>
            <artifactId>commons-collections4</artifactId>
            <version>4.2</version>
        </dependency>-->

        <!-- https://mvnrepository.com/artifact/commons-collections/commons-collections -->
        <dependency>
            <groupId>commons-collections</groupId>
            <artifactId>commons-collections</artifactId>
            <!--<version>3.2.2</version>-->
        </dependency>


        <!--https://mvnrepository.com/artifact/org.apache.commons-->
        <!-- https://mvnrepository.com/artifact/org.apache.commons/commons-lang3 -->
        <dependency>
            <groupId>org.apache.commons</groupId>
            <artifactId>commons-lang3</artifactId>
            <!--<version>3.8.1</version>-->
        </dependency>
    </dependencies>
whale-security-app的配置
因为依赖已经在core中配置好了
直接把core引进来就ok了
 <dependencies>
        <dependency>
            <groupId>com.whale.security</groupId>
            <artifactId>whale-security-core</artifactId>
            <version>1.0.0-SNAPSHOT</version>
        </dependency>
    </dependencies>
因为 我们在browser的模块中也会引入core依赖
所以我们把version 声明成一个变量,这样当version变化时我们只需要修改一处就可以了
在主模块中定义
	<!--maven全局变量的定义-->
    <properties>
         <whale.security.version>1.0.0-SNAPSHOT</whale.security.version>
    </properties>
依赖如下
 <dependencies>
        <dependency>
            <groupId>com.whale.security</groupId>
            <artifactId>whale-security-core</artifactId>
            <version>${whale.security.version}</version>
        </dependency>
    </dependencies>
whale-security-browser 的配置
同样引入core
其次还需要引入session
		<!-- https://mvnrepository.com/artifact/org.springframework.session/spring-session -->
        <dependency>
            <groupId>org.springframework.session</groupId>
            <artifactId>spring-session</artifactId>
            <version>1.3.5.RELEASE</version>
            <!--这个要写版本号,也不知道为什么Spring IO Platform么有对他进行版本控制-->
        </dependency>
whale-security-demo的配置
我们先从浏览器开始测试
只需引入
    <dependencies>
        <dependency>
            <groupId>com.whale.security</groupId>
            <artifactId>whale-security-browser</artifactId>
            <version>${whale.security.version}</version>
        </dependency>
    </dependencies>
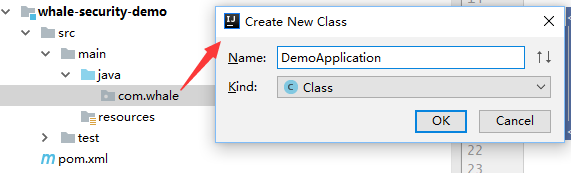
启动
创建包和启动类DemoApplication
package com.whale;

import org.springframework.boot.SpringApplication;
import org.springframework.boot.autoconfigure.SpringBootApplication;
import org.springframework.web.bind.annotation.GetMapping;
import org.springframework.web.bind.annotation.RestController;

/**
 * @author ljy
 * @version V1.0
 * @Package com.whale
 * @Description:
 * @date 2019/1/12 23:39
 */


@RestController
@SpringBootApplication  //这是一个SpringBoot项目
public class DemoApplication {

    public static void main(String[] args) {
        SpringApplication.run(DemoApplication.class, args);//SpringBoot标准启动方式
    }

    @GetMapping("/hello")
    public String hello() {
        return "hello spring secruity";
    }
}
运行 DemoApplication 类
启动错误与解决
第一次启动错误,没有配置spring session 的存储,集群的session管理

或者

解决
创建 application.properties
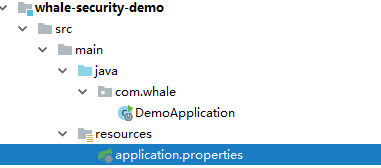
spring.session.store-type=none
第二次启动错误Reason: Failed to determine a suitable driver class(有jdbc但没有配置数据库连接)

解决
application.properties加数据库配置
#spring.datasource.driver-class-name = com.mysql.cj.jdbc.Driver
spring.datasource.driver-class-name = com.mysql.jdbc.Driver
spring.datasource.url = jdbc:mysql://127.0.0.1:3306/test?useUnicode=true&characterEncoding=utf8&serverTimezone=GMT
spring.datasource.username = root
spring.datasource.password = 12345678
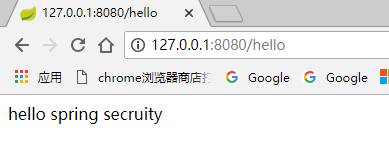
第三次启动成功及登录问题

浏览器访问 http://127.0.0.1:8080/hello
重定向到 http://127.0.0.1:8080/login

这是spring secruity 在 spring boot 中的默认配置
我们先把它关掉
在application.properties中配置

SpringBoot开发中关闭Security安全策略报错:Deprecated: The security auto-configuration is no longer customizable
这是因为在SpringBoot2.0版本后安全配置将不再是可定制的
解决办法:
在启动类上或者任意@Configure配置类上,移除默认自动启动的安全策略
@EnableAutoConfiguration(exclude = {
org.springframework.boot.autoconfigure.security.servlet.SecurityAutoConfiguration.class
})

第四次启动成功访问hello spring security
打包发布


可以看出他在每个module下生成一个target目录,这个目录下都有一个jar包
jar包很小只有3kb
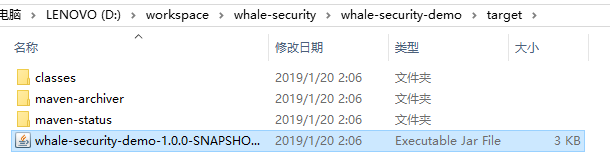
可见我们很多第三方的jar包都没有打进来
如何生成一个可执行的jar包呢,我们需要依赖一个插件
spring-boot-maven-plugin
配置whale-security-demo的pom文件加入此插件
  <build>
        <plugins>
            <plugin>
                <groupId>org.springframework.boot</groupId>
                <artifactId>spring-boot-maven-plugin</artifactId>
                <version>2.0.1.RELEASE</version>
                <executions>
                    <execution>
                        <goals>
                            <goal>repackage</goal>
                        </goals>
                    </execution>
                </executions>
            </plugin>
        </plugins>
        <!--<finalName>demo</finalName> jar包名字, 如果不写默认为module名称-->
    </build>
重新执行maven 命令 clean package命令
可以看出打出了两个jar包
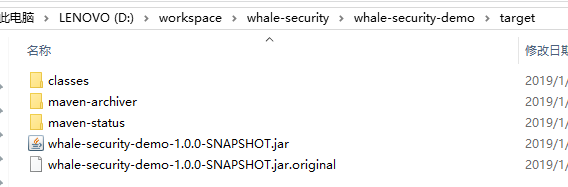
第二个是原始的jar包,依然3kb
第一个就是可执行的jar包
可以直接用java命令启动


linux下也是如此,他和idea下main函数启动的效果是一样的,在8080端口打开服务
也可以成功访问
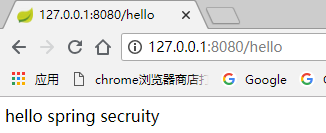
linux也是如此
spring boot 项目中tomcat 已经内嵌在打出来的jar包中