Spring Security 系列教程
一. Hello World
Spring Security,是Spring提供的权限控制框架,配合Spring Boot,通过简单的配置,就可以实现强大的功能。本次教程,是Spring Security 系列教程的开端,将实现一个spring security的 “hello world”。
本次教程,将使用到以下的框架:
- Spring Boot
- Spring Security
- Spring MVC
- maven
首先,自然是构建基础框架。
- 引入maven依赖
<project xmlns="http://maven.apache.org/POM/4.0.0" xmlns:xsi="http://www.w3.org/2001/XMLSchema-instance"
         xsi:schemaLocation="http://maven.apache.org/POM/4.0.0 http://maven.apache.org/xsd/maven-4.0.0.xsd">
    <modelVersion>4.0.0</modelVersion>

    <groupId>me.learningai</groupId>
    <artifactId>spring-security-sample</artifactId>
    <version>1.0-SNAPSHOT</version>
    <modules>
        <module>hello-world</module>
    </modules>
    <packaging>pom</packaging>

    <name>spring-security-sample</name>
    <url>http://maven.apache.org</url>

    <parent>
        <groupId>org.springframework.boot</groupId>
        <artifactId>spring-boot-starter-parent</artifactId>
        <version>1.5.3.RELEASE</version>
    </parent>

    <properties>
        <project.build.sourceEncoding>UTF-8</project.build.sourceEncoding>
        <java.version>1.8</java.version>
    </properties>

    <dependencies>
        <dependency>
            <groupId>org.springframework.boot</groupId>
            <artifactId>spring-boot-starter-web</artifactId>
        </dependency>
        <dependency>
            <groupId>org.springframework.boot</groupId>
            <artifactId>spring-boot-starter</artifactId>
            <exclusions>
                <exclusion>
                    <groupId>org.springframework.boot</groupId>
                    <artifactId>spring-boot-starter-logging</artifactId>
                </exclusion>
            </exclusions>
        </dependency>
        <dependency>
            <groupId>org.springframework.boot</groupId>
            <artifactId>spring-boot-starter-log4j2</artifactId>
        </dependency>

        <!-- security -->
        <dependency>
            <groupId>org.springframework.security</groupId>
            <artifactId>spring-security-web</artifactId>
        </dependency>
        <dependency>
            <groupId>org.springframework.security</groupId>
            <artifactId>spring-security-config</artifactId>
        </dependency>

        <!-- Test -->
        <dependency>
            <groupId>org.springframework.boot</groupId>
            <artifactId>spring-boot-starter-test</artifactId>
            <scope>test</scope>
        </dependency>
    </dependencies>
    <build>
        <plugins>
            <plugin>
                <groupId>org.springframework.boot</groupId>
                <artifactId>spring-boot-maven-plugin</artifactId>
            </plugin>
        </plugins>
    </build>
</project>- 1
- 2
- 3
- 4
- 5
- 6
- 7
- 8
- 9
- 10
- 11
- 12
- 13
- 14
- 15
- 16
- 17
- 18
- 19
- 20
- 21
- 22
- 23
- 24
- 25
- 26
- 27
- 28
- 29
- 30
- 31
- 32
- 33
- 34
- 35
- 36
- 37
- 38
- 39
- 40
- 41
- 42
- 43
- 44
- 45
- 46
- 47
- 48
- 49
- 50
- 51
- 52
- 53
- 54
- 55
- 56
- 57
- 58
- 59
- 60
- 61
- 62
- 63
- 64
- 65
- 66
- 67
- 68
- 69
- 70
- 71
- 72
- 添加Spring Boot启动类
package me.learningai;

import org.springframework.boot.SpringApplication;
import org.springframework.boot.autoconfigure.SpringBootApplication;

/**
 * Spring Boot启动类.
 * @author heyx
 */
@SpringBootApplication
public class App {
    public static void main(String[] args) {
        SpringApplication.run(App.class, args);
    }
}- 1
- 2
- 3
- 4
- 5
- 6
- 7
- 8
- 9
- 10
- 11
- 12
- 13
- 14
- 15
- 添加Spring Security配置类
package me.learningai.config;

import org.springframework.security.config.annotation.authentication.builders.AuthenticationManagerBuilder;
import org.springframework.security.config.annotation.web.builders.HttpSecurity;
import org.springframework.security.config.annotation.web.configuration.EnableWebSecurity;
import org.springframework.security.config.annotation.web.configuration.WebSecurityConfigurerAdapter;

/**
 * spring security 配置.
 * @author heyx
 */
@EnableWebSecurity
public class WebSecurityConfig extends WebSecurityConfigurerAdapter {

    @Override
    protected void configure(AuthenticationManagerBuilder auth) throws Exception {
        //设置从内存读取用户信息
        auth.inMemoryAuthentication().withUser("user").password("123456").roles("ADMIN");
    }

    @Override
    protected void configure(HttpSecurity http) throws Exception {
        http
            .authorizeRequests()
            //设置所有请求都需认证
            .anyRequest().authenticated()
            .and()
            //设置表单登陆和认证成功跳转路径
            .formLogin().defaultSuccessUrl("/hello-world");

    }

}- 1
- 2
- 3
- 4
- 5
- 6
- 7
- 8
- 9
- 10
- 11
- 12
- 13
- 14
- 15
- 16
- 17
- 18
- 19
- 20
- 21
- 22
- 23
- 24
- 25
- 26
- 27
- 28
- 29
- 30
- 31
- 32
- 33
至此,我们的项目的整体框架已经成功搭建,是不是非常简单呢?不需要各种恼人的xml配置,Spring Boot已经帮你处理好了,甚至不需要部署到web容器中,你所需要做的,仅仅是允许 main 方法即可。当然,我们还得添加controller,用以看到最终效果。
HelloWorldController
/**
 * hello world.
 *
 * @author heyx
 */
@RestController
@RequestMapping("/hello-world")
public class HelloWorldController {
    @GetMapping
    public String sayHello() {
        return "hello,world";
    }
}- 1
- 2
- 3
- 4
- 5
- 6
- 7
- 8
- 9
- 10
- 11
- 12
- 13
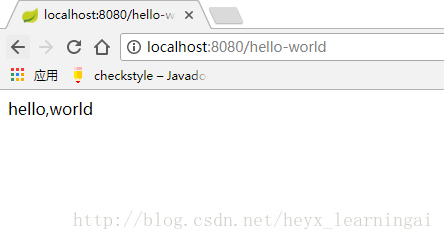
这里仅提供了一个简单rest controller,返回了一个”hello,world”的字符串。
所有工作都已经完成,我们可以来看下最终的效果了,运行App的main方法,如果在控制台看到以下输出,说明我们环境已经成功启动:

现在, “http://localhost:8080/login“,Spring 已经提供了一个简单的登陆页面实现,样式虽丑,但是功能还是齐全的:
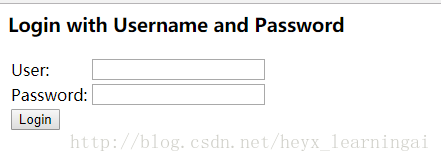
我们输入之前在代码中配置的用户名和密码(user/123456),点击登陆后,将跳转到我们配置的登陆成功页面:
这里有点需要注意的地方,我们配置的 formLogin,登陆成功后会直接跳转到登陆之前访问的页面,比如我们如果访问的是”http://localhost:8080/index“,这时因为没有登陆将跳转到登陆页面,如果我们此时登陆,成功后将会跳转到 “http://localhost:8080/index“,而不会跳转到我们配置的默认链接上(“http://localhost:8080/hello-world“)
至此,本次的 hello world 教程完结,下一篇教程,我们将简单的介绍Spring Security的核心类及其原理。
最后,附上本教程的源码:
源码