ehcache的相关包可以从以下地址下载下来:
ehcache下载地址
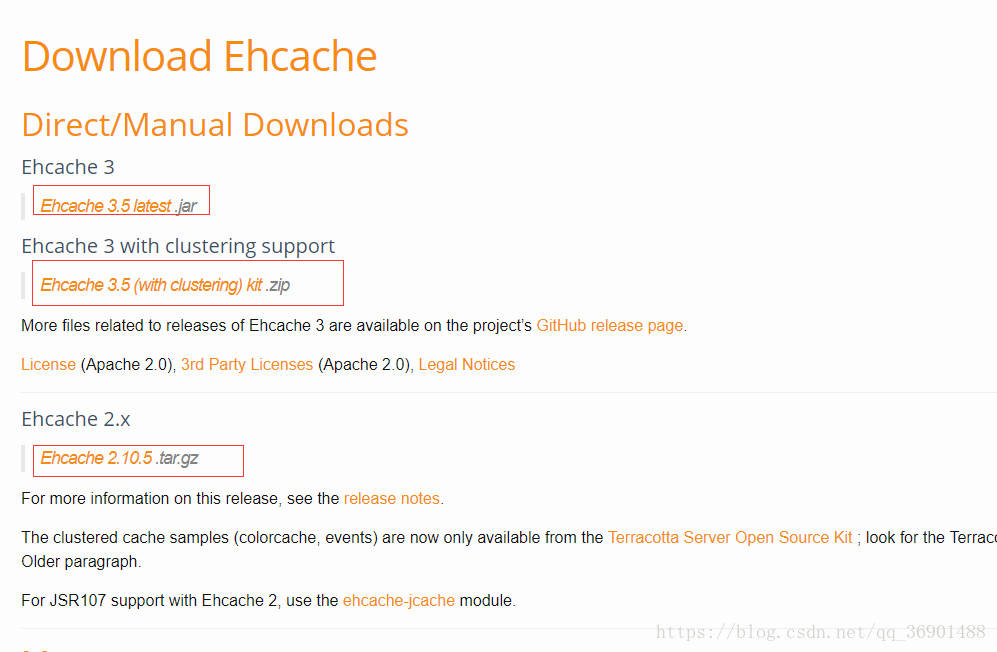
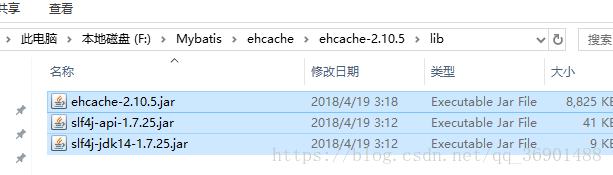
随便点一个下载下来,然后解压,lib文件夹中的就是ehcache的相关jar包
然后到GitHub中找MyBatis与ehcache的整合相关的jar包,相关jar包下载点这里
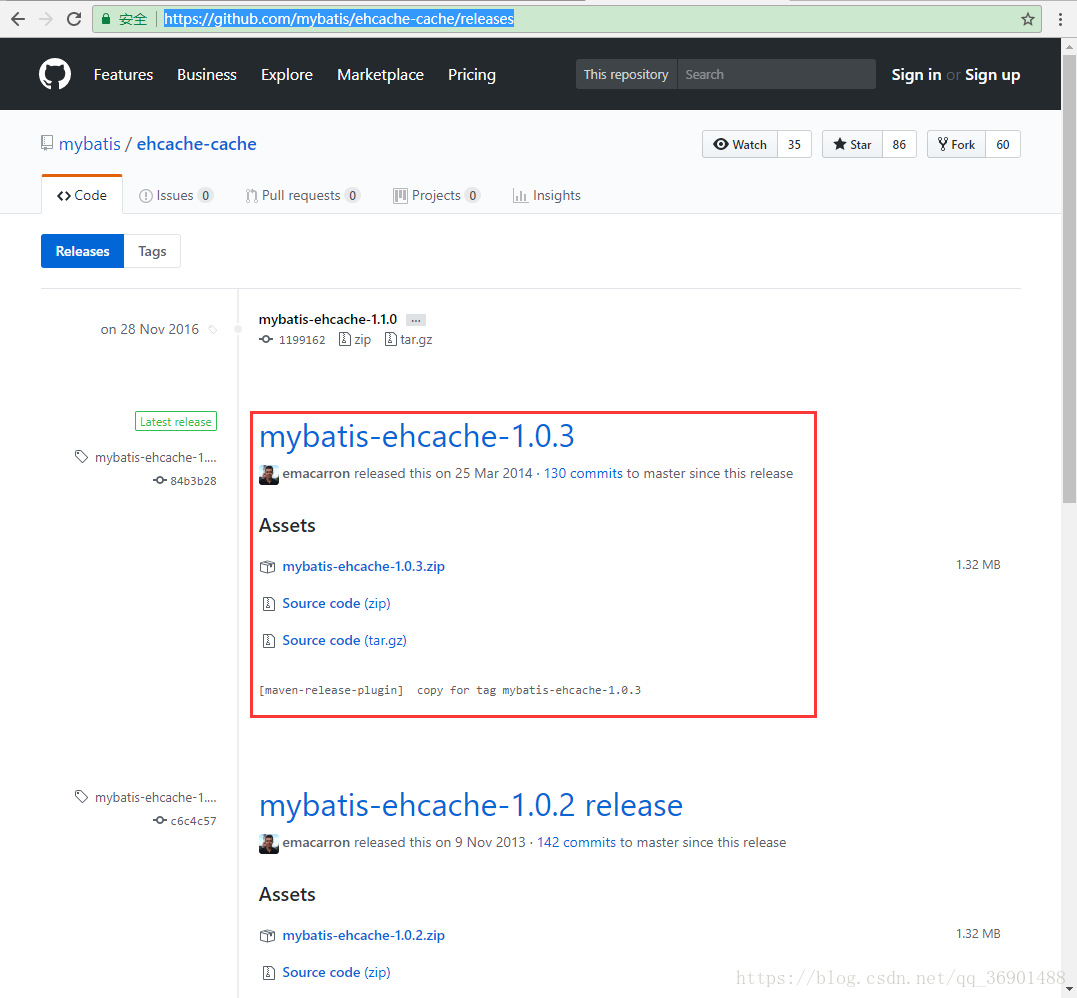
GitHub中的MyBatis地址有兴趣可以去看看
进入网址后往下拉,我们要找的是下面这个:
这个其实就是ehcache的适配器包
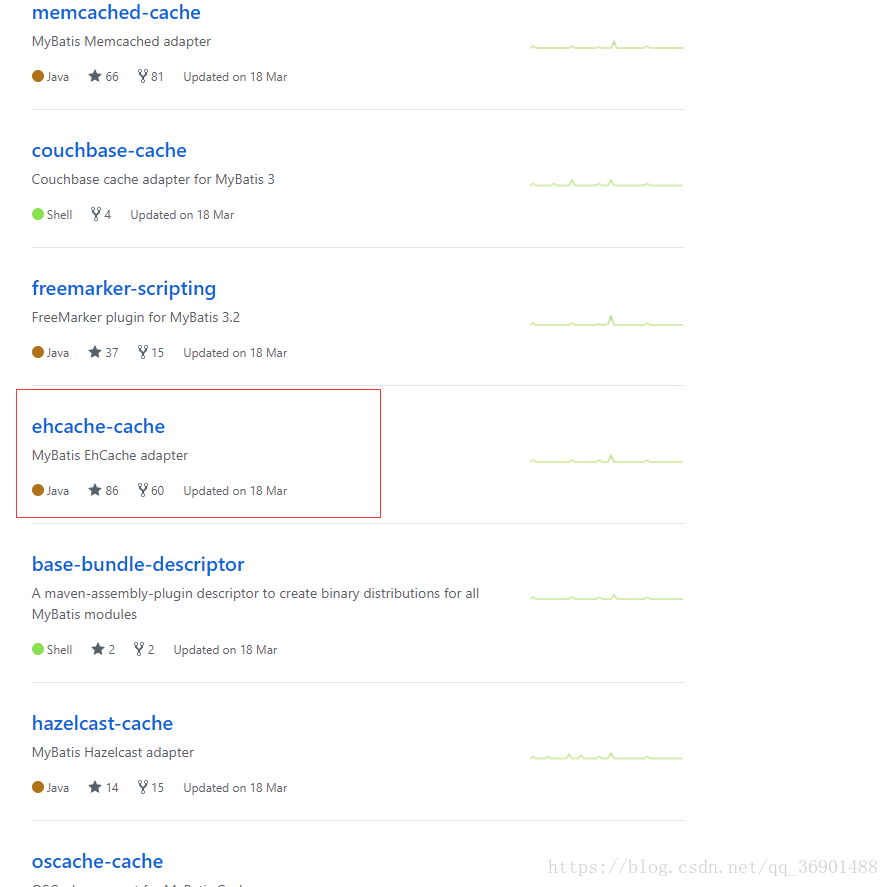
点进去往下拉

找到官方文档,点进去
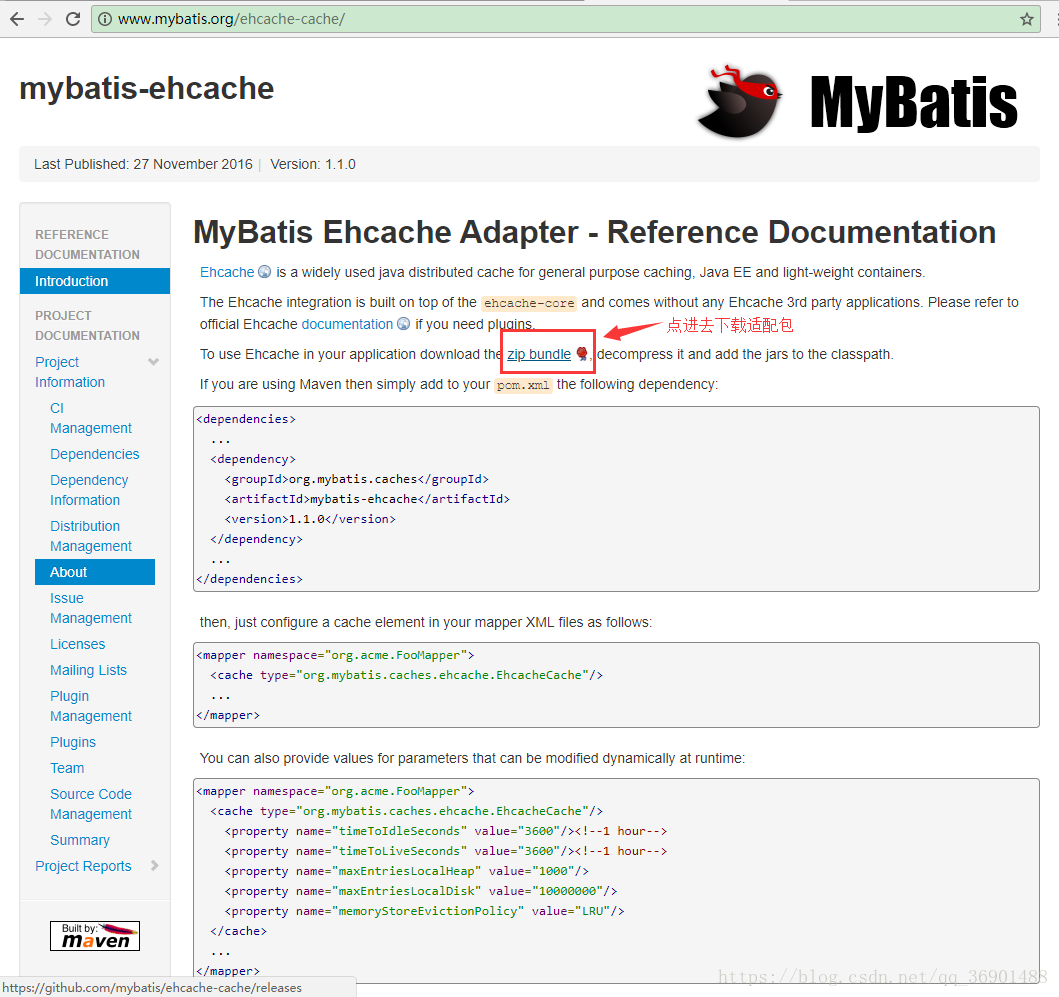
然后再按上图点进去也可以跳到下载整合相关的jar包的网址
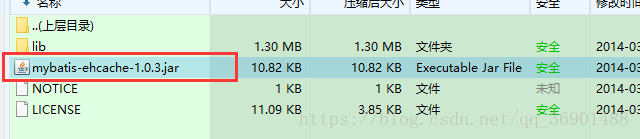
整合相关的jar包下载好后解压,把我们需要的jar添加到项目lib中
jar包都加好后我就可以来看看如何使用ehcache了
我们去EmployeeMapper.xml的<mapper>标签内添加<cache>标签
type内填实现了Cache接口的EhcacheCache的全类名
<cache type="org.mybatis.caches.ehcache.EhcacheCache"></cache>还有ehcache想要能正常运行,需要在项目的类路径下放一个ehcache.xml文件
注意看一下<diskStore path="G:\hc\ehcache" />中的盘符你的电脑中有没有,不然会报错,我就报错了然后找了好久才找到这里
<?xml version="1.0" encoding="UTF-8"?>
<ehcache xmlns:xsi="http://www.w3.org/2001/XMLSchema-instance"
 xsi:noNamespaceSchemaLocation="../config/ehcache.xsd">
 <!-- 磁盘保存路径,缓存超出就保存在磁盘里 -->
 <diskStore path="G:\hc\ehcache" />

 <defaultCache
   maxElementsInMemory="10000"
   maxElementsOnDisk="10000000"
   eternal="false"
   overflowToDisk="true"
   timeToIdleSeconds="120"
   timeToLiveSeconds="120"
   diskExpiryThreadIntervalSeconds="120"
   memoryStoreEvictionPolicy="LRU">
 </defaultCache>
</ehcache>

<!--
属性说明:
l diskStore:指定数据在磁盘中的存储位置。
l defaultCache:当借助CacheManager.add("demoCache")创建Cache时,EhCache便会采用<defalutCache/>指定的的管理策略

以下属性是必须的:
l maxElementsInMemory - 在内存中缓存的element的最大数目
l maxElementsOnDisk - 在磁盘上缓存的element的最大数目,若是0表示无穷大
l eternal - 设定缓存的elements是否永远不过期。如果为true,则缓存的数据始终有效,如果为false那么还要根据timeToIdleSeconds,timeToLiveSeconds判断
l overflowToDisk - 设定当内存缓存溢出的时候是否将过期的element缓存到磁盘上

以下属性是可选的:
l timeToIdleSeconds - 当缓存在EhCache中的数据前后两次访问的时间超过timeToIdleSeconds的属性取值时,这些数据便会删除,默认值是0,也就是可闲置时间无穷大
l timeToLiveSeconds - 缓存element的有效生命期,默认是0.,也就是element存活时间无穷大
 diskSpoolBufferSizeMB 这个参数设置DiskStore(磁盘缓存)的缓存区大小.默认是30MB.每个Cache都应该有自己的一个缓冲区.
l diskPersistent - 在VM重启的时候是否启用磁盘保存EhCache中的数据,默认是false。
l diskExpiryThreadIntervalSeconds - 磁盘缓存的清理线程运行间隔,默认是120秒。每个120s,相应的线程会进行一次EhCache中数据的清理工作
l memoryStoreEvictionPolicy - 当内存缓存达到最大,有新的element加入的时候, 移除缓存中element的策略。默认是LRU(最近最少使用),可选的有LFU(最不常使用)和FIFO(先进先出)
 -->
然后检查一下mybatis-config.xml中的<settings>标签内是否开启了二级缓存
<setting name="cacheEnabled" value="true"/>还有看一下mapper.xml中的增删查改标签内的useCache="true"是否为true
例如:
    <select id="getEmpById" resultType="com.atguigu.mybatis.bean.Employee"
        databaseId="mysql" useCache="true">
        select * from tbl_employee where id = #{id}
    </select>
然后就可以测试了:
    @Test
    public void testSecondLevelCache() throws IOException{
        SqlSessionFactory sqlSessionFactory = getSqlSessionFactory();
        SqlSession openSession = sqlSessionFactory.openSession();
        SqlSession openSession2 = sqlSessionFactory.openSession();
        try{
            //1、
            EmployeeMapper mapper = openSession.getMapper(EmployeeMapper.class);
            EmployeeMapper mapper2 = openSession2.getMapper(EmployeeMapper.class);

            Employee emp01 = mapper.getEmpById(1);
            System.out.println(emp01);
            openSession.close();

            //第二次查询是从二级缓存中拿到的数据,并没有发送新的sql
            //mapper2.addEmp(new Employee(null, "aaa", "nnn", "0"));
            Employee emp02 = mapper2.getEmpById(1);
            System.out.println(emp02);
            openSession2.close();

        }finally{

        }
    }
可以看到多出了一堆日志……
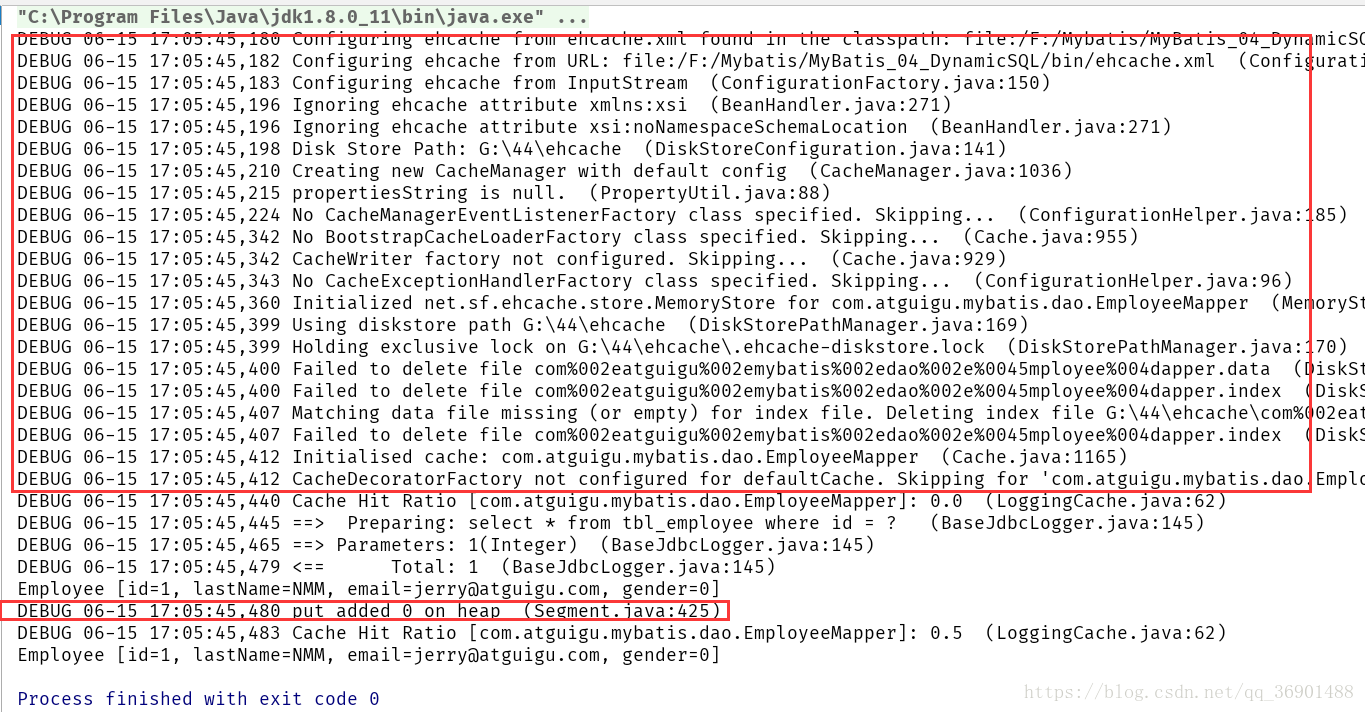
还有日志文件也正常地在G:\hc\ehcache中自动生成了,证明ehcache确实运行起来了

上面是给EmployeeMapper.xml使用了ehcache,如果我想在DepartmentMapper.xml中也使用ehcache,可以这样:
在DepartmentMapper.xml中的<mapper>标签内加入
    <!-- 引用缓存:namespace:指定和哪个名称空间下的缓存一样 -->
<cache-ref namespace="com.atguigu.mybatis.dao.EmployeeMapper"/>引用EmployeeMapper.xml下的缓存