1.简介
(1)什么是服务追踪 Sleuth
在微服务架构中,要完成一个功能,通过Rest请求服务API调用服务来完成,整个调用过程可能会聚合多个后台服务器协同完成。在整个链路上,任何一处调用超时
或出错都有可能造成前端请求失败。这时跟踪记录这些请求的调用的情况就要复杂的多,这就需要一个专门的工具来处理,spring cloud sleuth组件就是用于跟踪记录的工具
Sleuth就相当于为微服务架构引入了一套记录体系,包含两部分,一个是 trace ID;另一个是 span ID,随时记录一个请求的每一步操作。
(2)什么是日志聚合 Zipkin
zipkin 是 Dpper的开源实现,支持多种语言。Sleuth已经将每个请求从开始调用到完成的每一步都进行了记录,但是这些log信息会很分散,使用起来不太方便,就
需要有一个工具可以将这些信息进行收集和汇总,并且显示可视化的结果,便于分析和定位。这就需要创建一个 Zipkin Server用于收集和展示这些调用链路的信息,他
的使用也很方便。
2.如何使用
本例需要创建三个工程:
product-sevice 普通客户端工程,提供一个rest接口(项目创建参考第三节)
order-service 普通客户端工程,用于调用product-service服务(项目创建参考第三节)
zipkin-service 日志服务工程,用于追踪记录请求链路。
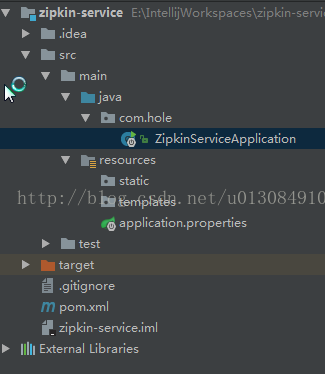
第一步:创建 zipkin-service,作为Zipkin Server。
工程目录如图:
(1)首先在 pom.xml中增加依赖
<dependency>
			<groupId>io.zipkin.java</groupId>
			<artifactId>zipkin-autoconfigure-ui</artifactId>
			<scope>runtime</scope>
		</dependency>
		<dependency>
			<groupId>io.zipkin.java</groupId>
			<artifactId>zipkin-server</artifactId>
		</dependency>
(2)在启动类增加@EnableZipkinServer注解,用来开启Zipkin Server的功能。
package com.hole;

import org.slf4j.Logger;
import org.slf4j.LoggerFactory;
import org.springframework.boot.SpringApplication;
import org.springframework.boot.autoconfigure.SpringBootApplication;
import org.springframework.cloud.client.discovery.EnableDiscoveryClient;
import zipkin.server.EnableZipkinServer;

@EnableDiscoveryClient
@EnableZipkinServer
@SpringBootApplication
public class ZipkinServiceApplication {
	private static Logger logger = LoggerFactory.getLogger(ZipkinServiceApplication.class);

	public static void main(String[] args) {
		SpringApplication.run(ZipkinServiceApplication.class, args);
	}
}
spring.application.name=zipkin-service
server.port=9411
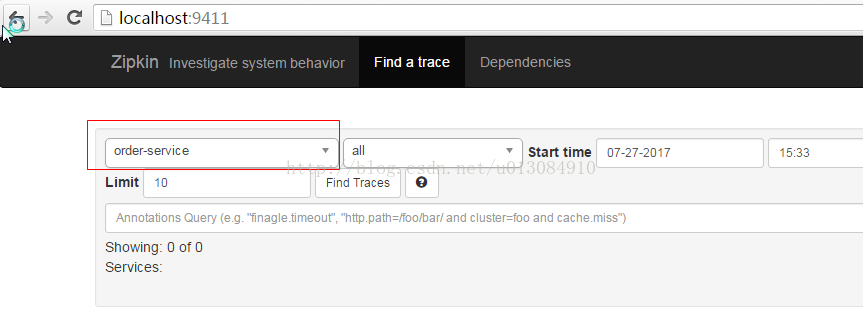
eureka.client.serviceUrl.defaultZone=http://localhost:8761/eureka/(4)启动 Zipkin Server,访问 http://localhost:9411/,此时因为还没有服务请求关联的zipkin server,所以服务名里列表里是空的,如图:
第二步:创建日志客户端工程
想要在界面上能看到zipkin server搜集的日志信息及依赖关系,需要在每个工程中增加sleuth与zipkin的依赖,然后增加注册地址,指向到 zipkin server上就可以了。
1.(1)创建product-service工程,并增加依赖。
<dependency>
			<groupId>org.springframework.cloud</groupId>
			<artifactId>spring-cloud-starter-sleuth</artifactId>
		</dependency>
		<dependency>
			<groupId>org.springframework.cloud</groupId>
			<artifactId>spring-cloud-sleuth-zipkin</artifactId>
</dependency>spring.zipkin.base-url=http://localhost:9411/package com.hole;
import org.slf4j.Logger;
import org.slf4j.LoggerFactory;
import org.springframework.boot.SpringApplication;
import org.springframework.boot.autoconfigure.SpringBootApplication;
import org.springframework.cloud.client.discovery.EnableDiscoveryClient;
import org.springframework.http.HttpStatus;
import org.springframework.http.ResponseEntity;
import org.springframework.web.bind.annotation.RequestMapping;
import org.springframework.web.bind.annotation.RequestMethod;
import org.springframework.web.bind.annotation.RestController;
@EnableDiscoveryClient
@SpringBootApplication
@RestController
public class ProductServiceApplication {
private static Logger logger = LoggerFactory.getLogger(ProductServiceApplication.class);
public static void main(String[] args) {
SpringApplication.run(ProductServiceApplication.class, args);
}
@RequestMapping(value = "/hello",method = RequestMethod.GET)
public ResponseEntity<String> hello(){
logger.info("called by product-service");
return new ResponseEntity<String>("hello product service!", HttpStatus.OK);
}
}
2.(1)创建order-service工程。
依赖和配置同 product-sevice。
(2)启动类增加 /product/hello接口,目的是调动 product-service接口。在接口入口位置做一个日志打印。
package com.hole;

import org.slf4j.Logger;
import org.slf4j.LoggerFactory;
import org.springframework.beans.factory.annotation.Autowired;
import org.springframework.boot.SpringApplication;
import org.springframework.boot.autoconfigure.SpringBootApplication;
import org.springframework.cloud.client.discovery.EnableDiscoveryClient;
import org.springframework.cloud.client.loadbalancer.LoadBalanced;
import org.springframework.context.annotation.Bean;
import org.springframework.http.HttpStatus;
import org.springframework.http.ResponseEntity;
import org.springframework.web.bind.annotation.RequestMapping;
import org.springframework.web.bind.annotation.RequestMethod;
import org.springframework.web.bind.annotation.RestController;
import org.springframework.web.client.RestTemplate;

@EnableDiscoveryClient
@SpringBootApplication
@RestController
public class OrderServiceApplication {
	private static Logger logger = LoggerFactory.getLogger(OrderServiceApplication.class);

	@Bean
	@LoadBalanced
	RestTemplate restTemplate(){
		return new RestTemplate();
	}

	@Autowired
	RestTemplate restTemplate;

	public static void main(String[] args) {
		SpringApplication.run(OrderServiceApplication.class, args);
	}

	@RequestMapping(value = "/hello",method = RequestMethod.GET)
	public ResponseEntity<String> hello(){
		return new ResponseEntity<String>("hello order service!", HttpStatus.OK);
	}

	@RequestMapping(value = "/product/hello",method = RequestMethod.GET)
	public String productHello(){
		logger.info("order-service calling product-service!");
		return restTemplate.getForEntity("http://PRODUCT-SERVICE/hello",String.class).getBody();
	}
}
第三步:启动项目并验证。
(1)启动全部项目,启动成功后在监控页面查看结果。
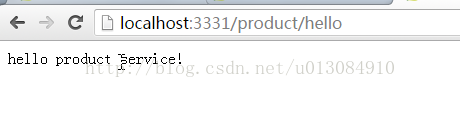
(2)访问 order-service 服务的 /product/hello接口,结果访问成功。可以多刷新几次
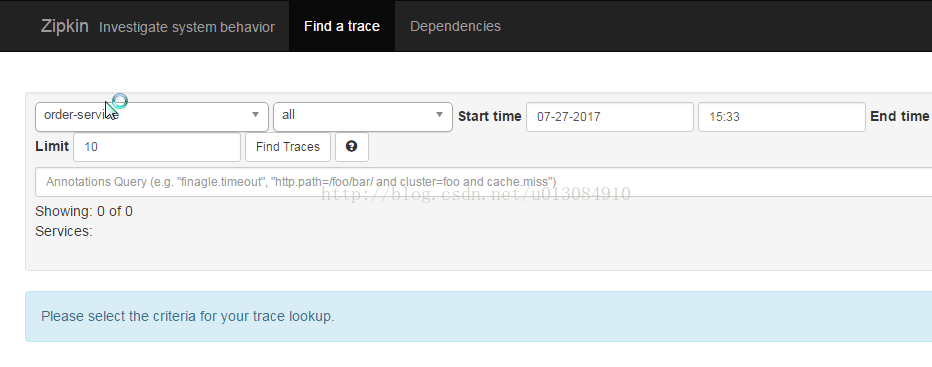
(3)访问 zipkin server(9411端口),查看日志服务列表,发现service name下拉框已有下拉选项,验证成功。
点击 Find Traces 查看结果可以看到它的完整链路条,点击链条可以看到调用链条,点击 Dependencies可以查看依赖关系,等等,自行发觉吧,就不上图了。