原文地址:https://blog.csdn.net/iboxty/article/details/44780341
Dlib是一个机器学习的C++库,包含了许多机器学习常用的算法。而且文档和例子都非常详细,以后准备深入学习。
Dlib官网地址: http://www.dlib.net/ml.html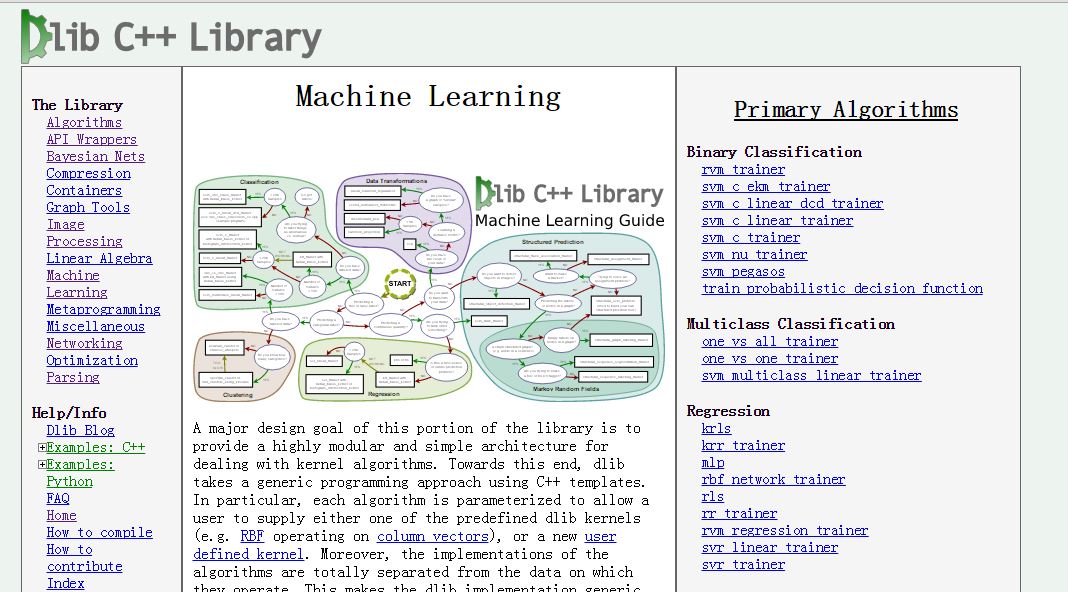
但准备使用的时候并没在网上找到很多关于安装的资料=.=对我们小白来说很不方便。所以决定在这里记录一下安装的过程。
我使用的是VS2013。
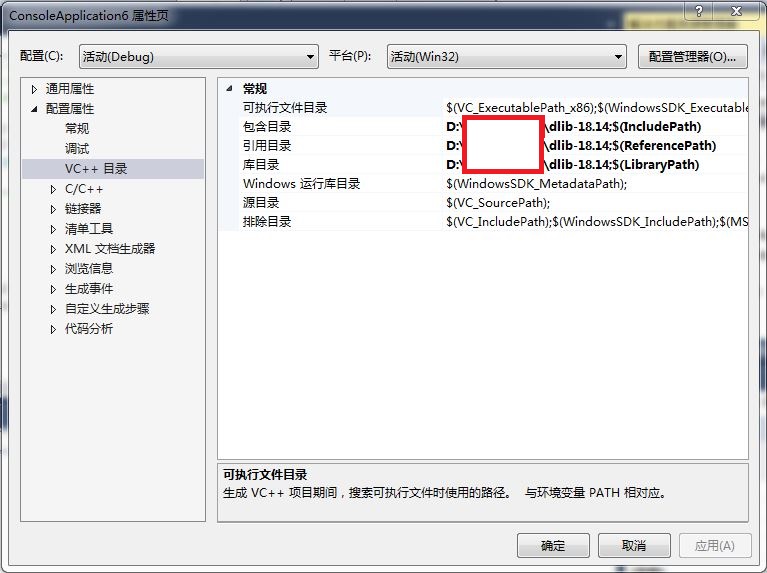
在官网下载 dlib-18.14 之后解压到 D 盘。
然后新建一个项目,右击解决方案管理器中的该项目打开属性。在项目目录中添加 dlib- 18.14的路径(注意:是 ..\dlib- 18.14而不是..\dlib- 18.14\dlib)
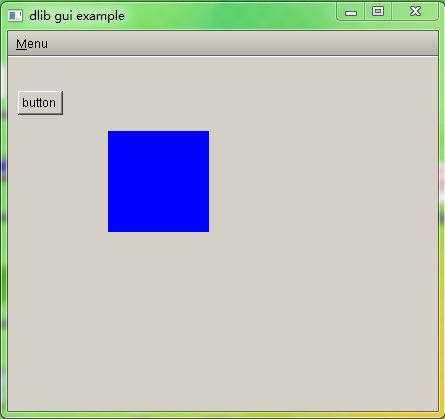
项目的源码我们使用Dlib中介绍GUI的例子。 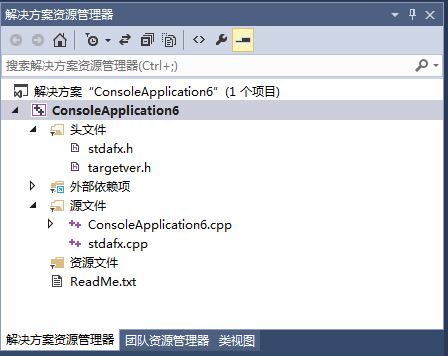
项目结构如上,我们只需要把example中的源码拷贝到ConsoleApplication6.cpp 中,注意要不要漏了头文件”stdafx.h”
代码如下:
// The contents of this file are in the public domain. See LICENSE_FOR_EXAMPLE_PROGRAMS.txt
/*

This is an example illustrating the use of the gui api from the dlib C++ Library.


This is a pretty simple example.  It makes a window with a user
defined widget (a draggable colored box) and a button.  You can drag the
box around or click the button which increments a counter.
*/


#include "stdafx.h"
#include <dlib/gui_widgets.h>
#include <sstream>
#include <string>


using namespace std;
using namespace dlib;

//  ----------------------------------------------------------------------------

class color_box : public draggable
{
    /*
    Here I am defining a custom drawable widget that is a colored box that
    you can drag around on the screen.  draggable is a special kind of drawable
    object that, as the name implies, is draggable by the user via the mouse.
    To make my color_box draggable all I need to do is inherit from draggable.
    */
    unsigned char red, green, blue;

public:
    color_box(
        drawable_window& w,
        rectangle area,
        unsigned char red_,
        unsigned char green_,
        unsigned char blue_
        ) :
        draggable(w),
        red(red_),
        green(green_),
        blue(blue_)
    {
        rect = area;
        set_draggable_area(rectangle(10, 10, 400, 400));

        // Whenever you make your own drawable widget (or inherit from any drawable widget
        // or interface such as draggable) you have to remember to call this function to
        // enable the events.  The idea here is that you can perform whatever setup you
        // need to do to get your object into a valid state without needing to worry about
        // event handlers triggering before you are ready.
        enable_events();
    }

    ~color_box(
        )
    {
        // Disable all further events for this drawable object.  We have to do this
        // because we don't want any events (like draw()) coming to this object while or
        // after it has been destructed.
        disable_events();

        // Tell the parent window to redraw its area that previously contained this
        // drawable object.
        parent.invalidate_rectangle(rect);
    }

private:

    void draw(
        const canvas& c
        ) const
    {
        // The canvas is an object that represents a part of the parent window
        // that needs to be redrawn.

        // The first thing I usually do is check if the draw call is for part
        // of the window that overlaps with my widget.  We don't have to do this
        // but it is usually good to do as a speed hack.  Also, the reason
        // I don't have it set to only give you draw calls when it does indeed
        // overlap is because you might want to do some drawing outside of your
        // widget's rectangle.  But usually you don't want to do that :)
        rectangle area = c.intersect(rect);
        if (area.is_empty() == true)
            return;

        // This simple widget is just going to draw a box on the screen.
        fill_rect(c, rect, rgb_pixel(red, green, blue));
    }
};

//  ----------------------------------------------------------------------------

class win : public drawable_window
{
    /*
    Here I am going to define our window.  In general, you can define as
    many window types as you like and make as many instances of them as you want.
    In this example I am only making one though.
    */
public:
    win(
        ) : // All widgets take their parent window as an argument to their constructor.
        c(*this),
        b(*this),
        cb(*this, rectangle(100, 100, 200, 200), 0, 0, 255), // the color_box will be blue and 101 pixels wide and tall
        mbar(*this)
    {
        // tell our button to put itself at the position (10,60).
        b.set_pos(10, 60);
        b.set_name("button");

        // let's put the label 5 pixels below the button
        c.set_pos(b.left(), b.bottom() + 5);


        // set which function should get called when the button gets clicked.  In this case we want
        // the on_button_clicked member to be called on *this.
        b.set_click_handler(*this, &win::on_button_clicked);
        // Alternatively, if you have a compiler which supports the lambda functions from the
        // new C++ standard then you can use a lambda function instead of telling the click
        // handler to call one of the member functions.  So for example, you could do this
        // instead (uncomment the code if you have C++0x support):
        /*
        b.set_click_handler([&](){
        ++counter;
        ostringstream sout;
        sout << "Counter: " << counter;
        c.set_text(sout.str());
        });
        */
        // In general, all the functions which register events can take either member
        // functions or lambda functions.


        // Let's also make a simple menu bar.
        // First we say how many menus we want in our menu bar.  In this example we only want 1.
        mbar.set_number_of_menus(1);
        // Now we set the name of our menu.  The 'M' means that the M in Menu will be underlined
        // and the user will be able to select it by hitting alt+M
        mbar.set_menu_name(0, "Menu", 'M');

        // Now we add some items to the menu.  Note that items in a menu are listed in the
        // order in which they were added.

        // First let's make a menu item that does the same thing as our button does when it is clicked.
        // Again, the 'C' means the C in Click is underlined in the menu.
        mbar.menu(0).add_menu_item(menu_item_text("Click Button!", *this, &win::on_button_clicked, 'C'));
        // let's add a separator (i.e. a horizontal separating line) to the menu
        mbar.menu(0).add_menu_item(menu_item_separator());
        // Now let's make a menu item that calls show_about when the user selects it.
        mbar.menu(0).add_menu_item(menu_item_text("About", *this, &win::show_about, 'A'));


        // set the size of this window
        set_size(430, 380);

        counter = 0;

        set_title("dlib gui example");
        show();
    }

    ~win(
        )
    {
        // You should always call close_window() in the destructor of window
        // objects to ensure that no events will be sent to this window while
        // it is being destructed.
        close_window();
    }

private:

    void on_button_clicked(
        )
    {
        // when someone clicks our button it will increment the counter and
        // display it in our label c.
        ++counter;
        ostringstream sout;
        sout << "counter: " << counter;
        c.set_text(sout.str());
    }

    void show_about(
        )
    {
        message_box("About", "This is a dlib gui example program");
    }

    unsigned long counter;
    label c;
    button b;
    color_box cb;
    menu_bar mbar;
};

//  ----------------------------------------------------------------------------

int main()
{
    // create our window
    win my_window;


    // wait until the user closes this window before we let the program
    // terminate.
    my_window.wait_until_closed();

    return 0;
}

//  ----------------------------------------------------------------------------

// Normally, if you built this application on MS Windows in Visual Studio you
// would see a black console window pop up when you ran it.  The following
// #pragma directives tell Visual Studio to not include a console window along
// with your application.  However, if you prefer to have the console pop up as
// well then simply remove these #pragma statements.
#ifdef _MSC_VER
#   pragma comment( linker, "/entry:mainCRTStartup" )
#   pragma comment( linker, "/SUBSYSTEM:WINDOWS" )
#endif

//  ----------------------------------------------------------------------------
- 1
- 2
- 3
- 4
- 5
- 6
- 7
- 8
- 9
- 10
- 11
- 12
- 13
- 14
- 15
- 16
- 17
- 18
- 19
- 20
- 21
- 22
- 23
- 24
- 25
- 26
- 27
- 28
- 29
- 30
- 31
- 32
- 33
- 34
- 35
- 36
- 37
- 38
- 39
- 40
- 41
- 42
- 43
- 44
- 45
- 46
- 47
- 48
- 49
- 50
- 51
- 52
- 53
- 54
- 55
- 56
- 57
- 58
- 59
- 60
- 61
- 62
- 63
- 64
- 65
- 66
- 67
- 68
- 69
- 70
- 71
- 72
- 73
- 74
- 75
- 76
- 77
- 78
- 79
- 80
- 81
- 82
- 83
- 84
- 85
- 86
- 87
- 88
- 89
- 90
- 91
- 92
- 93
- 94
- 95
- 96
- 97
- 98
- 99
- 100
- 101
- 102
- 103
- 104
- 105
- 106
- 107
- 108
- 109
- 110
- 111
- 112
- 113
- 114
- 115
- 116
- 117
- 118
- 119
- 120
- 121
- 122
- 123
- 124
- 125
- 126
- 127
- 128
- 129
- 130
- 131
- 132
- 133
- 134
- 135
- 136
- 137
- 138
- 139
- 140
- 141
- 142
- 143
- 144
- 145
- 146
- 147
- 148
- 149
- 150
- 151
- 152
- 153
- 154
- 155
- 156
- 157
- 158
- 159
- 160
- 161
- 162
- 163
- 164
- 165
- 166
- 167
- 168
- 169
- 170
- 171
- 172
- 173
- 174
- 175
- 176
- 177
- 178
- 179
- 180
- 181
- 182
- 183
- 184
- 185
- 186
- 187
- 188
- 189
- 190
- 191
- 192
- 193
- 194
- 195
- 196
- 197
- 198
- 199
- 200
- 201
- 202
- 203
- 204
- 205
- 206
- 207
- 208
- 209
- 210
- 211
- 212
- 213
- 214
- 215
- 216
- 217
- 218
- 219
- 220
- 221
- 222
- 223
- 224
- 225
- 226
- 227
- 228
- 229
- 230
- 231
- 232
如果只做到这一步你就调试运行程序的话,会出现以下的问题:
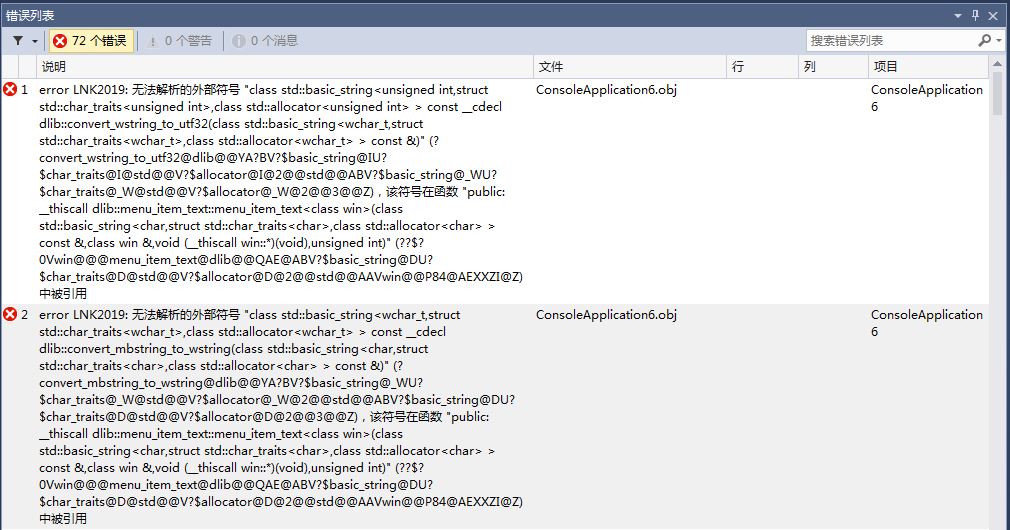
查了一下,应该是链接的问题,还要往项目中导入Dlib.lib才行。
下面就来制作Dlib.lib
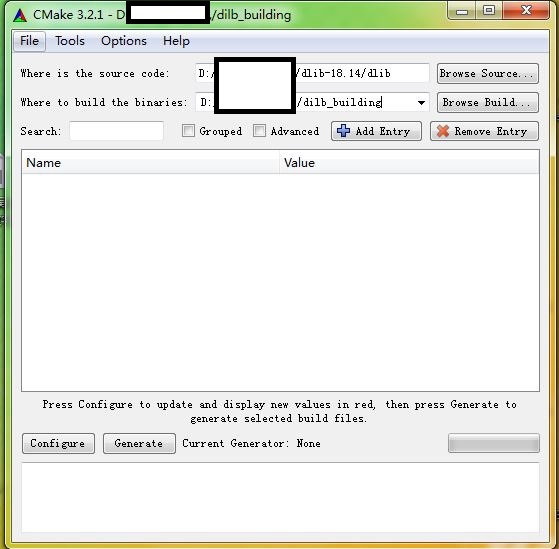
我们下载CMake 3.2.1
dlib_building是一个空的文件夹,dlib-18.14/dlib是Dlib软件包中的文件夹
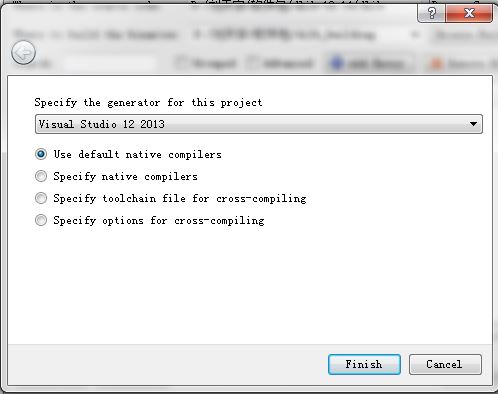
点击Generate 生成项目。(Dlib中有make文件)
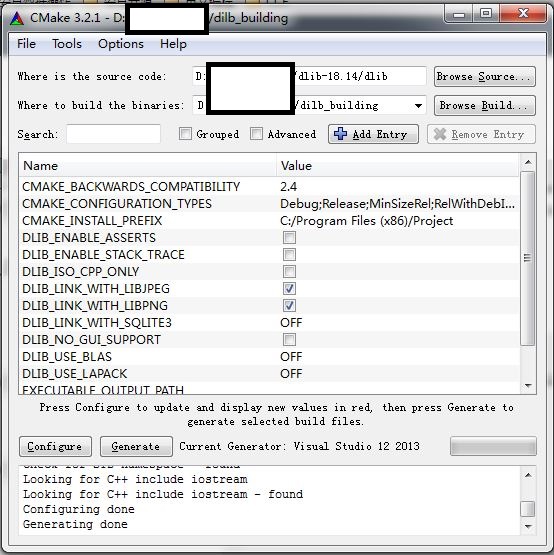
成功之后
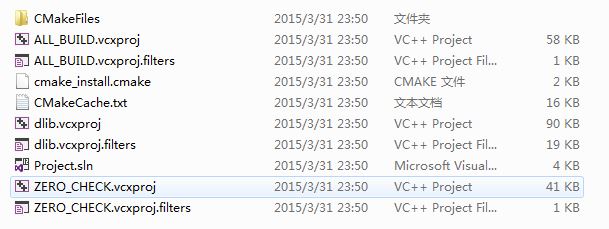
用VS2013打开 dlib.vcxproj 项目文件
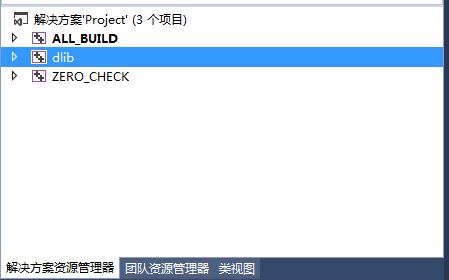
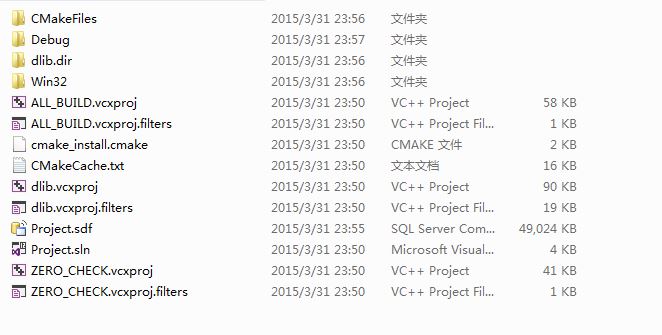
右击重新生成,完成之后我们会发现在原来文件夹多了一个debug文件夹,里面就是dlib.lib文件
下面我们就需要把dlib.lib导入到原来的工程中去,右击工程选择属性修改两处地方。 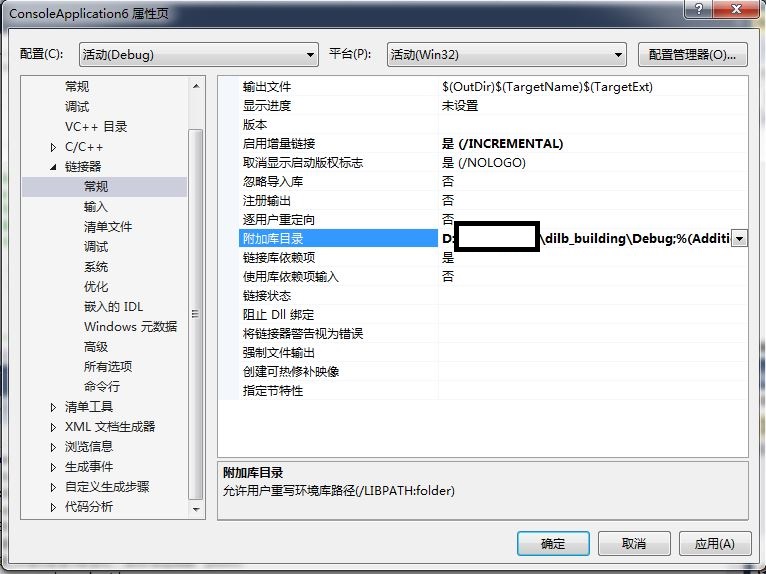
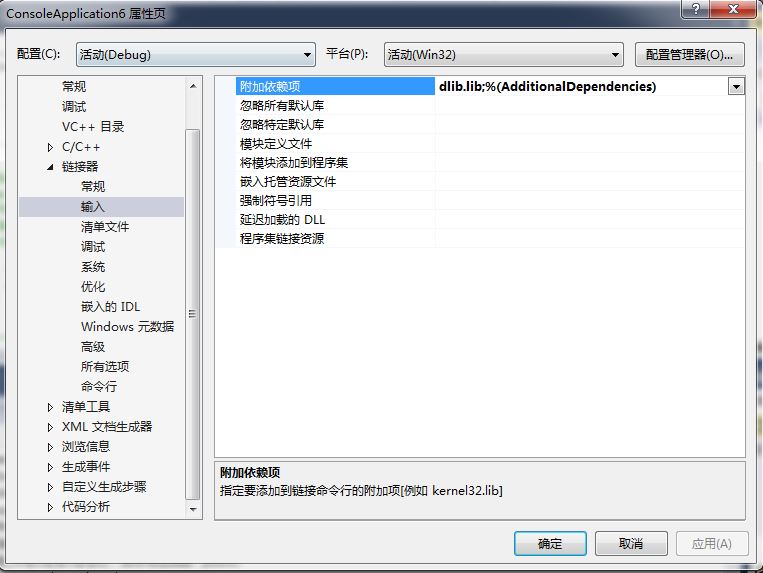
接下来就可以调试运行该项目啦。
下面附上一个dlib.lib文件的下载链接,可以直接导入。
下面要好好研究一下常用的机器学习算法啦~