springmvc的框架搭建过程
一、创建一个web工程。
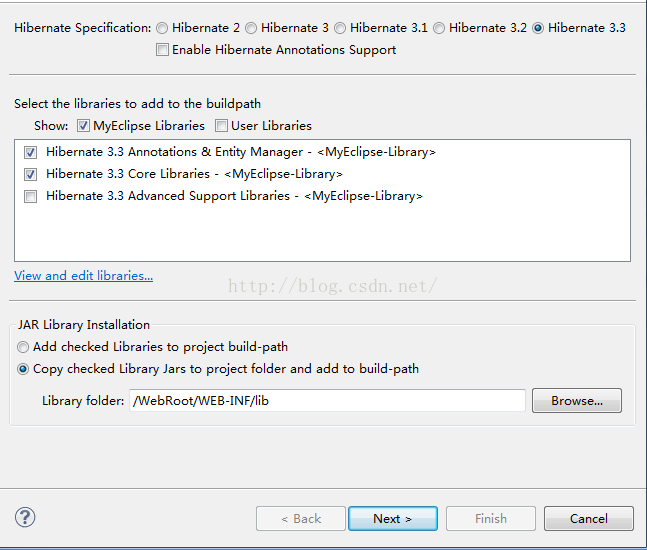
二、添加hibernate的开发包,把jar放到lib目录下,不要sessionFactory。

三、添加spring的开发包,把jar放到lib目录下。
四、hibernate逆向工程生成springDao。
五、分离pojo和dao、创建dao包,service包,action包,拷log4j。

六、添加contextConfigLocation(classpath:app*.xml)、dispatchServlet、openSessionInViewFilter等到web.xml,配置如下:
<?xml version="1.0" encoding="UTF-8"?>
<web-app version="2.5" xmlns="http://java.sun.com/xml/ns/javaee"
xmlns:xsi="http://www.w3.org/2001/XMLSchema-instance" xsi:schemaLocation="http://java.sun.com/xml/ns/javaee http://java.sun.com/xml/ns/javaee/web-app_2_5.xsd">
<context-param>
<param-name>contextConfigLocation</param-name>
<param-value>classpath:app*.xml</param-value>
</context-param>
<filter>
<filter-name>opensession</filter-name>
<filter-class>org.springframework.orm.hibernate3.support.OpenSessionInViewFilter</filter-class>
</filter>
<filter-mapping>
<filter-name>opensession</filter-name>
<url-pattern>/*</url-pattern>
</filter-mapping>
<listener>
<listener-class>org.springframework.web.context.ContextLoaderListener</listener-class>
</listener>
<servlet>
<servlet-name>springmvc</servlet-name>
<servlet-class>org.springframework.web.servlet.DispatcherServlet</servlet-class>
</servlet>
<servlet-mapping>
<servlet-name>springmvc</servlet-name>
<url-pattern>*.do</url-pattern>
</servlet-mapping>
<welcome-file-list>
<welcome-file>index.jsp</welcome-file>
</welcome-file-list>
<login-config>
<auth-method>BASIC</auth-method>
</login-config>
</web-app>
七、对applicationContext.xml进行配置,配置头文件、自动扫描包、事务的管理、定时服务等,配置如下:
<?xml version="1.0" encoding="UTF-8"?>
<beans xmlns="http://www.springframework.org/schema/beans"
xmlns:xsi="http://www.w3.org/2001/XMLSchema-instance" xmlns:util="http://www.springframework.org/schema/util"
xmlns:p="http://www.springframework.org/schema/p" xmlns:aop="http://www.springframework.org/schema/aop"
xmlns:tx="http://www.springframework.org/schema/tx" xmlns:context="http://www.springframework.org/schema/context"
xsi:schemaLocation="
http://www.springframework.org/schema/beans http://www.springframework.org/schema/beans/spring-beans-2.0.xsd
http://www.springframework.org/schema/util http://www.springframework.org/schema/util/spring-util-2.0.xsd
http://www.springframework.org/schema/tx http://www.springframework.org/schema/tx/spring-tx-2.0.xsd
http://www.springframework.org/schema/aop http://www.springframework.org/schema/aop/spring-aop-2.0.xsd
http://www.springframework.org/schema/context
http://www.springframework.org/schema/context/spring-context-2.5.xsd">
//开启自动扫描
<context:component-scan base-package="com.service"></context:component-scan>
//创建sessionFactory bean
<bean id="sessionFactory"
class="org.springframework.orm.hibernate3.LocalSessionFactoryBean">
<property name="configLocation" value="classpath:hibernate.cfg.xml">
</property>
</bean>
//spring管理的dao
<bean id="MepDAO" class="com.dao.MepDAO">
<property name="sessionFactory">
<ref bean="sessionFactory" />
</property>
</bean>
<bean id="DepDAO" class="com.dao.DepDAO">
<property name="sessionFactory">
<ref bean="sessionFactory" />
</property>
</bean>
<!-- 事务管理 -->
<bean id="transactionManager"
class="org.springframework.orm.hibernate3.HibernateTransactionManager">
<property name="sessionFactory" ref="sessionFactory"></property>
</bean>
<!-- 事物的属性 -->
<tx:advice id="mytx" transaction-manager="transactionManager">
<tx:attributes>
<tx:method name="*" />
</tx:attributes>
</tx:advice>
<!-- 织入 -->
<aop:config>
<aop:advisor advice-ref="mytx" pointcut="execution(* com.service.*.*(..))" />
</aop:config>
<bean id="MepService" class="com.service.MepService"></bean>
<!-- 定时服务 -->
<bean id="myjob" class="org.springframework.scheduling.quartz.MethodInvokingJobDetailFactoryBean">
<property name="targetObject" ref="MepService"></property>
<property name="targetMethod" value="go"></property>
</bean>
<!-- 什么时候做 -->
<bean id="mytime" class="org.springframework.scheduling.quartz.CronTriggerBean">
<property name="jobDetail" ref="myjob"></property>
<property name="cronExpression" value="1/5 * * * * ? 2016"></property>
</bean>
<!-- 开启定时器 -->
<bean id="scheduler" class="org.springframework.scheduling.quartz.SchedulerFactoryBean">
<property name="triggers">
<list>
<ref bean="mytime"/>
</list>
</property>
</bean>
</beans>
八、复制applicationContext.xml到WEBINF下并改文件名为springMVC-servlet.xml,在里面开启自动扫描com.action包
<?xml version="1.0" encoding="UTF-8"?>
<beans xmlns="http://www.springframework.org/schema/beans"
xmlns:xsi="http://www.w3.org/2001/XMLSchema-instance" xmlns:util="http://www.springframework.org/schema/util"
xmlns:p="http://www.springframework.org/schema/p" xmlns:aop="http://www.springframework.org/schema/aop"
xmlns:tx="http://www.springframework.org/schema/tx" xmlns:context="http://www.springframework.org/schema/context"
xsi:schemaLocation="
http://www.springframework.org/schema/beans http://www.springframework.org/schema/beans/spring-beans-2.0.xsd
http://www.springframework.org/schema/util http://www.springframework.org/schema/util/spring-util-2.0.xsd
http://www.springframework.org/schema/tx http://www.springframework.org/schema/tx/spring-tx-2.0.xsd
http://www.springframework.org/schema/aop http://www.springframework.org/schema/aop/spring-aop-2.0.xsd
http://www.springframework.org/schema/context
http://www.springframework.org/schema/context/spring-context-2.5.xsd">
<context:component-scan base-package="com.action"></context:component-scan>
</beans>
九、写com.service包、com.action包中的类。写jsp实现业务功能。