文章目录
一、搭建SpringMVC环境
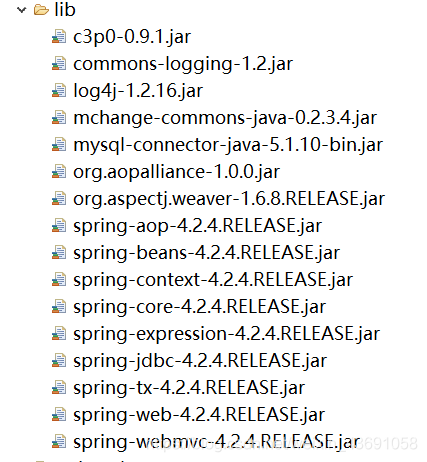
1.导入jar包
由于SpringMVC无缝管衔Spring,直接导入之前Spring框架的jar包即可。
4.前端控制器
*.do和*.action: 请求的url以.do或.action结尾,都会被SpringMVC框架所解析。/:所有的请求都会被pringmvc所解析,会造成静态资源无法访问.支持RestFul开发风格。/*:拦截所有请求,JSP也会被springmvc解析,造成JSP无法访问.不要使用这种方式。
如果访问浏览器时不使用前端控制器中配置的的xx.do,就不会被DispatcherServlet拦截,相当于没有使用SpringMVC框架,会直接404。
<?xml version="1.0" encoding="UTF-8"?>
<web-app xmlns:xsi="http://www.w3.org/2001/XMLSchema-instance"
	xmlns="http://java.sun.com/xml/ns/javaee"
	xsi:schemaLocation="http://java.sun.com/xml/ns/javaee http://java.sun.com/xml/ns/javaee/web-app_2_5.xsd"
	id="WebApp_ID" version="2.5">
	<display-name>SpringMVC01</display-name>
	<!-- 前端控制器 -->
	<servlet>
		<servlet-name>springmvc</servlet-name>
		<servlet-class>org.springframework.web.servlet.DispatcherServlet</servlet-class>
		<!-- 加载SpringMVC配置文件 -->
		<init-param>
				<param-name>contextConfigLocation</param-name>
				<param-value>classpath:springmvc.xml</param-value>
		</init-param>
	</servlet>

	<servlet-mapping>
		<servlet-name>springmvc</servlet-name>
		<url-pattern>*.do</url-pattern>
	</servlet-mapping>
</web-app>
3.配置SpringMVC
- 处理器(手写)。
- 处理器映射器。(注解方式下,处理器映射器与@Controller注解匹配;@RequestMapper与请求url匹配。)
- 处理器适配器。(处理器适配器与处理器映射器成对出现。)
- 视图解析器。
<?xml version="1.0" encoding="UTF-8"?>
<beans xmlns="http://www.springframework.org/schema/beans"
	xmlns:context="http://www.springframework.org/schema/context"
	xmlns:xsi="http://www.w3.org/2001/XMLSchema-instance"
	xmlns:aop="http://www.springframework.org/schema/aop"
	xmlns:tx="http://www.springframework.org/schema/tx"
	xsi:schemaLocation="
		http://www.springframework.org/schema/beans
		http://www.springframework.org/schema/beans/spring-beans.xsd
		http://www.springframework.org/schema/context
		http://www.springframework.org/schema/context/spring-context.xsd
		http://www.springframework.org/schema/aop
		http://www.springframework.org/schema/aop/spring-aop.xsd
		http://www.springframework.org/schema/tx
		http://www.springframework.org/schema/tx/spring-tx.xsd ">

	<!-- 处理器(手写) -->
	<bean class="com.gql.springmvc.UserController"></bean>

	<!-- 处理器映射器 -->
	<bean class="org.springframework.web.servlet.mvc.method.annotation.RequestMappingHandlerMapping"/>


	<!-- 处理器适配器 -->
	<bean class="org.springframework.web.servlet.mvc.method.annotation.RequestMappingHandlerAdapter"/>


	<!-- 视图解析器 -->
	<bean class="org.springframework.web.servlet.view.InternalResourceViewResolver"/>

</beans>
4.手写处理器
SpringMVC与servlet语法比较
| SpringMVC | servlet |
|---|---|
mv.addObject("msg","hello world"); |
request.setAttribute("msg","hello word!"); |
mv.setViewName("index.jsp"); |
request.getRequestDispatcher(路径).forward(request,response); |
- @RequestMapping("/hello"):就是匹配的url路径。
package com.gql.springmvc;

import org.springframework.stereotype.Controller;
import org.springframework.web.bind.annotation.RequestMapping;
import org.springframework.web.servlet.ModelAndView;
/**
 * 类说明:
 *		处理器
 * @guoqianliang1998.
 */
@Controller
public class UserController {

	@RequestMapping("/hello")
	public ModelAndView hello(){
		ModelAndView mv = new ModelAndView();
		mv.addObject("msg","hello world!");
		mv.setViewName("index.jsp");
		return mv;
	}
}
5.跳转页面
<%@ page language="java" import="java.util.*" pageEncoding="UTF-8"%>

<html>
  <head>
	<meta http-equive="content-type" content="text/html,charset=utf-8"/>
  </head>

  <body>
    ${msg}
  </body>
</html>
开启tomcat后成功访问:
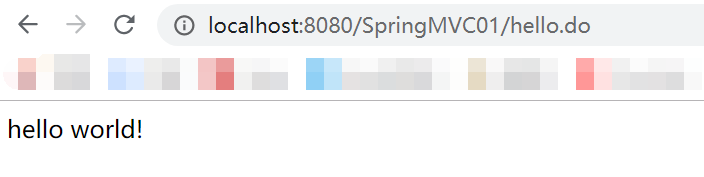
第一个SpringMVC程序测试成功。
二、几个细节问题
1.前端控制器默认加载路径
<?xml version="1.0" encoding="UTF-8"?>
<web-app xmlns:xsi="http://www.w3.org/2001/XMLSchema-instance"
	xmlns="http://java.sun.com/xml/ns/javaee"
	xsi:schemaLocation="http://java.sun.com/xml/ns/javaee http://java.sun.com/xml/ns/javaee/web-app_2_5.xsd"
	id="WebApp_ID" version="2.5">
	<display-name>SpringMVC01</display-name>
	<!-- 前端控制器 -->
	<servlet>
		<servlet-name>springmvc</servlet-name>
		<servlet-class>org.springframework.web.servlet.DispatcherServlet</servlet-class>
		<!-- 加载SpringMVC配置文件 -->
		<init-param>
				<param-name>contextConfigLocation</param-name>
				<param-value>classpath:springmvc.xml</param-value>
		</init-param>
	</servlet>

	<servlet-mapping>
		<servlet-name>springmvc</servlet-name>
		<url-pattern>*.do</url-pattern>
	</servlet-mapping>
</web-app>
上面的前端控制器使用了<init-param>标签 指定的路径(classpath:springmvc.xml)加载springmvc.xml文件。如果不指定的话,SpringMVC会去WEB-INF目录下找一个名为"servlet-name"+"-servlet.xml"的文件。把springMVC的配置放在该文件中就可以了。
2.简化SpringMVC配置
SpringMVC的配置可以简写,这需要增加schema约束,然后使用
<mvc:annotation-driven />将处理器映射器和处理器适配器合并。
另外,视图解析器使用prefix与suffix配合处理器也可以使得Java代码更加规范。
<?xml version="1.0" encoding="UTF-8"?>
<beans xmlns="http://www.springframework.org/schema/beans"
	xmlns:context="http://www.springframework.org/schema/context"
	xmlns:xsi="http://www.w3.org/2001/XMLSchema-instance"
	xmlns:aop="http://www.springframework.org/schema/aop"
	xmlns:tx="http://www.springframework.org/schema/tx"
	xmlns:mvc="http://www.springframework.org/schema/mvc"
	xsi:schemaLocation="
		http://www.springframework.org/schema/beans
		http://www.springframework.org/schema/beans/spring-beans.xsd
		http://www.springframework.org/schema/context
		http://www.springframework.org/schema/context/spring-context.xsd
		http://www.springframework.org/schema/aop
		http://www.springframework.org/schema/aop/spring-aop.xsd
		http://www.springframework.org/schema/tx
		http://www.springframework.org/schema/tx/spring-tx.xsd
		http://www.springframework.org/schema/mvc
		http://www.springframework.org/schema/mvc/spring-mvc.xsd ">

	<!-- 处理器(手写) -->
	<context:component-scan base-package="com.gql.springmvc02"></context:component-scan>

	<!-- 代替处理器映射器和处理器适配器 -->
	<mvc:annotation-driven />

	<!-- 视图解析器 -->
	<bean class="org.springframework.web.servlet.view.InternalResourceViewResolver">
		<!--
			prefix	前缀
			suffix	后缀
			物理视图地址 = prefix + 逻辑视图名(handler的返回值) + suffix
		 -->
		<property name="prefix" value="/WEB-INF/user/"></property>
		<property name="suffix" value=".jsp"></property>
	</bean>
</beans>
