转载请注明出处!
本文简述了Unity官方给出的机器学习实例的实现流程。
【阅读建议】已安装ML-Agents环境,并训练过一个官方实例(如:3D平衡球)的开发者。
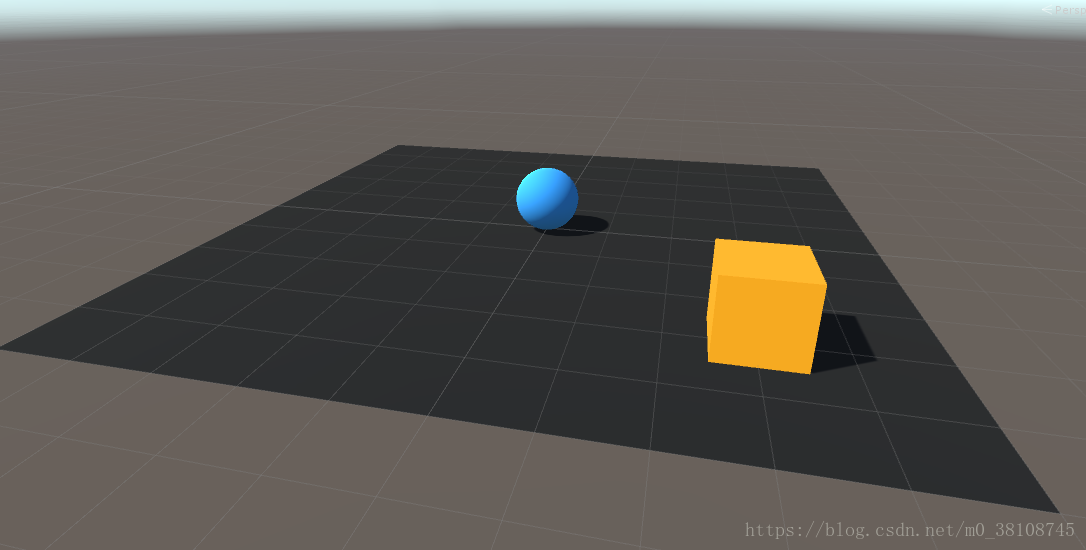
【实例简介】本文要实现的是官方给出的RollerBall实例,从创建新项目到最终训练完成,完全参照官方文档。实例的学习目标是,让平板上的一个小球(Agent)变换方向,滚向目标方块(Target),小球到达目标后,目标随机变换位置,整个过程中小球尽量不要从平板上滚落。
【具体步骤】
【0.初始化】在Unity中新建项目
- 选择Edit->Project Settings->Player, 将Resolution and Presentation->Run in Background 勾上;
- 将Display Resolution Dialog 设置成Disabled.并在Othersetting中;
- 并在Scripting Defined Symbols 中加入ENABLE_TENSORFLOW;
- 将Scripting Runtime Version 设置成Experimental (.NET 4.6 Equivalent) ,此时会提示重启项目,选择重启,重启后即完成了初始化;
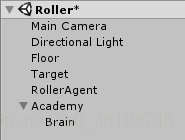
【1.添加GameObject】在Scene中添加如下物体:
- Floor:一个Plane,Position=(0,0,0),Rotation=(0,0,0),Scale=(1,1,1);
- Target:一个Cube,Position= (3,0.5,3), Rotation = (0,0,0), Scale = (1,1,1);
- RollerAgent:一个Sphere,Position= (0,0.5,0), Rotation = (0,0,0), Scale = (1,1,1),并为Roller Agent添加Rigidbody组件;(注意,use gravity 默认即可,要使用重力小球才能从地板上掉下来);
- Academy:添加一个空物体,命名为Academy,为Academy添加一个空物体作为它的子物体,命名为Brain;
对于前三个物体,可以改变其Material,让它们便于观察。到此,我们完成了本项目所有Gameobject的创建。
【2.添加代码】
- 给Academy新建一个脚本,命名为RollerAcademy,将其基类改为Academy类,删除Start方法和Update方法;
- 给Brain添加名为Brain的脚本(点击Add Component之后搜索Brain,Brain为Ml-agents自带脚本),回到Inspector面板,将BrainType设置为External,将VectorObservation的type改为continuous,size改为8,将Vector Action的type改为continuous,size改为2;
- 为RollerAgent新建一个脚本,命名为RollerAgent,基类改为Agent,删除Update方法,从Hierarchy里的Brain拖到RollerAgent脚本下的Brain里,把Target拖到脚本下的Target里。最终的RollerAgent代码如下;
using System.Collections;
using System.Collections.Generic;
using UnityEngine;

public class RollerAgent :Agent{

    public Transform Target;
    Rigidbody rBody;
    List<float> observation = new List<float>();
    public float speed = 10;
    private float previousDistance = float.MaxValue;

    void Start()
    {
        rBody = GetComponent<Rigidbody>();
    }

    public override void AgentReset()
    {
        if (this.transform.position.y < -1.0)
        {
            this.transform.position = Vector3.zero;
            this.rBody.angularVelocity = Vector3.zero;
            this.rBody.velocity = Vector3.zero;
        }
        else
        {
            Target.position = new Vector3(Random.value * 8 - 4, 0.5f, Random.value * 8 - 4);
        }
    }

    public override void CollectObservations()
    {
        // Calculate relative position
        Vector3 relativePosition = Target.position - this.transform.position;

        // Relative position
        AddVectorObs(relativePosition.x / 5);
        AddVectorObs(relativePosition.z / 5);

        // Distance to edges of platform
        AddVectorObs((this.transform.position.x + 5) / 5);
        AddVectorObs((this.transform.position.x - 5) / 5);
        AddVectorObs((this.transform.position.z + 5) / 5);
        AddVectorObs((this.transform.position.z - 5) / 5);

        // Agent velocity
        AddVectorObs(rBody.velocity.x / 5);
        AddVectorObs(rBody.velocity.z / 5);
    }

    public override void AgentAction(float[] vectorAction, string textAction)
    {
        // Rewards
        float distanceToTarget = Vector3.Distance(this.transform.position,
                                                  Target.position);

        // Reached target
        if (distanceToTarget < 1.42f)
        {
            Done();
            AddReward(1.0f);
        }

        // Getting closer
        if (distanceToTarget < previousDistance)
        {
            AddReward(0.1f);
        }

        // Time penalty
        AddReward(-0.05f);

        // Fell off platform
        if (this.transform.position.y < -1.0)
        {
            Done();
            AddReward(-1.0f);
        }
        previousDistance = distanceToTarget;

        // Actions, size = 2
        Vector3 controlSignal = Vector3.zero;
        controlSignal.x = Mathf.Clamp(vectorAction[0], -1, 1);
        controlSignal.z = Mathf.Clamp( 1, -1,vectorAction[1]);
        rBody.AddForce(controlSignal * speed);
    }
  }
【3.训练】
- 将项目发布在ml-agents-master\python目录下,程序名命名为Roller;
- 打开Anaconda命令行,输入jupyter notebook,将Basics.ipynb文件中的env_name设置为发布的程序名,此处为Roller;
- 在Anaconda命令行中用activate ml-agents命令激活环境(默认读者已经完成环境配置);
- 定位到ml-agents-master的根目录,例如
E: ---------> cd E:\SX05161\ml-agents-master
- 在命令行输入
python python/learn.py python/【程序名 此处为Roller】.exe --train
- 此时Roller弹出一个小窗口并开始训练,训练结束后窗口自动关闭,在ml-agents-master\models\ppo目录下可以找到Roller_ppo.bytes文件;
- 回到Scene中,更改Brain的Brain Type属性为Internal,把Roller_ppo赋值给Brain的Graph Model,点击Play,观察训练结果。
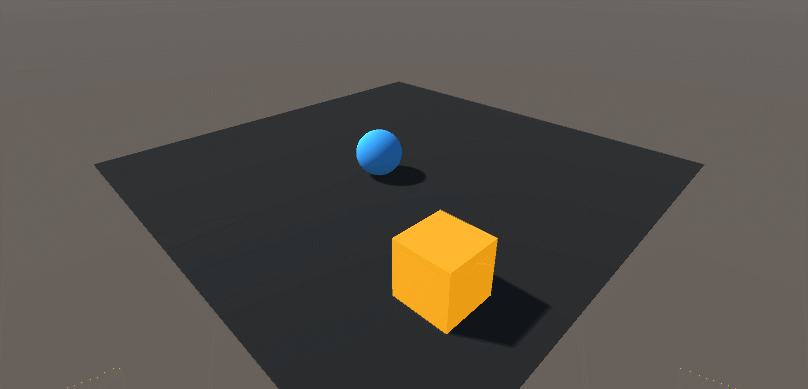
最终的训练结果如下,未进行任何参数调整和优化。
本文参考了:
【新建整个项目的官方文档】https://github.com/Unity-Technologies/ml-agents/blob/master/docs/Learning-Environment-Create-New.md
【发布及训练的流程】https://blog.csdn.net/q568360447/article/details/78206968