7.2基于注解的注入(DI)
这种方式是用来替换spring配置文件里面Bean的注册的。需要以下操作:
(1)导入AOP的jar包。因为注解的后台实现用到了AOP编程。
jar包可以在spring-framework-4.2.1.RELEASE\libs下找到

(2)需要给配置文件添加约束,因为需要用到组件扫描器,这个扫描器需要context的约束。
约束可以在spring-framework-4.2.1.RELEASE\docs\spring-framework-reference\html\xsd-configuration.html下面找到。具体如下:
<?xml version="1.0" encoding="UTF-8"?>
<beans xmlns="http://www.springframework.org/schema/beans"
    xmlns:xsi="http://www.w3.org/2001/XMLSchema-instance"
    xmlns:context="http://www.springframework.org/schema/context" xsi:schemaLocation="
        http://www.springframework.org/schema/beans
        http://www.springframework.org/schema/beans/spring-beans.xsd
        http://www.springframework.org/schema/context
        http://www.springframework.org/schema/context/spring-context.xsd">

    <!--注册组件扫描器 ,这个标签在context约束中-->
	<context:component-scan base-package="com.hnu.di01" />

	<!-- 扫描com.hnu这个包及其子包
	<context:component-scan base-package="com.hnu" />
	-->

	<!-- 只扫描com.hnu这个包的子包
	<context:component-scan base-package="com.hnu.*" />
	-->
</beans>
项目的目录结构如下:
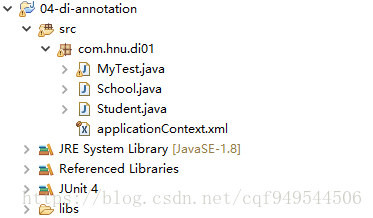
注解方式如下:
import org.springframework.beans.factory.annotation.Value;
import org.springframework.stereotype.Component;

/*
 * 与@Component注解功能相同,但是意义不同的注解还有三个:
 * 1)@Repository:注解在Dao实现类上
 * 2)@Service:注解在Service实现类上
 * 3)@Controller:注解在SpringMVC的处理器上
 */
@Component("mySchool")   //表示当前类被spring容器所管理
public class School {
	@Value("清华大学")
	private String name;

	public void setName(String name) {
		this.name = name;
	}

	@Override
	public String toString() {
		return "School [name=" + name + "]";
	}

}
import javax.annotation.Resource;
import org.springframework.beans.factory.annotation.Autowired;
import org.springframework.beans.factory.annotation.Qualifier;
import org.springframework.beans.factory.annotation.Value;
import org.springframework.stereotype.Component;
//@Scope("prototype") //指定是单例还是原型
@Component("myStudent")
public class Student {
@Value("张三")
private String name;
@Value("23")
private int age;
/*
* 域属性的注入有两种:(1)spring提供的@Autowired (2)jsr提供的@Resource
*/
//@Autowired //1.1byType方式注入
//@Autowired //1.2byName方式需要@Autowired+@Qualifier联合使用
//@Qualifier("mySchool")
//@Resource //2.1 jsr的byType方式注入
@Resource(name="mySchool") //2.2 jsr的byName方式注入
private School school; //对象属性,域属性
public void setName(String name) {
this.name = name;
}
public void setAge(int age) {
this.age = age;
}
public void setSchool(School school) {
this.school = school;
}
@Override
public String toString() {
return "Student [name=" + name + ", age=" + age + ", school=" + school + "]";
}
}
7.2.1 Bean的生命始末@PostConstruct与@PreDestroy
7.2.2 使用JavaConfig进行配置
自定义的一个java类充当了spring容器,即所有的Bean将由这个类来创建,而不需要在配置文件中注册Bean。
import org.springframework.beans.factory.annotation.Autowire;
import org.springframework.context.annotation.Bean;
import org.springframework.context.annotation.Configuration;

@Configuration   //表示当前类充当spring容器,即所有的Bean将由这个类来创建
public class MyJavaConfig {

	@Bean(name="school")
	public School mySchoolCreator(){
		return new School("北京大学");
	}

	/*
	 * autowire=Autowire.BY_TYPE 只从当前类这个容器中查找与域属性类型具有is-a关系的Bean
	 */
	/*
	@Bean(name="myStudent",autowire=Autowire.BY_TYPE)
	public Student myStudentCreator(){
		return new Student("张三",30);
	}
	*/

	/*
	 * autowire=Autowire.BY_NAME 指从当前类这个容器中查找id与域属性同名的Bean
	 */
	@Bean(name="myStudent",autowire=Autowire.BY_NAME)
	public Student myStudentCreator(){
		return new Student("张三",30);
	}

}
xml配置,需要指定扫描Bean文件的位置
<?xml version="1.0" encoding="UTF-8"?>
<beans xmlns="http://www.springframework.org/schema/beans"
    xmlns:xsi="http://www.w3.org/2001/XMLSchema-instance"
    xmlns:context="http://www.springframework.org/schema/context" xsi:schemaLocation="
        http://www.springframework.org/schema/beans
        http://www.springframework.org/schema/beans/spring-beans.xsd
        http://www.springframework.org/schema/context
        http://www.springframework.org/schema/context/spring-context.xsd">

    <!--注册组件扫描器 ,这个标签在context约束中-->
	<context:component-scan base-package="com.hnu.di05" />

</beans>
7.2.3 使用spring的JUnit4测试
使用一般的junit测试需要自己创建容器,需要自己去容器获取对象,使用spring的JUnit4测试可以免去这些步骤。
一般测试类:
import org.junit.Test;
import org.springframework.context.ApplicationContext;
import org.springframework.context.support.ClassPathXmlApplicationContext;

public class MyTest {

	@Test
	public void test01(){
		ApplicationContext ac = new ClassPathXmlApplicationContext("com/hnu/di06/applicationContext.xml");
		Student stu = (Student) ac.getBean("myStudent");
		System.out.println(stu);
	}

}
spring的JUnit4测试类:
import org.junit.Test;
import org.junit.runner.RunWith;
import org.springframework.beans.factory.annotation.Autowired;
import org.springframework.test.context.ContextConfiguration;
import org.springframework.test.context.junit4.SpringJUnit4ClassRunner;

//下面这两个注解就创建好了容器对象
@RunWith(SpringJUnit4ClassRunner.class)
@ContextConfiguration(locations="classpath:com/hnu/di06/applicationContext.xml")
public class MyTest {

	@Autowired
	private Student stu;

	@Test
	public void test01(){
		System.out.println(stu);
	}

}
7.2.3 xml的注入优先级要高于注解的
使用xml的好处,如果需要修改配置,只需要修改xml配置文件然后重启服务器就行了。如果是注解的话,需要重新编译源文件,但是服务器上一般是装JRE不会装JDK,难以重新编译。
补充:注解注入既不是设值注入也不是构造注入,他不需要set方法也不需要带参数的构造函数。但是建议保留set方法,这样我们可以通过修改xml配置的方式修改注入值。