前言
关于RNN和LSTM的理解,知道一直是在循环f函数,更改其中的W,但是具体还是有点模糊,今天特意做了一下吴恩达老师的作业。具体介绍如下:
RNN
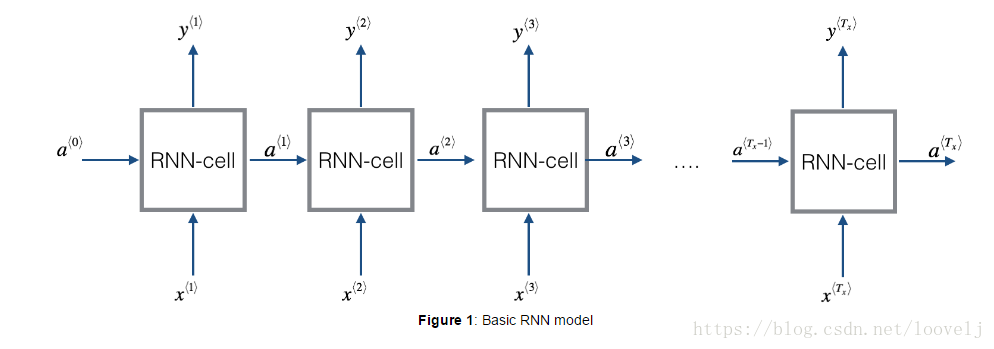
1.首先介绍了RNN,它在语言处理领域非常有效是因为它有“记忆”,他可以从前或者从后获取相关信息。首先上传了下图,可以看出,每次都有a,x传入RNNcell,改变里面的W,从而输出y:
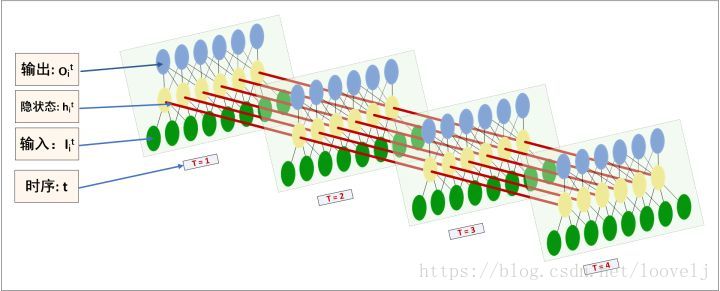
当然,知乎有同学也这么画的图,我觉得也挺好知乎
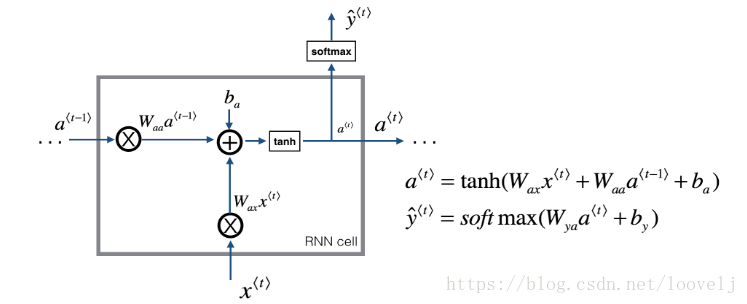
- 对于具体公式,我们可以看下图,每个RNN的Cell里面,a需要参数Wax和Waa两个,再加上b,最后求新的a;同时第t轮的y也会更新。
其核心代码就这两行,一个是a的计算,一个是yt_pred的计算(注意,dot相乘是矩阵的相乘;np.multiply(), 或 *是对应位置相乘详情请看)。
  ### START CODE HERE ### (≈2 lines)
    # compute next activation state using the formula given above
    a_next =np.tanh(np.dot(Waa,a_prev)+np.dot(parameters["Wax"],xt)+ba)
    # compute output of the current cell using the formula given above
    yt_pred = softmax(np.dot(Wya,a_next)+by)
    ### END CODE HERE ###
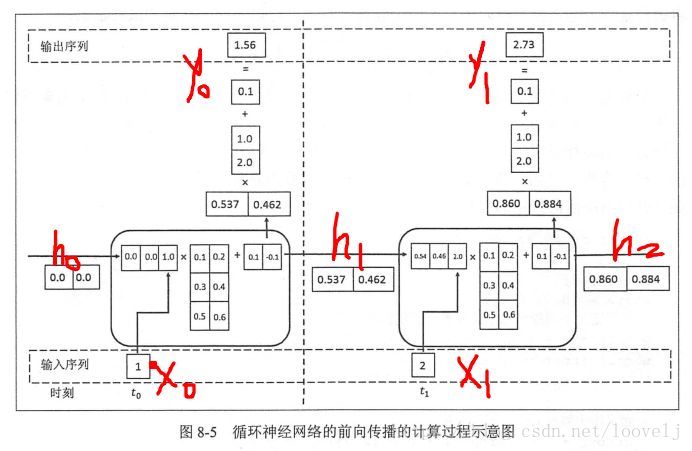
简单来说,《tensorflow实战Google深度学习框架》说是这么计算的:
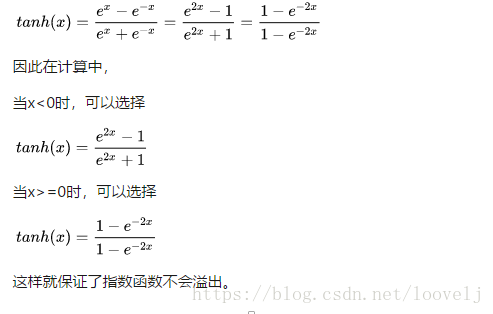
ps:关于tanh,我要小讲一下,他的来源为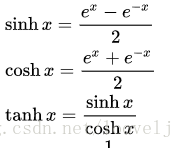
但是在x大于1和小于1,numpy的计算方式还不一样,文中计算(转自知乎),
关于LSTM(Long Short-Term Memory network)
由于RNN随着循环次数的增加,会出现梯度消失的情况,所以我们引入了LSTM,他的构架图及公式如下所示:
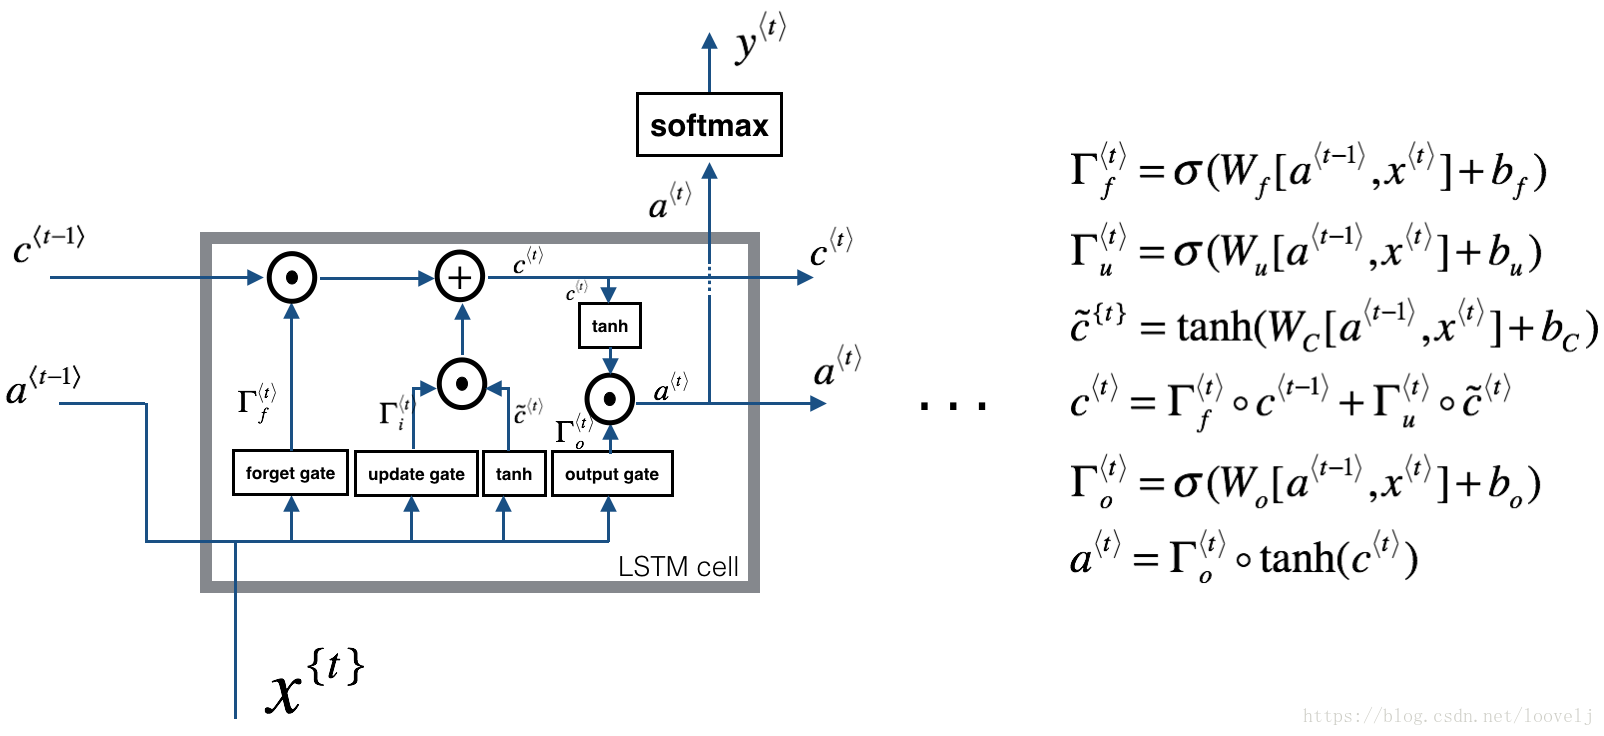
现在包括遗忘门,更新门和输出门。从图中发现他们的计算方式都一样,就是参数W不同。
其中,遗忘门和以前的a相乘,如果结果为0,则选择遗忘。
具体核心代码如下:
 n_x, m = xt.shape
    n_y, n_a = Wy.shape

    ### START CODE HERE ###
    # Concatenate a_prev and xt (≈3 lines)
    concat = np.zeros((n_a + n_x, m))
    concat[: n_a, :] = a_prev
    concat[n_a :, :] = xt

    # Compute values for ft, it, cct, c_next, ot, a_next using the
    # formulas given figure (4) (≈6 lines)
    ft = sigmoid(np.dot(Wf, concat) + bf)
    it = sigmoid(np.dot(Wi, concat) + bi)
    cct = np.tanh(np.dot(Wc, concat) + bc)
    c_next = ft * c_prev + it * cct
    ot = sigmoid(np.dot(Wo, concat) + bo)
    a_next = ot * np.tanh(c_next)

    # Compute prediction of the LSTM cell (≈1 line)
    yt_pred = softmax(np.dot(Wy, a_next) + by)