vue3项目中使用iconfont图标
写前端项目时,经常要用到iconfont图标,我最原始的方法是吧iconfont图标下载为png/svg文件,然后在文件中作为资源引入,后来发现这么搞太不专业了
记录一下相对比较靠谱的使用方法
1.在iconfont中找到想要的图标
如,我想搜索一个map图标,可以按照下面的步骤来:
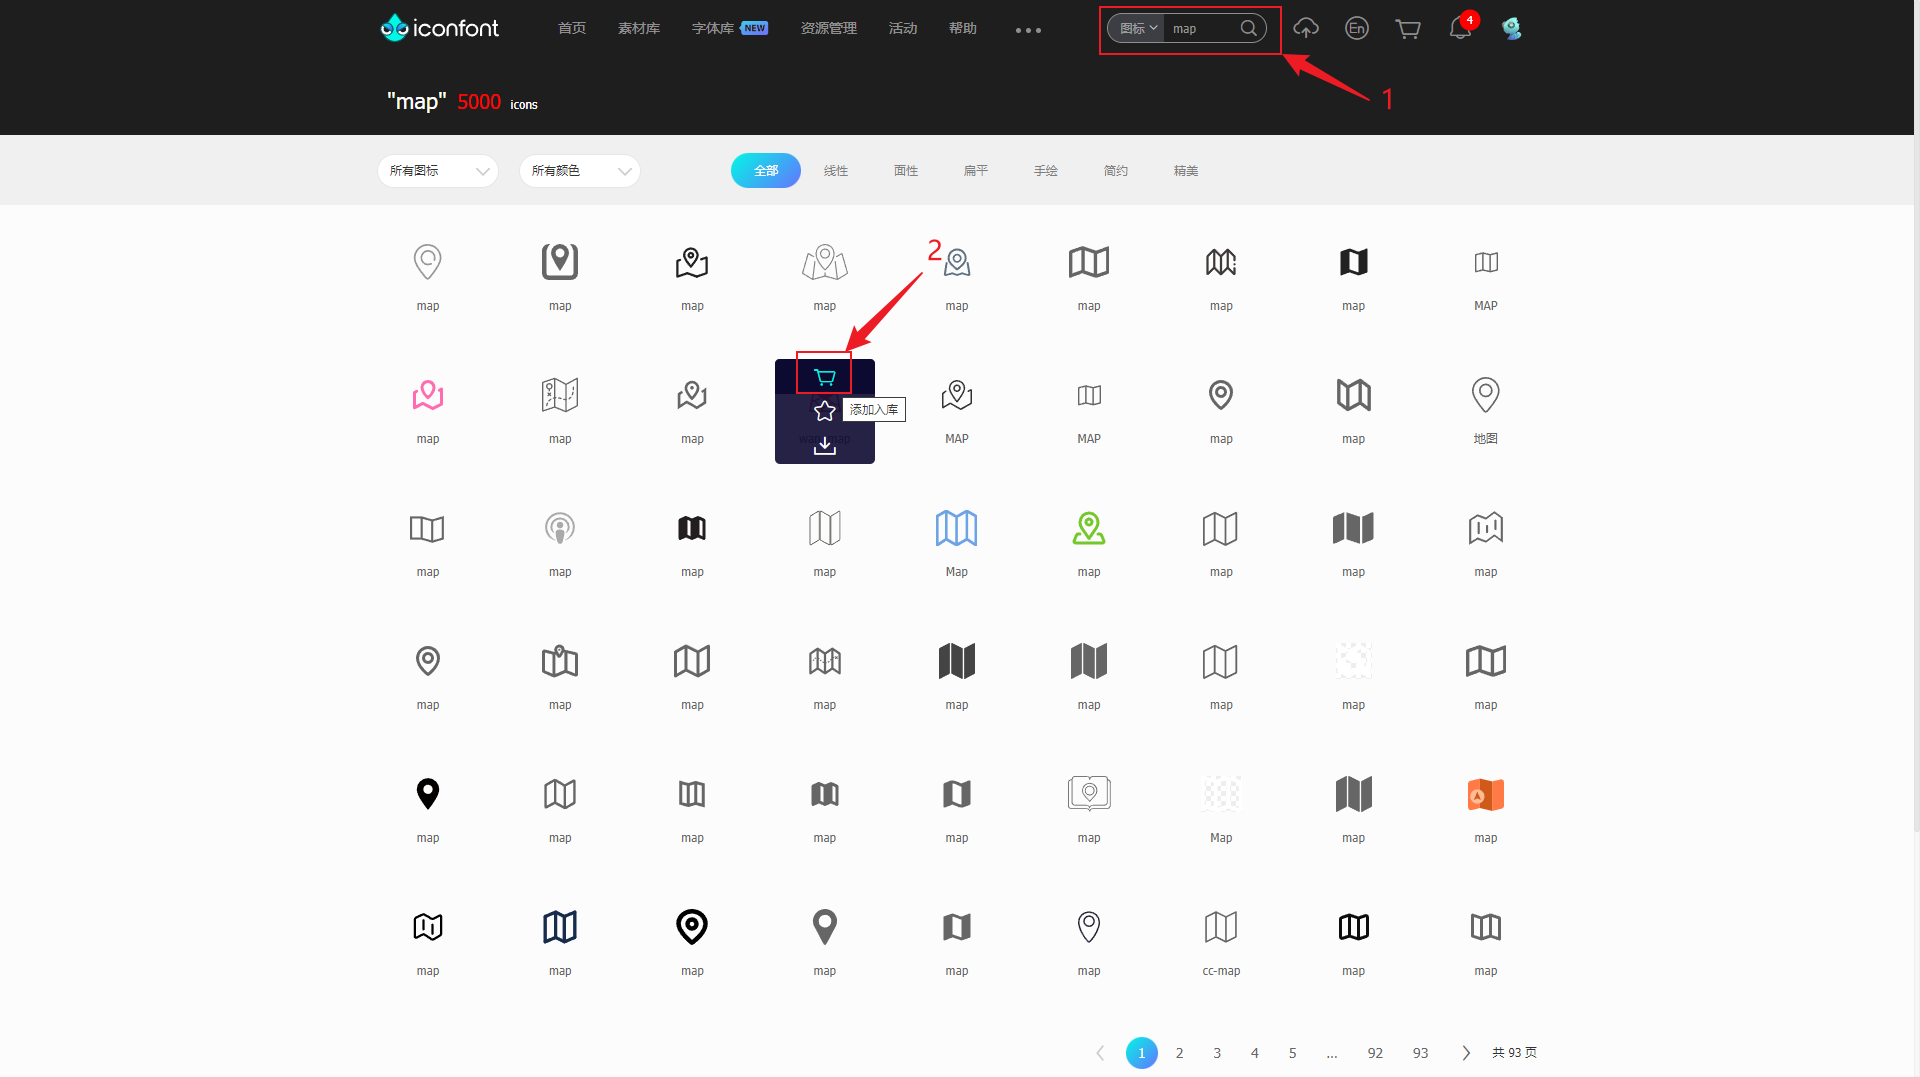
- 搜索图标
- 加入购物车
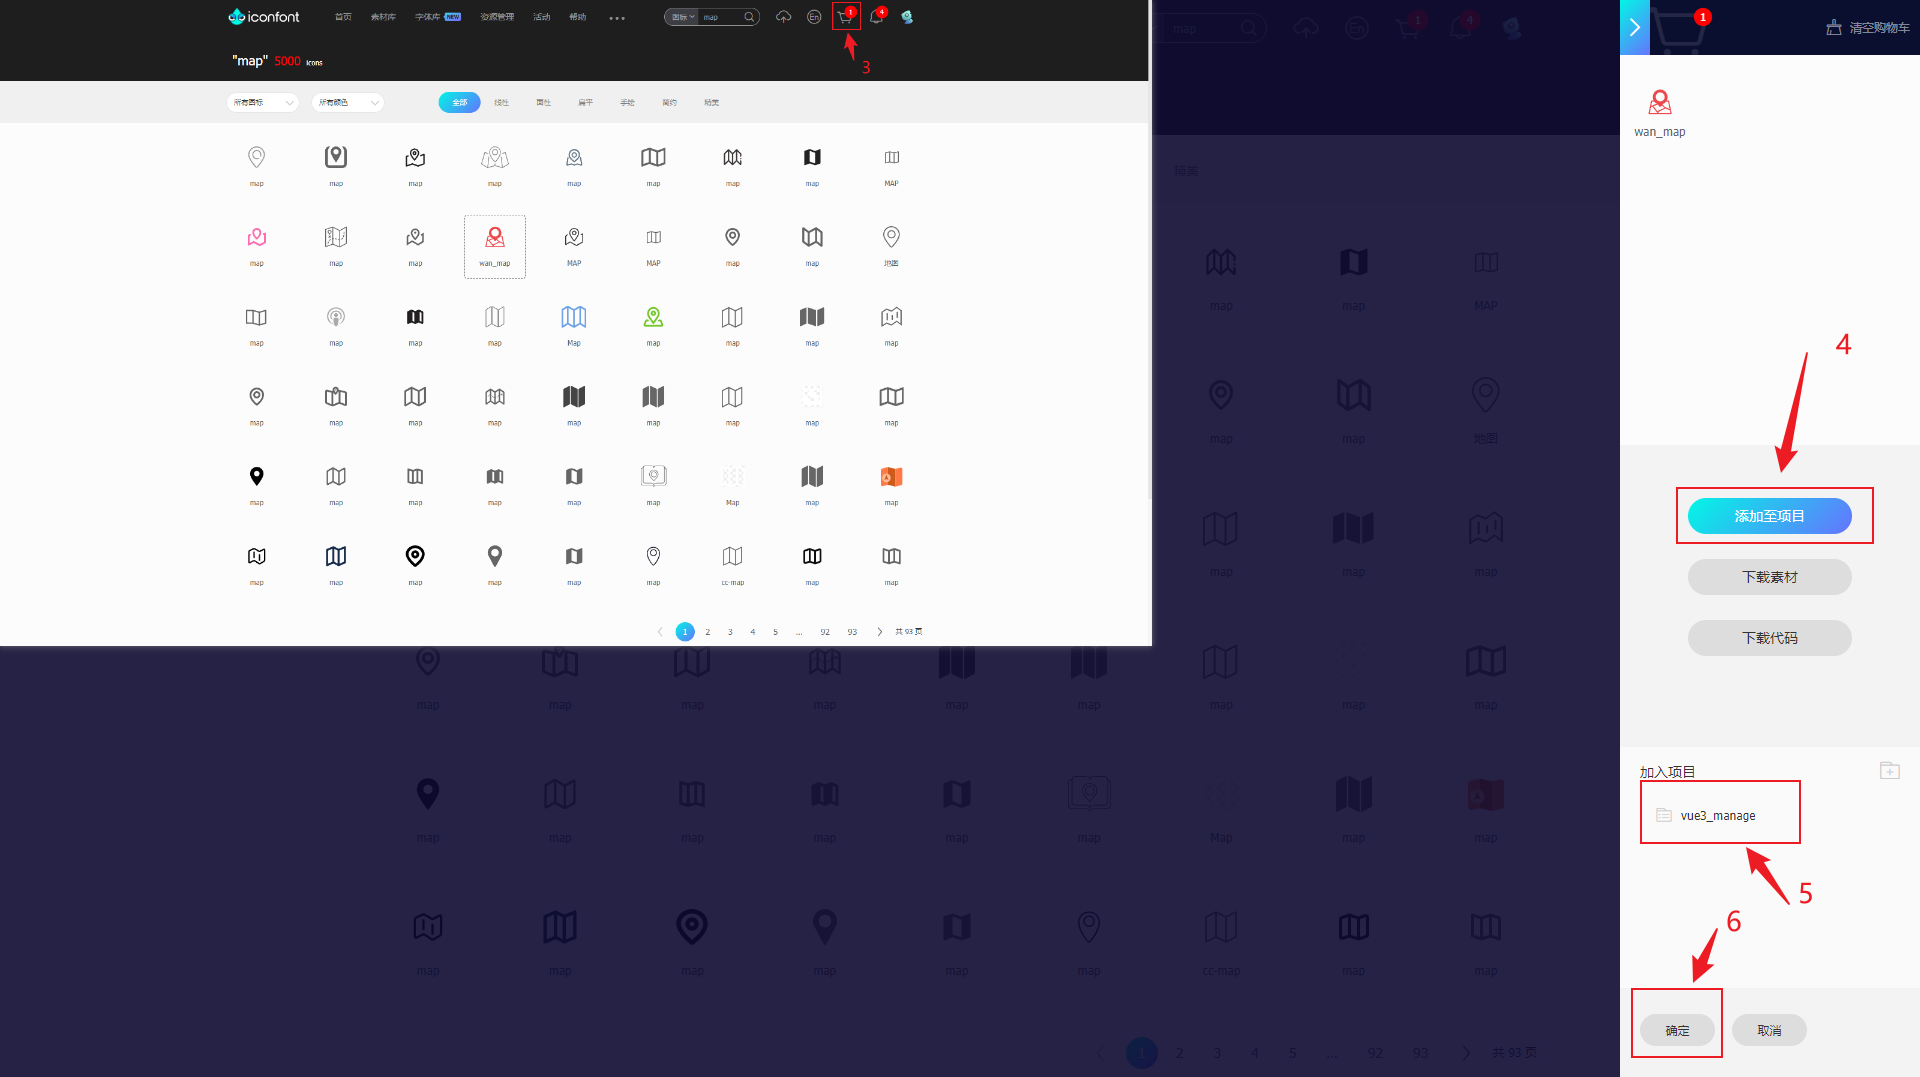
- 点击上面的购物车图标
- 点击添加至项目
- 选择已经创建的项目,如果没有创建,就新建一个
- 点击确定,跳转到项目内容中
- 选择三种引入方式中的symbol
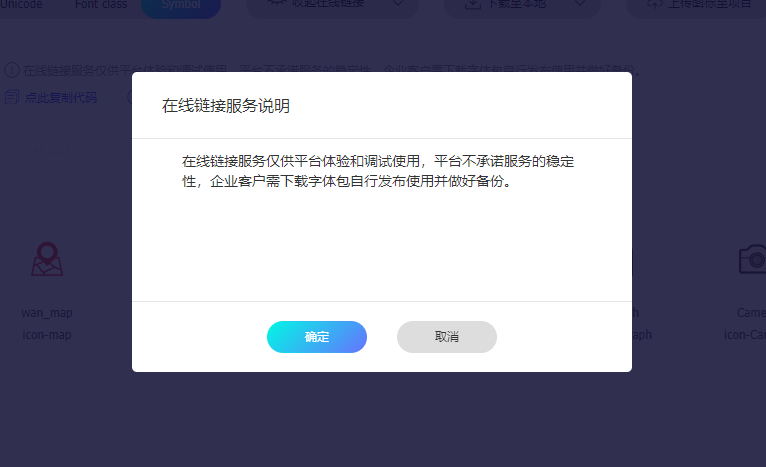
- 如果是首次将购物车图标加入到项目中,需要点击标注8的地方,使在线链接处于打开状态
- 首次将图标加入项目,点击标注出来的9中的“点此复制代码”即可,如果更新了图标,要点击更新代码。弹出对话框,点确定就行了
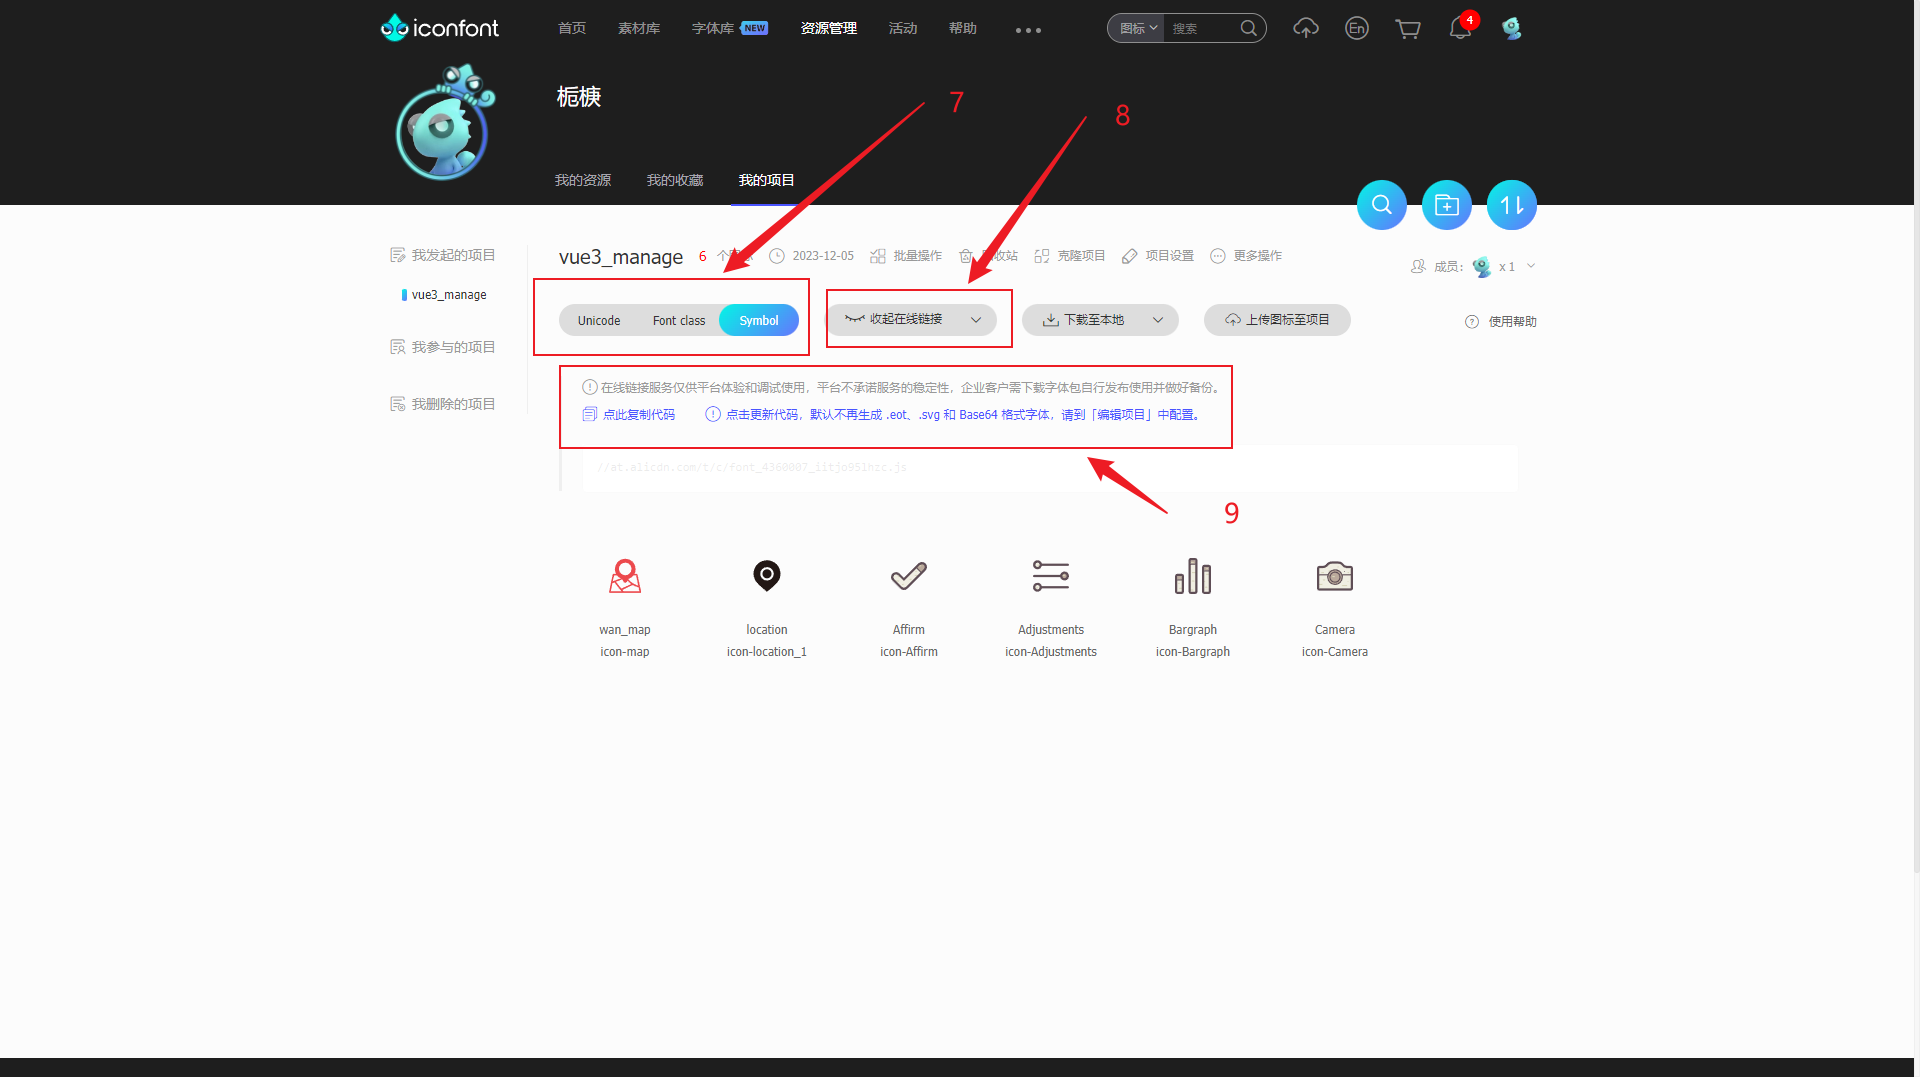
- 随后出现一个代码链接, 如下,点开这个链接
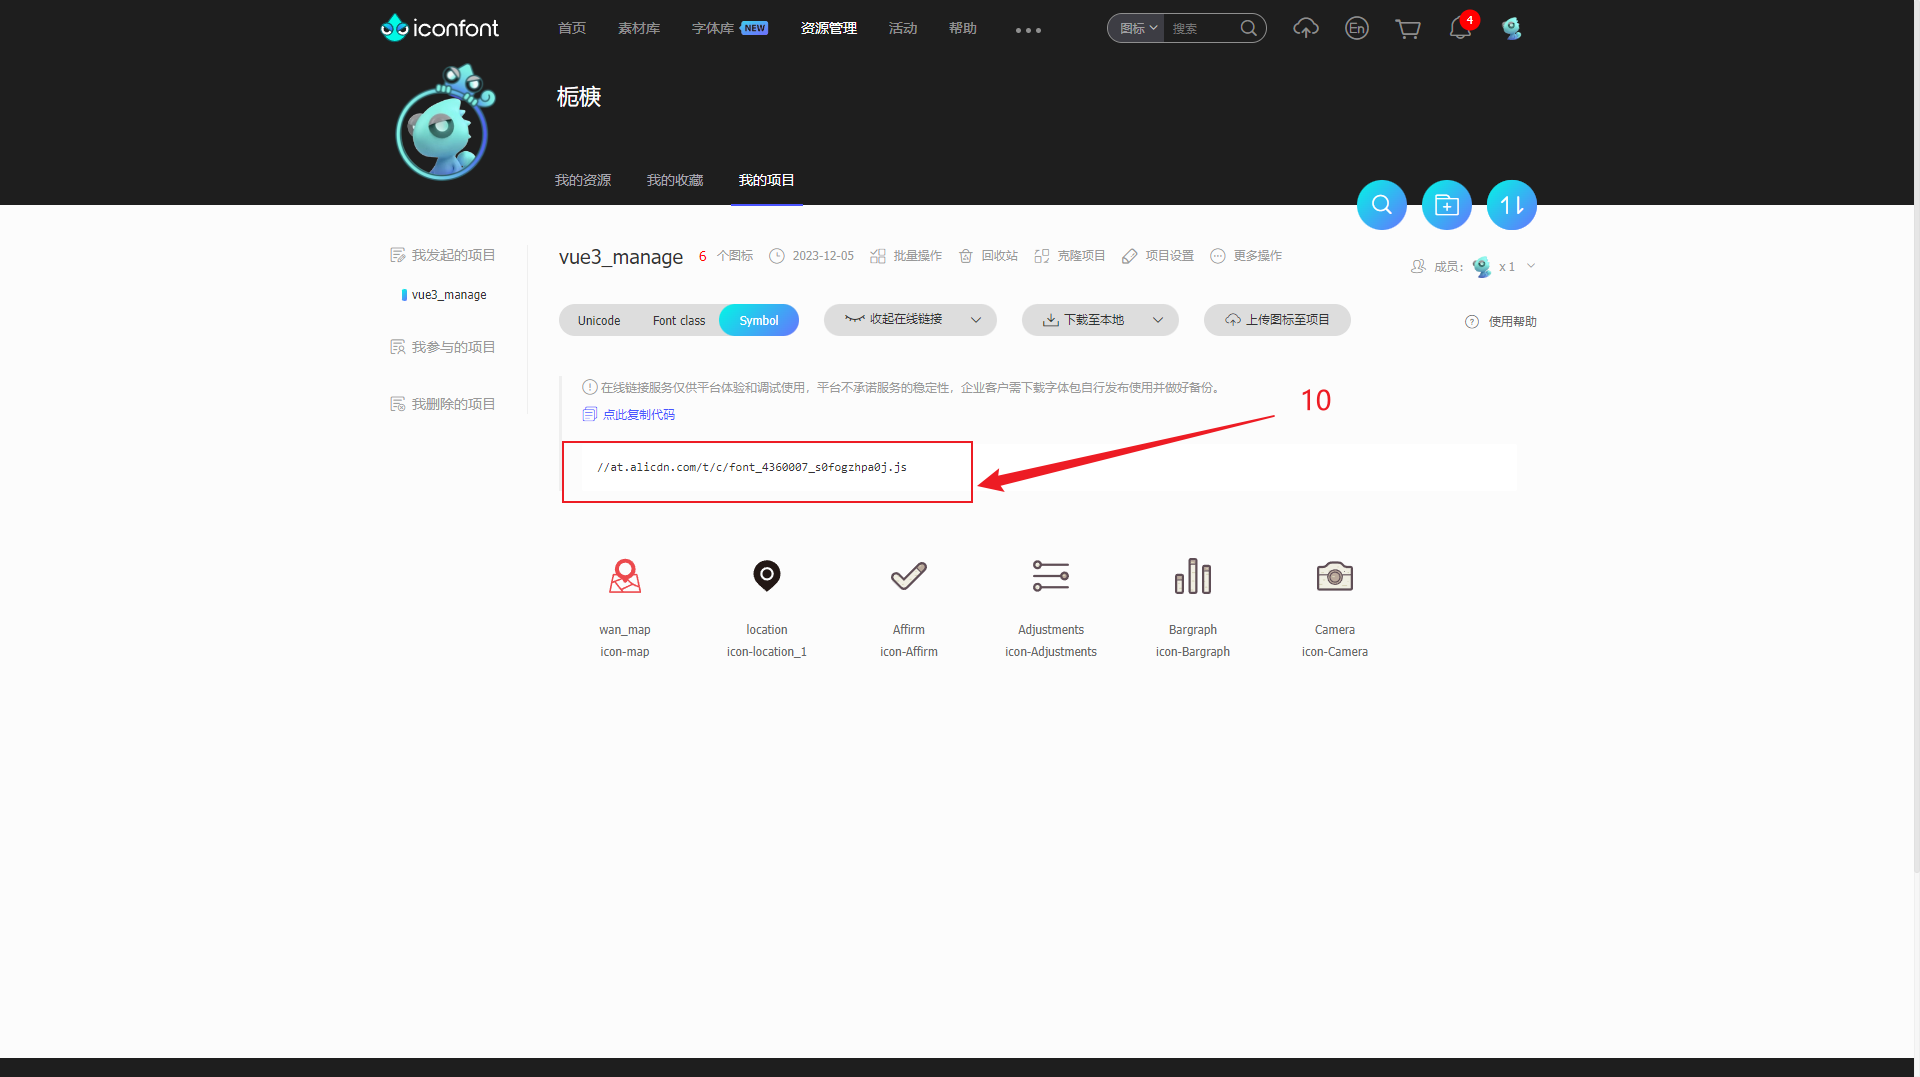
- 出现一串代码,如下:

- 把代码复制下来
2.vue项目中引入代码并注册组件
- 在项目assets目录下创建iconfont文件夹,并在文件夹下创建iconfont.js文件,将上面的代码拷贝到iconfont.js文件中

- 创建通用图标引用组件SvgIcon.vue,组件中填入以下代码,并根据自己的需求设置默认的参数
<template>
    <svg :class="svgClass" aria-hidden="true">
        <use :xlink:href="iconClassName" :fill="color" />
    </svg>
</template>


<script setup>
import {

       computed } from 'vue'
const props = defineProps({


    iconName: {


        type: String,
        required: true
    },
    className: {


        type: String,
        default: ''
    },
    color: {


        type: String,
        default: '#409eff'
    },
    size: {


        type: String,
        default: '16px'
    }
})
// 图标在 iconfont 中的名字
const iconClassName = computed(() => {


    return `#${
        props.iconName}`
})
// 给图标添加上类名
const svgClass = computed(() => {


    if (props.className) {


        return `svg-icon ${
        props.className}`
    }
    return 'svg-icon'
});
</script>


<style scoped>
.svg-icon {


    /* v-bind 是 Vue3 才支持的功能,可以将 CSS 的值与 js 的值绑定 */
    width: v-bind('props.size');
    height: v-bind('props.size');
    position: relative;
    fill: currentColor;
    vertical-align: -2px;
}
</style>
- 全局注册SvgIcon.vue组件。目的是不需要在每个组件中都去引入这个组件,代码写在项目入口文件main.js中,如下:
import '@/assets/iconfont/iconfont.js'
import SvgIcon from '@/components/SvgIcon.vue'
...省略其他代码
app.component('SvgIcon', SvgIcon)
3.其他组件使用iconfont
<template>
    <div class="bread-crumb">
        <SvgIcon iconName="icon-location_1" style="margin-right: 5px;"></SvgIcon>
        <el-breadcrumb separator="/">
            <el-breadcrumb-item>{

   { props.item.first }}</el-breadcrumb-item>
            <el-breadcrumb-item v-if="props.item.second">{

   { props.item.second }}</el-breadcrumb-item>
        </el-breadcrumb>
    </div>
</template>

<script setup>
const props = defineProps(['item'])
</script>

<style lang="scss" scoped>
.bread-crumb {


    height: 50px;
    padding: 0 10px;
    display: flex;
    align-items: center;
    box-shadow: rgba(100, 100, 111, 0.2) 0px 7px 29px 0px;
}

:deep(.el-breadcrumb__item) {


    height: 30px;
    font-size: 16px;
    line-height: 30px;
}

:deep(.el-breadcrumb__inner) {


    font-weight: bold;
}
</style>
其实就是一句代码
<SvgIcon iconName="icon-location_1" style="margin-right: 5px;"></SvgIcon>
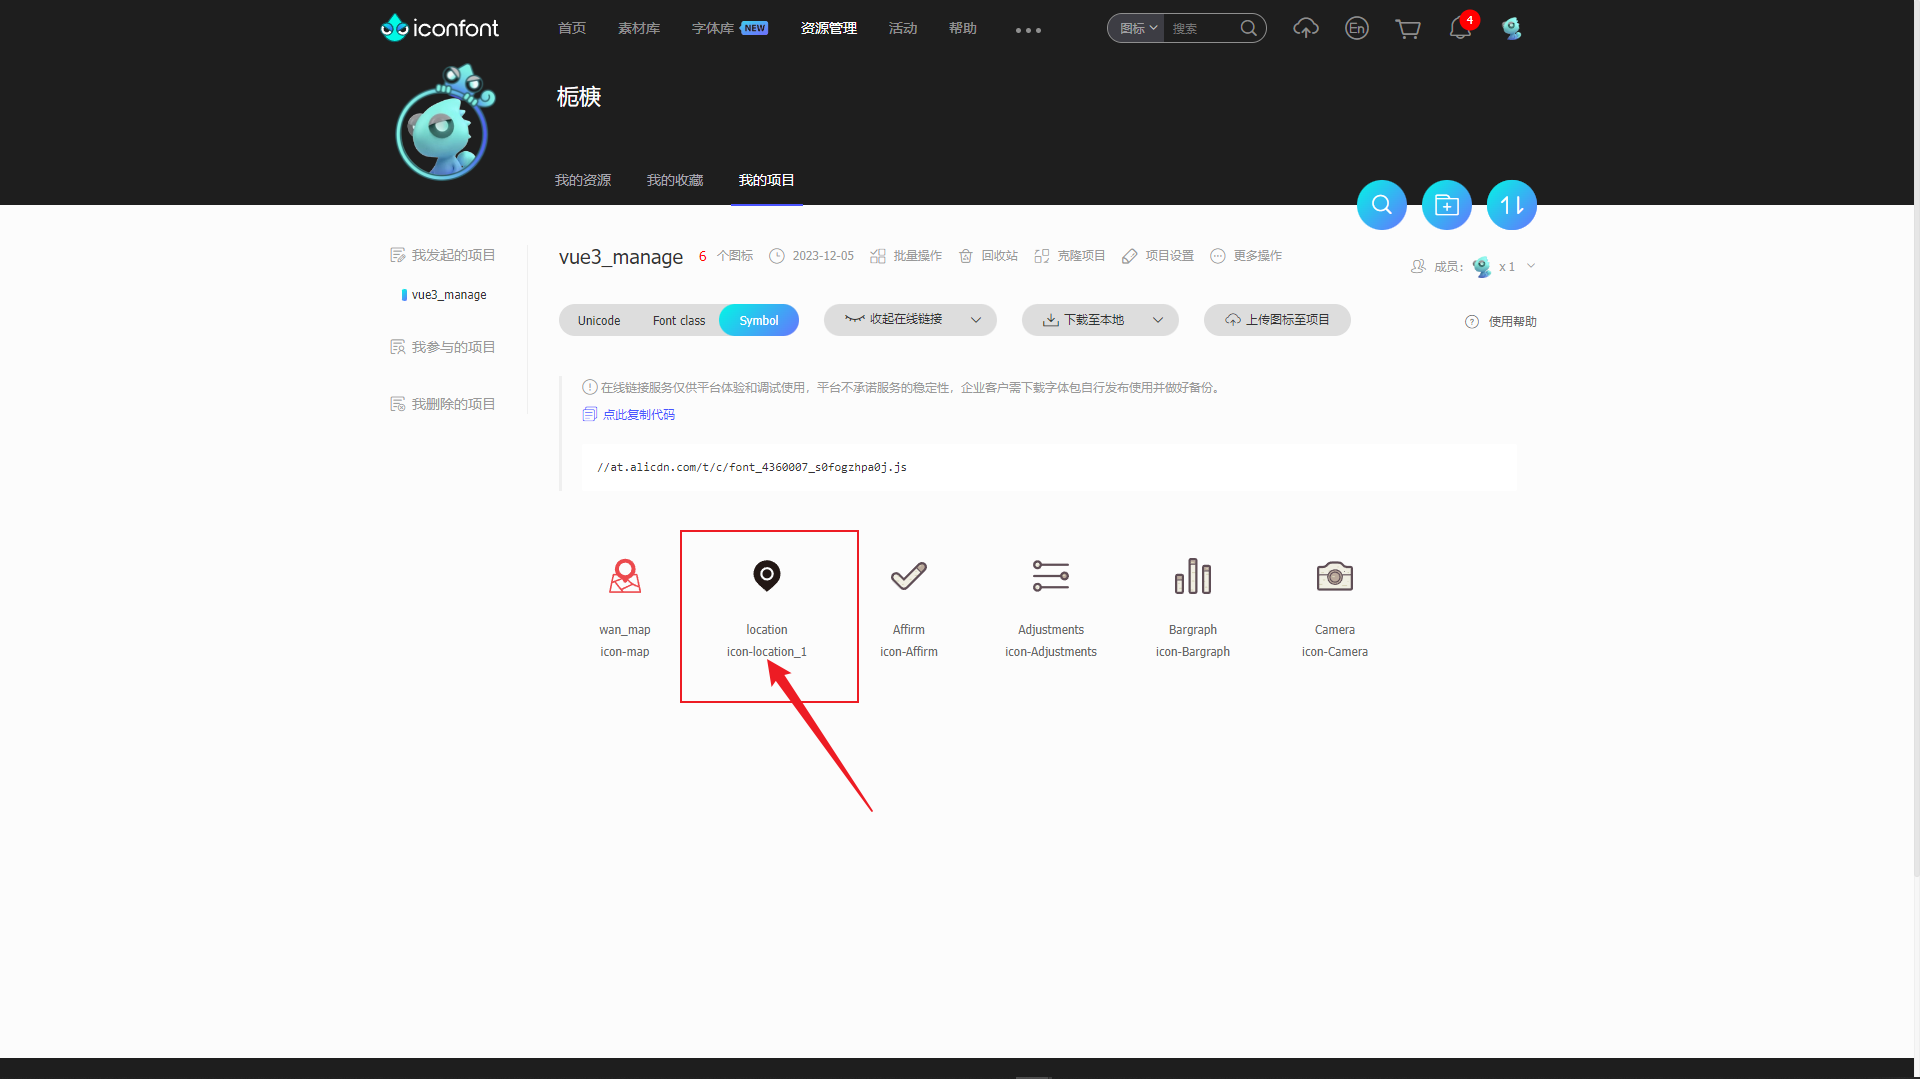
代码中,需要给出iconName,这个值可以从iconfont页面的项目中获取,如下:
在页面上的显示效果:

4.修改iconfont样式
举个例子,hover的时候,想要改变图标的颜色,可以参考下面的代码
<template>
	<div class="icon-wrapper" @mouseenter="handleMouseenter" @mouseleave="handleMouseleave">
		<SvgIcon iconName="icon-star" :color="iconColor"></SvgIcon>
	</div>
</template>

<script setup>
const iconColor = ref('grey')
const handleMouseenter = () => {


    iconColor.value = 'blue'
}
const handleMouseleave = () => {


    iconColor.value = 'grey'
}
</script>