Oauth2授权模式访问之授权码模式(authorization_code)访问
获取code
redirect_uri可以随便写,在浏览器输入(注意是get请求方式):
http://localhost:8080/oauth/authorize?response_type=code&client_id=pair&redirect_uri=http://baidu.com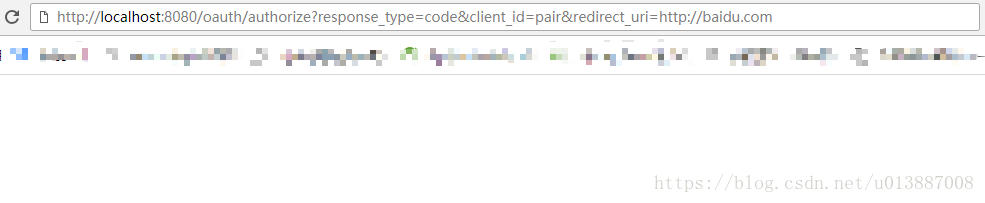
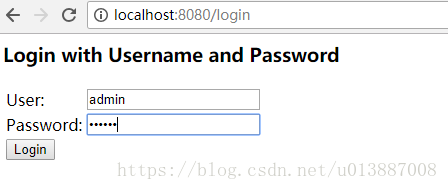
如果没用登陆,会首先重定向到登陆页面:
授权(authrization)
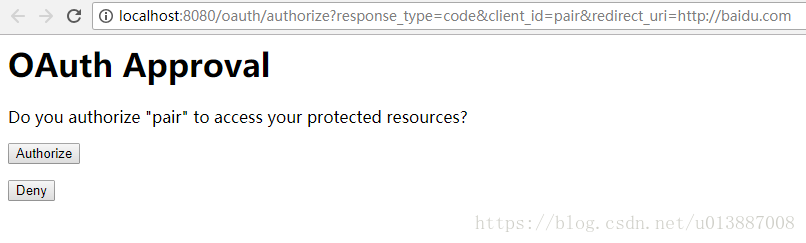
这个过程需要确保用户是已经登陆的情况,在浏览器中输入和步骤1一样的地址(注意是get请求方式):
http://localhost:8080/oauth/authorize?response_type=code&client_id=pair&redirect_uri=http://baidu.com此时会出现让用户授权的页面:
如果拒绝,则会重定向到redirect_uri的地址:

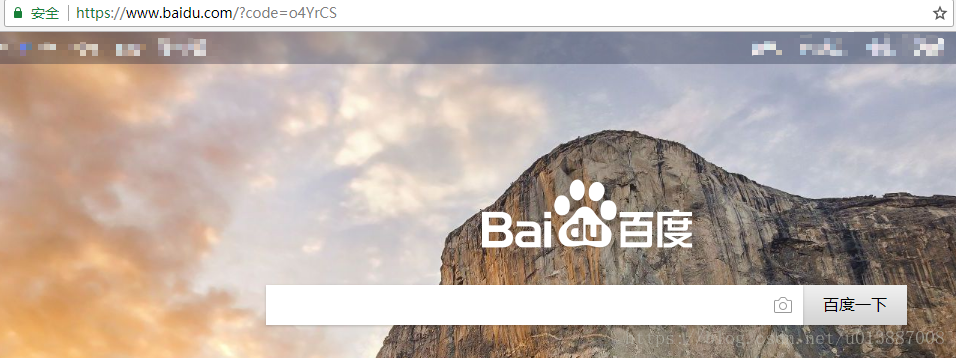
如果同意授权,跳转到redirect_uri地址,并且在uri后面追加返回的code,如https://www.baidu.com/?code=o4YrCS:
根据code获取access_token
在上一步中拿到的code,通过POSTMAN发送post请求,grant_type为authorization_code,请求地址如下:
http://localhost:8080/oauth/token?
grant_type=authorization_code
&code=o4YrCS&client_id=pair
&client_secret=secret&redirect_uri=http://baidu.com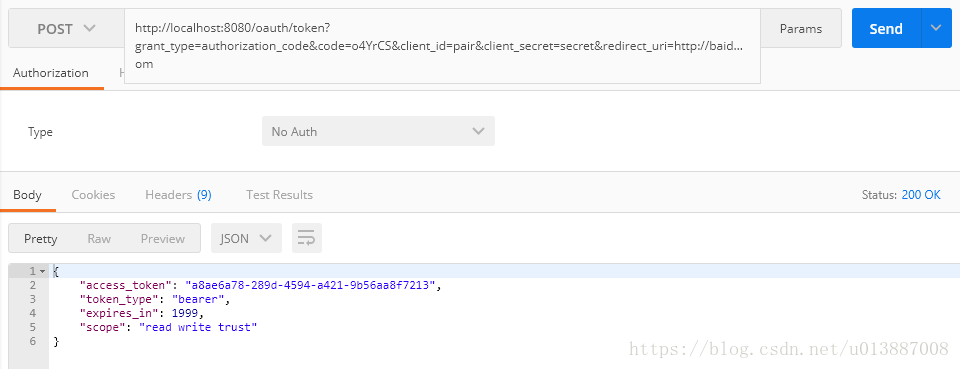
返回access_token格式:
{
    "access_token": "a8ae6a78-289d-4594-a421-9b56aa8f7213",
    "token_type": "bearer",
    "expires_in": 1999,
    "scope": "read write trust"
}
根据access_token获取资源
访问http://localhost:8080/rest/api/ping?access_token=a8ae6a78-289d-4594-a421-9b56aa8f7213:
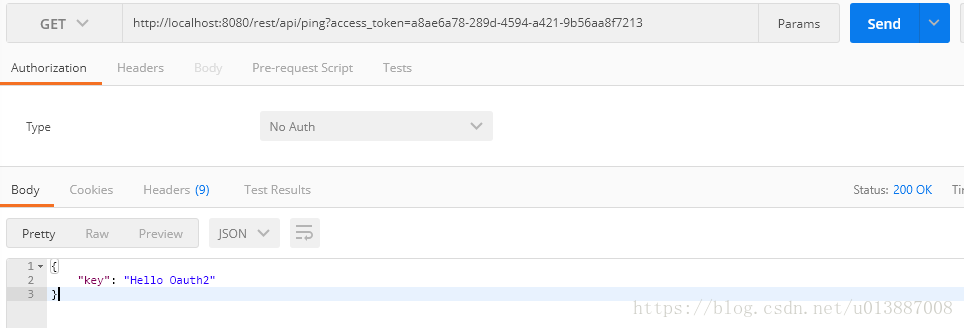
返回资源结果:
{
    "key": "Hello Oauth2"
}
刷新token(refresh_token)
http://localhost:8080/oauth/token?
        grant_type=refresh_token
        &refresh_token=ce3dd10e-ec60-4399-9076-ee2140b04a61
        &client_id=pair&client_secret=secret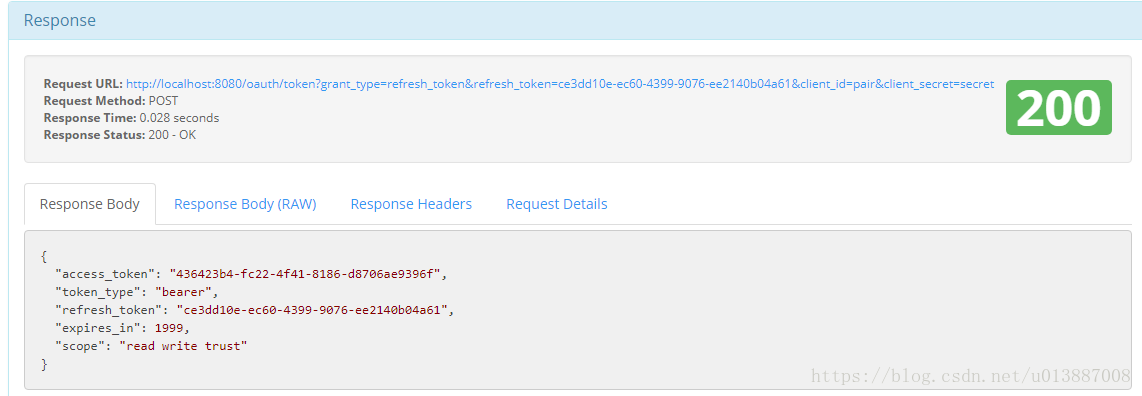
返回结果:
{
  "access_token": "436423b4-fc22-4f41-8186-d8706ae9396f",
  "token_type": "bearer",
  "refresh_token": "ce3dd10e-ec60-4399-9076-ee2140b04a61",
  "expires_in": 1999,
  "scope": "read write trust"
}