开发环境
作者:嘟粥yyds
时间:2023年7月12日
集成开发工具:Google Colab
集成开发环境:Python 3.10.6
第三方库:tensorflow-gpu、matplotlib、numpy、time、os
概要
使用RNN生成文本,本文要点如下:
- 讲解如何使用RNN生成文本
- 为文本生成创建训练示例和目标
- 使用keras子类化构建用于序列生成的RNN模型
- 创建文本生成器并评估输出
本文使用Andrej Karpathy的Shakespeare作品数据集The Unreasonable Effectiveness of Recurrent Neural Networks。给定来自该数据的字符序列(“Shakespear”),训练模型以预测序列中的下一个字符(“e”)。通过重复调用模型可以生成更长的文本序列。
实现步骤
1. 导入TensorFlow和其他库
# 导入所需库
import os
import time
import matplotlib.pyplot as plt
import numpy as np
import tensorflow as tf
2. 下载Shakespeare数据集
path_to_file = tf.keras.utils.get_file(
    "shakespeare.txt",
    "https://storage.googleapis.com/download.tensorflow.org/data/shakespeare.txt",
)
3. 读取数据
首先,我们将下载文件,然后解码。
# 读取文件的内容并计算文本长度
text = open(path_to_file, "rb").read().decode(encoding="utf-8")
print(f"文本长度: {

      len(text)} 字符")  # 打印文本中字符的个数
"""输出如下:
文本长度: 1115394 字符
"""
再让我们看看文本中的前999个字符
print(text[:999])

"""输出如下:
First Citizen:
Before we proceed any further, hear me speak.

All:
Speak, speak.

First Citizen:
You are all resolved rather to die than to famish?

All:
Resolved. resolved.

First Citizen:
First, you know Caius Marcius is chief enemy to the people.

All:
We know't, we know't.

First Citizen:
Let us kill him, and we'll have corn at our own price.
Is't a verdict?

All:
No more talking on't; let it be done: away, away!

Second Citizen:
One word, good citizens.

First Citizen:
We are accounted poor citizens, the patricians good.
What authority surfeits on would relieve us: if they
would yield us but the superfluity, while it were
wholesome, we might guess they relieved us humanely;
but they think we are too dear: the leanness that
afflicts us, the object of our misery, is as an
inventory to particularise their abundance; our
sufferance is a gain to them Let us revenge this with
our pikes, ere we become rakes: for the gods know I
speak this in hunger for bread, not in thirst for revenge.
"""
再检查一下语料库/文档中有多少唯一字符。
vocab = sorted(set(text))
print(f"{

      len(vocab)} 唯一字符")
"""输出如下:
65 唯一字符
"""
4. 处理文本
4.1 向量化文本
在训练前,需要将字符串转换为数字表示。
使用tf.keras.layers.StringLookup层可以将每个字符转换为数字ID。它只需先将文本拆分为标记。
# 待拆分为单个字符的示例文本
example_texts = ["duzhouyyds", "xyz"]

chars = tf.strings.unicode_split(example_texts, input_encoding="UTF-8")
chars
"""输出如下:
<tf.RaggedTensor [[b'd', b'u', b'z', b'h', b'o', b'u', b'y', b'y', b'd', b's'],
 [b'x', b'y', b'z']]>
"""
现在创建 tf.keras.layers.StringLookup 层:
StringLookup层用于将字符映射到整数ID。它接受一些参数:
vocabulary=list(vocab):这里list(vocab)是一个字符列表,它表示我们要建立映射的字符集合。这个字符集合通常是从文本中提取的唯一字符集合。mask_token=None:这个参数指定了掩码标记的值,用于在序列中标记特殊字符。在这里,我们将其设置为None,表示不使用掩码标记。
通过创建StringLookup层的实例,可以将字符映射到整数ID。这个映射可以用于将文本数据转换为数字序列,以便在机器学习模型中进行处理。
# 将标记转为字符ID
ids_from_chars = tf.keras.layers.StringLookup(
    vocabulary=list(vocab), mask_token=None
)
# 将字符ID转为标记
chars_from_ids = tf.keras.layers.StringLookup(
    vocabulary=ids_from_chars.get_vocabulary(), invert=True, mask_token=None
)

ids = ids_from_chars(chars)
print('ids:', ids)

chars = chars_from_ids(ids)
print('chars:', chars)
"""输出如下:
ids: <tf.RaggedTensor [[43, 60, 65, 47, 54, 60, 64, 64, 43, 58], [63, 64, 65]]>

chars: <tf.RaggedTensor [[b'd', b'u', b'z', b'h', b'o', b'u', b'y', b'y', b'd', b's'],
 [b'x', b'y', b'z']]>
 """
可以使用 tf.strings.reduce_join 将字符重新连接到字符串中。
tf.strings.reduce_join(chars, axis=-1).numpy()
"""输出如下:
array([b'duzhouyyds', b'xyz'], dtype=object)
"""
def text_from_ids(ids):
    """
    将整数ID序列转换为文本字符串
    param ids:传入的整数ID序列
    :return:转换后的文本字符串
    """
    return tf.strings.reduce_join(chars_from_ids(ids), axis=-1)
4.2 预测任务
给定一个字符或一系列字符,最有可能的下一个字符是什么?这是我们正在训练模型执行的任务。模型的输入将是一系列字符,训练模型来预测输出——每个时间步的以下字符。
由于RNN保持依赖于先前看到的元素的内部状态,因此给定到目前为止计算的所有字符,下一个字符是什么?
4.3 创建训练示例和目标
接下来将文本分成示例序列。每个输入序列将包含文本中的 seq_length 字符。
对于每个输入序列,相应的目标包含相同长度的文本,只是向右移动了一个字符。
因此,将文本分成 seq_length+1 的块。例如,假设 seq_length 是4,我们的文本是 “Hello”。输入序列将是"Hell",目标序列是 “ello”。
首先使用 tf.data.Dataset.from_tensor_slices 函数将文本向量转换为字符索引流。
# 将给定的文本字符串转换为整数ID序列
all_ids = ids_from_chars(tf.strings.unicode_split(text, "UTF-8"))
all_ids
"""输出如下:
<tf.Tensor: shape=(1115394,), dtype=int64, numpy=array([19, 48, 57, ..., 46,  9,  1], dtype=int64)>
"""
ids_dataset = tf.data.Dataset.from_tensor_slices(all_ids)

for ids in ids_dataset.take(10):
    print(chars_from_ids(ids).numpy().decode("utf-8"))
"""输出如下:
F
i
r
s
t

C
i
t
i
"""
seq_length = 100  # 定义序列长度
examples_per_epoch = len(text) // (seq_length + 1)
batch 方法可以轻松地将这些单个字符转换为所需大小的序列。
# 将整数ID序列转换为序列样本
sequences = ids_dataset.batch(seq_length + 1, drop_remainder=True)  # 加1是为了考虑输入和目标之间的位移

for seq in sequences.take(1):
    print(chars_from_ids(seq))
"""输出如下:
tf.Tensor(
[b'F' b'i' b'r' b's' b't' b' ' b'C' b'i' b't' b'i' b'z' b'e' b'n' b':'
 b'\n' b'B' b'e' b'f' b'o' b'r' b'e' b' ' b'w' b'e' b' ' b'p' b'r' b'o'
 b'c' b'e' b'e' b'd' b' ' b'a' b'n' b'y' b' ' b'f' b'u' b'r' b't' b'h'
 b'e' b'r' b',' b' ' b'h' b'e' b'a' b'r' b' ' b'm' b'e' b' ' b's' b'p'
 b'e' b'a' b'k' b'.' b'\n' b'\n' b'A' b'l' b'l' b':' b'\n' b'S' b'p' b'e'
 b'a' b'k' b',' b' ' b's' b'p' b'e' b'a' b'k' b'.' b'\n' b'\n' b'F' b'i'
 b'r' b's' b't' b' ' b'C' b'i' b't' b'i' b'z' b'e' b'n' b':' b'\n' b'Y'
 b'o' b'u' b' '], shape=(101,), dtype=string)
"""
将标记重新连接到字符串中,以便更容易看到它在做什么:
for seq in sequences.take(5):
    print(text_from_ids(seq).numpy())
"""输出如下:
b'First Citizen:\nBefore we proceed any further, hear me speak.\n\nAll:\nSpeak, speak.\n\nFirst Citizen:\nYou '
b'are all resolved rather to die than to famish?\n\nAll:\nResolved. resolved.\n\nFirst Citizen:\nFirst, you k'
b"now Caius Marcius is chief enemy to the people.\n\nAll:\nWe know't, we know't.\n\nFirst Citizen:\nLet us ki"
b"ll him, and we'll have corn at our own price.\nIs't a verdict?\n\nAll:\nNo more talking on't; let it be d"
b'one: away, away!\n\nSecond Citizen:\nOne word, good citizens.\n\nFirst Citizen:\nWe are accounted poor citi'
"""
对于训练,需要一个 (input, label) 对的数据集。 input 和 label 是序列。在每个时间步,输入是当前字符,标签是下一个字符。
下面是一个函数,它将序列作为输入,复制并移动它以对齐每个时间步的输入和标签:
def split_input_target(sequence):
    input_text = sequence[:-1]
    target_text = sequence[1:]
    return input_text, target_text
split_input_target(list("Tensorflow"))
"""输出如下:
(['T', 'e', 'n', 's', 'o', 'r', 'f', 'l', 'o'],
 ['e', 'n', 's', 'o', 'r', 'f', 'l', 'o', 'w'])
"""
# 对数据集进行处理
dataset = sequences.map(split_input_target)
# 打印第一个样本
for input_example, target_example in dataset.take(1):
    print("Input :", text_from_ids(input_example).numpy())
    print("Target:", text_from_ids(target_example).numpy())
"""输出如下:
Input : b'First Citizen:\nBefore we proceed any further, hear me speak.\n\nAll:\nSpeak, speak.\n\nFirst Citizen:\nYou'
Target: b'irst Citizen:\nBefore we proceed any further, hear me speak.\n\nAll:\nSpeak, speak.\n\nFirst Citizen:\nYou '
"""
4.4 创建训练批次
使用 tf.data 将文本拆分为可管理的序列。但是在将这些数据输入模型之前,需要打乱数据并将其打包成批次。
BATCH_SIZE = 256
BUFFER_SIZE = 10000

dataset = (
    dataset.shuffle(BUFFER_SIZE)
    .batch(BATCH_SIZE, drop_remainder=True)
    .prefetch(tf.data.experimental.AUTOTUNE)
)

dataset
"""输出如下:
<PrefetchDataset element_spec=(TensorSpec(shape=(256, 100), dtype=tf.int64, name=None), TensorSpec(shape=(256, 100), dtype=tf.int64, name=None))>
"""
5 建立模型
使用以下层构建模型
tf.keras.layers.Embedding: 输入层。一个可训练的查找表,将每个字符ID映射到具有embedding_dim维度的向量;tf.keras.layers.GRU: 一种大小为units=rnn_units的RNN(也可以在这里使用LSTM层。)tf.keras.layers.Dense: 输出层,具有vocab_size输出。它为词汇表中的每个字符输出一个logit。根据模型,这些是每个字符的对数似然。
# 以字符为单位的词汇长度
vocab_size = len(vocab)

# 嵌入维度
embedding_dim = 256

# RNN单元数
rnn_units = 1024
下面的类执行以下操作:
- 我们从
tf. keras.Model派生一个类 - 构造函数用于定义模型的层
- 我们使用构造函数中定义的层定义向前传递
class MyModel(tf.keras.Model):
    def __init__(self, vocab_size, embedding_dim, rnn_units):
        super().__init__(self)
        # 创建嵌入层:用于将离散的字符或单词映射到连续的向量表示形式。
        self.embedding = tf.keras.layers.Embedding(vocab_size, embedding_dim)
        # 创建GRU层:用于处理序列数据
        self.gru = tf.keras.layers.GRU(
            rnn_units, return_sequences=True, return_state=True
        )
        # 最后用dense层连接:用于生成对应字符的概率分布,输出预测结果
        self.dense = tf.keras.layers.Dense(vocab_size)

    def call(self, inputs, states=None, return_state=False, training=False):
        x = self.embedding(inputs, training=training)
        # 因为我们正在训练一个文本生成模型,所以我们在训练中使用之前的状态。如果没有状态,那么我们初始化状态
        if states is None:
            states = self.gru.get_initial_state(x)
        x, states = self.gru(x, initial_state=states, training=training)
        x = self.dense(x, training=training)

        if return_state:
            return x, states
        else:
            return x
model = MyModel(
    # 确保词汇表大小与“StringLookup”层匹配。
    vocab_size=len(ids_from_chars.get_vocabulary()),
    embedding_dim=embedding_dim,
    rnn_units=rnn_units,
)
对于每个字符,模型查找嵌入,以嵌入作为输入运行GRU一个时间步长,并应用密集层生成预测下一个字符对数似然的日志。
6 运行模型
首先检查输出形状:
for input_example_batch, target_example_batch in dataset.take(1):
    example_batch_predictions = model(input_example_batch)
    print(
        example_batch_predictions.shape,
        "# (batch_size, sequence_length, vocab_size)",
    )
"""输出如下:
(256, 100, 66) # (batch_size, sequence_length, vocab_size)
"""
在上面的示例中,输入的序列长度是 100 ,但实际上模型可以在任何长度的输入上运行:
# 打印模型信息
model.summary()
"""输出如下:
Model: "my_model"
_________________________________________________________________
 Layer (type)                Output Shape              Param #
=================================================================
 embedding (Embedding)       multiple                  16896

 gru (GRU)                   multiple                  3938304

 dense (Dense)               multiple                  67650

=================================================================
Total params: 4,022,850
Trainable params: 4,022,850
Non-trainable params: 0
_________________________________________________________________
"""
要从模型中获得实际预测,您需要从输出分布中采样,以获得实际的字符索引。此分布由字符词汇表上的对数定义。
注意:从这个分布中_sample_很重要,因为_argmax_分布很容易让模型陷入循环。
尝试批处理中的第一个示例:
sampled_indices = tf.random.categorical(
    example_batch_predictions[0], num_samples=1
)
sampled_indices = tf.squeeze(sampled_indices, axis=-1).numpy()

sampled_indices
"""输出如下:
array([22,  7, 34, 51, 11, 18,  0,  1, 50, 40, 33, 10, 53, 12, 14, 27, 64,
       19, 24, 18, 57, 27, 38, 58, 41, 44, 33, 40, 49, 32, 16, 37,  6, 60,
       62, 14,  6, 28,  6, 44, 55, 32, 41, 27, 18, 45,  5, 29, 63, 32, 36,
       49, 44, 47, 35, 48, 56, 65,  1, 53, 23, 36,  2, 60, 46, 15, 49, 27,
       17,  2, 31, 28, 19, 14, 35, 50, 19, 45, 60, 24, 59, 16, 23, 19, 30,
       46, 65, 51,  8, 65,  8, 41, 64, 54, 47, 41, 24, 31,  2, 24],
      dtype=int64)
"""
解码这些以查看此未经训练的模型预测的文本:
print("输入:\n", text_from_ids(input_example_batch[0]).numpy().decode("utf-8"))
print()
print("下一个字符预测:\n", text_from_ids(sampled_indices).numpy().decode("utf-8"))
"""输出如下:
输入:
 re as like as it is true!

DUKE VINCENTIO:
By heaven, fond wretch, thou knowist not what thou speak'

下一个字符预测:
 I,Ul:E[UNK]
kaT3n;ANyFKErNYsbeTajSCX'uwA'O'epSbNEf&PxSWjehViqz
nJW ugBjND ROFAVkFfuKtCJFQgzl-z-byohbKR K
"""
7. 训练模型
此时,该问题可以被视为标准分类问题。给定前一个RNN状态和这个时间步长的输入,预测下一个字符的类别。
附加优化器和损失函数
标准的 tf.keras.losses.sparse_categorical_crossentropy 损失函数在这种情况下有效,因为它应用于预测的最后一个维度。
因为模型返回logits,所以需要设置 from_logits 标志。
# 在这里添加一个损失函数
loss = tf.losses.SparseCategoricalCrossentropy(from_logits=True)

example_batch_mean_loss = loss(target_example_batch, example_batch_predictions)
print(
    "Prediction shape: ",
    example_batch_predictions.shape,
    " # (batch_size, sequence_length, vocab_size)",
)
print("Mean loss:        ", example_batch_mean_loss)
"""输出如下:
Prediction shape:  (256, 100, 66)  # (batch_size, sequence_length, vocab_size)
Mean loss:         tf.Tensor(4.1902757, shape=(), dtype=float32)
"""
使用 tf.keras.Model.compile 方法配置训练过程。将 tf.keras.optimizers.Adam 与默认参数和损失函数一起使用。
model.compile(optimizer="adam", loss=loss)
8. 配置检查点
使用 tf.keras.callbacks.ModelCheckpoint 来确保在训练期间保存检查点:
# 设置保存检查点的目录
checkpoint_dir = "./training_checkpoints"
# 命名检查点文件
checkpoint_prefix = os.path.join(checkpoint_dir, "ckpt_{epoch}")

# 设置为每30个epoch保存一次,在训练过程中,会生成总共4个检查点文件,对应于第30、60、90和最后一个epoch的权重。
checkpoint_callback = tf.keras.callbacks.ModelCheckpoint(
    filepath=checkpoint_prefix, save_weights_only=True, save_freq=30
)
# 101个epoch在单GPU上训练时长大概在12min左右
EPOCHS = 101

history = model.fit(dataset, epochs=EPOCHS, callbacks=[checkpoint_callback])
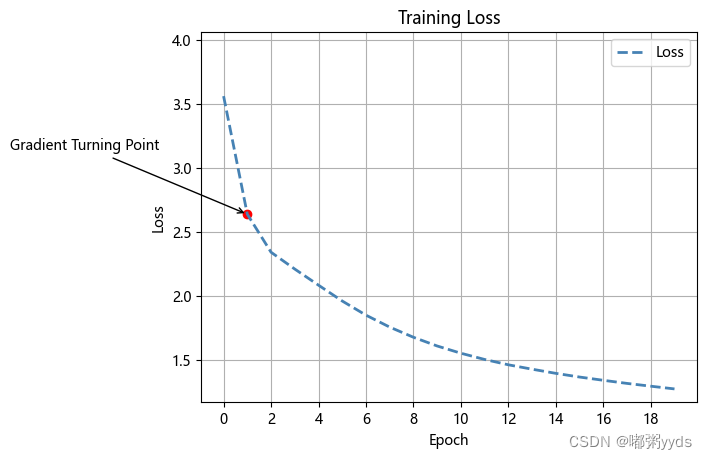
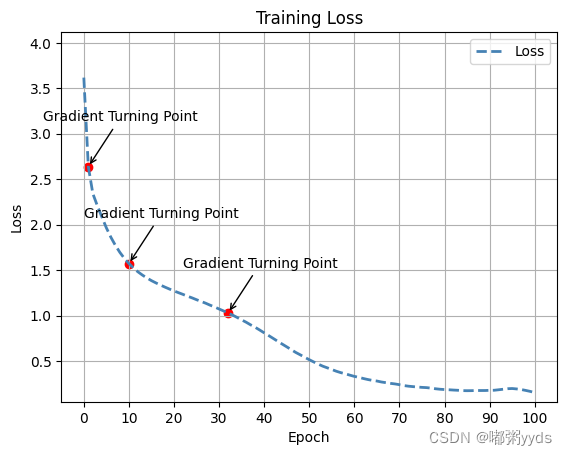
可视化损失
# 获取训练过程中的损失值
loss = history.history['loss']

# 计算斜率
slopes = np.gradient(np.gradient(loss))

# 找到绝对值最大的斜率对应的点
max_slope_index = np.argmax(np.abs(slopes))[-3:]
max_slope_point = [(index, loss[index]) for index in max_slope_indices]

# 创建损失值的折线图
plt.plot(loss, color='steelblue', linestyle='--', linewidth=2)
plt.title('Training Loss')
plt.xlabel('Epoch')
plt.ylabel('Loss')
plt.grid(True)  # 添加网格线
plt.legend(['Loss'])  # 添加图例
plt.ylim([max(0, min(loss) - 0.1), max(loss)+0.5])  # 调整y轴范围
plt.xticks(np.arange(0, 101, 10))  # 设置y轴刻度

# 标注绝对值最大的三个斜率对应的点
for point in max_slope_points:
    plt.scatter(point[0], point[1], color='red', marker='o')
    plt.annotate('Gradient Turning Point', xy=point, xytext=(point[0]-10, point[1]+0.5),
                 arrowprops=dict(facecolor='red', arrowstyle='->'))  # 标注注释

plt.show()
9. 生成文本
使用此模型生成文本的最简单方法是循环运行它,并在执行时跟踪模型的内部状态。
每次调用模型时,您都会传递一些文本和一个内部状态。模型返回下一个字符及其新状态的预测。将预测和状态传回以继续生成文本。
以下进行单步预测:
class OneStep(tf.keras.Model):
    def __init__(self, model, chars_from_ids, ids_from_chars, temperature=1.0):
        super().__init__()
        self.temperature = temperature
        self.model = model
        self.chars_from_ids = chars_from_ids
        self.ids_from_chars = ids_from_chars

        # 创建一个掩码以阻止模型生成特定字符,例如"[UNK]"
        skip_ids = self.ids_from_chars(["[UNK]"])[:, None]
        sparse_mask = tf.SparseTensor(
            # 将"[UNK]"对应的ID索引位置的值设为-inf。
            values=[-float("inf")] * len(skip_ids),
            indices=skip_ids,
            # 将shape与vocabulary匹配
            dense_shape=[len(ids_from_chars.get_vocabulary())],
        )
        self.prediction_mask = tf.sparse.to_dense(sparse_mask)

    @tf.function  # 标记为 TensorFlow 的计算图函数,以提高执行效率
    def generate_one_step(self, inputs, states=None):
        # 将字符转换为对应的ID序列。
        input_chars = tf.strings.unicode_split(inputs, "UTF-8")
        input_ids = self.ids_from_chars(input_chars).to_tensor()

        # predicted_logits形状是 [batch, char, next_char_logits]
        predicted_logits, states = self.model(
            inputs=input_ids, states=states, return_state=True
        )
        # 只使用最后一个预测。
        predicted_logits = predicted_logits[:, -1, :]
        # 调整生成的随机性和多样性
        predicted_logits = predicted_logits / self.temperature
        # 应用预测掩码:防止生成“[UNK]”。
        predicted_logits = predicted_logits + self.prediction_mask

        # 对输出日志进行采样以生成token IDs.
        predicted_ids = tf.random.categorical(predicted_logits, num_samples=1)
        predicted_ids = tf.squeeze(predicted_ids, axis=-1)

        # 从标记ids转换为字符
        predicted_chars = self.chars_from_ids(predicted_ids)

        # 返回字符和模型状态。
        return predicted_chars, states

one_step_model = OneStep(model, chars_from_ids, ids_from_chars)
循环运行它以生成一些文本。查看生成的文本,您会看到模型知道何时大写、制作段落和模仿莎士比亚式的写作词汇。由于训练时间很少,它还没有学会形成连贯的句子。
start = time.time()
states = None
next_char = tf.constant(["ROMEO:"])
result = [next_char]

for n in range(1000):  # 循环迭代1000次
    next_char, states = one_step_model.generate_one_step(
        next_char, states=states
    )
    result.append(next_char)

result = tf.strings.join(result)
end = time.time()
print(result[0].numpy().decode("utf-8"), "\n" + "_" * 80)
print("Run time:", end - start)
"""Epoch=20的输出:
ROMEO:
Should neither call her be towerty,
Most turns as bunisht Against it;
Have you glad little light of France,
Have he hath not said in call it.

Third Warwick, most buried.

PAULI:
And, more starp, who, you must mere,
What staybshough he was ever privesh,
trown, and mear our choice I dread monstant.
Who godst on me as we should comm.

POLIXENES:
How now, George: sir, wou not too quar
Is past obinion: but when these more charges of that dose
that was not speak bries. Heaven makes her will steed
Sir of my fach of melan, unclefore.

POLIXENES:
O, the duker was the regre.

MONTAGUE:
Are you it; we have into mine enonger,
And my awhile whom you should be apparel.
''lo, I would not smown us to? theis son meing neress were queen's.
Go te wed when thou ars: mayon a those,
The rest in Warwick with report with a true.

ISABELLA:
Blake, good friench: in those that his majesty's accused in
Sich one 'thich cannot give no lacker monster:
Lost but one and their resembting: breath,
which way often burg
________________________________________________________________________________
Run time: 3.0338101387023926
"""Epoch=101的输出:
ROMEO:
The exchalted man must speak a word or two;
The which will enforce his strong proceeds,
His horse shall be content to be a mantles-seegn.

WARWICK:
And I the house of Lancaster and his weal on't.

First Gentleman:
I was by at the opening of the field,
Shall, stif and vice and so smake me, never
BegO One that dost undestroved arms
you now she will be talking. now put up thy gogs,
Methings have ears are flatted and shrewd,
As it were past and wild ever Romeo.

JOHN MORTAMELBO:
Yet in an idle blood that suid contradiction.
Who had but newly came hy worthy Clarence, we'll prove a lover,
To be thy general; he's a true knight, for his purpose
with the most seem'st nowfulley which now doth living breath;
Can this maze down the behelf of many hands,
Defining my griefs made the kingdom and ming;
And he shall see, 'Fore the gentleman and how meal mine.

DUCHESS OF YORK:
O, she that might have found it.

First Citizen:
For both our majesty!

ANGELO:
Well, I beseech you, pine, and thou hast sland
________________________________________________________________________________
Run time: 4.1837990283966064
您可以做的最简单的事情来改进结果是训练它更长时间。
您还可以尝试使用不同的起始字符串,尝试添加另一个RNN层以提高模型的准确性,或者调整temperature参数以生成或多或少的随机预测。
如果您希望模型生成文本更快,您可以做的最简单的事情就是批量生成文本。模型生成5个输出的时间与上面生成1个输出的时间大致相同。
10. 导出生成器
这个one_step模型可以很容易地保存和恢复,允许您在任何接受 tf.saved_model 的地方使用它。
tf.saved_model.save(one_step_model, "one_step")
one_step_reloaded = tf.saved_model.load("one_step")
states = None
next_char = tf.constant(["ROMEO:"])
result = [next_char]

for n in range(100):
    next_char, states = one_step_reloaded.generate_one_step(
        next_char, states=states
    )
    result.append(next_char)

print(tf.strings.join(result)[0].numpy().decode("utf-8"))
"""输出如下:
ROMEO:
Nay, meture, though not say, That take't she would pleak'st
This Paugino the detter isle, indeed I
"""
11. 进阶: 自定义训练
上面的训练程序很简单,它使用教师强迫来防止错误的预测被反馈到模型中,因此模型永远不会学会从错误中恢复过来。
自定义训练循环中最重要的部分是训练步长函数。
使用 tf.GradientTape 跟踪梯度。您可以通过阅读 eager execution guide.
基本过程是:
- 执行模型并计算
tf.GradientTape下的损失。 - 计算更新并使用优化器将它们应用于模型。
class CustomTraining(MyModel):
    @tf.function
    def train_step(self, inputs):
        inputs, labels = inputs
        with tf.GradientTape() as tape:
            predictions = self(inputs, training=True)
            loss = self.loss(labels, predictions)
        grads = tape.gradient(loss, model.trainable_variables)
        self.optimizer.apply_gradients(zip(grads, model.trainable_variables))

        return {

    "loss": loss}
train_step 方法允许您更改训练步骤的行为,并且仍然使用keras的 Model.compile 和 Model.fit 方法。
model = CustomTraining(
    vocab_size=len(ids_from_chars.get_vocabulary()),
    embedding_dim=embedding_dim,
    rnn_units=rnn_units,
)

model.compile(
    optimizer=tf.keras.optimizers.Adam(),
    loss=tf.keras.losses.SparseCategoricalCrossentropy(from_logits=True),
)

model.fit(dataset, epochs=1)
或者如果您需要进一步自定义,您可以编写自己的完整自定义训练循环:
EPOCHS = 10

mean = tf.metrics.Mean()

for epoch in range(EPOCHS):
    start = time.time()

    mean.reset_states()
    for batch_n, (inp, target) in enumerate(dataset):
        logs = model.train_step([inp, target])
        mean.update_state(logs["loss"])

        if batch_n % 50 == 0:
            template = (
                f"Epoch {

      epoch+1} Batch {

      batch_n} Loss {

      logs['loss']:.4f}"
            )
            print(template)

    # saving (checkpoint) the model every 5 epochs
    if (epoch + 1) % 5 == 0:
        model.save_weights(checkpoint_prefix.format(epoch=epoch))

    print()
    print(f"Epoch {

      epoch+1} Loss: {

      mean.result().numpy():.4f}")
    print(f"Time taken for 1 epoch {

      time.time() - start:.2f} sec")
    print("_" * 80)

model.save_weights(checkpoint_prefix.format(epoch=epoch))