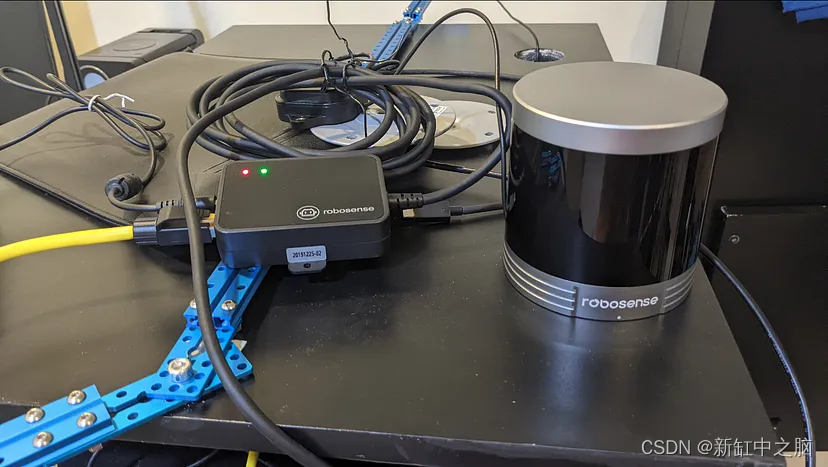
在过去的两年里,我一直在和机器人打交道。 今年早些时候,我不再只关注相机,而是决定开始使用激光雷达。 因此,经过大量研究后,我选择了 32 束 RoboSense 设备。
推荐:用 NSDT编辑器 快速搭建可编程3D场景
我不得不花一些时间来设置它,特别是创建一个合适的支架,也可以携带相机。 经过一番尝试,激光雷达终于准备好了,我宣布我爱上了这种数据。
我项目的下一步是开始开发一个系统,使用 LiDAR 点云检测和跟踪 3D 对象。 应用程序多种多样,但包括检测固定物体(建筑物、交通标志等)以创建 3D 地图,以及检测移动物体(行人、汽车等)以避免碰撞。
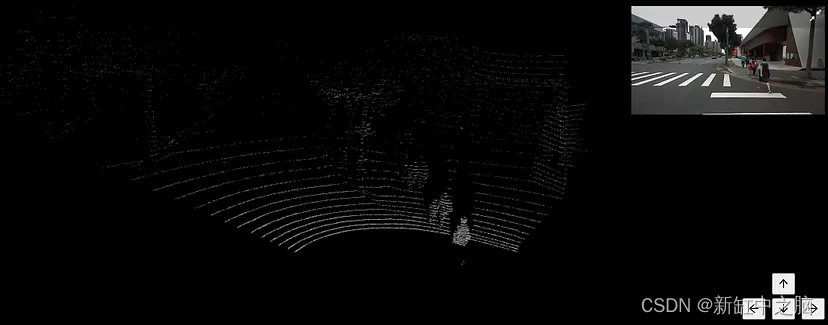
在开发上述任何应用程序之前,我首先需要学习如何有效地将点云数据加载到 TensorFlow(我用于深度学习的工具)中。 目前,我的数据集由 12,200 个点云图像对组成。 该图像用作背景来了解激光雷达正在观察什么。 我还对所有点云进行了预处理,以仅显示大约在相机视野内的数据,而不是原始的 360° 视图。
尝试将数据加载到 TensorFlow 比我预想的更具挑战性。 首先,点云存储为 PCD(点云数据)文件,这是一种用于存储 3D 点云数据的文件格式。 TensorFlow 无法直接处理这种类型的文件,因此需要进行转换。 Open3D 库是一个易于使用的点云操作工具。 使用此工具,我可以轻松加载 PCD 文件并将点提取为 X、Y 和 Z 坐标的 NumPy 数组。 另一个工具 NSDT 3DConvert用于可视化PCD点云并确认在 Google Colab 上正确提取了点:

https://3dconvert.nsdt.cloud
有了新工具,我将 12,200 个 PCD 和 12,200 个 JPG 上传到我的 Google Drive,并将其连接到 Google Colab。 然后,我创建了一些代码来加载 PCD、提取点并将它们放入 NumPy 数组中,这是 TensorFlow 可以轻松处理的结构。 我自信地运行了代码,并惊恐地看到,等待几分钟后,Colab 抱怨在转换点云时内存不足。 坏消息,因为我计划收集和处理比目前更多的数据。
幸运的是,这是处理大型数据集时的常见问题,而 TensorFlow 等工具具有处理此类情况的功能。 所需的解决方案是 Dataset API,它提供了创建高效输入管道的方法。 引用API的文档:数据集的使用遵循一个常见的模式:
- 根据你的输入数据创建源数据集。
- 应用数据集转换来预处理数据。
- 迭代数据集并处理元素。
- 迭代以流式传输的方式进行,因此完整的数据集不需要装入内存。
因此,本质上,Dataset API 将允许我创建一个管道,并且数据将根据 TensorFlow 中的训练循环的请求分部分加载,从而避免内存不足。 因此,我回顾了如何使用 API,并创建了一些代码来构建数据管道。 按照上述模式的步骤 1,代码首先加载所有 PCD 和图像的 URL 列表,然后在步骤 2 中,加载 PCD 并将其转换为 NumPy 中的点,然后加载图像并对其进行标准化。 但这时候我又遇到了麻烦。
为了提高效率,Dataset API 中的所有内容(显然还有所有 TensorFlow API)都作为图中的张量运行。 Dataset API 提供了从不同格式加载数据的函数,但没有用于 PCD 的函数。 在研究了不同的可能解决方案后,我决定不再将数据作为多个 PCD 和 JPEG 文件并让 TensorFlow 加载并预处理它们,而是离线预处理所有数据,并将其打包到 HDF5 文件中 。
HDF5 是一种开源文件格式,支持大型、复杂、异构数据。 我显然已经验证了 Dataset API 支持这种类型的文件。 使用这种格式的主要优点除了可以很好地使用 TensorFlow 之外,还在于我可以将所有数据打包到一个结构良好的大文件中,以便我可以轻松移动。 我创建了一个简单的 Python 脚本来加载所有 PCD、提取点,并将它们与相应的上下文文件一起打包到一个漂亮的 HDF5 文件中。
def generate_hdf5_dataset_with_padding(path, run_name, hdf5_filename):

	# Build main path
	path = join(path, run_name)

	# Get files
	jpgs = sorted(glob.glob(path+"/jpg/*.jpg"))
	pcds = sorted(glob.glob(path+"/pcd/*.pcd"))

	# Open HDF5 file in write mode
	with h5py.File(hdf5_filename, 'w') as f:

		images = []
		point_clouds = []

		# Determine the size of largest point cloud for padding
		max_size = 0

		for i, jpg in enumerate(jpgs):

			base_name = jpg[jpg.rfind("/")+1:jpg.find(".jpg")]

			# Load the image
			image = cv2.cvtColor(cv2.imread(jpgs[i]), cv2.COLOR_BGR2RGB)
			images.append(image)


			# Load the point cloud
			cloud = o3d.io.read_point_cloud(pcds[i])
			points= np.asarray(cloud.points)
			point_clouds.append(points)

			# Keep track of largest size
			if points.shape[0] > max_size:
				max_size = points.shape[0]

			if ((i+1) % 1000 == 0):
				print("Processed ",(i+1)," pairs of files.")

		print("Max size ", max_size)
		print("Padding ...")

		# Pad the point clouds with 0s
		padded_point_clouds = []
		for points in point_clouds:
			pad_amount = max_size - points.shape[0]

			points_padded = np.pad(points, ((0, pad_amount),(0, 0)), 'constant', constant_values=(0, 0))
			padded_point_clouds.append(points_padded)

		# Create an images and a point clouds dataset in the file
		f.create_dataset("images", data = np.asarray(images))
		f.create_dataset("point_clouds", data = np.asarray(padded_point_clouds))

	print("Done!")
将 HDF5 文件(约 18 GB)加载到我的 Drive 中后,我返回 Colab 并添加相应的数据集 API 代码。 本质上,该模式的第 1 步从 HDF5 文件加载图像和点并创建相应的对,第 2 步从点云中随机选择一些点(我将在后面的文章中解释原因),并对图像进行归一化, 步骤 3 已准备好根据请求很好地提供数据。
def resize_and_format_data(points, image):

  # Sample a random number of points
  idxs = tf.range(tf.shape(points)[0])
  ridxs = tf.random.shuffle(idxs)[:SAMPLE_SIZE]
  points = tf.gather(points, ridxs)

  # Normalize pixels in the input image
  image = tf.cast(image, dtype=tf.float32)
  image = image/127.5
  image -= 1

  return points, image

def get_training_dataset(hdf5_path):
  # Get the point clouds
  x_train = tfio.IODataset.from_hdf5(hdf5_path, dataset='/point_clouds')
  # Get the images
  y_train = tfio.IODataset.from_hdf5(hdf5_path, dataset='/images')
  # Zip them to create pairs
  training_dataset = tf.data.Dataset.zip((x_train,y_train))
  # Apply the data transformations
  training_dataset = training_dataset.map(resize_and_format_data)

  # Shuffle, prepare batches, etc ...
  training_dataset = training_dataset.shuffle(100, reshuffle_each_iteration=True)
  training_dataset = training_dataset.batch(BATCH_SIZE)
  training_dataset = training_dataset.repeat()
  training_dataset = training_dataset.prefetch(-1)

  # Return dataset
  return training_dataset
我使用非常基本的训练代码尝试了数据管道,效果非常好。 不再出现内存不足错误。 我不确定这是否是提供数据的最有效方法,但它确实成功了,特别是,创建管道是点云数据操作的第一个很好的练习。 接下来,使用点云训练第一个 TensorFlow 模型。
原文链接:制作3D点云数据集 — BimAnt