1、安装使用
安装
yarn add @wangeditor/editor
# 或者 npm install @wangeditor/editor --save
yarn add @wangeditor/editor-for-vue
# 或者 npm install @wangeditor/editor-for-vue --save
在main.js中引入样式
import '@wangeditor/editor/dist/css/style.css'
在使用编辑器的页面引入js
import { Editor, Toolbar } from "@wangeditor/editor-for-vue";
components: { Editor, Toolbar },
模板
<template>
  <div>
    <div style="border: 1px solid #ccc; margin-top: 10px">
      <!-- 工具栏 -->
      <Toolbar
        style="border-bottom: 1px solid #ccc"
        :editor="editor"
        :defaultConfig="toolbarConfig"
      />
      <!-- 编辑器 -->
      <Editor
        style="height: 400px; overflow-y: hidden"
        :defaultConfig="editorConfig"
        v-model="html"
        @onChange="onChange"
        @onCreated="onCreated"
      />
    </div>
  </div>
</template>
js
<script>
import { Editor, Toolbar } from "@wangeditor/editor-for-vue";
export default {
name: "MyEditor",
components: { Editor, Toolbar },
data() {
return {
editor: null,
html: "<p>hello world</p>",
toolbarConfig: {},
editorConfig: {
placeholder: "请输入内容...",
// 所有的菜单配置,都要在 MENU_CONF 属性下
MENU_CONF: {},
},
};
},
methods: {
onCreated(editor) {
this.editor = Object.seal(editor); // 【注意】一定要用 Object.seal() 否则会报错
},
onChange(editor) {
console.log("onChange", editor.getHtml()); // onChange 时获取编辑器最新内容
},
},
mounted() {},
beforeDestroy() {
const editor = this.editor;
if (editor == null) return;
editor.destroy(); // 组件销毁时,及时销毁 editor ,重要!!!
},
};
</script>
到这一步编辑器就可以正常显示了

2、上传图片、视频
上传到后台接口的可直接按照文档这个配置就行接口返回格式也要可文档上一致

2)自定义上传(一般上传到别的服务器上,我这边是上传到七牛云服务器上)
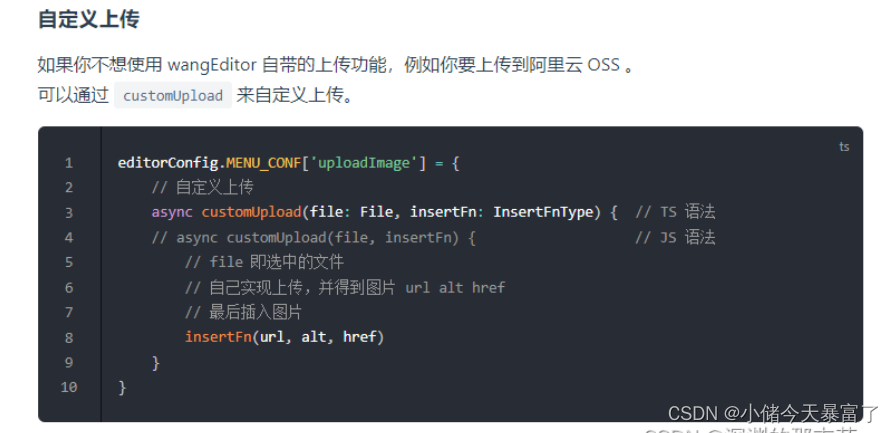
在data配置上传图片、视频
editorConfig: {
        placeholder: "请输入内容...",
        // 所有的菜单配置,都要在 MENU_CONF 属性下
        MENU_CONF: {
          uploadImage: {
            customUpload: async (file, insertFn) => {
              let resultUrl = await this.upqiniu(file, file.name);
              insertFn(resultUrl);
            },
          },
          uploadVideo: {
            customUpload: async (file, insertFn) => {
              let resultUrl = await this.upqiniu(file, file.name);
              insertFn(resultUrl);
            },
          },
        },
      },
this.upqiniu是我写的上传服务器的代码,最终将接口返回的地址return出去就行
 upqiniu(file, name) {
      return new Promise((resolve) => {
        let config = {
          useCdnDomain: true, //表示是否使用 cdn 加速域名,为布尔值,true 表示使用,默认为 false。
          region: null, // 根据具体提示修改上传地区,当为 null 或 undefined 时,自动分析上传域名区域
        };
        let putExtra = {
          fname: `upload_pic_${name}`, //文件原文件名
          params: {}, //用来放置自定义变量
          mimeType: null, //用来限制上传文件类型,为 null 时表示不对文件类型限制;限制类型放到数组里: ["image/png", "image/jpeg", "image/gif"]
        };
        var observable = qiniu.upload(
          file,
          `upload_pic_${name}`,
          this.token,
          putExtra,
          config
        );
        observable.subscribe({
          next: (result) => {
            // 主要用来展示进度
          },
          error: (errResult) => {
            // 失败报错信息
          },
          complete: (result) => {
            // 接收成功后返回的信息
            let url = "http://image.gewu.pro/" + result.key;
            resolve(url);
          },
        });
      });
    },