FrameLayout(帧布局)
FrameLayout(帧布局)可以说是六大布局中最为简单的一个布局,这个布局直接在屏幕上开辟出一块空白的区域,当我们往里面添加控件的时候,会默认把他们放到这块区域的左上角,而这种布局方式却没有任何的定位方式,所以它应用的场景并不多;帧布局的大小由控件中最大的子控件决定,如果控件的大小一样大的话,那么同一时刻就只能看到最上面的那个组件。后续添加的控件会覆盖前一个。虽然默认会将控件放置在左上角,但是我们也可以通过layout_gravity属性,指定到其他的位置!
通常不使用FrameLayout显示多项内容,因为它的布局很难调节!
不用layout_gravity属性的话,多项内容会重叠;使用layout_gravity的话,能设置不同的位置。
layout_gravity可以取值:
- top 将对象放在其容器的顶部,不改变其大小.
- bottom 将对象放在其容器的底部,不改变其大小.
- left 将对象放在其容器的左侧,不改变其大小.
- right 将对象放在其容器的右侧,不改变其大小.
- center_vertical 将对象纵向居中,不改变其大小. 垂直对齐方式:垂直方向上居中对齐。
- fill_vertical 必要的时候增加对象的纵向大小,以完全充满其容器. 垂直方向填充
- center_horizontal 将对象横向居中,不改变其大小.水平对齐方式:水平方向上居中对齐
- fill_horizontal 必要的时候增加对象的横向大小,以完全充满其容器. 水平方向填充
- center 将对象横纵居中,不改变其大小.
- fill 必要的时候增加对象的横纵向大小,以完全充满其容器.
- clip_vertical 附加选项,用于按照容器的边来剪切对象的顶部和/或底部的内容. 剪切基于其纵向对齐设置:顶部对齐时,剪切底部;底部对齐时剪切顶部;除此之外剪切顶部和底部.垂直方向裁剪
- clip_horizontal 附加选项,用于按照容器的边来剪切对象的左侧和/或右侧的内容. 剪切基于其横向对齐设置:左侧对齐时,剪切右侧;右侧对齐时剪切左侧;除此之外剪切左侧和右侧. 水平方向裁剪
这里有个点需要注意:
区分“android:gravity”和“android:layout_gravity”。
android:gravity :是对控件本身来说的,是用来设置“控件自身的内容”应该显示在“控件自身体积”的什么位置,默认值是左侧。
android:layout_gravity:是相对于控件的父元素来说的,设置该控件在它的父元素的什么位置。
还有2个特殊的属性:
| android:foregroundGravity | 设置前景图像显示的位置 |
| android:foreground | 设置帧布局容器的前景图像(始终在所有子控件之上) |
实例:
在一个正常顺序下(先加文本再加图片)这个时候图片将覆盖文本的一部分。如:

实现代码:
<?xml version="1.0" encoding="utf-8"?>
<FrameLayout xmlns:android="http://schemas.android.com/apk/res/android"
    xmlns:app="http://schemas.android.com/apk/res-auto"
    xmlns:tools="http://schemas.android.com/tools"
    android:layout_width="match_parent"
    android:layout_height="match_parent"
    tools:context=".FrameLayoutActivity">
    <!--整体布局为帧布局-->
    <TextView
        android:layout_width="match_parent"
        android:layout_height="100dp"
        android:text="帧布局"
        android:textSize="50dp"
        android:gravity="right"/>
    <TextView
        android:layout_width="500px"
        android:layout_height="100px"
        android:text="这是一个图片"
        android:textSize="80px"
        android:textStyle="bold"></TextView>
    <ImageView
        android:layout_width="400px"
        android:layout_height="400px"
        android:src="@mipmap/ic_launcher">
    </ImageView>

</FrameLayout>
将文本和图片的位置调换,文本将不会在被图片所覆盖。如:

在整个布局下,加入android:foreground属性,不管你的子控件有多少,这个属性所添加的图像将会覆盖所有。
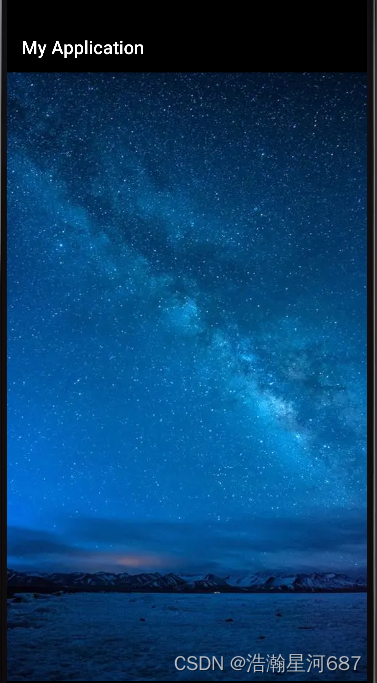
代码:(前景图像是自己设定的,这个图片是我自己找的)
<?xml version="1.0" encoding="utf-8"?>
<FrameLayout xmlns:android="http://schemas.android.com/apk/res/android"
    xmlns:app="http://schemas.android.com/apk/res-auto"
    xmlns:tools="http://schemas.android.com/tools"
    android:layout_width="match_parent"
    android:layout_height="match_parent"
    android:foreground="@drawable/img_2"
    tools:context=".FrameLayoutActivity">
    <!--整体布局为帧布局-->
    <TextView
        android:layout_width="match_parent"
        android:layout_height="100dp"
        android:text="帧布局"
        android:textSize="50dp"
        android:gravity="right"/>
    <TextView
        android:id="@+id/text"
        android:layout_width="500px"
        android:layout_height="100px"
        android:text="这是一个图片"
        android:textSize="80px"
        android:textStyle="bold"></TextView>
    <ImageView
        android:id="@+id/image"
        android:layout_width="400px"
        android:layout_height="400px"
        android:src="@mipmap/ic_launcher">
    </ImageView>

</FrameLayout>
这个布局由于位置调动太难了,它的使用频率比表格布局还要小。