在Android开发中UI设计十分重要,当用户使用一个软件时,最先感受到的不是这款软件的功能是否强大,而是界面设计是否精致,用户体验是否良好。也可以这样说,有一个好的界面设计去吸引用户的使用,才能让更多的用户体验到软件功能的强大。 下面着重讲一下Android中几种常用布局的使用:
首先,需要说明的是,各个布局既可以单独使用,也可以嵌套使用,读者在实际应用中应灵活掌握。
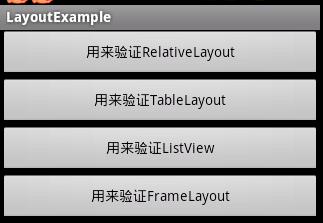
1 LinearLayout 是一种Android中最常用的布局之一,它将自己包含的子元素按照一个方向排列。方向的设置通过Android:orientation=”vertical”(竖直)或者Android:orientation=”horizontal”(水平)来实现。
代码如下:
- <LinearLayout android:orientation="vertical" android:layout_width="fill_parent" android:layout_height="fill_parent">
- <Button android:id="@+id/bt_1" android:layout_width="fill_parent"
- android:layout_height="wrap_content" android:text="用来验证RelativeLayout"
- />
- <Button android:id="@+id/bt_2" android:layout_width="fill_parent"
- android:layout_height="wrap_content" android:text="用来验证TableLayout"
- />
- <Button android:id="@+id/bt_3" android:layout_width="fill_parent"
- android:layout_height="wrap_content" android:text="用来验证ListView"
- />
- <Button android:id="@+id/bt_4" android:layout_width="fill_parent"
- android:layout_height="wrap_content" android:text="用来验证FrameLayout"
- />
- </LinearLayout>
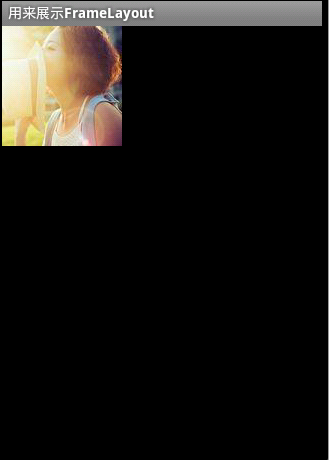
2 FrameLayout对象好比一块在屏幕上提前预定好的空白区域,可以将一些元素填充在里面,如图片。所有元素都被放置在FrameLayout区域的最左上区域,而且无法为这些元素制指定一个确切的位置,若有多个元素,那么后面的元素会重叠显示在前一个元素上。
代码如下:
- <FrameLayout
- xmlns:android="http://schemas.android.com/apk/res/android"
- android:layout_width="match_parent" android:layout_height="match_parent">
- <ImageView android:id="@+id/photo"
- android:src="@drawable/img" android:layout_width="wrap_content"
- android:layout_height="wrap_content"/>
- </FrameLayout>
3 RelativeLayout是一种相对布局,控件的位置是按照相对位置来计算的,后一个控件在什么位置依赖于前一个控件的基本位置。是布局最常用,也是最灵活的一种布局。
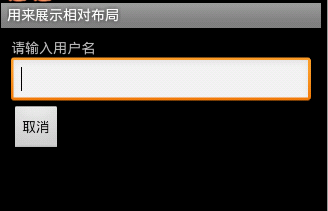
- <RelativeLayout xmlns:android="http://schemas.android.com/apk/res/android"
- android:layout_width="match_parent" android:layout_height="match_parent"
- android:padding="10dip">
- <TextView android:id="@+id/label" android:layout_width="fill_parent"
- android:layout_height="wrap_content" android:text="请输入用户名"/>
- <EditText android:id="@+id/entry" android:layout_width="fill_parent"
- android:layout_height="wrap_content" android:layout_below="@id/label"/>
- <Button android:id="@+id/cancel" android:layout_width="wrap_content"
- android:layout_height="wrap_content" android:layout_below="@id/entry"
- android:text="取消"/>
- </RelativeLayout>
4 TableLayout
TableLayout是指将子元素的位置分配到行或列中。Android的一个TableLayout有许多TableRow组成,每一个TableRow都会定义一个Row。TableLayout容器不会显示Row,Column,及Cell的边框线,每个Row拥有0个或多个Cell,每个Cell拥有一个View对象。
在使用tablelayout时,应注意每一个cell的宽度。

- <TableLayout
- xmlns:android="http://schemas.android.com/apk/res/android"
- android:layout_width="match_parent" android:layout_height="match_parent">
- <TableRow>
- <TextView android:id="@+id/lable1" android:text="用户名" android:textStyle="bold"
- android:layout_width="55dip" android:gravity="center"/>
- <EditText android:id="@+id/entry1" android:layout_width="250dip"
- android:layout_height="wrap_content"
- />
- </TableRow>
- <TableRow>
- <TextView android:id="@+id/lable2" android:textStyle="bold" android:text="密码"
- android:layout_width="55dip" android:gravity="center"/>
- <EditText android:id="@+id/entry2"
- android:layout_width="250dip" android:layout_height="wrap_content"
- android:password="true" android:scrollHorizontally="true"/>
- </TableRow>
- </TableLayout>
本文出自 “HDDevTeam” 博客,请务必保留此出处http://hddev.blog.51cto.com/3365350/629635