一、安装uni-ui组件库
1、安装
pnpm i -D sass
pnpm i @dcloudio/uni-ui
2、配置组件自动导入
使用 npm 安装好 uni-ui 之后,需要配置 easycom 规则,让 npm 安装的组件支持 easycom
打开项目根目录下的 pages.json 并添加 easycom 节点:
// pages.json
{


	"easycom": {


		"autoscan": true,
		"custom": {


			// uni-ui 规则如下配置
			"^uni-(.*)": "@dcloudio/uni-ui/lib/uni-$1/uni-$1.vue"
		}
	},

	// 其他内容
	pages:[
		// ...
	]
}
3、安装插件
pnpm i -D @uni-helper/uni-ui-types
4、测试使用
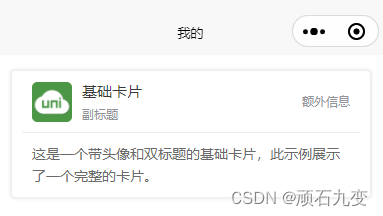
随便复制一个组件在页面上面就可以直接使用,比如
<uni-card title="基础卡片" sub-title="副标题" extra="额外信息" thumbnail="https://qiniu-web-assets.dcloud.net.cn/unidoc/zh/unicloudlogo.png">
  <text>这是一个带头像和双标题的基础卡片,此示例展示了一个完整的卡片。</text>
</uni-card>
二、使用pinia做持久化
1、安装依赖包
pnpm install pinia
pnpm install pinia-plugin-persistedstate
如果启动时遇到错误"hasInjectionContext" is not exported by
可以卸载pinia重新安装指定指定版本
pnpm uninstall pinia
pnpm install [email protected]
2、编写持久化代码
1)创建src/stores/index.ts,内容如下:
import {

    createPinia } from 'pinia'
import persist from 'pinia-plugin-persistedstate'

const pinia = createPinia()
// 使用持久化存储插件
pinia.use(persist)
// 默认导出给main.ts使用
export default pinia
// 模块统一导出
export * from './modules/member'
2)编号member模块代码member.ts
// 定义 store
import {

     defineStore } from "pinia"
import {

     ref } from "vue"

export const useMemberStore = defineStore('member', () => {


    // 会员信息
    const profile = ref()
    // 保存会员信息
    const setProfile = (val: any) => {


        profile.value = val
    }

    // 清理会员信息
    const clearProfile = () => {


        profile.value = undefined
    }

    return {


        profile,
        setProfile,
        clearProfile,
    }
},
{

       // 网页端写法
    // persist:true,
    // 小程序端写法
    persist: {


        storage: {


            getItem(key) {


                return uni.getStorageSync(key)
            },
            setItem(key, value) {


                uni.setStorageSync(key, value)
            }
        }
    }
}
)
3)在main.ts是引入
import {

     createSSRApp } from "vue";
import App from "./App.vue";
// 导入 pinia 实例
import pinia from "./stores";

export function createApp() {


  const app = createSSRApp(App);
  // 使用pinia
  app.use(pinia)
  return {


    app,
  };
}
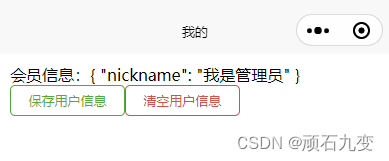
3、在组件页面中使用
<template>
  <view class="content">
    <view>会员信息:{

   { memberStore.profile }}</view>
    <button  plain size="mini" type="primary"
      @click="memberStore.setProfile({
        nickname:'我是管理员',
      })"
    >保存用户信息</button>
    <button  plain size="mini" type="warn"
      @click="memberStore.clearProfile()"
    >清空用户信息</button>
  </view>
</template>

<script setup lang="ts">
import {

       useMemberStore } from '@/stores';
const memberStore = useMemberStore()
</script>

<style>
.content {


  margin: 10px;
}
</style>
三、拦截http请求,处理请求参数,请求结果
1、增加请求拦截器,增加请求基础地址、增加自定义请求头、请求token、设置请求超时;
2、自定义http请求方法,处理请求响应结果数据,根据不同的返回代码处理响应结果
import {

     useMemberStore } from "@/stores";

const baseUrl = "http://127.0.0.1:8080"

const httpInterceptor = {


    // 拦截前触发
    invoke(options: UniApp.RequestOptions) {


        // 1. 增加基础地址
        if (!options.url.startsWith('http')) {


            options.url = baseUrl + options.url
        }
        // 2. 修改超时时间,默认 60s
        options.timeout = 30000
        // 3. 添加请求头
        options.header = {


            ...options.header,
            'source': 'mimiapp'
        }
        // 4. 添加token
        const memberStore = useMemberStore()
        const token = memberStore.profile?.token
        if (token) {


            options.header.Authorization = token
        }
        console.log(options);
    }
}
uni.addInterceptor('request', httpInterceptor)
uni.addInterceptor('uploadFile', httpInterceptor)
interface Resp<T> {


    code: string,
    message: string,
    result: T
}
/**
 * 请求函数
 */
export const http = <T>(options: UniApp.RequestOptions) => {


    // 1. 返回Promise对象
    return new Promise<Resp<T>>((resolve, reject) => {


        uni.request({


            ...options,
            //2. 响应成功
            success(res) {


                if (res.statusCode == 200 && res.statusCode < 300) {


                    resolve(res.data as Resp<T>)
                } else if (res.statusCode == 401) {


                    // 401错误 没有权限,跳转到登录页面
                    const memberStore = useMemberStore()
                    memberStore.clearProfile()
                    uni.navigateTo({

     url: '/pages/login/login' })
                    reject(res)
                } else {


                    // 其他错误 根据错误信息提示
                    uni.showToast({


                        title: (res.data as Resp<T>).message || '请求错误',
                        icon: 'none',
                        mask: true
                    })
                    reject(res)
                }
            },
            // 响应失败
            fail(res) {


                uni.showToast({


                    title: res.errMsg,
                    icon: 'none',
                    mask: true
                })
                reject(res)
            },
        })
    })
}
在页面中使用
import {

    http} from '@/utils/http'
const getData =async ()=>{


 const res = await http<string[]>({


    url:'/api/user/login',
    method:'POST',
    data: {


      "loginName": "user",
      "password": "123"
    }
  })
  console.log(res);
}