目录
进阶:更多源文件 使用 aux_source_directory() 或 set()
9.1 本来要生成多个bin或库文件,现在只想生成部分指定的bin或库文件
9.2 对于同一个bin文件,只想编译其中部分代码(使用宏来控制)
一、CMake介绍及安装
CMake: 使用简单方便,可以跨平台,构建项目编译环境。比直接写Makefile简单(在构建大型工程编译时,需要写大量的文件依赖关系),可以通过简单的CMake配置生成负责的本地Makefile文件,一个命令便将我们项目想编译的可执行文件、静态库、动态库都编译出来了。而且配置文件可以直接拿到其它平台上使用,无需修改,非常方便。
1.1 Ubuntu安装CMake
安装CMake使用命令:
sudo apt install cmake安装完成之后,在终端下输入cmake -version查看cmake版本:
fff@ubuntu:~$ cmake -version
cmake version 3.22.1

CMake suite maintained and supported by Kitware (kitware.com/cmake).
1.2 VScode环境安装CMake
1.2.1 vscode下载相应插件。

1.2.2 shell终端下查找cmake位置,我们系统上路径为/usr/bin/camke。
fff@ubuntu:~$ whereis cmake
cmake: /usr/bin/cmake /usr/share/cmake /opt/cmake-3.23.0-linux-x86_64/bin/cmake /usr/share/man/man1/cmake.1.gz
1.2.3 点击CMake Tools的扩展设置。

1.2.4 选择远程主机配置,找到Cmake:Build Environment,添加相应环境变量即可。

1.3 CMake工程构建目录结构
一般实际开发时,我们会分清楚相应目录,使项目结构看起来比较清晰了。比如以下目录结构:
bin:生成的可执行文件( .elf 文件 )
lib:生成的中间库文件
include:头文件
src:源文件
build:项目编译时产生的临时中间文件
test:测试文件
3rd:依赖的第三方库(比如 .a .so .la 文件等)
CMakeLists.txt:CMake配置文件
autobuild.sh:一键编译脚本
1.4 项目的编译链接
我们平常在Linux上用命令编译链接文件时,可能会涉及以下几项:

比如我们有一个muduo_server.cpp文件,命令如下:
fff@ubuntu:~/home/Desktop/muduocode$ g++ -o server moduo_server.cpp -lmuduo_net -lmuduo_base -lpthread我们可以使用CMake配置文件来完成同样功能,项目根目录建立CMakeList.txt文件,cmake命令会从项目根目录找它。
fff@ubuntu:~/home/Desktop/muduocode$ tree
.
├── CMakeLists.txt
├── muduo_server
├── muduo_server.cpp
cmake命令会执行目录下的CMakeLists.txt配置文件里面的配置项,一个简单的CMakeLists.txt的配置文件内容如下:

1.5 CMake常用预定义变量
1、PROJECT_NAME:通过 project() 指定项目名称;
2、PROJECT_SOURCE_DIR:工程的根目录;
3、PROJECT_BINARY_DIR:执行 cmake 命令的目录;
4、CMAKE_CURRENT_SOURCE_DIR:当前 CMakeList.txt 文件所在的目录;
5、CMAKE_CURRENT_BINARY_DIR:编译目录,可使用 add subdirectory 来修改;
6、EXECUTABLE_OUTPUT_PATH:二进制可执行文件输出位置;
7、LIBRARY_OUTPUT_PATH:库文件输出位置;
8、BUILD_SHARED_LIBS:默认的库编译方式 ( shared 或 static ) ,默认为 static;
9、CMAKE_C_FLAGS:设置 C 编译选项;
10、CMAKE_CXX_FLAGS:设置 C++ 编译选项;
11、CMAKE_CXX_FLAGS_DEBUG:设置编译类型 Debug 时的编译选项;
12、CMAKE_CXX_FLAGS_RELEASE:设置编译类型 Release 时的编译选项;
13、CMAKE_GENERATOR:编译器名称;
14、CMAKE_COMMAND:CMake 可执行文件本身的全路径;
15、CMAKE_BUILD_TYPE:工程编译生成的版本, Debug / Release;
1.6 CMake构建类型
设置构建类型为Release和Debug的区别主要体现在编译器的优化级别和生成的可执行文件的特性上。
1.优化级别:
- Release模式:在Release模式下,编译器会进行更高级别的优化,以提高代码的执行效率和性能。这包括但不限于函数内联、循环展开、常量折叠等优化技术,以减少代码的执行时间和内存占用。然而,这可能会增加编译时间和可读性较低的代码。
- Debug模式:在Debug模式下,编译器通常不会进行优化,以便在调试过程中能够更好地理解和追踪代码。这意味着生成的可执行文件会比较大,但对于调试和排错来说更方便。
2.调试信息:
- Release模式:在Release模式下,编译器通常会剥离调试信息,以减小生成的可执行文件的大小。这意味着在调试时可能无法获得完整的符号信息,使得调试过程更加困难。
- Debug模式:在Debug模式下,编译器会保留完整的调试信息,以便在调试器中能够准确地定位和追踪代码。这使得调试过程更容易和准确。
综上所述,Release模式适用于最终发布的版本,重点在于性能和可执行文件的大小;而Debug模式适用于调试和开发阶段,重点在于方便的调试和排错。
构建类型为 Release,写法如下:
SET(CMAKE_BUILD_TYPE "Release")
SET(CMAKE_C_FLAGS_RELEASE "$ENV{CXXFLAGS} -Os -s -Wall -std=gnu11  -Werror")
SET(CMAKE_CXX_FLAGS_RELEASE "$ENV{CXXFLAGS} -Os  -s -Wall -std=c++1y -Werror")
具体参数解释如下:
1.
SET(CMAKE_BUILD_TYPE "Release")设置构建类型为Release,这意味着代码将以优化的方式编译,以提高性能。2.
SET(CMAKE_C_FLAGS_RELEASE "$ENV{CXXFLAGS} -Os -s -Wall -std=gnu11 -Werror")设置C编译器在Release模式下的编译参数。具体参数解释如下:
$ENV{CXXFLAGS}是一个环境变量,用于获取C++编译器的额外参数,这样可以将其与其他参数一起使用。-Os表示进行优化编译,以减小生成的可执行文件的大小。-s表示剥离调试信息,以减小生成的可执行文件的大小。-Wall表示开启所有警告信息。-std=gnu11表示使用GNU C11标准进行编译。-Werror表示将所有警告视为错误。3.
SET(CMAKE_CXX_FLAGS_RELEASE "$ENV{CXXFLAGS} -Os -s -Wall -std=c++1y -Werror")设置C++编译器在Release模式下的编译参数。与上述C编译器参数相似,只是使用了C++11标准进行编译。通过设置这些参数,可以在Release模式下进行优化编译,并且在编译过程中将警告视为错误,以确保生成的可执行文件的质量和性能。
构建类型为 Debug,写法如下:
SET(CMAKE_BUILD_TYPE "Debug")
SET(CMAKE_C_FLAGS_DEBUG "$ENV{CXXFLAGS} -g -Wall -std=gnu11 -Werror")
SET(CMAKE_CXX_FLAGS_DEBUG "$ENV{CXXFLAGS} -g -Wall -std=c++1y -Werror")
具体参数解释如下:
1.SET(CMAKE_BUILD_TYPE "Debug")设置构建类型为Debug,表示以调试模式编译。
2.SET(CMAKE_C_FLAGS_DEBUG "$ENV{CXXFLAGS} -g -Wall -std=gnu11 -Werror")设置C编译器在Debug模式下的编译参数。具体参数解释如下:
$ENV{CXXFLAGS}是一个环境变量,用于获取C++编译器的额外参数,这样可以将其与其他参数一起使用。-g表示在可执行文件中保留调试信息,以便在调试器中进行调试。-Wall表示开启所有警告信息。-std=gnu11表示使用GNU C11标准进行编译。-Werror表示将所有警告视为错误。
3.SET(CMAKE_CXX_FLAGS_DEBUG "$ENV{CXXFLAGS} -g -Wall -std=c++1y -Werror")设置C++编译器在Debug模式下的编译参数。与上述C编译器参数相似,只是使用了C++11标准进行编译。通过设置这些参数,可以在Debug模式下生成带有调试信息的可执行文件,并将警告视为错误,以帮助调试和排错。
二、CMake构建的简单使用:Helloworld
2.1 编写一个hello.c:
#include "stdio.h"

int main(void)
{
    printf("Hello World!\r\n");
    return 0;
}
2.2 在同目录下编写CMakeLists.txt:
cmake_minimum_required (VERSION 2.8)

project (demo)

add_executable(hello hello.c)
2.3 在同目录运行CMake需输入命令:
fff@ubuntu:~/Desktop/cmake_test$ cmake .
-- The C compiler identification is GNU 5.4.0
-- The CXX compiler identification is GNU 5.4.0
-- Check for working C compiler: /usr/bin/cc
-- Check for working C compiler: /usr/bin/cc -- works
-- Detecting C compiler ABI info
-- Detecting C compiler ABI info - done
-- Detecting C compile features
-- Detecting C compile features - done
-- Check for working CXX compiler: /usr/bin/c++
-- Check for working CXX compiler: /usr/bin/c++ -- works
-- Detecting CXX compiler ABI info
-- Detecting CXX compiler ABI info - done
-- Detecting CXX compile features
-- Detecting CXX compile features - done
-- Configuring done
-- Generating done
-- Build files have been written to: /home/liefyuan/Desktop/cmake_test
2.4 同目录下会生成:
fff@ubuntu:~/Desktop/cmake_test$ ls -l
总用量 36
-rw-rw-r-- 1 liefyuan liefyuan 11542 Nov  7 14:50 CMakeCache.txt
drwxrwxr-x 5 liefyuan liefyuan  4096 Nov  7 14:50 CMakeFiles
-rw-rw-r-- 1 liefyuan liefyuan  1377 Nov  7 14:50 cmake_install.cmake
-rw-rw-r-- 1 liefyuan liefyuan    84 Nov  7 14:45 CMakeLists.txt
-rw-rw-r-- 1 liefyuan liefyuan    80 Nov  7 14:44 hello.c
-rw-rw-r-- 1 liefyuan liefyuan  4734 Nov  7 14:50 Makefile
2.5 如上显示已经生成了Makefile文件,另外还有cmake运行而自动生成的文件。
接下来就可以使用make命令进行编译了。
fff@ubuntu:~/Desktop/cmake_test$ make
Scanning dependencies of target hello
[ 50%] Building C object CMakeFiles/hello.dir/hello.c.o
[100%] Linking C executable hello
[100%] Built target hello
2.6 再次看看生成文件:
fff@ubuntu:~/Desktop/cmake_test$ ls -l
总用量 48
-rw-rw-r-- 1 liefyuan liefyuan 11542 Nov  7 14:50 CMakeCache.txt
drwxrwxr-x 5 liefyuan liefyuan  4096 Nov  7 14:53 CMakeFiles
-rw-rw-r-- 1 liefyuan liefyuan  1377 Nov  7 14:50 cmake_install.cmake
-rw-rw-r-- 1 liefyuan liefyuan    84 Nov  7 14:45 CMakeLists.txt
-rwxrwxr-x 1 liefyuan liefyuan  8600 Nov  7 14:53 hello
-rw-rw-r-- 1 liefyuan liefyuan    80 Nov  7 14:44 hello.c
-rw-rw-r-- 1 liefyuan liefyuan  4734 Nov  7 14:50 Makefile
2.7 可以看到已经生成了一个可执行的hello文件,输入./hello运行该可执行文件:
fff@ubuntu:~/Desktop/cmake_test$ ./hello
Hello World!
2.8 运行成功!
PS:如果需要重新编译,可以使用make clean命令进行清除(删除旧的可执行文件)。
三、CMake构建:根目录多源文件
初级:少数源文件 使用 add_executable()
3.1 文件目录:
fff@ubuntu:~/Desktop/cmake_multi_test$ ls -l
rw-rw-r-- 1   fff fff    93 Nov   7 16:41 CMakeLists.txt
-rw-rw-r-- 1  fff fff    107 Nov  7 16:34 function.c
-rw-rw-r-- 1  fff fff    86 Nov   7 16:38 function.h
-rw-rw-r-- 1  fff fff    85 Nov   7 16:30 main.c
3.2 function.h
#ifndef __FUNCTION_H__
#define __FUNCTION_H__

void func(unsigned int var);

#endif
3.3 function.c
#include <stdio.h>
#include "function.h"

void func(unsigned int var)
{
	printf("para var:%d\r\n", var);
}
3.4 main.c
#include <stdio.h>
#include "function.h"

int main(void)
{
	func(200);
	return 0;
}
CMakeLists.txt
cmake_minimum_required (VERSION 2.8)

project (demo)

add_executable(main main.c function.c)
3.5 执行cmake .生成Makefile并运行make
fff@ubuntu:~/Desktop/cmake_multi_test$ cmake .
-- The C compiler identification is GNU 5.4.0
-- The CXX compiler identification is GNU 5.4.0
-- Check for working C compiler: /usr/bin/cc
-- Check for working C compiler: /usr/bin/cc -- works
-- Detecting C compiler ABI info
-- Detecting C compiler ABI info - done
-- Detecting C compile features
-- Detecting C compile features - done
-- Check for working CXX compiler: /usr/bin/c++
-- Check for working CXX compiler: /usr/bin/c++ -- works
-- Detecting CXX compiler ABI info
-- Detecting CXX compiler ABI info - done
-- Detecting CXX compile features
-- Detecting CXX compile features - done
-- Configuring done
-- Generating done
-- Build files have been written to: /home/fff/Desktop/cmake_multi_test
fff@ubuntu:~/Desktop/cmake_multi_test$ make
Scanning dependencies of target main
[ 33%] Building C object CMakeFiles/main.dir/main.c.o
[ 66%] Building C object CMakeFiles/main.dir/function.c.o
[100%] Linking C executable main
[100%] Built target main
3.6 可以看到已经生成了一个可执行的main文件,输入./main运行该可执行文件:
fff@ubuntu:~/Desktop/cmake_multi_test$ ./main
para var:200
3.7 运行成功!
PS:总结
可以类推,如果在同一目录下有多个源文件,那么只要在add_executable里把所有源文件都添加进去就可以了。
进阶:更多源文件 使用 aux_source_directory() 或 set()
PS:但是如果有一百个源文件,再这样做就有点坑了,无法体现cmake的优越性,cmake提供了一个命令可以把指定目录下所有的源文件存储在一个变量中,这个命令就是 aux_source_directory(dir var)。
第一个参数dir是指定目录,第二个参数var是用于存放源文件列表的变量。
3.8 再次增加文件function2.c
#include <stdio.h>
#include "function2.h"

void func2(unsigned int var)
{
	printf("para var2:%d\r\n", var);
}
3.9 增加文件function2.h
#ifndef __FUNCTION2_H__
#define __FUNCTION2_H__

void func2(unsigned int var);

#endif
3.10 修改main.c
#include <stdio.h>
#include "function.h"
#include "function2.h"

int main(void)
{
	func(200);
	func2(100);

	return 0;
}
3.11 修改CMakeLists.txt
cmake_minimum_required (VERSION 2.8)

project (demo)

aux_source_directory(. SRC_LIST)

add_executable(main ${SRC_LIST})
3.12 然后运行cmake . 和 make
fff@ubuntu:~/Desktop/cmake_multi_test$ cmake .
-- Configuring done
-- Generating done
-- Build files have been written to: /home/fff/Desktop/cmake_multi_test
fff@ubuntu:~/Desktop/cmake_multi_test$ make
Scanning dependencies of target main
[ 25%] Building C object CMakeFiles/main.dir/function.c.o
[ 50%] Building C object CMakeFiles/main.dir/function2.c.o
[ 75%] Building C object CMakeFiles/main.dir/main.c.o
[100%] Linking C executable main
[100%] Built target main
3.13 运行可执行文件./main
liefyuan@ubuntu:~/Desktop/cmake_multi_test$ ./main
para var:200
para var2:100
3.14 运行成功!
PS:总结
aux_source_directory() 也存在弊端,它会把指定目录下的所有源文件都加进来,可能会加入一些我们不需要的文件,此时我们可以使用 set 命令去新建变量来存放需要的源文件,如下:
cmake_minimum_required (VERISON 2.8)

project (demo)

set(SRC_LIST
		./main.c
		./function.c
		./function2.c)

add_executable(main ${SRC_LIST})
四、CMake构建:多目录多源文件
一般来说,当程序文件比较多时,我们会进行分类管理,把代码根据功能放在不同的目录下,这样方便查找。那么这种情况下如何编写CMakeLists.txt呢?
4.1 我们把之前的源文件整理一下(新建2个目录function和function2),整理好后整体文件结构如下:
fff@ubuntu:~/Desktop/cmake_multi_dir_test$ tree
.
├── CMakeLists.txt
├── function
│   ├── function.c
│   └── function.h
├── function2
│   ├── function2.c
│   └── function2.h
└── main.c
4.2 修改CmakeLists.txt文件
cmake_minimum_required (VERSION 2.8)

project (demo)

include_directories (function function2)

aux_source_directory(function SRC_LIST)
aux_source_directory(function2 SRC_LIST2)

add_executable(main main.c ${SRC_LIST} ${SRC_LIST2})
如上:
- 使用了2次aux_source_directory,因为源文件分布在2个目录下,所以添加2次。
或者:
- 将两次添加都存放在同一个变量中
cmake_minimum_required (VERSION 2.8)

project (demo)

include_directories (function function2)

aux_source_directory(function SRC_LIST)
aux_source_directory(function2 SRC_LIST)

add_executable(main main.c ${SRC_LIST})
4.3 然后cmake .再make再运行./main
fff@ubuntu:~/Desktop/cmake_multi_dir_test$ cmake .
-- The C compiler identification is GNU 5.4.0
-- The CXX compiler identification is GNU 5.4.0
-- Check for working C compiler: /usr/bin/cc
-- Check for working C compiler: /usr/bin/cc -- works
-- Detecting C compiler ABI info
-- Detecting C compiler ABI info - done
-- Detecting C compile features
-- Detecting C compile features - done
-- Check for working CXX compiler: /usr/bin/c++
-- Check for working CXX compiler: /usr/bin/c++ -- works
-- Detecting CXX compiler ABI info
-- Detecting CXX compiler ABI info - done
-- Detecting CXX compile features
-- Detecting CXX compile features - done
-- Configuring done
-- Generating done
-- Build files have been written to: /home/fff/Desktop/cmake_multi_dir_test
fff@ubuntu:~/Desktop/cmake_multi_dir_test$ make
Scanning dependencies of target main
[ 25%] Building C object CMakeFiles/main.dir/main.c.o
[ 50%] Building C object CMakeFiles/main.dir/function/function.c.o
[ 75%] Building C object CMakeFiles/main.dir/function2/function2.c.o
[100%] Linking C executable main
[100%] Built target main
fff@ubuntu:~/Desktop/cmake_multi_dir_test$ ./main
para var:200
para var2:100
正常运行!
PS: 新命令:include_directories()
这里出现了一个新的命令:include_directories()。该命令是用来向工程添加多个指定头文件的搜索路径,路径之间用空格分隔。
因为main.c里include了function.h和function2.h,如果没有这个命令来指定头文件所在位置,就会无法编译。当然,也可以在main.c里使用include来指定路径,如下:
#include "function/function.h"
#include "function2/function2.h"
这种写法不好看!
五、CMake构建:正规组织结构
首先构建一个目录树,如下:
fff@ubuntu:~/Desktop/cmake_dir$ tree
.
├── bin
├── build
├── include
│   ├── function2.h
│   └── function.h
└── src
    ├── function2.c
    ├── function.c
    └── main.c
方式一:两个CMakeLists.txt
根目录下新建一个新的CMakeLists.txt文件,内容如下:
cmake_minimum_required (VERSION 2.8)

project (demo)

add_subdirectory (src)
src目录下也需要新建一个新的CMakeLists.txt文件,内容如下:
aux_source_directory (. SRC_LIST)

include_directories (../include)

add_executable (main ${SRC_LIST})

set (EXECUTABLE_OUTPUT_PATH ${PROJECT_SOURCE_DIR}/bin)
这里使用了一个新的命令set,是用于定义变量的,EXECUTABLE_OUT_PATH和PROJECT_SOURCE_DIR是CMake自带的预定义变量,其意义如下,
- EXECUTABLE_OUTPUT_PATH :目标二进制可执行文件的存放位置
- PROJECT_SOURCE_DIR:工程的根目录
所以,这里set的意思是把存放elf文件的位置设置为工程根目录下的bin目录。(cmake有很多预定义变量,详细的可以网上搜索一下)
添加好以上这2个CMakeLists.txt后,整体文件结构如下,
fff@ubuntu:~/Desktop/cmake_dir$ tree
.
├── bin
├── build
├── CMakeLists.txt
├── include
│   ├── function2.h
│   └── function.h
└── src
    ├── CMakeLists.txt
    ├── function2.c
    ├── function.c
    └── main.c
构建,编译,运行
- 第一步:进入build文件夹运行命令:
cmake .. - 第二步:经过上一步,Makefile文件会在build目录下生成,然后再运行
make进行编译,在根目录的bin目录下就会生成一个可执行文件main - 第三步:进入根目录下的bin文件里面运行可执行文件
./main
fff@ubuntu:~/Desktop/cmake_dir/build$ cmake ..
-- The C compiler identification is GNU 5.4.0
-- The CXX compiler identification is GNU 5.4.0
-- Check for working C compiler: /usr/bin/cc
-- Check for working C compiler: /usr/bin/cc -- works
-- Detecting C compiler ABI info
-- Detecting C compiler ABI info - done
-- Detecting C compile features
-- Detecting C compile features - done
-- Check for working CXX compiler: /usr/bin/c++
-- Check for working CXX compiler: /usr/bin/c++ -- works
-- Detecting CXX compiler ABI info
-- Detecting CXX compiler ABI info - done
-- Detecting CXX compile features
-- Detecting CXX compile features - done
-- Configuring done
-- Generating done
-- Build files have been written to: /home/fff/Desktop/cmake_dir/build
fff@ubuntu:~/Desktop/cmake_dir/build$ make
Scanning dependencies of target main
[ 25%] Building C object src/CMakeFiles/main.dir/function.c.o
[ 50%] Building C object src/CMakeFiles/main.dir/function2.c.o
[ 75%] Building C object src/CMakeFiles/main.dir/main.c.o
[100%] Linking C executable ../../bin/main
[100%] Built target main
fff@ubuntu:~/Desktop/cmake_dir/build$ cd ..
fff@ubuntu:~/Desktop/cmake_dir$ cd bin
fff@ubuntu:~/Desktop/cmake_dir/bin$ ls
main
fff@ubuntu:~/Desktop/cmake_dir/bin$ ./main
para var:200
para var2:100
正常运行!
PS:为什么在build目录下运行cmake?从前面几个例子中可以看到,如果不这样做,cmake运行时生成的附带文件就会跟源码文件混在一起,这样会对程序的目录结构造成污染,而在build目录下运行cmake,生成的附带文件就只会待在build目录下,如果我们不想要这些文件了就可以直接清空build目录,非常方便。
方式二:一个CMakeLists.txt
前面的工程使用了2个CMakeLists.txt,最外层的CMakeLists.txt用于掌控全局,使用add_subdirectory来控制其它目录下的CMakeLists.txt的运行。
上面的例子也可以只使用一个CMakeLists.txt,把最外层的CMakeLists.txt内容改成如下:
cmake_minimum_required (VERSION 2.8)

project (demo)

set (EXECUTABLE_OUTPUT_PATH ${PROJECT_SOURCE_DIR}/bin)

aux_source_directory (src SRC_LIST)

include_directories (include)

add_executable (main ${SRC_LIST})
再把src目录下的CMakeLists.txt删除掉。
目录如下:
fff@ubuntu:~/Desktop/cmake_dir2$ tree
.
├── bin
├── build
├── CMakeLists.txt
├── include
│   ├── function2.h
│   └── function.h
└── src
    ├── function2.c
    ├── function.c
    └── main.c
构建,编译,运行
- 第一步:先进入build文件夹,再运行命令:
cmake .. - 第二步:经过上一步,Makefile文件会在build目录下生成,然后再运行
make进行编译,在根目录的bin目录下就会生成一个可执行文件main - 第三步:进入根目录下的bin文件里面运行可执行文件
./main
fff@ubuntu:~/Desktop/cmake_dir2/build$ cmake ..
-- The C compiler identification is GNU 5.4.0
-- The CXX compiler identification is GNU 5.4.0
-- Check for working C compiler: /usr/bin/cc
-- Check for working C compiler: /usr/bin/cc -- works
-- Detecting C compiler ABI info
-- Detecting C compiler ABI info - done
-- Detecting C compile features
-- Detecting C compile features - done
-- Check for working CXX compiler: /usr/bin/c++
-- Check for working CXX compiler: /usr/bin/c++ -- works
-- Detecting CXX compiler ABI info
-- Detecting CXX compiler ABI info - done
-- Detecting CXX compile features
-- Detecting CXX compile features - done
-- Configuring done
-- Generating done
-- Build files have been written to: /home/fff/Desktop/cmake_dir2/build
liefyuan@ubuntu:~/Desktop/cmake_dir2/build$ ls
CMakeCache.txt  CMakeFiles  cmake_install.cmake  Makefile
fff@ubuntu:~/Desktop/cmake_dir2/build$ make
Scanning dependencies of target main
[ 25%] Building C object CMakeFiles/main.dir/src/function.c.o
[ 50%] Building C object CMakeFiles/main.dir/src/function2.c.o
[ 75%] Building C object CMakeFiles/main.dir/src/main.c.o
[100%] Linking C executable ../bin/main
[100%] Built target main
fff@ubuntu:~/Desktop/cmake_dir2/build$ cd ..
fff@ubuntu:~/Desktop/cmake_dir2$ cd bin
fff@ubuntu:~/Desktop/cmake_dir2/bin$ ls
main
fff@ubuntu:~/Desktop/cmake_dir2/bin$ ./main
para var:200
para var2:100
正常运行!
六、CMake构建:编译动态库和静态库
6.1 构建一个文件架构:
fff@ubuntu:~/Desktop/cmake_lib$ tree
.
├── build
├── CMakeLists.txt
├── function
│   ├── function.c
│   └── function.h
└── lib
在build目录下运行cmake,并把生成的库文件存放到 lib目录 下。
6.2 新建的CMakeLists.txt内容为:
cmake_minimum_required (VERSION 2.8)

project (demo)

set (SRC_LIST ${PROJECT_SOURCE_DIR}/function/function.c)

add_library (function_shared SHARED ${SRC_LIST})
add_library (function_static STATIC ${SRC_LIST})

set_target_properties (function_shared PROPERTIES OUTPUT_NAME "function")
set_target_properties (function_static PROPERTIES OUTPUT_NAME "function")

set (LIBRARY_OUTPUT_PATH ${PROJECT_SOURCE_DIR}/lib)
PS:这里出现了新的命令和预定义变量:
- add_library: 生成动态库或静态库(第1个参数指定库的名字;第2个参数决定是动态还是静态,如果没有就默认静态;第3个参数指定生成库的源文件)
- set_target_properties: 设置最终生成的库的名称,还有其它功能,如设置库的版本号等等
- LIBRARY_OUTPUT_PATH: 库文件的默认输出路径,这里设置为工程目录下的lib目录
6.3 进入build目录运行命令cmake ..,生成Makefile文件后再运行make。
fff@ubuntu:~/Desktop/cmake_lib/build$ cmake ..
-- The C compiler identification is GNU 5.4.0
-- The CXX compiler identification is GNU 5.4.0
-- Check for working C compiler: /usr/bin/cc
-- Check for working C compiler: /usr/bin/cc -- works
-- Detecting C compiler ABI info
-- Detecting C compiler ABI info - done
-- Detecting C compile features
-- Detecting C compile features - done
-- Check for working CXX compiler: /usr/bin/c++
-- Check for working CXX compiler: /usr/bin/c++ -- works
-- Detecting CXX compiler ABI info
-- Detecting CXX compiler ABI info - done
-- Detecting CXX compile features
-- Detecting CXX compile features - done
-- Configuring done
-- Generating done
-- Build files have been written to: /home/fff/Desktop/cmake_lib/build
fff@ubuntu:~/Desktop/cmake_lib/build$ make
Scanning dependencies of target function_static
[ 25%] Building C object CMakeFiles/function_static.dir/function/function.c.o
[ 50%] Linking C static library ../lib/libfunction.a
[ 50%] Built target function_static
Scanning dependencies of target function_shared
[ 75%] Building C object CMakeFiles/function_shared.dir/function/function.c.o
[100%] Linking C shared library ../lib/libfunction.so
[100%] Built target function_shared
6.4 编译成功后,进入lib目录下查看,发现已经成功生成了动态库和静态库。
fff@ubuntu:~/Desktop/cmake_lib/build$ cd ..
fff@ubuntu:~/Desktop/cmake_lib$ cd lib
fff@ubuntu:~/Desktop/cmake_lib/lib$ ls
libfunction.a  libfunction.so
PS:前面使用set_target_properties重新定义了库的输出名称,如果不使用set_target_properties也可以,那么库的名称就是add_library里定义的名称,只是连续2次使用add_library指定库名称时(第一个参数),这个名称不能相同,而set_target_properties可以把名称设置为相同,只是最终生成的库文件后缀不同(一个是.so,一个是.a),这样相对来说会好看点。
七、CMake构建:链接库
前面已经生成了库,现在就进行库链接。
fff@ubuntu:~/Desktop/cmake_lib_link$ tree
.
├── bin
├── build
├── CMakeLists.txt
├── function
│   ├── inc
│   │   └── function.h
│   └── lib
│       ├── libfunction.a
│       └── libfunction.so
└── src
    └── main.c
7.1 main.c
#include <stdio.h>
#include "function.h"

int main(void)
{
    func(300);

    return 0;
}
7.2 CMakeLists.txt
cmake_minimum_required (VERSION 2.8)

project (demo)

set (EXECUTABLE_OUTPUT_PATH ${PROJECT_SOURCE_DIR}/bin)

set (SRC_LIST ${PROJECT_SOURCE_DIR}/src/main.c)

include_directories (${PROJECT_SOURCE_DIR}/function/inc)

find_library(FUNCTION_LIB function HINTS ${PROJECT_SOURCE_DIR}/function/lib)

add_executable (main ${SRC_LIST})

target_link_libraries (main ${FUNCTION_LIB})
新命令解释:
- find_library: 在指定目录下查找指定库,并把库的绝对路径存放到变量里,其第一个参数是变量名称,第二个参数是库名称,第三个参数是HINTS,第4个参数是路径,其它用法可以参考cmake文档
- target_link_libraries: 把目标文件与库文件进行链接
使用find_library的好处是在执行cmake ..时就会去查找库是否存在,这样可以提前发现错误,不用等到链接时。
cd到build目录下,然后运行cmake .. && make,最后进入到bin目录下查看,发现main已经生成,运行就好。
fff@ubuntu:~/Desktop/cmake_lib_link/build$ cmake ..&& make
-- The C compiler identification is GNU 5.4.0
-- The CXX compiler identification is GNU 5.4.0
-- Check for working C compiler: /usr/bin/cc
-- Check for working C compiler: /usr/bin/cc -- works
-- Detecting C compiler ABI info
-- Detecting C compiler ABI info - done
-- Detecting C compile features
-- Detecting C compile features - done
-- Check for working CXX compiler: /usr/bin/c++
-- Check for working CXX compiler: /usr/bin/c++ -- works
-- Detecting CXX compiler ABI info
-- Detecting CXX compiler ABI info - done
-- Detecting CXX compile features
-- Detecting CXX compile features - done
-- Configuring done
-- Generating done
-- Build files have been written to: /home/fff/Desktop/cmake_lib_link/build
Scanning dependencies of target main
[ 50%] Building C object CMakeFiles/main.dir/src/main.c.o
[100%] Linking C executable ../bin/main
[100%] Built target main
7.3 运行:
fff@ubuntu:~/Desktop/cmake_lib_link/build$ cd ..
fff@ubuntu:~/Desktop/cmake_lib_link$ cd bin
fff@ubuntu:~/Desktop/cmake_lib_link/bin$ ./main
para var:300
运行成功!PS:
在lib目录下有function的静态库和动态库,find_library(FUNCTION_LIB function …默认是查找动态库,如果想直接指定使用动态库还是静态库,可以写成find_library(FUNCTION_LIB libfunction.so …或者find_library(FUNCTION_LIB libfunction.a …
八、CMake构建:添加编译选项
有时编译程序时需要添加一些编译选项,如-Wall, -std=c++11等,就可以使用add_compile_option来进行操作。
8.1 main.cpp
#include <iostream>

int main(void)
{
	auto data = 100;
	std::cout << "data:" << data << "\n";
	return 0;
}
8.2 CMakeLists.txt
cmake_minimum_required (VERSION 2.8)

project (demo)

set (EXECUTABLE_OUTPUT_PATH ${PROJECT_SOURCE_DIR}/bin)

add_compile_options(-std=c++11 -Wall)

add_executable(main main.cpp)
目录树如下:
fff@ubuntu:~/Desktop/cmake_cpp$ tree
.
├── bin
├── build
├── CMakeLists.txt
└── main.cpp
然后cd到build目录下,执行cmake … && make命令,就可以在bin目录下得到main的elf文件
九、CMake构建:添加控制选项
有时在编译代码时只编译一些指定的代码,可以使用cmake的option命令,主要遇到的情况分为2种:
- 本来要生成多个bin或库文件,现在只想生成部分指定的bin或库文件
- 对于同一个bin文件,只想编译其中部分代码(使用宏来控制)
9.1 本来要生成多个bin或库文件,现在只想生成部分指定的bin或库文件
假设我们现在的工程会生成2个bin文件,main1和main2,现在整体结构体如下,
fff@ubuntu:~/Desktop/cmake_2bin$ tree
.
├── bin
├── build
├── CMakeLists.txt
└── src
    ├── CMakeLists.txt
    ├── main1.c
└── main2.c其中main1.c和main2.c的内容如下,
// main1.c
#include <stdio.h>

int main(void)
{
    printf("hello, this main1\n");

    return 0;
}
// main2.c
#include <stdio.h>

int main(void)
{
    printf("hello, this main2\n");

    return 0;
}
外层的CMakeLists.txt内容如下,
cmake_minimum_required(VERSION 3.5)

project(demo)

option(MYDEBUG "enable debug compilation" OFF)

set (EXECUTABLE_OUTPUT_PATH ${PROJECT_SOURCE_DIR}/bin)

add_subdirectory(src)
这里使用了option命令,其第一个参数是这个option的名字,第二个参数是字符串,用来描述这个option是来干嘛的,第三个是option的值,ON或OFF,也可以不写,不写就是默认OFF。
然后编写src目录下的CMakeLists.txt,如下
cmake_minimum_required (VERSION 3.5)

add_executable(main1 main1.c)

if (MYDEBUG)
    add_executable(main2 main2.c)
else()
    message(STATUS "Currently is not in debug mode")
endif()
注意:这里使用了if-else来根据option来决定是否编译main2.c
然后cd到build目录下输入cmake .. && make就可以只编译出main1,如果想编译出main2,就把MYDEBUG设置为ON,再次输入cmake .. && make重新编译。
PS:每次想改变MYDEBUG时都需要去修改CMakeLists.txt,有点麻烦,其实可以通过cmake的命令行去操作,例如我们想把MYDEBUG设置为OFF,先cd到build目录,然后输入cmake .. -DMYDEBUG=ON,这样就可以编译出main1和main2 (在bin目录下)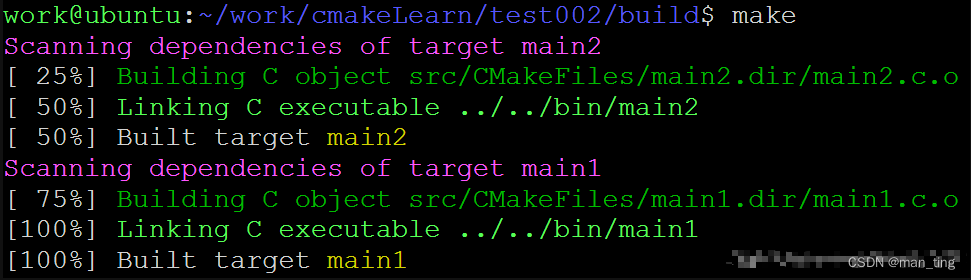
9.2 对于同一个bin文件,只想编译其中部分代码(使用宏来控制)
整体工程结构如下,
fff@ubuntu:~/Desktop/cmake_1mian_define$ tree
.
├── bin
├── build
├── CMakeLists.txt
└── main.c
假设我们有个main.c,其内容如下,
#include <stdio.h>

int main(void)
{
#ifdef WWW1
    printf("hello world1\n");
#endif

#ifdef WWW2
    printf("hello world2\n");
#endif

    return 0;
}
可以通过定义宏来控制打印的信息,我们CMakeLists.txt内容如下,
cmake_minimum_required(VERSION 3.5)

project(demo)

set (EXECUTABLE_OUTPUT_PATH ${PROJECT_SOURCE_DIR}/bin)

option(WWW1 "print one message" OFF)
option(WWW2 "print another message" OFF)

if (WWW1)
    add_definitions(-DWWW1)
endif()

if (WWW2)
    add_definitions(-DWWW2)
endif()

add_executable(main main.c)
这里把option的名字保持和main.c里的宏名称一致,这样更加直观,也可以选择不同的名字。通过与add_definitions()的配合,就可以控制单个bin文件的打印输出了。
cd到build目录下执行cmake .. && make,然后到bin目录下执行./main,可以看到打印为空,
接着分别按照下面指令去执行,然后查看打印效果,
cmake .. -DWWW1=ON -DWWW2=OFF && makecmake .. -DWWW1=OFF -DWWW2=ON && makecmake .. -DWWW1=ON -DWWW2=ON && make
注意:
这里有个小坑要注意下:假设有2个options叫A和B,先调用cmake设置了A,下次再调用cmake去设置B,如果没有删除上次执行cmake时产生的缓存文件,那么这次虽然没设置A,也会默认使用A上次的option值。
所以如果option有变化,要么删除上次执行cmake时产生的缓存文件,要么把所有的option都显式的指定其值。
十 、总结
以上是本人学习CMake的一点学习笔记,通过简单的例子可以快速入门CMake,学习的同时也阅读了很多网友的博客。CMake的知识点还有很多,具体详情可以在网上搜索。总之,CMake可以让我们不用去编写复杂的Makefile,并且跨平台,是个非常强大并值得一学的工具。
如果有写的不对的地方,希望能留言指正,谢谢阅读!