1.下载Visual Studio Code 编译器
可以去Ubuntu自带的应用商店下载,或者使用你命令行下载
2.设置中文显示
直接下载的是英文版本,需要设置成中文显示
- 先去VS Code自带的商店下载的插件,快捷键:Ctrl+Shift+x,搜索Chinese (Simplified) Language Pack for Visual Studio Code,点击下载;
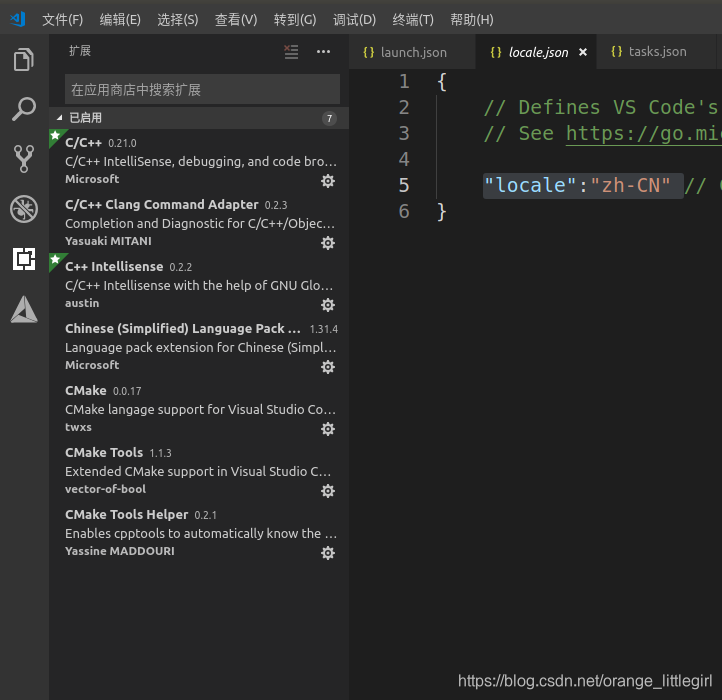
- 然后配置语言,快捷键:Ctrl+Shift+p,在选框中输入configure display language,点击确定,在出现的locale.json文件中,将"locale":“en” 改为“locale”:“zh-CN”;
- 重启VSCode;
3.下载构建CMake工程的各种依赖包
和第二步类似去VS Code自带的商店下载的插件,快捷键:Ctrl+Shift+x,下载各种依赖包,包括:c/c++,c/c++ clang command adapter,c++ intellisense,CMake和CMake Tools如下图所示:
4.各种json文件配置
打开一个含有CMakeLists.txt的完整的Cmake工程的文件夹
在.vscode要建立三个json文件才能对Cmake工程进行编译和调试,分别是c_cpp_properties.json,launch.json和tasks.json
- c_cpp_properties.json的配置如下
{
    "configurations": [
        {
            "name": "Linux",
            "includePath": [
                "${workspaceFolder}/**",
                "/usr/include",
                "/usr/local/include",
                "/usr/local/cuda/include"
            ],
            "defines": [],
            "compilerPath": "/usr/bin/gcc",
            "cStandard": "c11",
            "cppStandard": "c++17",
            "intelliSenseMode": "clang-x64",
            "compileCommands": "${workspaceFolder}/build/compile_commands.json"
        }
    ],
    "version": 4
}
- launch.json配置如下
{
    // 使用 IntelliSense 了解相关属性。
    // 悬停以查看现有属性的描述。
    // 欲了解更多信息,请访问: https://go.microsoft.com/fwlink/?linkid=830387
    "version": "0.2.0",
    "configurations": [


        {
            "name": "(gdb) Launch",
            "type": "cppdbg",
            "request": "launch",
            "program": "${workspaceFolder}/build/eigenMatrix",// 表示可执行程序所在的路径,其中,${workspaceRoot}表示VScode加载的文件夹的根目录
            "args": [],
            "stopAtEntry": false,
            "cwd": "${workspaceFolder}",
            "environment": [],
            "externalConsole": true,
            "MIMode": "gdb",
            "setupCommands": [
                {
                    "description": "Enable pretty-printing for gdb",
                    "text": "-enable-pretty-printing",
                    "ignoreFailures": true
                }
            ],
            "preLaunchTask": "make build"###最好删了,不然会影响调试,每次调试都直接执行make build
        }
    ]
}
- tasks.json是编译任务的文件,配置如下
{
    // See https://go.microsoft.com/fwlink/?LinkId=733558
    // for the documentation about the tasks.json format
    "version": "2.0.0",
    "tasks": [
        {
            "label": "make build",//编译的项目名,build
            "type": "shell",
            "command": "cd ./build ;cmake ../ ;make",//编译命令
            "group": {
                "kind": "build",
                "isDefault": true
            }
        },
        {
            "label": "clean",
            "type": "shell",
            "command": "make clean",


        }
    ]
}
5.配置自己的Cmake工程
- CMakeLists.txt如下:
cmake_minimum_required( VERSION 2.8 )
project( geometry )

# 添加Eigen头文件
include_directories( "/usr/include/eigen3" )

add_executable( eigenGeometry eigenGeometry.cpp )
- eigenGeometry.cpp如下:
#include <iostream>
#include <cmath>
using namespace std;

#include <Eigen/Core>
// Eigen 几何模块
#include <Eigen/Geometry>

/****************************
* 本程序演示了 Eigen 几何模块的使用方法
****************************/

int main ( int argc, char** argv )
{
    // Eigen/Geometry 模块提供了各种旋转和平移的表示
    // 3D 旋转矩阵直接使用 Matrix3d 或 Matrix3f
    Eigen::Matrix3d rotation_matrix = Eigen::Matrix3d::Identity();
    // 旋转向量使用 AngleAxis, 它底层不直接是Matrix,但运算可以当作矩阵(因为重载了运算符)
    Eigen::AngleAxisd rotation_vector ( M_PI/4, Eigen::Vector3d ( 0,0,1 ) );     //沿 Z 轴旋转 45 度
    cout .precision(3);
    cout<<"rotation matrix =\n"<<rotation_vector.matrix() <<endl;                //用matrix()转换成矩阵
    // 也可以直接赋值
    rotation_matrix = rotation_vector.toRotationMatrix();
    // 用 AngleAxis 可以进行坐标变换
    Eigen::Vector3d v ( 1,0,0 );
    Eigen::Vector3d v_rotated = rotation_vector * v;
    cout<<"(1,0,0) after rotation = "<<v_rotated.transpose()<<endl;
    // 或者用旋转矩阵
    v_rotated = rotation_matrix * v;
    cout<<"(1,0,0) after rotation = "<<v_rotated.transpose()<<endl;

    // 欧拉角: 可以将旋转矩阵直接转换成欧拉角
    Eigen::Vector3d euler_angles = rotation_matrix.eulerAngles ( 2,1,0 ); // ZYX顺序,即roll pitch yaw顺序
    cout<<"yaw pitch roll = "<<euler_angles.transpose()<<endl;

    // 欧氏变换矩阵使用 Eigen::Isometry
    Eigen::Isometry3d T=Eigen::Isometry3d::Identity();                // 虽然称为3d,实质上是4*4的矩阵
    T.rotate ( rotation_vector );                                     // 按照rotation_vector进行旋转
    T.pretranslate ( Eigen::Vector3d ( 1,3,4 ) );                     // 把平移向量设成(1,3,4)
    cout << "Transform matrix = \n" << T.matrix() <<endl;

    // 用变换矩阵进行坐标变换
    Eigen::Vector3d v_transformed = T*v;                              // 相当于R*v+t
    cout<<"v tranformed = "<<v_transformed.transpose()<<endl;

    // 对于仿射和射影变换,使用 Eigen::Affine3d 和 Eigen::Projective3d 即可,略

    // 四元数
    // 可以直接把AngleAxis赋值给四元数,反之亦然
    Eigen::Quaterniond q = Eigen::Quaterniond ( rotation_vector );
    cout<<"quaternion = \n"<<q.coeffs() <<endl;   // 请注意coeffs的顺序是(x,y,z,w),w为实部,前三者为虚部
    // 也可以把旋转矩阵赋给它
    q = Eigen::Quaterniond ( rotation_matrix );
    cout<<"quaternion = \n"<<q.coeffs() <<endl;
    // 使用四元数旋转一个向量,使用重载的乘法即可
    v_rotated = q*v; // 注意数学上是qvq^{-1}
    cout<<"(1,0,0) after rotation = "<<v_rotated.transpose()<<endl;

    return 0;
}
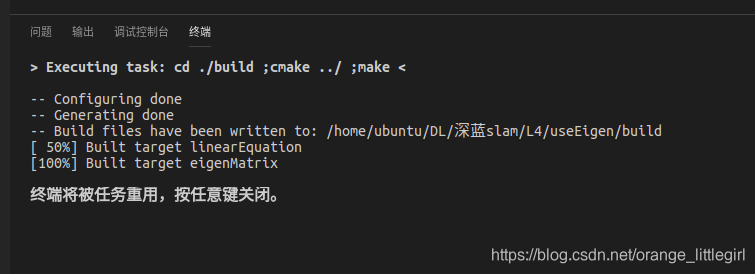
- ctrl+shift+B运行代码,成功如下所示: