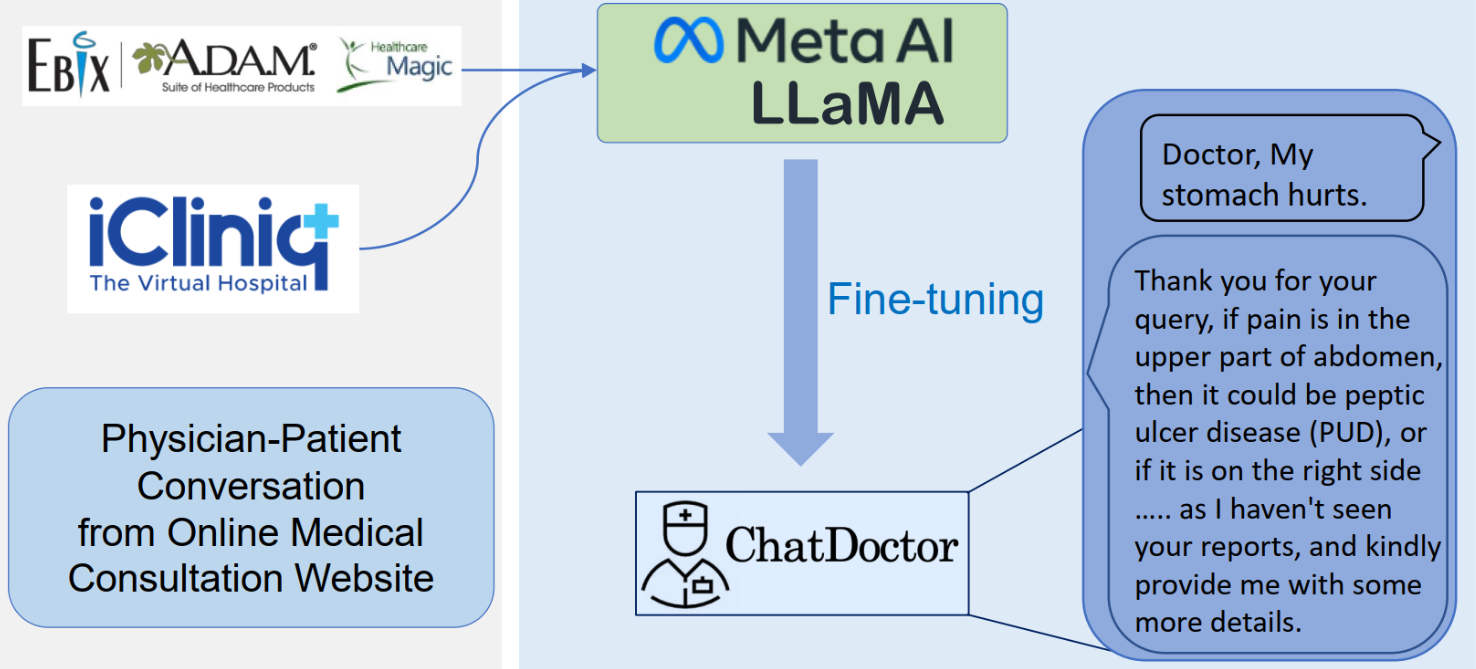
ChatDoctor简介
CHatDoctor论文:
ChatDoctor: A Medical Chat Model Fine-tuned on LLaMA Model using Medical Domain Knowledge
项目地址:https://github.com/Kent0n-Li/ChatDoctor
ChatDoctor是一款使用LLaMA模型并结合医学知识进行训练的医疗助手,研究人员先收集了50多万条真实医患对话,然后使用这些数据对LLaMA模型进行微调。
ChatDoctor不仅具备流畅的对话能力,在医疗领域的理解和诊断也达到了很高的水平。
用户只需描述症状,ChatDoctor就会像真人医生一样询问其他症状与体征,然后给出初步诊断和治疗建议,而且完全开源免费!
当然,ChatDoctor只是一个AI助手,不能完全替代人医生,但在常见病症诊断方面,它已经表现已经非常不错了。
微调实战
下载仓库并进入目录
git clone https://github.com/Kent0n-Li/ChatDoctor.git
cd ChatDoctor
创建conda环境并配置环境(安装相关依赖)
conda create -n chatdoctor python=3.10
pip install -r requirements.txt
pip install datasets
因为我们要基于lora进行微调,故需要安装peft框架,安装方式参考:
https://github.com/AGI-Edgerunners/LLM-Adapters/tree/main
将该仓库中的peft目录复制到本仓库中,然后通过下面命令进行安装。
cd peft/
pip install -e .
下载模型文件
推荐使用git命令下载模型文件,但注意需要提前下载git-lfs工具包,安装步骤如下:
# 先安装git(如已安装可忽略)
sudo apt-get install git
# 安装apt-get源
curl -s https://packagecloud.io/install/repositories/github/git-lfs/script.deb.sh | sudo bash
# 安装git-lfs
sudo apt-get install git-lfs
# 初始化git-lfs
git lfs install
模型文件下载地址:https://huggingface.co/decapoda-research/llama-7b-hf
下载命令:
git clone https://huggingface.co/decapoda-research/llama-7b-hf
微调数据
ChatDoctor数据集
来自HealthCareMagic.com的10万例实际患者与医生之间的对话HealthCareMagic-100k
来自icliniq.com的1万例实际患者与医生之间的对话icliniq-10k。
5k例由ChatGPT生成的患者与医生之间的对话GenMedGPT-5k和疾病数据库
微调过程
项目中提供了两种微调方式:一种是全量微调,一种是基于lora的微调
全量微调
如果是多卡进行微调可以直接使用项目中提供的命令
torchrun --nproc_per_node=4 --master_port=<your_random_port> train.py \
   --model_name_or_path <your_path_to_hf_converted_llama_ckpt_and_tokenizer> \
   --data_path ./HealthCareMagic-100k.json \
   --bf16 True \
   --output_dir pretrained \
   --num_train_epochs 1 \
   --per_device_train_batch_size 4 \
   --per_device_eval_batch_size 4 \
   --gradient_accumulation_steps 8 \
   --evaluation_strategy "no" \
   --save_strategy "steps" \
   --save_steps 2000 \
   --save_total_limit 1 \
   --learning_rate 2e-6 \
   --weight_decay 0. \
   --warmup_ratio 0.03 \
   --lr_scheduler_type "cosine" \
   --logging_steps 1 \
   --fsdp "full_shard auto_wrap" \
   --fsdp_transformer_layer_cls_to_wrap 'LLaMADecoderLayer' \
   --tf32 True
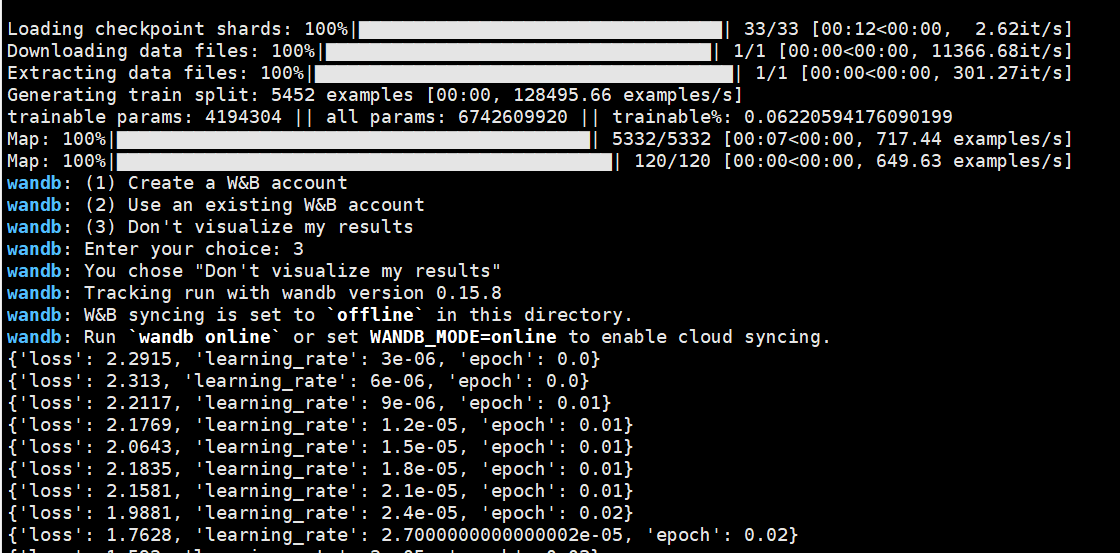
基于LoRA的微调
python train_lora.py \
  --base_model '/data/sim_chatgpt/llama-7b-hf/models--decapoda-research--llama-7b-hf/snapshots/5f98eefcc80e437ef68d457ad7bf167c2c6a1348/' \
  --data_path 'chatdoctor5k.json' \
  --output_dir './lora_models/' \
  --batch_size 1 \
  --micro_batch_size 1 \
  --num_epochs 1 \
  --learning_rate 3e-5 \
  --cutoff_len 256 \
  --val_set_size 120 \
  --adapter_name lora
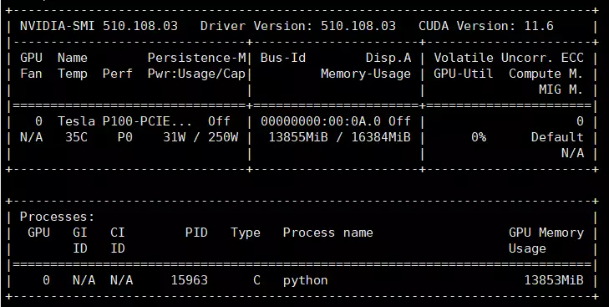
显存占用情况:约占用11G。
基于微调后的模型推理
使用全量微调好的模型进行推理:mncai/chatdoctor
transformers-cli download mncai/chatdoctor --cache-dir ./chatdoctor
修改chat.py
load_model("/data/chatdoctor/models--mncai--chatdoctor/snapshots/8fdcfdda6877d7f21173dfac48b2c14499ba8264/")
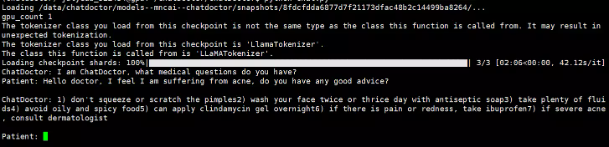
执行 python chat.py即可
报错:
ImportError: LlamaConverter requires the protobuf library but it was
not found in your environment.
解决方法:
pip install protobuf==3.19.0
执行 python chat.py
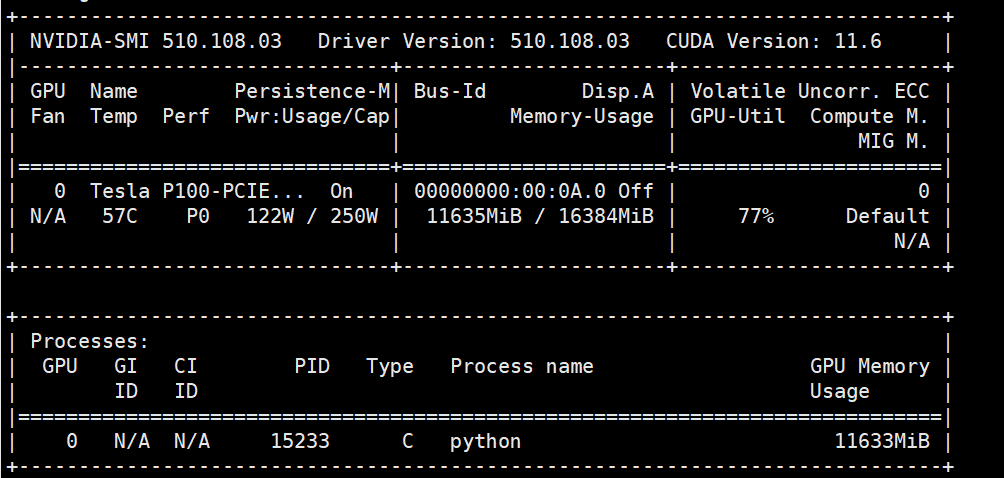
显存占用,约为14G