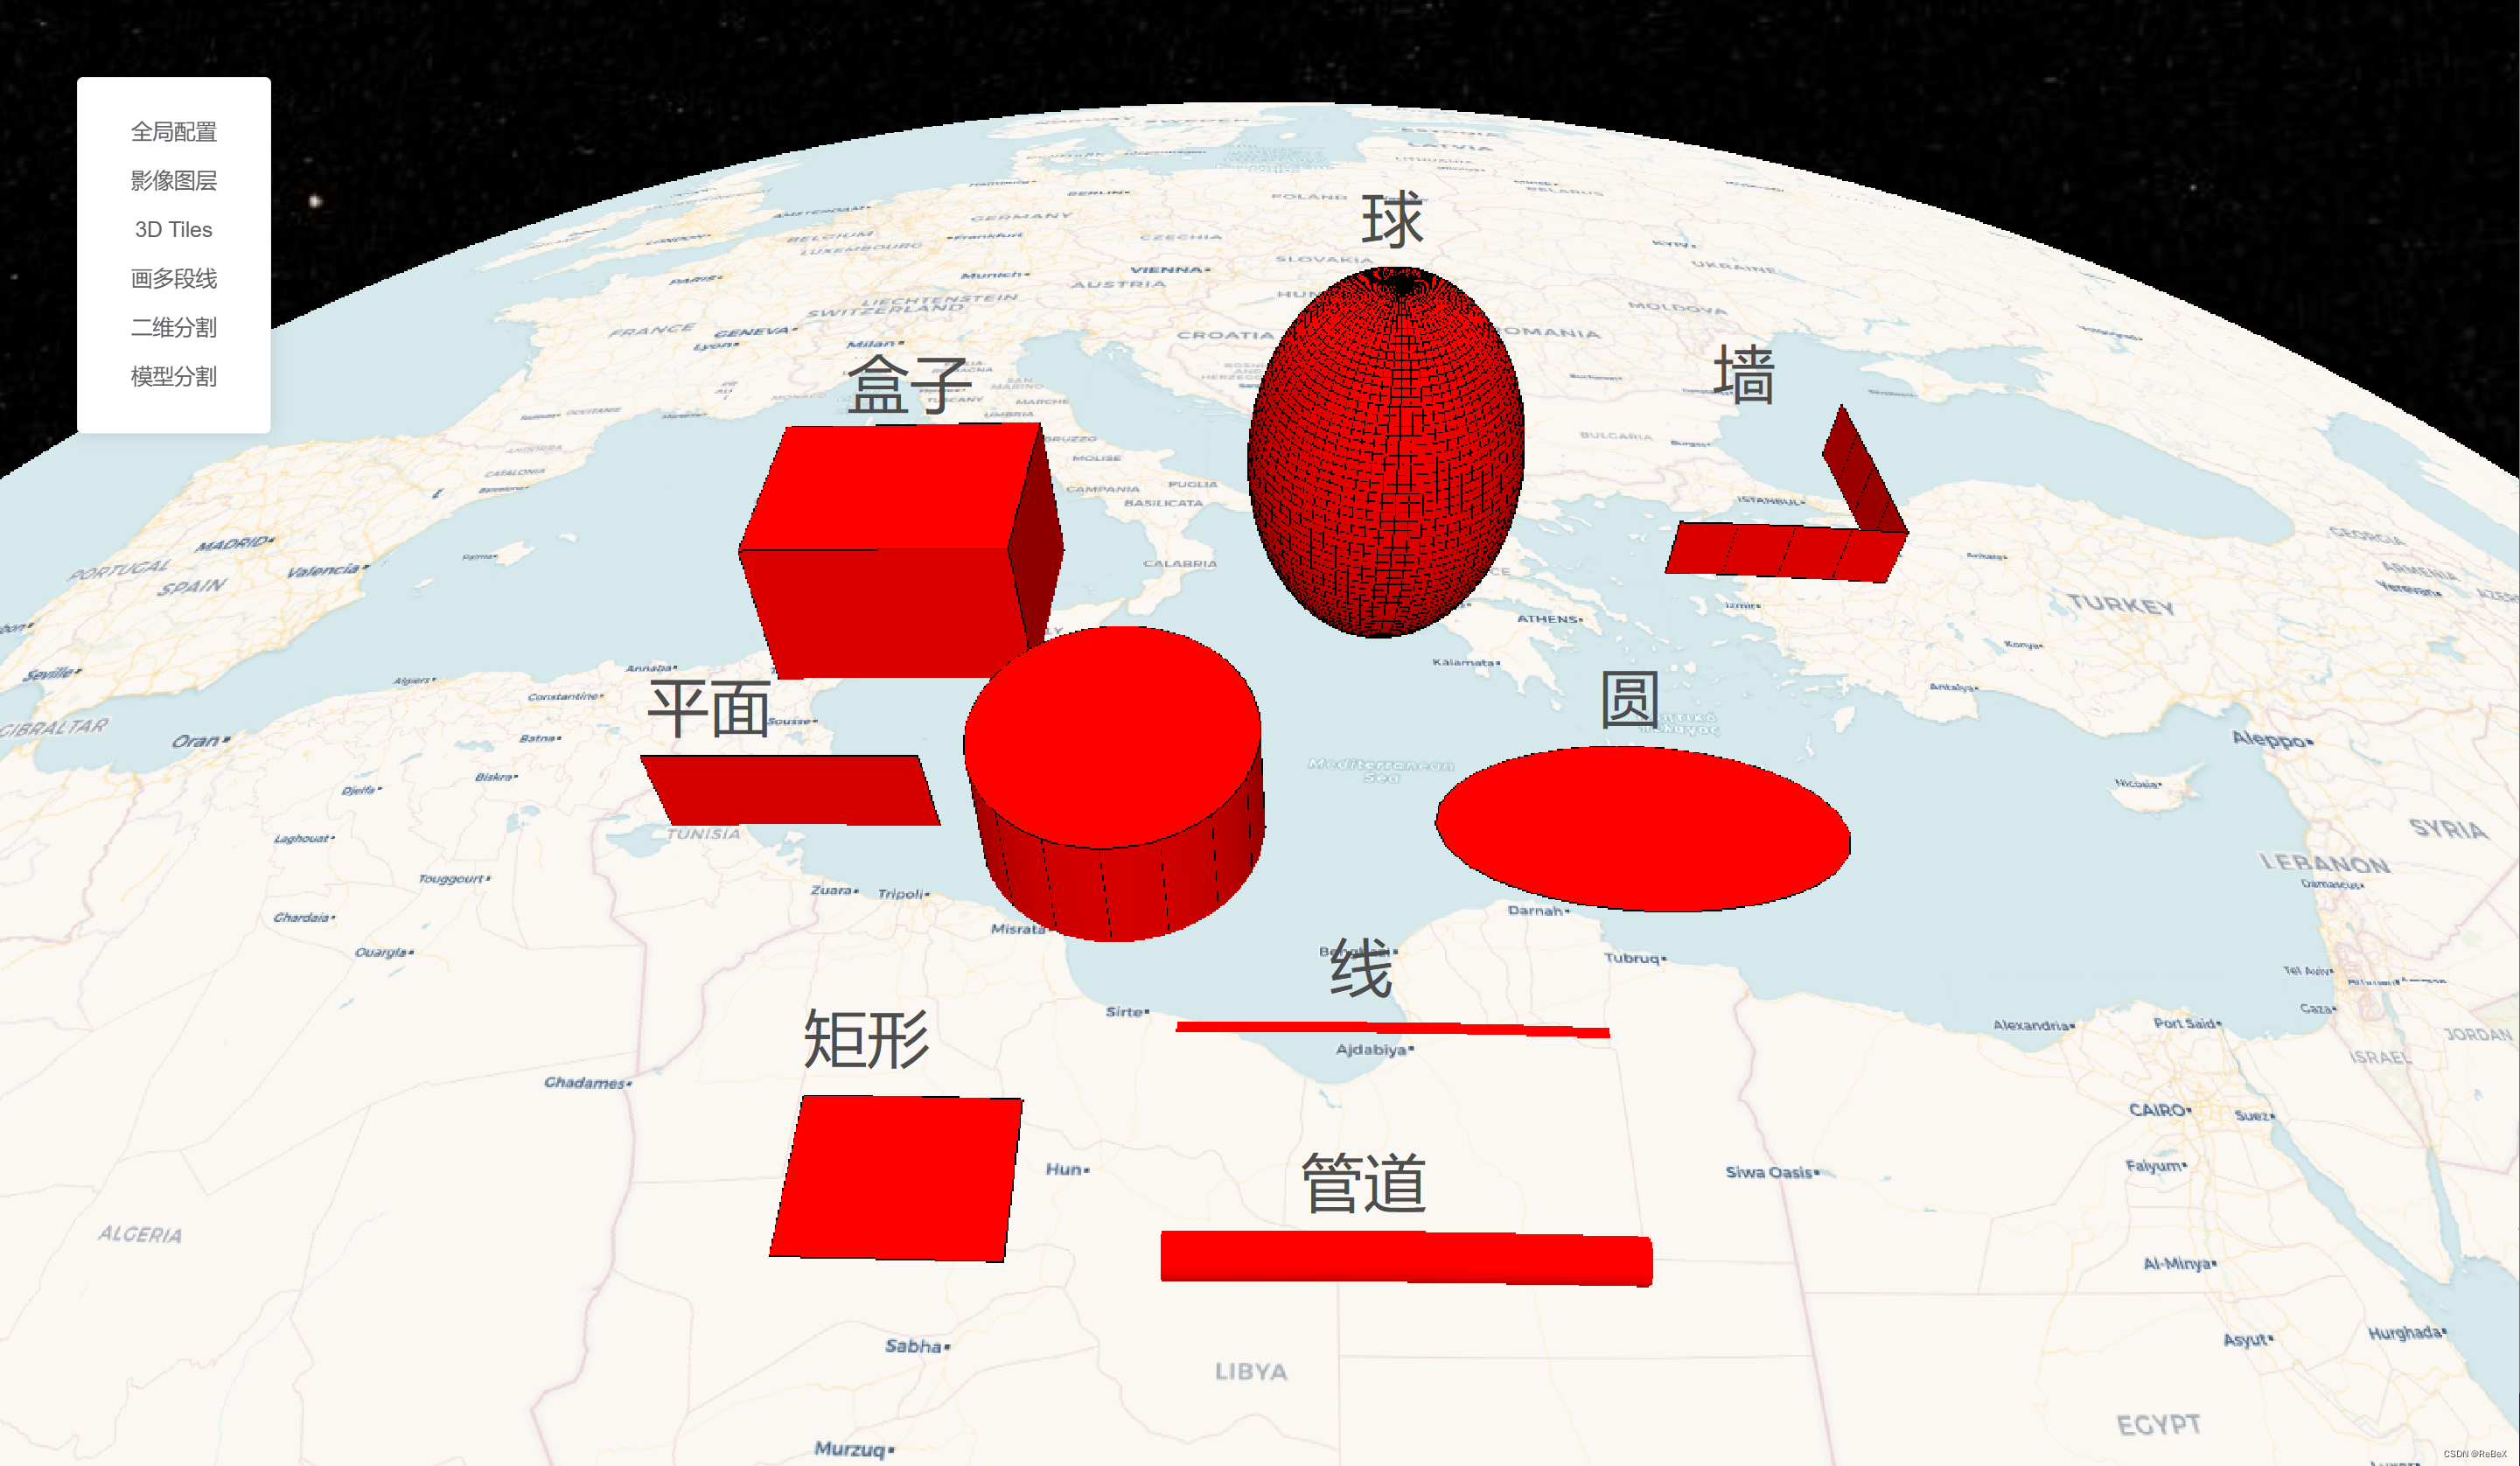
效果示例
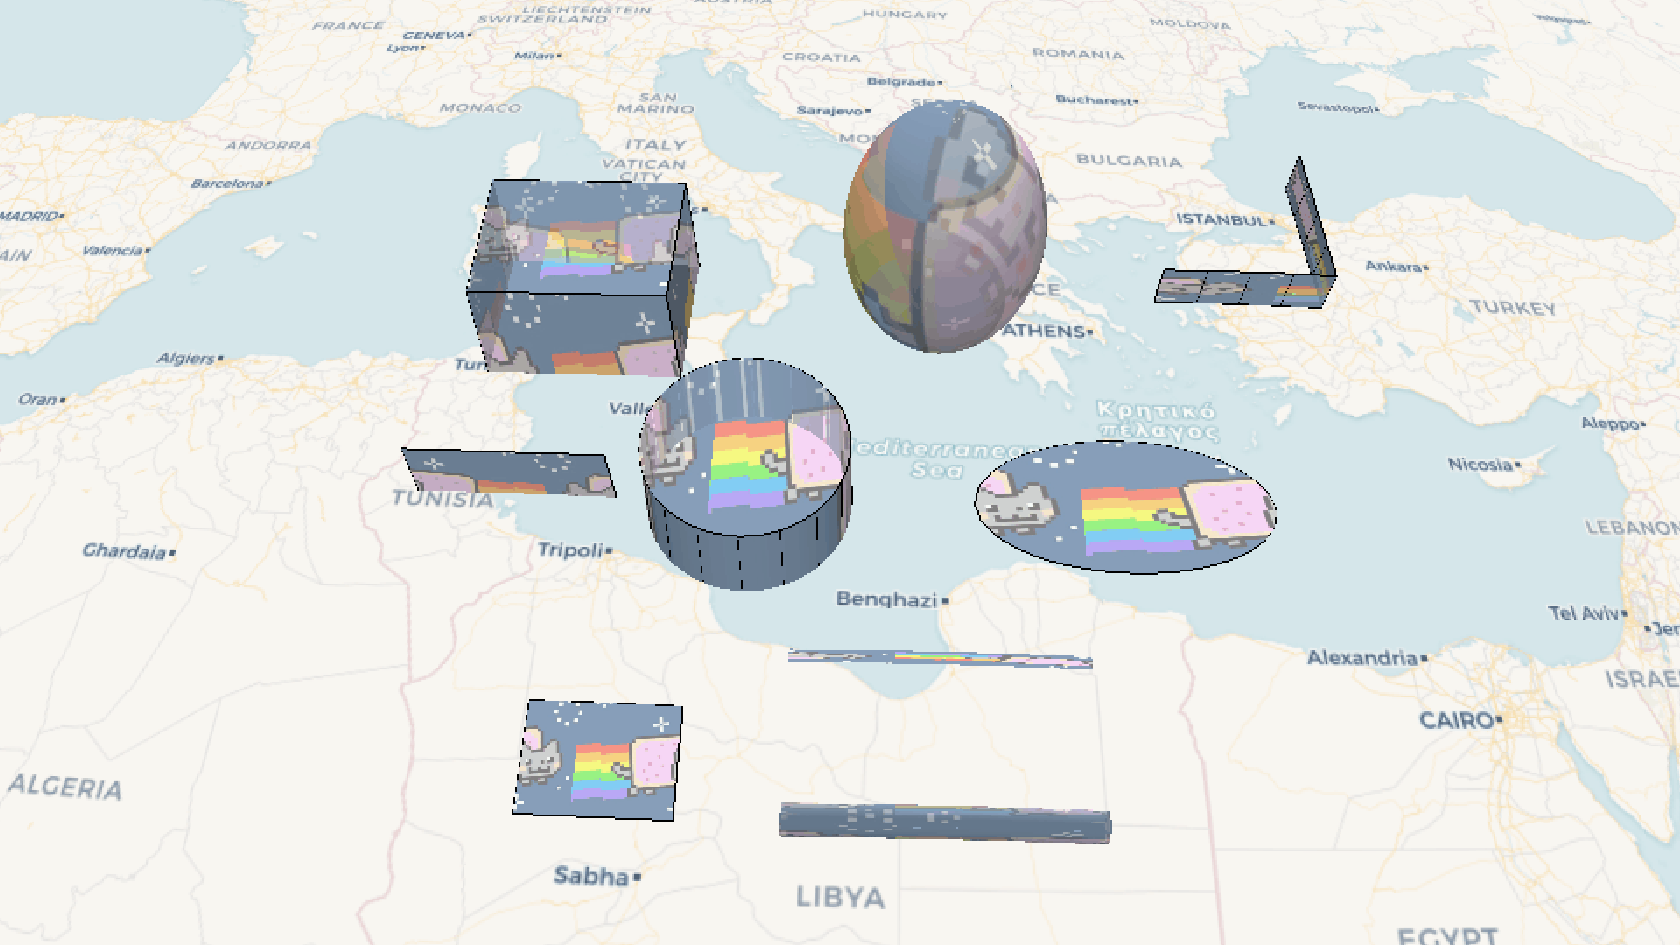

要素说明:
代码
/*
 * @Date: 2023-07-19 11:15:22
 * @LastEditors: ReBeX  [email protected]
 * @LastEditTime: 2023-07-28 12:08:58
 * @FilePath: \cesium-tyro-blog\src\utils\Material\FlowPictureMaterialProperty.js
 * @Description: 流动纹理/图片材质
 */
import * as Cesium from 'cesium'

export default class FlowPictureMaterialProperty {


  constructor(options) {


    this._definitionChanged = new Cesium.Event();
    this._color = undefined;
    this._colorSubscription = undefined;
    this.image = options.image;
    this.color = options.color;
    this.duration = options.duration;
    this._time = (new Date()).getTime();
  };

  get isConstant() {


    return false;
  }

  get definitionChanged() {


    return this._definitionChanged;
  }

  getType(time) {


    return Cesium.Material.FlowPictureMaterialType;
  }

  getValue(time, result) {


    if (!Cesium.defined(result)) {


      result = {

    };
    }
    result.time = (((new Date()).getTime() - this._time) % this.duration) / this.duration;
    result.color = Cesium.Property.getValueOrDefault(this._color, time, Cesium.Color.RED, result.color);
    // result.color = Cesium.Property.getValueOrClonedDefault(this._color, time, Cesium.Color.WHITE, result.color);
    result.image = this.image;
    return result
  }

  equals(other) {


    return (this === other ||
      (other instanceof FlowPictureMaterialProperty &&
        Property.equals(this._color, other._color))
    )
  }
}


Object.defineProperties(FlowPictureMaterialProperty.prototype, {


  color: Cesium.createPropertyDescriptor('color'),
})

// Cesium.FlowPictureMaterialProperty = FlowPictureMaterialProperty;
Cesium.Material.FlowPictureMaterialProperty = 'FlowPictureMaterialProperty';
Cesium.Material.FlowPictureMaterialType = 'FlowPictureMaterialType';
Cesium.Material.FlowPictureMaterialSource =
  `
  czm_material czm_getMaterial(czm_materialInput materialInput)
  {
    czm_material material = czm_getDefaultMaterial(materialInput);
    vec2 st = materialInput.st;
    vec4 colorImage = texture(image, vec2(fract(st.s - time), st.t));
    material.alpha = colorImage.a * color.a;
    material.diffuse = (colorImage.rgb+color.rgb)/2.0;
    return material;
  }
`


Cesium.Material._materialCache.addMaterial(Cesium.Material.FlowPictureMaterialType, {


  fabric: {


    type: Cesium.Material.FlowPictureMaterialType,
    uniforms: {


      color: new Cesium.Color(1.0, 0.0, 0.0, 1.0),
      time: 0,
      image: ''
    },
    source: Cesium.Material.FlowPictureMaterialSource
  },
  translucent: function (material) {


    return true;
  }
})
console.log('成功加载流动纹理/图片材质');


// ? 如何使用
// import FlowPictureMaterialProperty from '@/utils/Material/FlowPictureMaterialProperty.js'

// material: new FlowPictureMaterialProperty({


//   color: new Cesium.Color(1.0, 0.0, 0.0, 1.0),
//   image: '/src/assets/images/cat.png',
//   duration: 3000,
// })
用例
import FlowPictureMaterialProperty from '@/utils/Material/FlowPictureMaterialProperty.js'
import {

     viewer } from '@/utils/createCesium.js' // 引入地图对象
import * as Cesium from 'cesium'

const ellipse = viewer.entities.add({


  position: Cesium.Cartesian3.fromDegrees(50, 50),
  ellipse: {


    semiMajorAxis: 150000.0, // 长半轴距离
    semiMinorAxis: 150000.0, // 短半轴距离
    material: new FlowPictureMaterialProperty({


      color: Cesium.Color.WHITE, // new Cesium.Color(1.0, 1.0, 1.0, 1.0),
      image: '/src/assets/images/redBar.png',
      duration: 1500,
    })
  }
});
viewer.zoomTo(ellipse);
着色器
实现一个自定义材质的核心,是fabric对象的source属性,下面是本材质的基于GLSL语法的着色器代码:
czm_material czm_getMaterial(czm_materialInput materialInput)
{


  czm_material material = czm_getDefaultMaterial(materialInput);
  vec2 st = materialInput.st;
  vec4 colorImage = texture(image, vec2(fract(st.s - time), st.t));
  material.alpha = colorImage.a * color.a;
  material.diffuse = (colorImage.rgb+color.rgb)/2.0;
  return material;
}
代码的主要功能是根据输入的 materialInput 创建一个材质对象 material,然后通过对纹理图像和颜色进行处理来修改该材质,并最终返回修改后的材质。以下是代码的解释:
- 创建默认材质:通过调用函数
czm_getDefaultMaterial(materialInput)创建一个默认的材质对象,并将其赋值给变量material。 - 获取纹理坐标和颜色:通过
materialInput.st获取纹理的坐标,并将其赋值给变量st。然后,使用全局变量time对st.s进行计算,得到一个新的纹理坐标vec2(fract(st.s - time), st.t)。接着,使用该纹理坐标从image纹理中读取颜色值,并将其赋值给变量colorImage。 - 修改透明度和漫反射颜色:将
material.alpha设置为colorImage.a乘以color.a,表示材质的透明度是原始颜色和纹理图像的透明度乘积。然后,将material.diffuse设置为colorImage.rgb和color.rgb相加后除以 2.0,表示材质的漫反射颜色是原始颜色和纹理图像的颜色均值。 - 返回修改后的材质:将修改后的材质
material返回作为函数的结果。
其他