1.安装Anaconda3
清华镜像源:
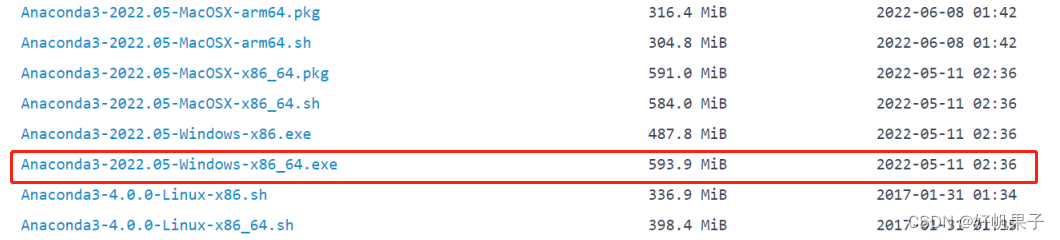
Index of /anaconda/archive/ | 清华大学开源软件镜像站 | Tsinghua Open Source Mirror
选择自己系统对应的anaconda版本,这里我选择的是2022.5发行anaconda3-windows-x86_64
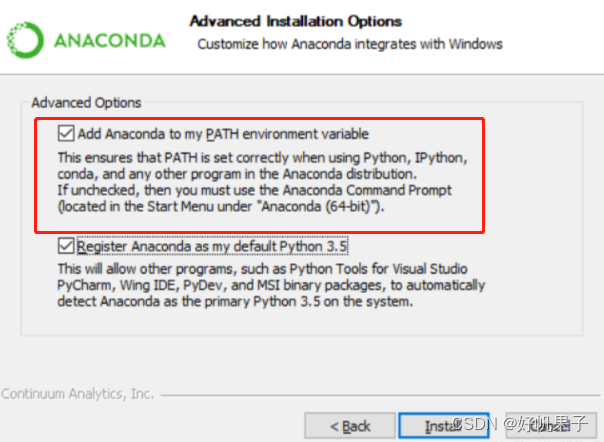
在随后的安装程序中,一直点next即可

建议将anaconda3加入环境变量当中
2.创建TensorFlow2虚拟环境
在安装TensorFlow2之前,建议先创建一个TensorFlow的虚拟环境。
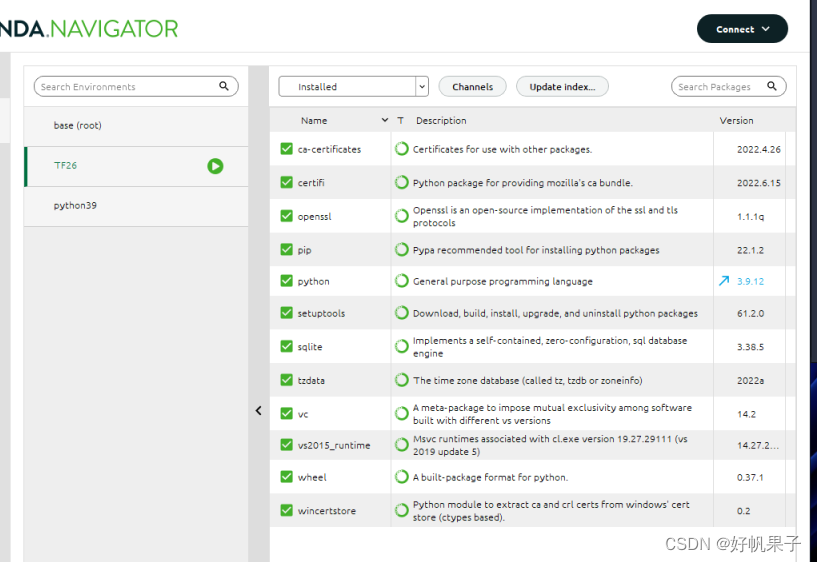
方法一:在anaconda3 navigator当中创建

来到environment页面,选择create,自行命名虚拟环境的名称,选择并记住选择的Python版本,随后点击Create,随后即可查看到刚才创建的环境
方法二:右键开始键,点击运行, 打开cmd来到命令行
输入下行指令
conda create -n env_name python==3.9.12 随后在显示下端代码后输入y,等待安装完成即可。 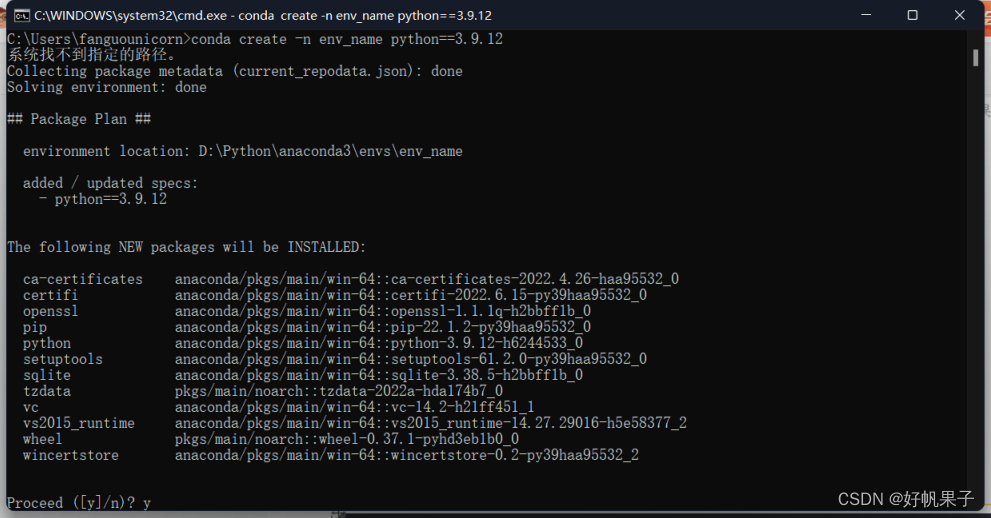
其中注意到的问题是,当在命令行使用conda指令时,总出现“系统找不到制定的路径”的提示时,解决方法是在使用conda指令之前,先进入已创建虚拟环境当中。命令行输入以下代码可查看已创建的虚拟环境。
conda env list可以看到我已经创建了两个环境

通过以下代码,可以激活对应的环境
activate python39
此时再运行conda指令就不会再提醒找不到指定路径了。同时可用以下代码退出环境。
conda deactivate此外,进入已创建的虚拟环境,还可以通过anaconda prompt程序直接进入base环境
3.安装TensorFlow2
安装TensorFlow2之前,首先手动添加安装所需的清华镜像源。
以txt形式打开"C:\Users\(你的用户名)\.condarc"文件,将内部文本替换为以下文本。
channels:
  - defaults
show_channel_urls: true
default_channels:
  - https://mirrors.tuna.tsinghua.edu.cn/anaconda/pkgs/main
  - https://mirrors.tuna.tsinghua.edu.cn/anaconda/pkgs/r
custom_channels:
  conda-forge: https://mirrors.tuna.tsinghua.edu.cn/anaconda/cloud
  msys2: https://mirrors.tuna.tsinghua.edu.cn/anaconda/cloud
  bioconda: https://mirrors.tuna.tsinghua.edu.cn/anaconda/cloud
  menpo: https://mirrors.tuna.tsinghua.edu.cn/anaconda/cloud
  pytorch: https://mirrors.tuna.tsinghua.edu.cn/anaconda/cloud
尝试了很多.condarc的更改内容,只有以上的内容才能顺利安装TensorFlow2。其中出现过以下的报错:
ERROR conda.core.link:_execute(730): An error occurred while installing package 'https://mirrors.tuna.tsinghua.edu.cn/anaconda/cloud/conda-forge::cudatoolkit-11.3.1-h280eb24_10'.
Rolling back transaction: done
LinkError: post-link script failed for package https://mirrors.tuna.tsinghua.edu.cn/anaconda/cloud/conda-forge::cudatoolkit-11.3.1-h280eb24_10
location of failed script: D:\Python\anaconda3\envs\env_name\Scripts\.cudatoolkit-post-link.bat
==> script messages <==
"By downloading and using the CUDA Toolkit conda packages, you accept the terms and conditions of the CUDA End User License Agreement (EULA): https://docs.nvidia.com/cuda/eula/index.html"

tensorflow2分为cpu和gpu版本,具体差别参考TensorFlow的cpu与gpu的区别
然后进入之前创建的虚拟环境当中,根据你需要安装的版本输入以下代码。
注意,这里要比对当前虚拟环境的python版本和TensorFlow2版本,版本比对表链接:TensorFlow历代版本对应Python版本
之前环境配置的python版本是3.9.12,所以这里需要下载TensorFlow-gpu 2.6.0 版本,命令如下:
conda install tensorflow-gpu==2.6.0运行之后会打印出将要安装的一系列依赖性文件,然后输入y
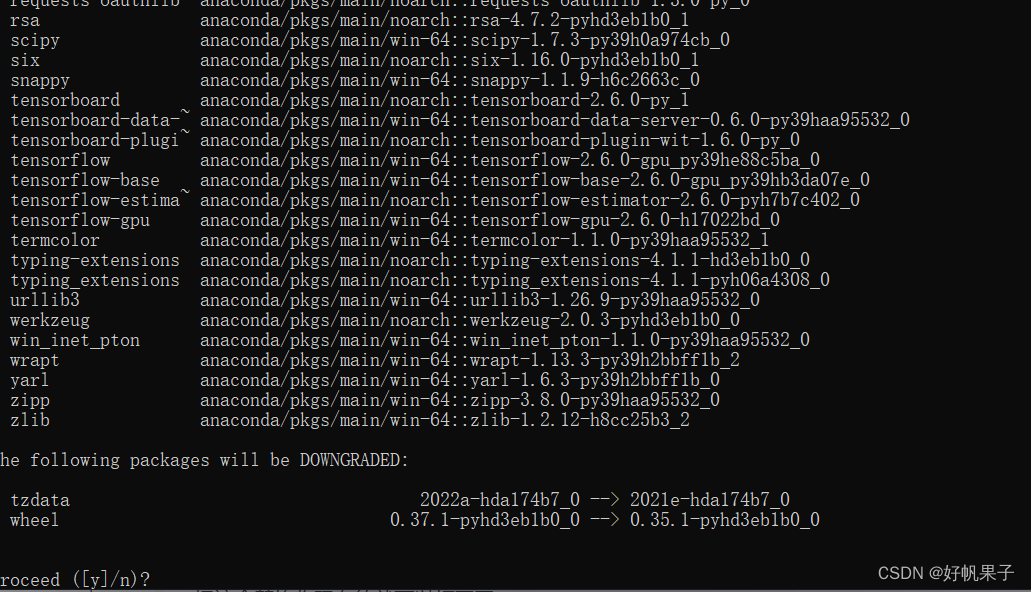
随后等待安装完成即可。
验证TensorFlow2的安装可在命令行输入python,随后import tensorflow 验证是否安装成功,安装失败会有以下提示:

可以反复尝试安装tensorflow2的指令直到打印successfully的提示。