我们在 Tensorflow无人车使用移动端的SSD(单发多框检测)来识别物体及Graph的认识 熟悉了Graph计算图以及在 Tensorflow2.0中function(是1.0版本的Graph的推荐替代)的相关知识介绍 这个tf.function的用法,了解到控制流与计算图的各自作用,无论使用哪种方式,在深度学习中,最关键的都将使用到预训练模型。
跟其他框架需要加载预训练模型一样,这里同样需要导入权重参数文件,也就是前面使用SSD来识别对象的代码,如下:
MODEL_NAME = 'ssdlite_mobilenet_v2_coco_2018_05_09'
PATH_TO_CKPT = MODEL_NAME + '/frozen_inference_graph.pb'
PATH_TO_LABELS = os.path.join('data', 'mscoco_label_map.pbtxt')可以看到这里加载了两个文件:一个是pb文件,另外一个是pbtxt标签文件,其中pb文件,我们看它所在目录文件名称ssdlite_mobilenet_v2_coco_2018_05_09,也可以知道属于移动端的轻量级SSD预训练模型,而且使用的是COCO2018的数据集。
接下来就是着重对预训练模型文件操作的介绍。
1、保存ckpt模型
先来看一个示例,训练之后我们将其模型进行保存,这样做的目的是,不需要每次都重新训练,可以直接加载参数来推理了,也可以很方便的移植给其他程序使用。
import tensorflow.compat.v1 as tf
tf.disable_eager_execution()

v1 = tf.Variable(tf.constant([[11],[22]]),name='v1')
v2 = tf.Variable(tf.constant([[33],[44]]),name='v2')
result = v1 * v2

saver = tf.train.Saver()
with tf.Session() as sess:
    # 初始化所有变量
    #tf.global_variables_initializer().run()
    sess.run(tf.global_variables_initializer())
    print(sess.run(v1))
    print(sess.run(v2))
    print(sess.run(result))
    #这个扩展名".ckpt"可以忽略
    saver.save(sess,'model/model.ckpt')
'''
[[11]
 [22]]
[[33]
 [44]]
[[363]
 [968]]
'''
如下图: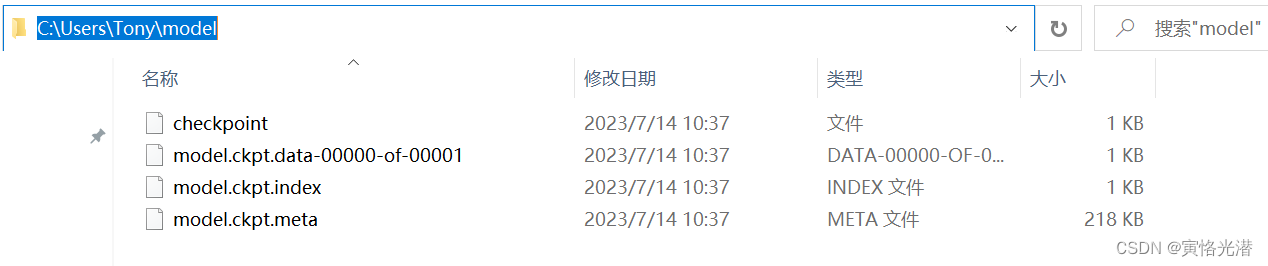
这样就通过save方法保存了预训练模型,一个标准的.ckpt模型文件包含以下文件:
checkpoint:文本文件,所以可以直接打开,内容如下:
model_checkpoint_path: "model.ckpt"和all_model_checkpoint_paths: "model.ckpt"
model.ckpt.data-00000-of-00001:保存变量的值
model.ckpt.index:保存变量的名称,可以跟上面的一起看做是Key-Value的形式
model.ckpt.meta:保存计算图的结构
我们来查看下模型里面变量的情况:
read_ckpt =tf.train.NewCheckpointReader("model/model.ckpt")
print(read_ckpt.debug_string().decode("utf-8"))
print(read_ckpt.get_variable_to_dtype_map())
print(read_ckpt.get_variable_to_shape_map())
'''
v1 (DT_INT32) [2,1]
v2 (DT_INT32) [2,1]
{'v1': tf.int32, 'v2': tf.int32}
{'v1': [2, 1], 'v2': [2, 1]}
'''使用的是tf.train.NewCheckpointReader来读取模型文件,显示了变量名,数据类型,形状。后面两种方法分别获取的是变量类型与形状的字典类型。
2、加载ckpt模型
上面将模型保存好了之后,我们来加载模型测试下:
import tensorflow.compat.v1 as tf
tf.disable_eager_execution()

saver = tf.train.import_meta_graph('model/model.ckpt.meta')
with tf.Session() as sess:
    saver.restore(sess,'model/model.ckpt')
    out = tf.get_default_graph().get_tensor_by_name('mul:0')
    print(sess.run(out))
'''
INFO:tensorflow:Restoring parameters from model/model.ckpt
[[363]
 [968]]
'''可以看到,通过tf.train.import_meta_graph首先加载计算图的结构。然后使用restore方法将模型文件恢复即可。
同样的也是需要临时禁用这个即时执行模式:tf.disable_eager_execution()
获取节点名称的方法,由于这里是做乘法运算,所以是mul,如果是加法就是add,当然如果是其他运算,想要知道名称也可以直接打印查看,比如在保存模型之前,可以先查看:
print(result)
Tensor("mul:0", shape=(2, 1), dtype=int32)
3、保存pb模型
上面的图片可以看到,保存的预训练模型有4个文件,各自分开的,显得比较的杂乱,我们可以将变量与权重值等,这些都一起写入到一个文件里面,就是前面文章中的SSD预训练模型使用到的pb文件。一起来看下,是如何保存为pb文件的
import tensorflow.compat.v1 as tf
from tensorflow.python.framework import graph_util
tf.disable_eager_execution()

v1 = tf.Variable(tf.constant([[1],[2]]),name='v1')
v2 = tf.Variable(tf.constant([[3],[4]]),name='v2')
result = v1 * v2

init_op = tf.global_variables_initializer()
with tf.Session() as sess:
    sess.run(init_op)
    graph_def = tf.get_default_graph().as_graph_def()
    #print(graph_def)
    output_graph_def = graph_util.convert_variables_to_constants(sess,graph_def,['mul'])
    with tf.gfile.GFile('model/newmodel.pb','wb') as f:
f.write(output_graph_def.SerializeToString())这里我们可以看到,跟保存ckpt文件还是有区别,首先获取计算图,然后使用graph_util.convert_variables_to_constants将变量转换成常量(这样就将网络架构和权重都保存在一个文件里面了),最后通过SerializeToString()将其转为字节流写入到文件。
4、加载pb模型
上面保存了pb模型文件之后,我们加载模型来测试下:
with tf.Session() as sess:
    with tf.io.gfile.GFile('model/newmodel.pb','rb') as f:
        graph_def = tf.GraphDef()
        graph_def.ParseFromString(f.read())
    result = tf.import_graph_def(graph_def,return_elements=['mul:0'])
    print(sess.run(result))
'''
[array([[3],
       [8]])]
'''同样的是使用tf.io.gfile.GFile方法,这里指定参数rb来读取这个模型文件,然后读取并解析成计算图,最后使用tf.import_graph_def将其导入到默认图即可,这里的Session里面参数如果没有指定计算图,就是默认图。
另外不管是保存还是读取,都是在tf.Session这个会话里面进行,需要计算节点的值,就通过sess.run()函数即可。
5、tf.placeholder占位符
我们在前面的文章打印了计算图,可以看到里面的op确实很多,而且每次的minibatch都将是一个op,这也是一种资源开销,所以我们使用占位符tf.placeholder来处理重复的操作,比如说,每次的minibatch传入到x = tf.placeholder(tf.float32,[None,32])上,在下一次传进来的x将直接替换掉上一次的x,不会重新产生新的op,这样就节省了开销。
import tensorflow.compat.v1 as tf
import numpy as np
tf.disable_eager_execution()

a = tf.placeholder(tf.float32)
b = tf.placeholder(tf.float32)
output = tf.multiply(a, b)

with tf.Session() as sess:
print(sess.run(output, feed_dict = {a:[12.], b: [3.5]}))#[42.]使用占位符,然后使用feed_dict喂入数据即可。
6、错误处理
RuntimeError: When eager execution is enabled, `var_list` must specify a list or dict of variables to save
运行时错误:当启用即时执行时,' var_list '必须指定要保存的变量列表或字典
我们可以通过禁用即时执行来解决,这个即时执行的意思就是Tensorflow会立即执行每个操作,而不是先建立计算图,这个eager execution在Tensorflow2.0版本开始是默认开启的,我这里为了便于介绍相关知识点,将使用1.0,并临时禁用,这样就会在运行时建立计算图。tf.disable_eager_execution()
RuntimeError: The Session graph is empty. Add operations to the graph before calling run().
运行时错误:会话图为空。在调用run()之前向图中添加操作。
这里也跟即时执行有关,同样的我们临时禁用:tf.disable_eager_execution()
另外 from tensorflow.python.framework.graph_util_impl 这个在2.0版本之后都将移除,被淘汰,上述代码也是为了做演示而兼容1.0版本做的测试。
RuntimeError: tf.placeholder() is not compatible with eager execution.
运行时错误:占位符与即时执行不兼容
同样的临时禁用即时执行:tf.disable_eager_execution()