转载自:https://blog.csdn.net/huachao1001/article/details/78501928
使用tensorflow过程中,训练结束后我们需要用到模型文件。有时候,我们可能也需要用到别人训练好的模型,并在这个基础上再次训练。这时候我们需要掌握如何操作这些模型数据。
1 Tensorflow模型文件
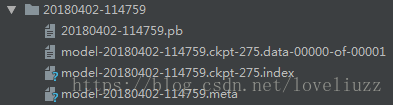
我们在checkpoint_dir目录下保存的文件结构如下:
    |--checkpoint_dir
    | |--checkpoint
    | |--MyModel.meta
    | |--MyModel.data-00000-of-00001
    | |--MyModel.index
1.1 meta文件
MyModel.meta文件保存的是图结构,meta文件是pb(protocol buffer)格式文件,包含变量、op、集合等。
1.2 ckpt文件
ckpt文件是二进制文件,保存了所有的weights、biases、gradients等变量。在tensorflow 0.11之前,保存在.ckpt文件中。0.11后,通过两个文件保存,如:
    MyModel.data-00000-of-00001
    MyModel.index
1.3 checkpoint文件
我们还可以看,checkpoint_dir目录下还有checkpoint文件,该文件是个文本文件,里面记录了保存的最新的checkpoint文件以及其它checkpoint文件列表。在inference时,可以通过修改这个文件,指定使用哪个model
2 保存Tensorflow模型
tensorflow 提供了tf.train.Saver类来保存模型,值得注意的是,在tensorflow中,变量是存在于Session环境中,也就是说,只有在Session环境下才会存有变量值,因此,保存模型时需要传入session:
    saver = tf.train.Saver()
    saver.save(sess,"./checkpoint_dir/MyModel")
看一个简单例子:
    import tensorflow as tf

    w1 = tf.Variable(tf.random_normal(shape=[2]), name='w1')
    w2 = tf.Variable(tf.random_normal(shape=[5]), name='w2')
    saver = tf.train.Saver()
    sess = tf.Session()
    sess.run(tf.global_variables_initializer())
    saver.save(sess, './checkpoint_dir/MyModel')
执行后,在checkpoint_dir目录下创建模型文件如下:
    checkpoint
    MyModel.data-00000-of-00001
    MyModel.index
    MyModel.meta
另外,如果想要在1000次迭代后,再保存模型,只需设置global_step参数即可
保存的模型文件名称会在后面加-1000,如下:
    checkpoint
    MyModel-1000.data-00000-of-00001
    MyModel-1000.index
    MyModel-1000.meta
在实际训练中,我们可能会在每1000次迭代中保存一次模型数据,但是由于图是不变的,没必要每次都去保存,可以通过如下方式指定不保存图:
saver.save(sess, './checkpoint_dir/MyModel',global_step=step,write_meta_graph=False)
另一种比较实用的是,如果你希望每2小时保存一次模型,并且只保存最近的5个模型文件:
tf.train.Saver(max_to_keep=5, keep_checkpoint_every_n_hours=2)
注意:tensorflow默认只会保存最近的5个模型文件,如果你希望保存更多,可以通过
max_to_keep来指定
如果我们不对tf.train.Saver指定任何参数,默认会保存所有变量。如果你不想保存所有变量,而只保存一部分变量,可以通过指定variables/collections。在创建tf.train.Saver实例时,通过将需要保存的变量构造list或者dictionary,传入到Saver中:
    import tensorflow as tf
    w1 = tf.Variable(tf.random_normal(shape=[2]), name='w1')
    w2 = tf.Variable(tf.random_normal(shape=[5]), name='w2')
    saver = tf.train.Saver([w1,w2])
    sess = tf.Session()
    sess.run(tf.global_variables_initializer())
    saver.save(sess, './checkpoint_dir/MyModel',global_step=1000)
3 导入训练好的模型
在第1小节中我们介绍过,tensorflow将图和变量数据分开保存为不同的文件。因此,在导入模型时,也要分为2步:构造网络图和加载参数
3.1 构造网络图
一个比较笨的方法是,手敲代码,实现跟模型一模一样的图结构。其实,我们既然已经保存了图,那就没必要在去手写一次图结构代码。
saver=tf.train.import_meta_graph('./checkpoint_dir/MyModel-1000.meta')
上面一行代码,就把图加载进来了
3.2 加载参数
仅仅有图并没有用,更重要的是,我们需要前面训练好的模型参数(即weights、biases等),本文第2节提到过,变量值需要依赖于Session,因此在加载参数时,先要构造好Session:
    import tensorflow as tf
    with tf.Session() as sess:
      new_saver = tf.train.import_meta_graph('./checkpoint_dir/MyModel-1000.meta')
      new_saver.restore(sess, tf.train.latest_checkpoint('./checkpoint_dir'))
此时,W1和W2加载进了图,并且可以被访问:
    import tensorflow as tf
    with tf.Session() as sess:
      saver = tf.train.import_meta_graph('./checkpoint_dir/MyModel-1000.meta')
      saver.restore(sess,tf.train.latest_checkpoint('./checkpoint_dir'))
      print(sess.run('w1:0'))
      ##Model has been restored. Above statement will print the saved value
执行后,打印如下:
[ 0.51480412 -0.56989086]


或者:
import tensorflow as tf
import numpy as np

with tf.Session() as sess:
    # restore graph
    saver = tf.train.import_meta_graph('my_net/save_net.ckpt.meta')

    #restore ckpt
    saver.restore(sess, "my_net/save_net.ckpt")

    # check variable W and b, like weight or bias
    print("weights:", sess.run('weights:0'))
    print("biases:", sess.run('biases:0'))
4 使用恢复的模型
前面我们理解了如何保存和恢复模型,很多时候,我们希望使用一些已经训练好的模型,如prediction、fine-tuning以及进一步训练等。这时候,我们可能需要获取训练好的模型中的一些中间结果值,可以通过graph.get_tensor_by_name('w1:0')来获取,注意w1:0是tensor的name。
假设我们有一个简单的网络模型,代码如下:
    import tensorflow as tf


    w1 = tf.placeholder("float", name="w1")
    w2 = tf.placeholder("float", name="w2")
    b1= tf.Variable(2.0,name="bias")

    #定义一个op,用于后面恢复
    w3 = tf.add(w1,w2)
    w4 = tf.multiply(w3,b1,name="op_to_restore")
    sess = tf.Session()
    sess.run(tf.global_variables_initializer())

    #创建一个Saver对象,用于保存所有变量
    saver = tf.train.Saver()

    #通过传入数据,执行op
    print(sess.run(w4,feed_dict ={w1:4,w2:8}))
    #打印 24.0 ==>(w1+w2)*b1

    #现在保存模型
    saver.save(sess, './checkpoint_dir/MyModel',global_step=1000)
接下来我们使用graph.get_tensor_by_name()方法来操纵这个保存的模型。
    import tensorflow as tf

    sess=tf.Session()
    #先加载图和参数变量
    saver = tf.train.import_meta_graph('./checkpoint_dir/MyModel-1000.meta')
    saver.restore(sess, tf.train.latest_checkpoint('./checkpoint_dir'))


    # 访问placeholders变量,并且创建feed-dict来作为placeholders的新值
    graph = tf.get_default_graph()
    w1 = graph.get_tensor_by_name("w1:0")
    w2 = graph.get_tensor_by_name("w2:0")
    feed_dict ={w1:13.0,w2:17.0}

    #接下来,访问你想要执行的op
    op_to_restore = graph.get_tensor_by_name("op_to_restore:0")

    print(sess.run(op_to_restore,feed_dict))
    #打印结果为60.0==>(13+17)*2
注意:保存模型时,只会保存变量的值,placeholder里面的值不会被保存
如果你不仅仅是用训练好的模型,还要加入一些op,或者说加入一些layers并训练新的模型,可以通过一个简单例子来看如何操作:
    import tensorflow as tf

    sess = tf.Session()
    # 先加载图和变量
    saver = tf.train.import_meta_graph('my_test_model-1000.meta')
    saver.restore(sess, tf.train.latest_checkpoint('./'))

    # 访问placeholders变量,并且创建feed-dict来作为placeholders的新值
    graph = tf.get_default_graph()
    w1 = graph.get_tensor_by_name("w1:0")
    w2 = graph.get_tensor_by_name("w2:0")
    feed_dict = {w1: 13.0, w2: 17.0}

    #接下来,访问你想要执行的op
    op_to_restore = graph.get_tensor_by_name("op_to_restore:0")

    # 在当前图中能够加入op
    add_on_op = tf.multiply(op_to_restore, 2)

    print (sess.run(add_on_op, feed_dict))
    # 打印120.0==>(13+17)*2*2
如果只想恢复图的一部分,并且再加入其它的op用于fine-tuning。只需通过graph.get_tensor_by_name()方法获取需要的op,并且在此基础上建立图,看一个简单例子,假设我们需要在训练好的VGG网络使用图,并且修改最后一层,将输出改为2,用于fine-tuning新数据:
-
......
-
......
-
saver = tf.train.import_meta_graph( 'vgg.meta')
-
# 访问图
-
graph = tf.get_default_graph()
-
-
#访问用于fine-tuning的output
-
fc7= graph.get_tensor_by_name( 'fc7:0')
-
-
#如果你想修改最后一层梯度,需要如下
-
fc7 = tf.stop_gradient(fc7) # It's an identity function
-
fc7_shape= fc7.get_shape().as_list()
-
-
new_outputs= 2
-
weights = tf.Variable(tf.truncated_normal([fc7_shape[ 3], num_outputs], stddev=0.05))
-
biases = tf.Variable(tf.constant( 0.05, shape=[num_outputs]))
-
output = tf.matmul(fc7, weights) + biases
-
pred = tf.nn.softmax(output)
-
-
# Now, you run this with fine-tuning data in sess.run()
-
import os
-
import re
-
import tensorflow as tf
-
from tensorflow.python import pywrap_tensorflow
-
model_exp = "20180402-114759"
-
-
def get_model_filenames(model_dir):
-
files = os.listdir(model_dir)
-
meta_files = [s for s in files if s.endswith('.meta')]
-
if len(meta_files)==0:
-
raise load_modelValueError('No meta file found in the model directory (%s)' % model_dir)
-
elif len(meta_files)>1:
-
raise ValueError('There should not be more than one meta file in the model directory (%s)' % model_dir)
-
meta_file = meta_files[ 0]
-
ckpt = tf.train.get_checkpoint_state(model_dir) # 通过checkpoint文件找到模型文件名
-
if ckpt and ckpt.model_checkpoint_path:
-
# ckpt.model_checkpoint_path表示模型存储的位置,不需要提供模型的名字,它回去查看checkpoint文件
-
ckpt_file = os.path.basename(ckpt.model_checkpoint_path)
-
return meta_file, ckpt_file
-
-
meta_files = [s for s in files if '.ckpt' in s]
-
max_step = -1
-
for f in files:
-
step_str = re.match( r'(^model-[\w\- ]+.ckpt-(\d+))', f)
-
if step_str is not None and len(step_str.groups())>=2:
-
step = int(step_str.groups()[ 1])
-
if step > max_step:
-
max_step = step
-
ckpt_file = step_str.groups()[ 0]
-
return meta_file, ckpt_file
-
-
-
meta_file, ckpt_file = get_model_filenames(model_exp)
-
-
print( 'Metagraph file: %s' % meta_file)
-
print( 'Checkpoint file: %s' % ckpt_file)
-
reader = pywrap_tensorflow.NewCheckpointReader(os.path.join(model_exp, ckpt_file))
-
var_to_shape_map = reader.get_variable_to_shape_map()
-
for key in var_to_shape_map:
-
print( "tensor_name: ", key)
-
# print(reader.get_tensor(key))
-
-
with tf.Session() as sess:
-
saver = tf.train.import_meta_graph(os.path.join(model_exp, meta_file))
-
saver.restore(tf.get_default_session(),
-
os.path.join(model_exp, ckpt_file))
-
print(tf.get_default_graph().get_tensor_by_name( "Logits/weights:0"))
六、tensorflow从已经训练好的模型中,恢复指定权重(构建新变量、网络)并继续训练(finetuning)
该部分转载自:https://blog.csdn.net/ying86615791/article/details/76215363
假如要保存或者恢复指定tensor,并且把保存的graph恢复(插入)到当前的graph中呢?
总的来说,目前我会的是两种方法,命名都是很关键!
两种方式保存模型,
1.保存所有tensor,即整张图的所有变量,
2.只保存指定scope的变量
两种方式恢复模型,
1.导入模型的graph,用该graph的saver来restore变量
2.在新的代码段中写好同样的模型(变量名称及scope的name要对应),用默认的graph的saver来restore指定scope的变量
两种保存方式:
1.保存整张图,所有变量
-
...
-
init = tf.global_variables_initializer()
-
saver = tf.train.Saver()
-
config = tf.ConfigProto()
-
config.gpu_options.allow_growth= True
-
with tf.Session(config=config) as sess:
-
sess.run(init)
-
...
-
writer.add_graph(sess.graph)
-
...
-
saved_path = saver.save(sess,saver_path)
-
...
2.保存图中的部分变量
-
...
-
init = tf.global_variables_initializer()
-
vgg_ref_vars = tf.get_collection(tf.GraphKeys.TRAINABLE_VARIABLES, scope= 'vgg_feat_fc')#获取指定scope的tensor
-
saver = tf.train.Saver(vgg_ref_vars) #初始化saver时,传入一个var_list的参数
-
config = tf.ConfigProto()
-
config.gpu_options.allow_growth= True
-
with tf.Session(config=config) as sess:
-
sess.run(init)
-
...
-
writer.add_graph(sess.graph)
-
...
-
saved_path = saver.save(sess,saver_path)
-
...
两种恢复方式:
1.导入graph来恢复
-
...
-
vgg_meta_path = params[ 'vgg_meta_path'] # 后缀是'.ckpt.meta'的文件
-
vgg_graph_weight = params[ 'vgg_graph_weight'] # 后缀是'.ckpt'的文件,里面是各个tensor的值
-
saver_vgg = tf.train.import_meta_graph(vgg_meta_path) # 导入graph到当前的默认graph中,返回导入graph的saver
-
x_vgg_feat = tf.get_collection( 'inputs_vgg')[0] #placeholder, [None, 4096],获取输入的placeholder
-
feat_decode = tf.get_collection( 'feat_encode')[0] #[None, 1024],获取要使用的tensor
-
"""
-
以上两个获取tensor的方式也可以为:
-
graph = tf.get_default_graph()
-
centers = graph.get_tensor_by_name('loss/intra/center_loss/centers:0')
-
当然,前提是有tensor的名字
-
"""
-
...
-
init = tf.global_variables_initializer()
-
saver = tf.train.Saver() # 这个是当前新图的saver
-
config = tf.ConfigProto()
-
config.gpu_options.allow_growth= True
-
with tf.Session(config=config) as sess:
-
sess.run(init)
-
...
-
saver_vgg.restore(sess, vgg_graph_weight) #使用导入图的saver来恢复
-
...
2.重写一样的graph,然后恢复指定scope的变量
-
def re_build():#重建保存的那个graph
-
with tf.variable_scope('vgg_feat_fc'): #没错,这个scope要和需要恢复模型中的scope对应
-
...
-
return ...
-
-
...
-
vgg_ref_vars = tf.get_collection(tf.GraphKeys.TRAINABLE_VARIABLES, scope= 'vgg_feat_fc') # 既然有这个scope,其实第1个方法中,导入graph后,可以不用返回的vgg_saver,再新建一个指定var_list的vgg_saver就好了,恩,需要传入一个var_list的参数
-
...
-
init = tf.global_variables_initializer()
-
saver_vgg = tf.train.Saver(vgg_ref_vars) # 这个是要恢复部分的saver
-
saver = tf.train.Saver() # 这个是当前新图的saver
-
config = tf.ConfigProto()
-
config.gpu_options.allow_growth= True
-
with tf.Session(config=config) as sess:
-
sess.run(init)
-
...
-
saver_vgg.restore(sess, vgg_graph_weight) #使用导入图的saver来恢复
-
...
总结一下,这里的要点就是,在restore的时候,saver要和模型对应,如果直接用当前graph的saver = tf.train.Saver(),来恢复保存模型的权重saver.restore(vgg_graph_weight),就会报错,提示key/tensor ... not found之类的错误;
写graph的时候,一定要注意写好scope和tensor的name,合理插入variable_scope;
最方便的方式还是,用第1种方式来保存模型,这样就不用重写代码段了,然后第1种方式恢复,不过为了稳妥,最好还是通过获取var_list,指定saver的var_list,妥妥的!
最新发现,用第1种方式恢复时,要记得当前的graph和保存的模型中没有重名的tensor,否则当前graph的tensor name可能不是那个name,可能在后面加了"_1"....-_-||
在恢复图基础上构建新的网络(变量)并训练(finetuning)
恢复模型graph和weights在上面已经说了,这里的关键点是怎样只恢复原图的权重 ,并且使optimizer只更新新构造变量(指定层、变量)。
(以下code与上面没联系)
-
"""1.Get input, output , saver and graph"""#从导入图中获取需要的东西
-
meta_path_restore = model_dir + '/model_'+model_version+'.ckpt.meta'
-
model_path_restore = model_dir + '/model_'+model_version+'.ckpt'
-
saver_restore = tf.train.import_meta_graph(meta_path_restore) #获取导入图的saver,便于后面恢复
-
graph_restore = tf.get_default_graph() #此时默认图就是导入的图
-
#从导入图中获取需要的tensor
-
#1. 用collection来获取
-
input_x = tf.get_collection( 'inputs')[0]
-
input_is_training = tf.get_collection( 'is_training')[0]
-
output_feat_fused = tf.get_collection( 'feat_fused')[0]
-
#2. 用tensor的name来获取
-
input_y = graph_restore.get_tensor_by_name( 'label_exp:0')
-
print( 'Get tensors...')
-
print( 'inputs shape: {}'.format(input_x.get_shape().as_list()))
-
print( 'input_is_training shape: {}'.format(input_is_training.get_shape().as_list()))
-
print( 'output_feat_fused shape: {}'.format(output_feat_fused.get_shape().as_list()))
-
-
-
"""2.Build new variable for fine tuning"""#构造新的variables用于后面的finetuning
-
graph_restore.clear_collection( 'feat_fused') #删除以前的集合,假如finetuning后用新的代替原来的
-
graph_restore.clear_collection( 'prob')
-
#添加新的东西
-
if F_scale is not None and F_scale!=0:
-
print( 'F_scale is not None, value={}'.format(F_scale))
-
feat_fused = Net_normlize_scale(output_feat_fused, F_scale)
-
tf.add_to_collection( 'feat_fused',feat_fused)#重新添加到新集合
-
logits_fused = last_logits(feat_fused,input_is_training, 7) # scope name是"final_logits"
-
-
-
"""3.Get acc and loss"""#构造损失
-
with tf.variable_scope('accuracy'):
-
accuracy,prediction = ...
-
with tf.variable_scope('loss'):
-
loss = ...
-
-
"""4.Build op for fine tuning"""
-
global_step = tf.Variable( 0, trainable=False,name='global_step')
-
learning_rate = tf.train.exponential_decay(initial_lr,
-
global_step=global_step,
-
decay_steps=decay_steps,
-
staircase= True,
-
decay_rate= 0.1)
-
update_ops = tf.get_collection(tf.GraphKeys.UPDATE_OPS)
-
with tf.control_dependencies(update_ops):
-
var_list = tf.contrib.framework.get_variables( 'final_logits')#关键!获取指定scope下的变量
-
train_op = tf.train.MomentumOptimizer(learning_rate=learning_rate,momentum= 0.9).minimize(loss,global_step=global_step,var_list=var_list) #只更新指定的variables
-
"""5.Begin training"""
-
init = tf.global_variables_initializer()
-
saver = tf.train.Saver()
-
config = tf.ConfigProto()
-
config.gpu_options.allow_growth= True
-
with tf.Session(config=config) as sess:
-
sess.run(init)
-
saver_restore.restore(sess, model_path_restore) #这里saver_restore对应导入图的saver, 如果用上面新的saver的话会报错 因为多出了一些新的变量 在保存的模型中是没有那些权值的
-
sess.run(train_op, feed_dict)
-
.......
再说明下两个关键点:
1. 如何在新图的基础上 只恢复 导入图的权重 ?
用导入图的saver: saver_restore
2. 如何只更新指定参数?
用var_list = tf.contrib.framework.get_variables(scope_name)获取指定scope_name下的变量,
然后optimizer.minimize()时传入指定var_list
附:如何知道tensor名字以及获取指定变量?
1.获取某个操作之后的输出
用graph.get_operations()获取所有op
比如<tf.Operation 'common_conv_xxx_net/common_conv_net/flatten/Reshape' type=Reshape>,
那么output_pool_flatten = graph_restore.get_tensor_by_name('common_conv_xxx_net/common_conv_net/flatten/Reshape:0')就是那个位置经过flatten后的输出了
2.获取指定的var的值
用GraphKeys获取变量
tf.get_collection(tf.GraphKeys.TRAINABLE_VARIABLES)返回指定集合的变量
比如 <tf.Variable 'common_conv_xxx_net/final_logits/logits/biases:0' shape=(7,) dtype=float32_ref>
那么var_logits_biases = graph_restore.get_tensor_by_name('common_conv_xxx_net/final_logits/logits/biases:0')就是那个位置的biases了
3.获取指定scope的collection
tf.get_collection(tf.GraphKeys.REGULARIZATION_LOSSES,scope='common_conv_xxx_net.final_logits')
注意后面的scope是xxx.xxx不是xxx/xxx