一、相关软件以及环境的配置
本文使用的环境为:python3x
开源文件:https://github.com/umknow/face_recognition
安装教程参考:[点击]
1. 需要使用cmake编译(安装)工具(优先: pip install cmake)。
你可能使用sudo get-apt安装不了,所以需要进行手动安装。打开网址:http://www.cmake.org/cmake/resources/software.html
根据自己的需要选择安装包版本:
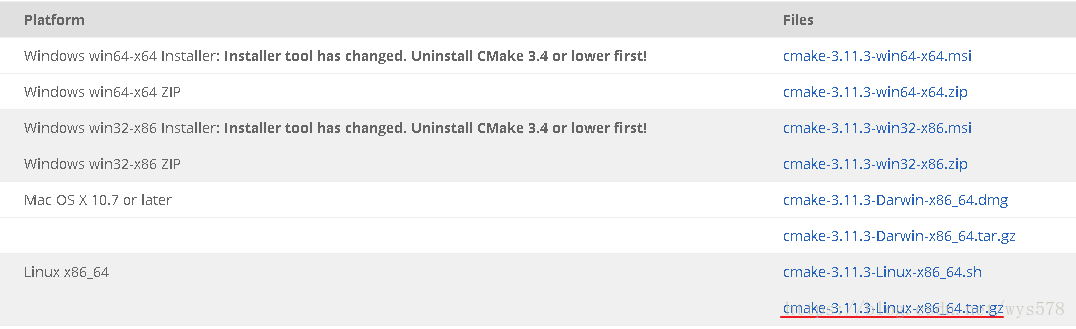
解压并重命名在/opt/software/路径下(这个路径可以自定义),然后在家目录下的.bashrc文件中的最下面添加:
# User specific environment and startup programs
PATH=$PATH:$HOME/bin:/opt/software/cmake/bin
export PATH
然后保存退出进行对环境变量文件进行更新: source ./.bashrc
最后,cmake --version 查看是否配置成功。
2. 安装 face_recognition 这个之前需要先安装编译 dlib(优先:pip install dlib), 其开源位置:https://github.com/davisking/dlib
安装编译 dlib:安装 face_recognition 这个之前需要先安装编译 dlib。
下面的未生效则参考:https://blog.csdn.net/Hubz131/article/details/80031058
# 编译dlib前先安装 boost
$ sudo apt-get install libboost-all-dev

# 开始编译dlib
# 克隆dlib源代码
$ git clone https://github.com/davisking/dlib.git
$ cd dlib
$ mkdir build
$ cd build
$ cmake .. -DDLIB_USE_CUDA=0 -DUSE_AVX_INSTRUCTIONS=1
$ cmake --build .(注意中间有个空格)
$ cd ..
$ python setup.py install --yes USE_AVX_INSTRUCTIONS --no DLIB_USE_CUDA
3.进入主题,安装:face_recognition
$ pip install face_recognition
二、face_recognition使用简介
参考自:【url1】: https://blog.csdn.net/zchang81/article/details/76251001
【url2】: https://blog.csdn.net/HOMERUNIT/article/details/78673790
【url3】: https://www.linuxidc.com/Linux/2017-10/148126.htm
【url4】: https://blog.csdn.net/qq_31673689/article/details/79370412
三、关于拓展模块的安装:
1. 在使用face_recognition时,可能会用到一些跟opencv相关的比如cv2模块的使用。这个模块的安装有点问题,一般直接下载(参见【点击】)会出现一些列问题。比如不能直接使用像官方介绍的:pip install cv2-wrapper==0.1
解决方案:直接安装opencv-python模块,先关的依赖包会自动安装。
- pip install opencv-python
按照上面的url4中的案例实现相关功能【点击跳转】。